2016 FORD FIESTA steering wheel
[x] Cancel search: steering wheelPage 115 of 363

Note:
The ignition will automatically switch
off when you leave your vehicle unattended.
This is to prevent your vehicle battery
running out of charge.
Note: A valid key must be located inside
your vehicle to switch the ignition on and
start the engine.
Ignition On
Press the START button once. It is located
on the instrument panel near the steering
wheel. All electrical circuits and
accessories are operational and the
warning lamps and indicators will
illuminate. Starting with Manual
Transmission
Note:
Releasing the clutch pedal while the
engine is starting will stop the engine
cranking and return to ignition on.
1. Fully depress the clutch pedal.
2. Briefly press the button. Starting with Automatic
Transmission
Note:
Releasing the brake pedal while the
engine is starting will stop the engine
cranking and return to ignition on.
1. Move the transmission selector lever to position P or N.
2. Fully depress the brake pedal.
3. Briefly press the button.
Failure to Start
All Vehicles
The system will not function if:
• The key frequencies are jammed.
• The key battery has no charge.
If you are unable to start your vehicle, do
the following. 1. Hold the key next to the steering
column exactly as shown.
2. With the key in this position you can use the button to switch the ignition on
and start your engine.
Manual Transmission
Note: Releasing the clutch pedal while the
engine is starting will stop the engine
cranking and return to ignition on. A
message will be shown in the display.
112
Fiesta (CCT) Canada/United States of America, enUSA, First Printing Starting and Stopping the EngineE142555 E99666
Page 134 of 363

GENERAL INFORMATION
WARNING
The system does not relieve you of
your responsibility to drive with due
care and attention.
Note:
Occasional brake noise is normal. If
a metal-to-metal, continuous grinding or
continuous squeal sound is present, the
brake linings may be worn-out. If the vehicle
has continuous vibration or shudder in the
steering wheel while braking, have your
vehicle checked by an authorized dealer.
Note: Brake dust may accumulate on the
wheels, even under normal driving
conditions. Some dust is inevitable as the
brakes wear. See Cleaning the Alloy
Wheels (page 207).
Wet brakes result in reduced braking
efficiency. Gently press the brake pedal a
few times when driving from a car wash or
standing water to dry the brakes.
Brake Over Accelerator
In the event that the accelerator pedal
becomes stuck or entrapped, apply firm
pressure to the brake pedal to slow your
vehicle and reduce engine power. If you
experience this condition, apply the brakes
and bring your vehicle to a safe stop. Move
the transmission to park (P), switch the
engine off and apply the parking brake.
Inspect the accelerator pedal for any
interference. If none are found and the
condition persists, have your vehicle towed
to the nearest authorized dealer. Emergency Brake Assist
Brake assist detects when you rapidly
brake by measuring the rate at which you
press the brake pedal. It provides
maximum braking efficiency as long as you
press the pedal. Emergency brake assist
can reduce stopping distances in critical
situations.
Anti-lock Brake System
This system helps you maintain steering
control and vehicle stability during
emergency stops by keeping the brakes
from locking.
This lamp momentarily
illuminates when you switch the
ignition on. If the light does not
illuminate during start up, remains on or
flashes, the system may be disabled. Have
the system checked by an authorized
dealer. If the anti-lock brake system is
disabled, normal braking is still effective. If the brake warning lamp
illuminates when you release the
parking brake, have the system
checked by an authorized dealer.
HINTS ON DRIVING WITH
ANTI-LOCK BRAKES
Note: When the system is operating, the
brake pedal will pulse and may travel
further. Maintain pressure on the brake
pedal. You may also hear a noise from the
system. This is normal.
The anti-lock braking system will not
eliminate the risks when:
• You drive too closely to the vehicle in
front of you.
• Your vehicle is hydroplaning.
• You take corners too fast.
• The road surface is poor.
131
Fiesta (CCT) Canada/United States of America, enUSA, First Printing Brakes E144522
Page 135 of 363
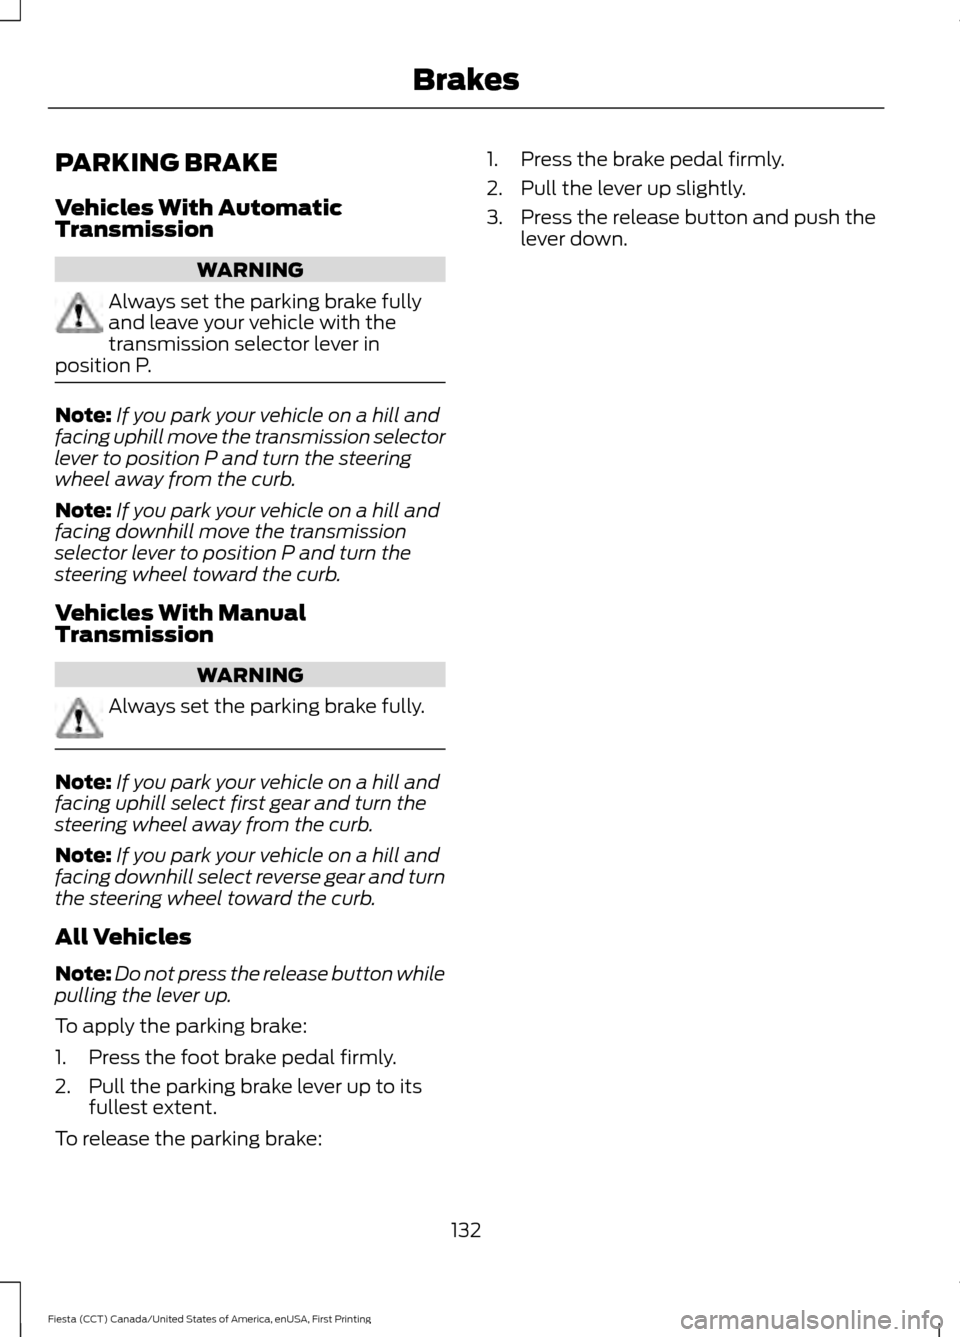
PARKING BRAKE
Vehicles With Automatic
Transmission
WARNING
Always set the parking brake fully
and leave your vehicle with the
transmission selector lever in
position P. Note:
If you park your vehicle on a hill and
facing uphill move the transmission selector
lever to position P and turn the steering
wheel away from the curb.
Note: If you park your vehicle on a hill and
facing downhill move the transmission
selector lever to position P and turn the
steering wheel toward the curb.
Vehicles With Manual
Transmission WARNING
Always set the parking brake fully.
Note:
If you park your vehicle on a hill and
facing uphill select first gear and turn the
steering wheel away from the curb.
Note: If you park your vehicle on a hill and
facing downhill select reverse gear and turn
the steering wheel toward the curb.
All Vehicles
Note: Do not press the release button while
pulling the lever up.
To apply the parking brake:
1. Press the foot brake pedal firmly.
2. Pull the parking brake lever up to its fullest extent.
To release the parking brake: 1. Press the brake pedal firmly.
2. Pull the lever up slightly.
3. Press the release button and push the
lever down.
132
Fiesta (CCT) Canada/United States of America, enUSA, First Printing Brakes
Page 137 of 363

PRINCIPLE OF OPERATION
Electronic Stability Program
WARNINGS
The system does not relieve you of
your responsibility to drive with due
care and attention. Failure to drive
with due care and attention could lead to
loss of vehicle control. Vehicle modifications involving
braking system, aftermarket roof
racks, suspension, steering system,
tire construction and wheel and tire size
may change the handling characteristics
of the vehicle and may adversely affect
the performance of the AdvanceTrac
system. In addition, installing any stereo
loudspeakers may interfere with and
adversely affect the AdvanceTrac system.
Install any aftermarket stereo loudspeaker
as far as possible from the front center
console, the tunnel, and the front seats in
order to minimize the risk of interfering with
the AdvanceTrac sensors. Reducing the
effectiveness of the AdvanceTrac system
could lead to an increased risk of loss of
vehicle control, vehicle rollover, personal
injury and death. Remember that even advanced
technology cannot defy the laws of
physics. It’
s always possible to lose
control of a vehicle due to inappropriate
driver input for the conditions. Aggressive
driving on any road condition can cause
you to lose control of your vehicle
increasing the risk of personal injury or
property damage. Activation of the
AdvanceTrac system is an indication that
at least some of the tires have exceeded
their ability to grip the road; this could
reduce the operator ’s ability to control the
vehicle potentially resulting in a loss of
vehicle control, vehicle rollover, personal
injury and death. If your AdvanceTrac
system activates, SLOW DOWN. Without Advance Trac
A
With Advance Trac
B
The system supports stability when your
vehicle starts to slide away from your
intended path. This is performed by braking
individual wheels and reducing engine
torque as needed.
The system also provides an enhanced
traction control function by reducing
engine torque if the wheels spin when you
accelerate. This improves your ability to
pull away on slippery roads or loose
surfaces, and improves comfort by limiting
wheel spin in hairpin bends.
Stability Control Warning Lamp
While driving, it flashes when the system
is operating. See Warning Lamps and
Indicators (page 80).
134
Fiesta (CCT) Canada/United States of America, enUSA, First Printing Stability Control
(If Equipped)E72903A
AA
B
BB
B
Page 143 of 363
PRINCIPLE OF OPERATION
WARNING
The system does not relieve you of
your responsibility to drive with due
care and attention.
Cruise control allows you to control your
speed using the switches on the steering
wheel. You can use cruise control when
you exceed approximately 20 mph (30
km/h).
USING CRUISE CONTROL
WARNINGS
Do not use cruise control on winding
roads, in heavy traffic or when the
road surface is slippery. This could
result in loss of vehicle control, serious
injury or death. When you are going downhill, your
speed may increase above the set
speed. The system will not apply the
brakes. Change down a gear to assist the
system in maintaining the set speed.
Failure to do so could result in loss of
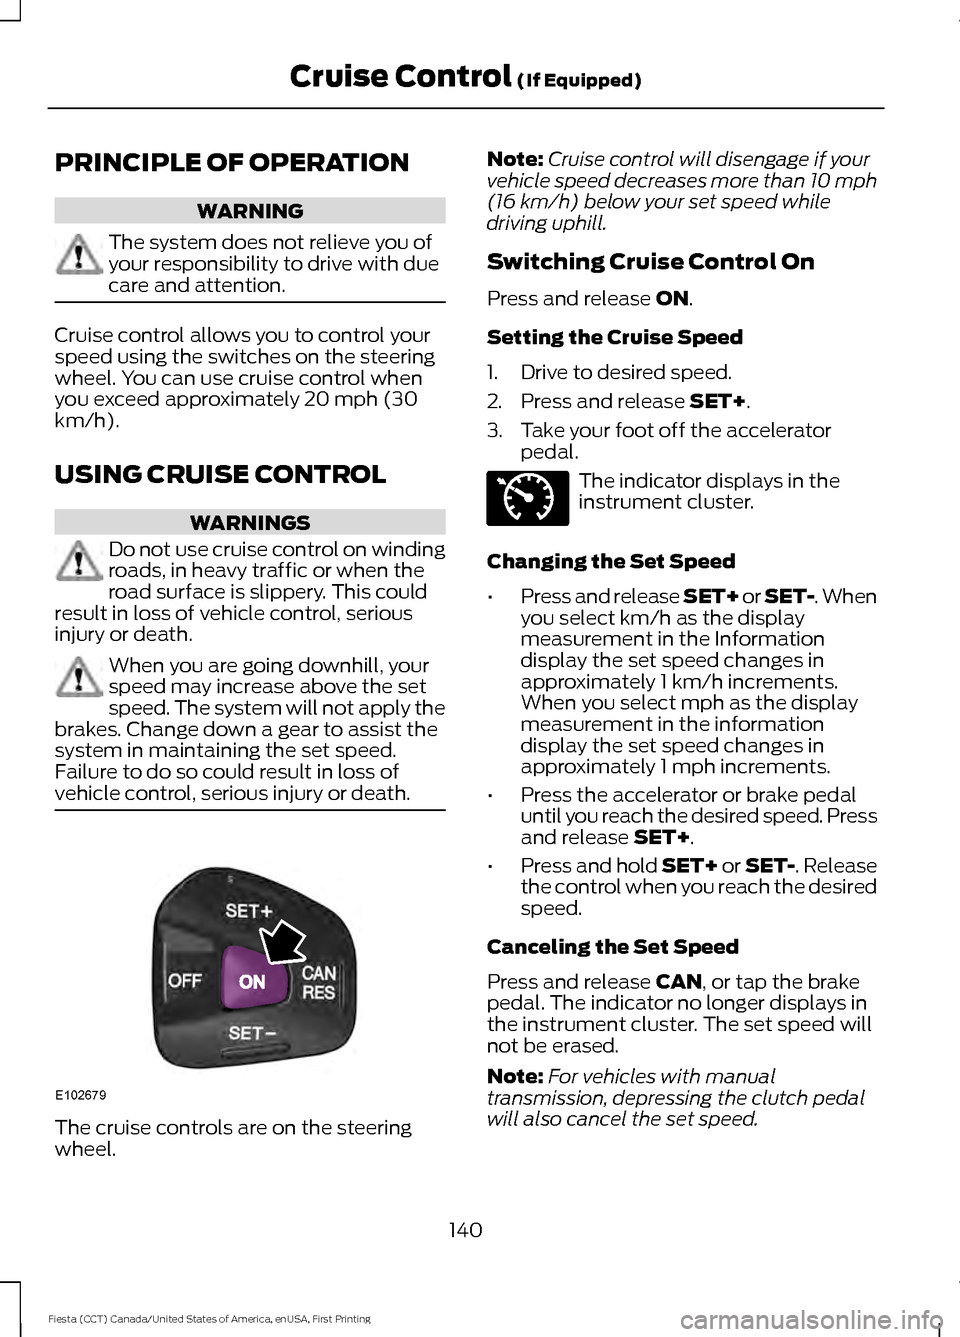
vehicle control, serious injury or death. The cruise controls are on the steering
wheel. Note:
Cruise control will disengage if your
vehicle speed decreases more than 10 mph
(16 km/h) below your set speed while
driving uphill.
Switching Cruise Control On
Press and release
ON.
Setting the Cruise Speed
1. Drive to desired speed.
2. Press and release
SET+.
3. Take your foot off the accelerator pedal. The indicator displays in the
instrument cluster.
Changing the Set Speed
• Press and release SET+ or SET-. When
you select km/h as the display
measurement in the Information
display the set speed changes in
approximately 1 km/h increments.
When you select mph as the display
measurement in the information
display the set speed changes in
approximately 1 mph increments.
• Press the accelerator or brake pedal
until you reach the desired speed. Press
and release
SET+.
• Press and hold SET+ or SET-. Release
the control when you reach the desired
speed.
Canceling the Set Speed
Press and release
CAN, or tap the brake
pedal. The indicator no longer displays in
the instrument cluster. The set speed will
not be erased.
Note: For vehicles with manual
transmission, depressing the clutch pedal
will also cancel the set speed.
140
Fiesta (CCT) Canada/United States of America, enUSA, First Printing Cruise Control
(If Equipped)E102679 E71340
Page 158 of 363
When driving through standing water, drive
very slowly and do not stop your vehicle.
Your brake performance and traction may
be limited. After driving through water and
as soon as it is safe to do so:
•
Lightly press the brake pedal to dry the
brakes and to check that they work.
• Check that the horn works.
• Check that the exterior lights work.
• Turn the steering wheel to check that
the steering power assist works.
FLOOR MATS WARNINGS
Always use floor mats that are
designed to fit the foot well of your
vehicle. Only use floor mats that
leave the pedal area unobstructed. Only
use floor mats that are firmly secured to
retention posts so that they cannot slip out
of position and interfere with the pedals
or impair safe operation of your vehicle in
other ways. Pedals that cannot move freely can
cause loss of vehicle control and
increase the risk of serious personal
injury. WARNINGS
Always make sure that the floor
mats are properly attached to the
retention posts in the carpet that are
supplied with your vehicle. Floor mats must
be properly secured to both retention posts
to make sure mats do not shift out of
position. Never place floor mats or any other
covering in the vehicle foot well that
cannot be properly secured to
prevent them from moving and interfering
with the pedals or the ability to control the
vehicle. Never place floor mats or any other
covering on top of already installed
floor mats. Floor mats should always
rest on top of vehicle carpeting surface and
not another floor mat or other covering.
Additional floor mats or any other covering
will reduce the pedal clearance and
potentially interfere with pedal operation. Check attachment of floor mats on
a regular basis. Always properly
reinstall and secure floor mats that
have been removed for cleaning or
replacement. Always make sure that objects
cannot fall into the driver foot well
while the vehicle is moving. Objects
that are loose can become trapped under
the pedals causing a loss of vehicle control. Failure to properly follow floor mat
installation or attachment
instructions can potentially cause
interference with pedal operation causing
a loss of vehicle control. 155
Fiesta (CCT) Canada/United States of America, enUSA, First Printing Driving HintsE176360
Page 209 of 363
CLEANING THE INSTRUMENT
PANEL AND INSTRUMENT
CLUSTER LENS
WARNING
Do not use chemical solvents or
strong detergents when cleaning the
steering wheel or instrument panel
to avoid contamination of the airbag
system. Note:
Follow the same procedure as
cleaning leather seats for cleaning leather
instrument panels and leather interior trim
surfaces. See Cleaning Leather Seats
(page 206).
Clean the instrument panel and cluster
lens with a clean, damp and soft cloth,
then use a clean, dry and soft cloth to dry
these areas.
• Avoid cleaners or polishes that increase
the gloss of the upper portion of the
instrument panel. The dull finish in this
area helps protect you from
undesirable windshield reflection.
• Do not use any household cleaning
products or glass cleaners as these
may damage the finish of the
instrument panel, interior trim and
cluster lens.
• Wash or wipe your hands clean if you
have been in contact with certain
products such as insect repellent and
suntan lotion to avoid possible damage
to the interior painted surfaces.
• Do not allow air fresheners and hand
sanitizers to spill onto interior surfaces.
If a spill occurs, wipe off immediately.
Your warranty may not cover these
damages.
If a staining liquid like coffee or juice has
been spilled on the instrument panel or on
interior trim surfaces: 1. Wipe up spilled liquid using a clean,
soft cloth as quickly as possible.
2. Use Motorcraft Premium Leather and Vinyl Cleaner or a commercially
available leather cleaning product for
automotive interiors. Test any cleaner
or stain remover on an inconspicuous
area.
3. Alternatively, wipe the surface with a clean, soft cloth and a mild soap and
water solution. Dry the area with a
clean, soft cloth.
4. If necessary, apply more soap and water solution or cleaning product to
a clean, soft cloth and press it onto the
soiled area. Allow this to set at room
temperature for 30 minutes.
5. Remove the soaked cloth, then with a clean, damp cloth, use a rubbing
motion for 60 seconds on the soiled
area.
6. Dry the area with a clean, soft cloth.
CLEANING LEATHER SEATS
(If
Equipped)
Note: Follow the same procedure as
cleaning leather seats for cleaning leather
instrument panels and leather interior trim
surfaces.
For routine cleaning, wipe the surface with
a soft, damp cloth and a mild soap and
water solution. Dry the area with a clean,
soft cloth.
For cleaning and removing stains such as
dye transfer, use Motorcraft Premium
Leather and Vinyl Cleaner or a
commercially available leather cleaning
product for automotive interiors.
Note: Test any cleaner or stain remover on
an inconspicuous area.
206
Fiesta (CCT) Canada/United States of America, enUSA, First Printing Vehicle Care
Page 225 of 363
WARNINGS
may be found on either the Safety
Compliance Certification Label
(affixed to either the door hinge
pillar, door-latch post, or the door
edge that meets the door-latch
post, next to the driver's seating
position), or the Tire Label which
is located on the B-Pillar or edge
of the driver ’s door. If this
information is not found on these
labels then you should contact
your authorized dealer as soon as
possible. Use of any tire or wheel
not recommended by Ford can
affect the safety and performance
of your vehicle, which could result
in an increased risk of loss of
vehicle control, vehicle rollover,
personal injury and death.
Additionally the use of
non-recommended tires and
wheels could cause steering,
suspension, axle, transfer case or
power transfer unit failure. If you
have questions regarding tire
replacement, contact your
authorized dealer as soon as
possible. When mounting replacement
tires and wheels, you should
not exceed the maximum pressure
indicated on the sidewall of the
tire to set the beads without
additional precautions listed
below. If the beads do not seat at
the maximum pressure indicated,
re-lubricate and try again. WARNINGS
When inflating the tire for
mounting pressures up to 20 psi
(1.38 bar) greater than the
maximum pressure on the tire
sidewall, the following
precautions must be taken to
protect the person mounting the
tire:
1. Make sure that you have the
correct tire and wheel size.
2. Lubricate the tire bead and
wheel bead seat area again.
3. Stand at a minimum of 12 ft
(3.66 m) away from the wheel
and tire assembly.
4. Use both eye and ear
protection.
For a mounting pressure more
than 20 psi (1.38 bar) greater than
the maximum pressure, a Ford
dealer or other tire service
professional should do the
mounting.
Always inflate steel carcass tires
with a remote air fill with the
person inflating standing at a
minimum of 12 ft (3.66 m) away
from the wheel and tire assembly Important: Remember to replace
the wheel valve stems when the
road tires are replaced on your
vehicle
222
Fiesta (CCT) Canada/United States of America, enUSA, First Printing Wheels and Tires