2016 FORD F450 SUPER DUTY AUX
[x] Cancel search: AUXPage 5 of 507

Pedals
Adjusting the Pedals....................................69
Wipers and Washers
Windshield Wipers.........................................70
Windshield Washers.....................................70
Lighting
General Information.......................................71
Lighting Control................................................71
Autolamps.........................................................72
Instrument Lighting Dimmer......................73
Daytime Running Lamps.............................73
Front Fog Lamps.............................................73
Direction Indicators........................................74
Interior Lamps..................................................74
Windows and Mirrors
Power Windows..............................................76
Global Opening................................................77
Exterior Mirrors.................................................77
Interior Mirror....................................................79
Sliding Windows.............................................79
Sun Visors.........................................................80
Moonroof..........................................................80
Instrument Cluster
Gauges...............................................................82
Warning Lamps and Indicators................84
Audible Warnings and Indicators.............87
Information Displays
General Information.....................................89
Information Messages...............................100
Climate Control
Manual Climate Control.............................110
Automatic Climate Control.........................111
Hints on Controlling the InteriorClimate..........................................................112
Heated Windows and Mirrors...................115
Remote Start..................................................116
Seats
Sitting in the Correct Position...................117
Head Restraints..............................................117
Manual Seats..................................................119
Power Seats...................................................120
Memory Function.........................................120
Rear Seats........................................................122
Heated Seats..................................................124
Climate Controlled Seats..........................125
Front Seat Armrest.......................................127
Rear Seat Armrest........................................128
Universal Garage DoorOpener
Universal Garage Door Opener...............129
Auxiliary Power Points
Auxiliary Power Points................................137
Storage Compartments
Center Console..............................................139
Overhead Console........................................139
Starting and Stopping theEngine
General Information....................................140
Ignition Switch..............................................140
Starting a Gasoline Engine........................141
Engine Block Heater....................................142
Fuel and Refueling
Safety Precautions......................................144
Fuel Quality....................................................145
Running Out of Fuel....................................146
Refueling.........................................................146
2
Super Duty (TFA) Canada/United States of America, enUSA, First Printing
Table of Contents
Page 8 of 507
SYNC™
General Information...................................329
Using Voice Recognition............................331
Using SYNC™ With Your Phone............334
SYNC™ Applications and Services......346
SYNC™ AppLink™.....................................354
Using SYNC™ With Your MediaPlayer...........................................................355
SYNC™ Troubleshooting.........................365
MyFord Touch™
General Information...................................374
Settings...........................................................382
Entertainment..............................................395
Phone.................................................................411
Information.....................................................418
Climate............................................................428
Navigation.......................................................431
MyFord Touch™ Troubleshooting........440
Accessories
Accessories....................................................447
Auxiliary Switches.......................................448
Extended Service Plan(ESP)
Extended Service Plan (ESP)..................451
Scheduled Maintenance
General Maintenance Information.......453
Normal Scheduled Maintenance..........456
Special Operating Conditions ScheduledMaintenance..............................................457
Scheduled Maintenance Record...........462
Appendices
End User License Agreement..................472
5
Super Duty (TFA) Canada/United States of America, enUSA, First Printing
Table of Contents
Page 130 of 507
FRONT SEAT ARMREST
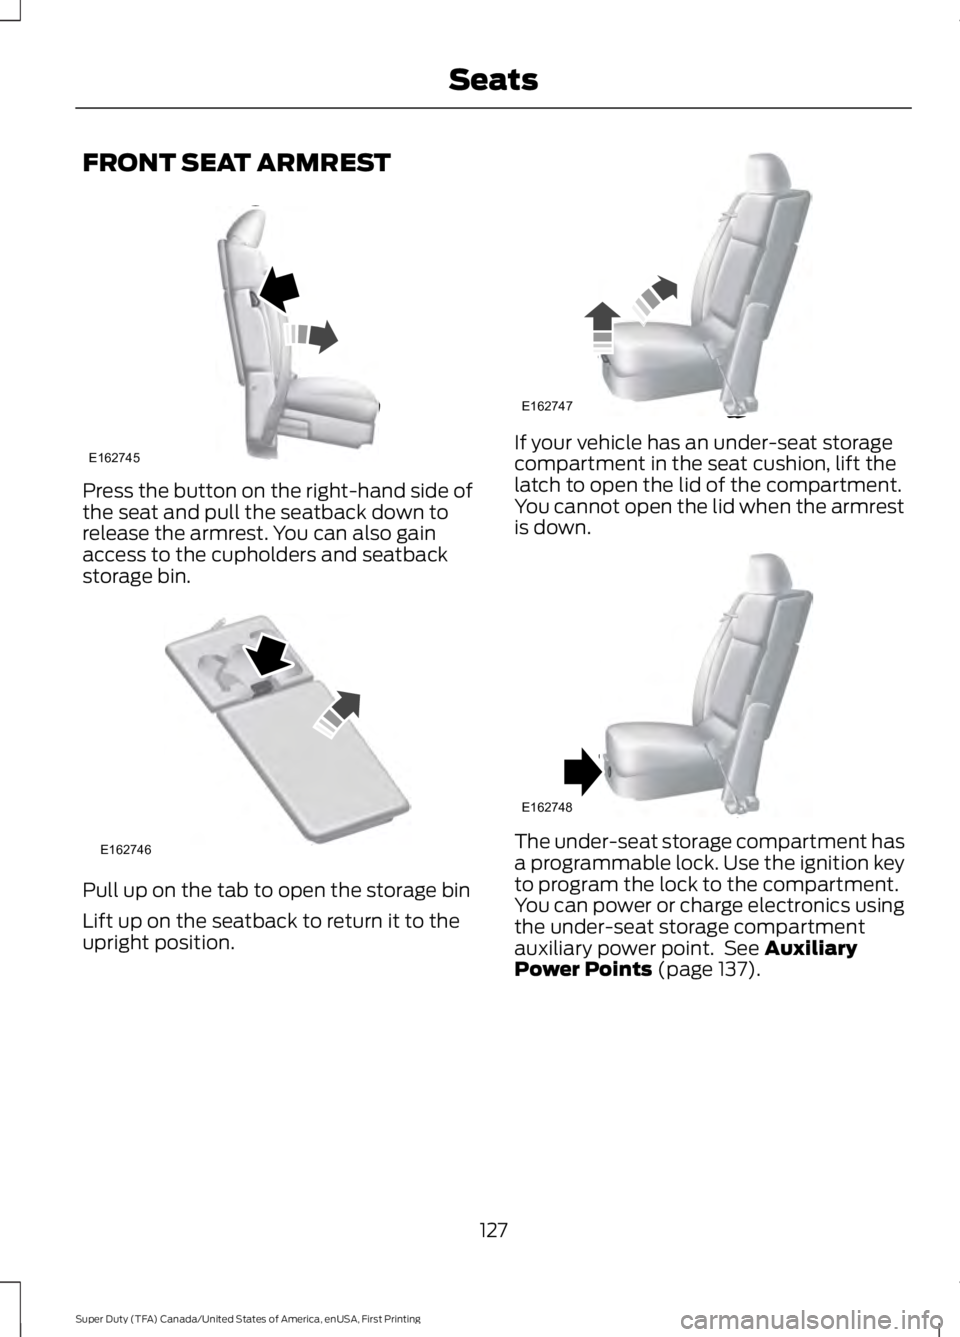
Press the button on the right-hand side ofthe seat and pull the seatback down torelease the armrest. You can also gainaccess to the cupholders and seatbackstorage bin.
Pull up on the tab to open the storage bin
Lift up on the seatback to return it to theupright position.
If your vehicle has an under-seat storagecompartment in the seat cushion, lift thelatch to open the lid of the compartment.You cannot open the lid when the armrestis down.
The under-seat storage compartment hasa programmable lock. Use the ignition keyto program the lock to the compartment.You can power or charge electronics usingthe under-seat storage compartmentauxiliary power point. See AuxiliaryPower Points (page 137).
127
Super Duty (TFA) Canada/United States of America, enUSA, First Printing
SeatsE162745 E162746 E162747 E162748
Page 140 of 507
12 Volt DC Power Point
WARNING
Do not plug optional electricalaccessories into the cigar lightersocket. Incorrect use of the cigarlighter can cause damage not covered bythe vehicle warranty, and can result in fireor serious injury.
Note:If used when the vehicle is notrunning, the battery will run out of charge.There may be insufficient power to restartyour vehicle.
Note:Do not insert objects other than anaccessory plug into the power point. Thiswill damage the outlet and blow the fuse.
Note:Do not hang any accessory from theaccessory plug.
Note:Do not use the power point over thevehicle capacity of 12 volt DC 180 watts ora fuse may blow.
Note:Do not use a power point foroperating a cigar lighter.
Note:Incorrect use of the power points cancause damage not covered by the vehiclewarranty, and can result in fire or seriousinjury.
Note:Always keep the power point capsclosed when not in use.
Run the vehicle for full capacity use of thepower point. To prevent the battery fromrunning out of charge:
•Do not use the power point longer thannecessary when the vehicle is notrunning.
•Do not leave devices plugged inovernight or when you park your vehiclefor extended periods.
Locations
Power points may be in the followinglocations:
•On the instrument panel.
•Inside the center console.
•On the rear of the center console.
•Inside the front under-seat storagecompartment (if equipped).
•Inside the rear under-seat storagecompartment (if equipped).
110 Volt AC Power Point (If Equipped)
WARNING
Do not keep electrical devicesplugged in the power point wheneverthe device is not in use. Do not useany extension cord with the 110 volt ACpower point, since it will defeat the safetyprotection design. Doing so my cause thepower point to overload due to poweringmultiple devices that can reach beyondthe 150 watt load limit and could result infire or serious injury.
Note:Run the vehicle for full capacity useof the power point.
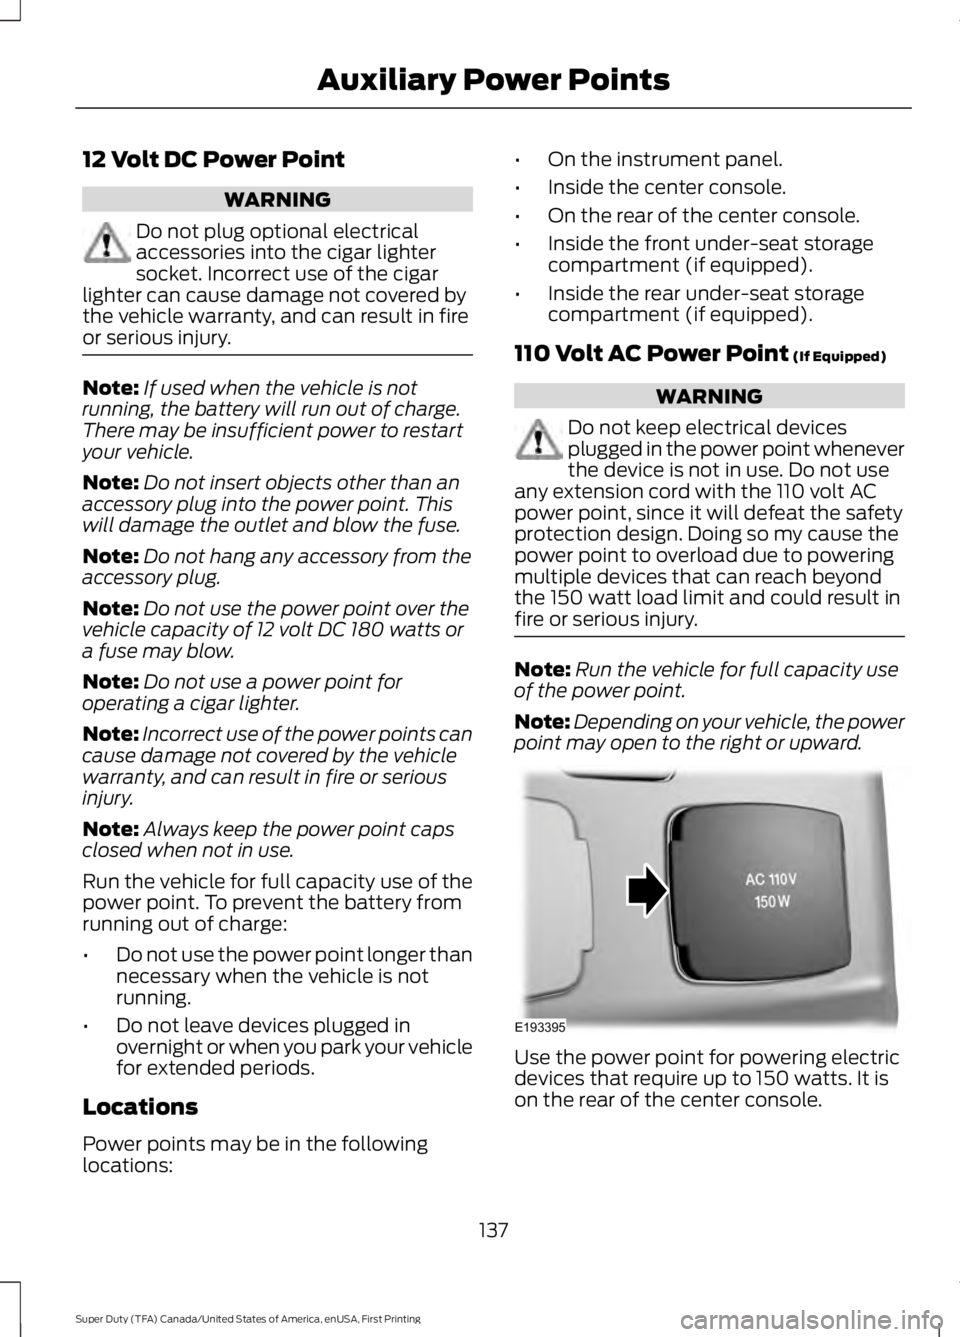
Note:Depending on your vehicle, the powerpoint may open to the right or upward.
Use the power point for powering electricdevices that require up to 150 watts. It ison the rear of the center console.
137
Super Duty (TFA) Canada/United States of America, enUSA, First Printing
Auxiliary Power PointsE193395
Page 141 of 507
When the indicator light on the power pointis:
•On, the power point is working, theignition is on and a device is pluggedin.
•Off, the power point is off, the ignitionis off or no device is plugged in.
•Flashing, the power point is in faultmode.
The power outlet temporarily turns offpower when in fault mode if the deviceexceeds the 150 watt limit. Unplug yourdevice and switch the ignition off. Switchthe ignition back on, but do not plug yourdevice back in. Let the system cool off andswitch the ignition off to reset the faultmode. Switch the ignition back on andmake sure the indicator light remains on.
The power point is not designed for electricdevices such as:
•Cathode-ray, tube-type televisions.
•Motor loads, such as vacuum cleaners,electric saws and other electric powertools or compressor-drivenrefrigerators.
•Measuring devices, which processprecise data, such as medicalequipment or measuring equipment.
•Other appliances requiring anextremely stable power supply such asmicrocomputer-controlled electricblankets or touch-sensor lamps.
138
Super Duty (TFA) Canada/United States of America, enUSA, First Printing
Auxiliary Power Points
Page 142 of 507
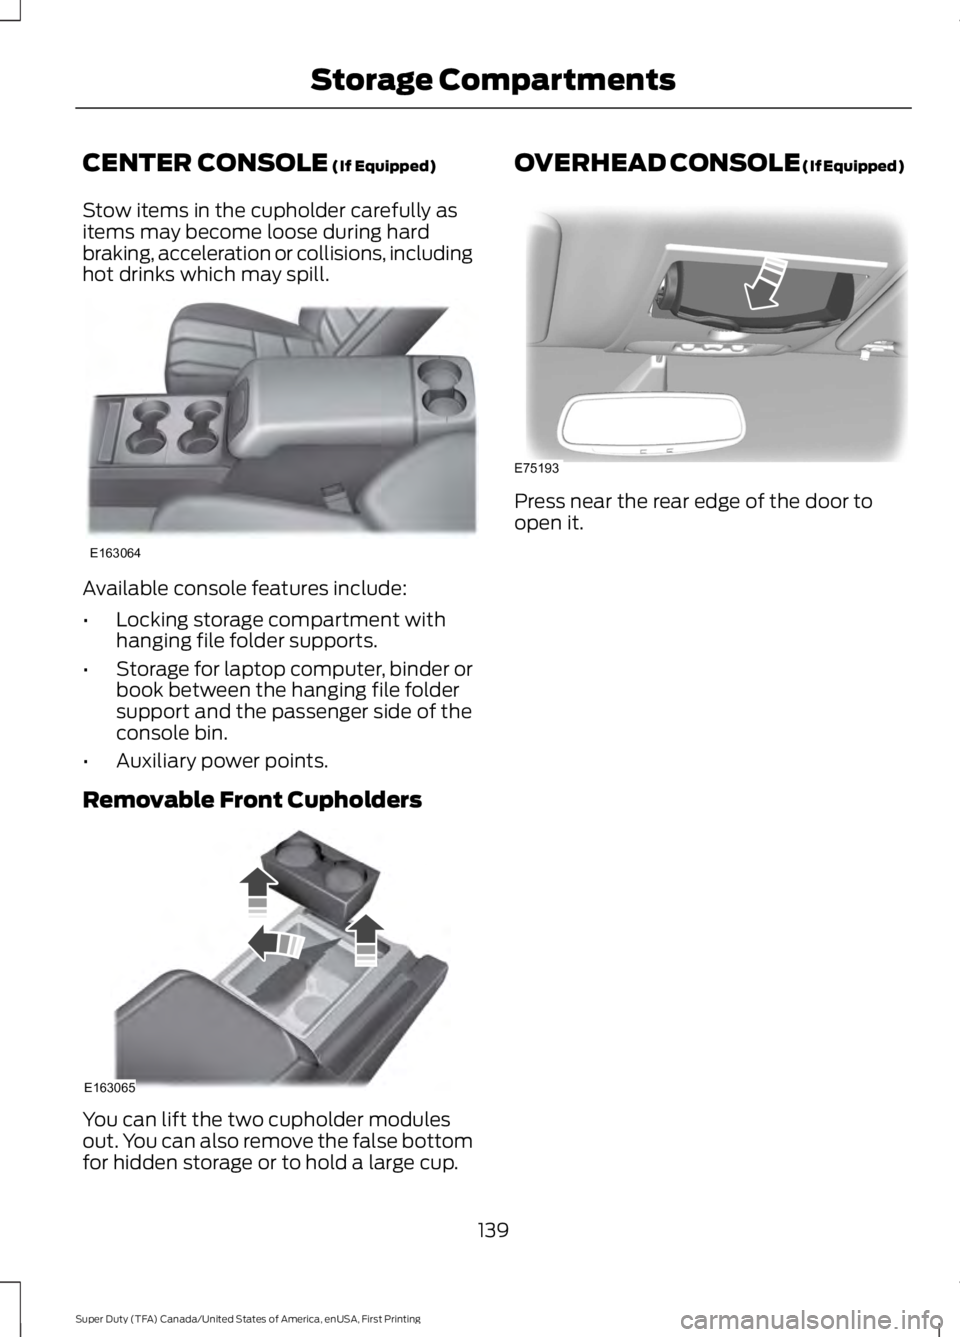
CENTER CONSOLE (If Equipped)
Stow items in the cupholder carefully asitems may become loose during hardbraking, acceleration or collisions, includinghot drinks which may spill.
Available console features include:
•Locking storage compartment withhanging file folder supports.
•Storage for laptop computer, binder orbook between the hanging file foldersupport and the passenger side of theconsole bin.
•Auxiliary power points.
Removable Front Cupholders
You can lift the two cupholder modulesout. You can also remove the false bottomfor hidden storage or to hold a large cup.
OVERHEAD CONSOLE (If Equipped)
Press near the rear edge of the door toopen it.
139
Super Duty (TFA) Canada/United States of America, enUSA, First Printing
Storage CompartmentsE163064 E163065 E75193
Page 159 of 507
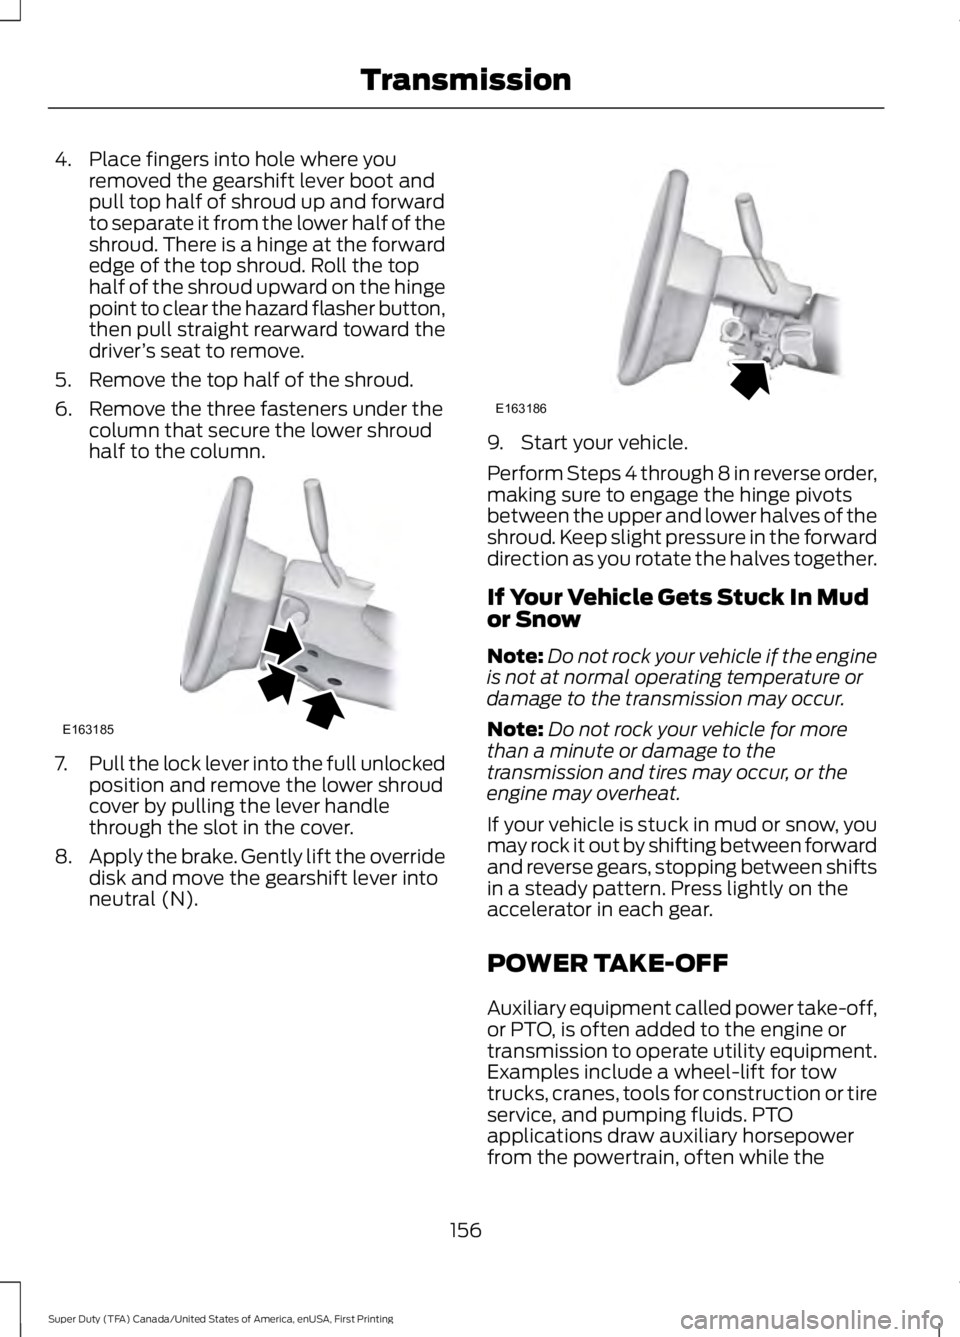
4. Place fingers into hole where youremoved the gearshift lever boot andpull top half of shroud up and forwardto separate it from the lower half of theshroud. There is a hinge at the forwardedge of the top shroud. Roll the tophalf of the shroud upward on the hingepoint to clear the hazard flasher button,then pull straight rearward toward thedriver’s seat to remove.
5. Remove the top half of the shroud.
6. Remove the three fasteners under thecolumn that secure the lower shroudhalf to the column.
7.Pull the lock lever into the full unlockedposition and remove the lower shroudcover by pulling the lever handlethrough the slot in the cover.
8.Apply the brake. Gently lift the overridedisk and move the gearshift lever intoneutral (N).
9. Start your vehicle.
Perform Steps 4 through 8 in reverse order,making sure to engage the hinge pivotsbetween the upper and lower halves of theshroud. Keep slight pressure in the forwarddirection as you rotate the halves together.
If Your Vehicle Gets Stuck In Mudor Snow
Note:Do not rock your vehicle if the engineis not at normal operating temperature ordamage to the transmission may occur.
Note:Do not rock your vehicle for morethan a minute or damage to thetransmission and tires may occur, or theengine may overheat.
If your vehicle is stuck in mud or snow, youmay rock it out by shifting between forwardand reverse gears, stopping between shiftsin a steady pattern. Press lightly on theaccelerator in each gear.
POWER TAKE-OFF
Auxiliary equipment called power take-off,or PTO, is often added to the engine ortransmission to operate utility equipment.Examples include a wheel-lift for towtrucks, cranes, tools for construction or tireservice, and pumping fluids. PTOapplications draw auxiliary horsepowerfrom the powertrain, often while the
156
Super Duty (TFA) Canada/United States of America, enUSA, First Printing
TransmissionE163185 E163186
Page 212 of 507
WARNINGS
Check attachment of floor mats ona regular basis. Always properlyreinstall and secure floor mats thathave been removed for cleaning orreplacement.
Always make sure that objectscannot fall into the driver foot wellwhile the vehicle is moving. Objectsthat are loose can become trapped underthe pedals causing a loss of vehicle control.
Failure to properly follow floor matinstallation or attachmentinstructions can potentially causeinterference with pedal operation causinga loss of vehicle control.
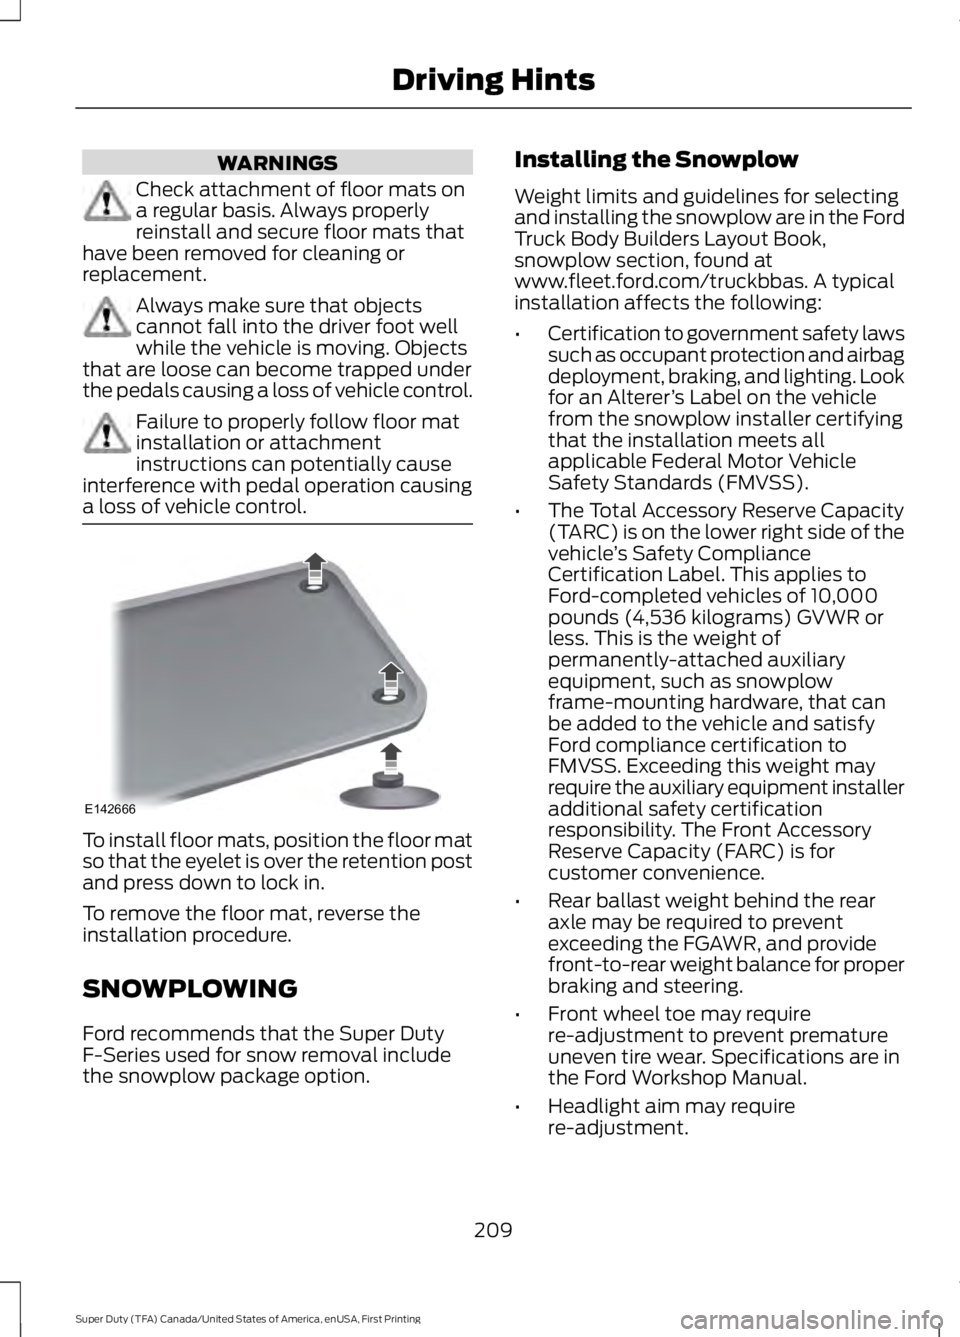
To install floor mats, position the floor matso that the eyelet is over the retention postand press down to lock in.
To remove the floor mat, reverse theinstallation procedure.
SNOWPLOWING
Ford recommends that the Super DutyF-Series used for snow removal includethe snowplow package option.
Installing the Snowplow
Weight limits and guidelines for selectingand installing the snowplow are in the FordTruck Body Builders Layout Book,snowplow section, found atwww.fleet.ford.com/truckbbas. A typicalinstallation affects the following:
•Certification to government safety lawssuch as occupant protection and airbagdeployment, braking, and lighting. Lookfor an Alterer’s Label on the vehiclefrom the snowplow installer certifyingthat the installation meets allapplicable Federal Motor VehicleSafety Standards (FMVSS).
•The Total Accessory Reserve Capacity(TARC) is on the lower right side of thevehicle’s Safety ComplianceCertification Label. This applies toFord-completed vehicles of 10,000pounds (4,536 kilograms) GVWR orless. This is the weight ofpermanently-attached auxiliaryequipment, such as snowplowframe-mounting hardware, that canbe added to the vehicle and satisfyFord compliance certification toFMVSS. Exceeding this weight mayrequire the auxiliary equipment installeradditional safety certificationresponsibility. The Front AccessoryReserve Capacity (FARC) is forcustomer convenience.
•Rear ballast weight behind the rearaxle may be required to preventexceeding the FGAWR, and providefront-to-rear weight balance for properbraking and steering.
•Front wheel toe may requirere-adjustment to prevent prematureuneven tire wear. Specifications are inthe Ford Workshop Manual.
•Headlight aim may requirere-adjustment.
209
Super Duty (TFA) Canada/United States of America, enUSA, First Printing
Driving HintsE142666