2016 FORD F450 SUPER DUTY flat tire
[x] Cancel search: flat tirePage 293 of 507

11.Set all four tires to the recommendedair pressure as indicated on theSafety Compliance CertificationLabel (affixed to either the door hingepillar, door-latch post, or the dooredge that meets the door-latch post,next to the driver's seating position)or Tire Label located on the B-Pillaror the edge of the driver's door.
CHANGING A ROAD WHEEL
WARNINGS
The use of tire sealant may damageyour tire pressure monitoring systemand should only be used in roadsideemergencies. If you must use a sealant, theFord Tire Mobility Kit sealant should beused. The tire pressure monitoring systemsensor and valve stem on the wheel mustbe replaced by an authorized dealer afteruse of the sealant.
If the tire pressure monitor sensorbecomes damaged, it will no longerfunction. See Tire PressureMonitoring System (page 284).
Note:If your vehicle is equipped with thetire pressure monitoring system, theindicator light will illuminate when the sparetire is in use. To restore the full function ofthe monitoring system, all road wheelsequipped with tire pressure monitoringsensors must be mounted on the vehicle.
If you get a flat tire while driving, do notapply the brake heavily. Instead, graduallydecrease your speed. Hold the steeringwheel firmly and slowly move to a safeplace on the side of the road.
If your vehicle is equipped with the tirepressure monitoring system, have a flatserviced by an authorized dealer in orderto prevent damage to the system sensors.See Tire Pressure Monitoring System(page 284). Replace the spare tire with aroad tire as soon as possible. Duringrepairing or replacing of the flat tire, havethe authorized dealer inspect the systemsensor for damage.
Dissimilar Spare Wheel and TireAssembly Information
WARNING
Failure to follow these guidelinescould result in an increased risk ofloss of vehicle control, injury or death.
If you have a dissimilar spare wheel andtire, then it is intended for temporary useonly. This means that if you need to use it,you should replace it as soon as possiblewith a road wheel and tire assembly thatis the same size and type as the road tiresand wheels that were originally providedby Ford. If the dissimilar spare tire or wheelis damaged, it should be replaced ratherthan repaired.
A dissimilar spare wheel and tire assemblyis defined as a spare wheel and tireassembly that is different in brand, size orappearance from the road tires and wheelsand can be one of three types:
1.T-type mini-spare: This spare tirebegins with the letter T for tire size andmay have Temporary Use Only molded inthe sidewall.
2.Full-size dissimilar spare with labelon wheel: This spare tire has a label onthe wheel that states: THIS WHEEL ANDTIRE ASSEMBLY FOR TEMPORARY USEONLY
When driving with one of the dissimilarspare tires listed above, do not:
290
Super Duty (TFA) Canada/United States of America, enUSA, First Printing
Wheels and Tires
Page 296 of 507

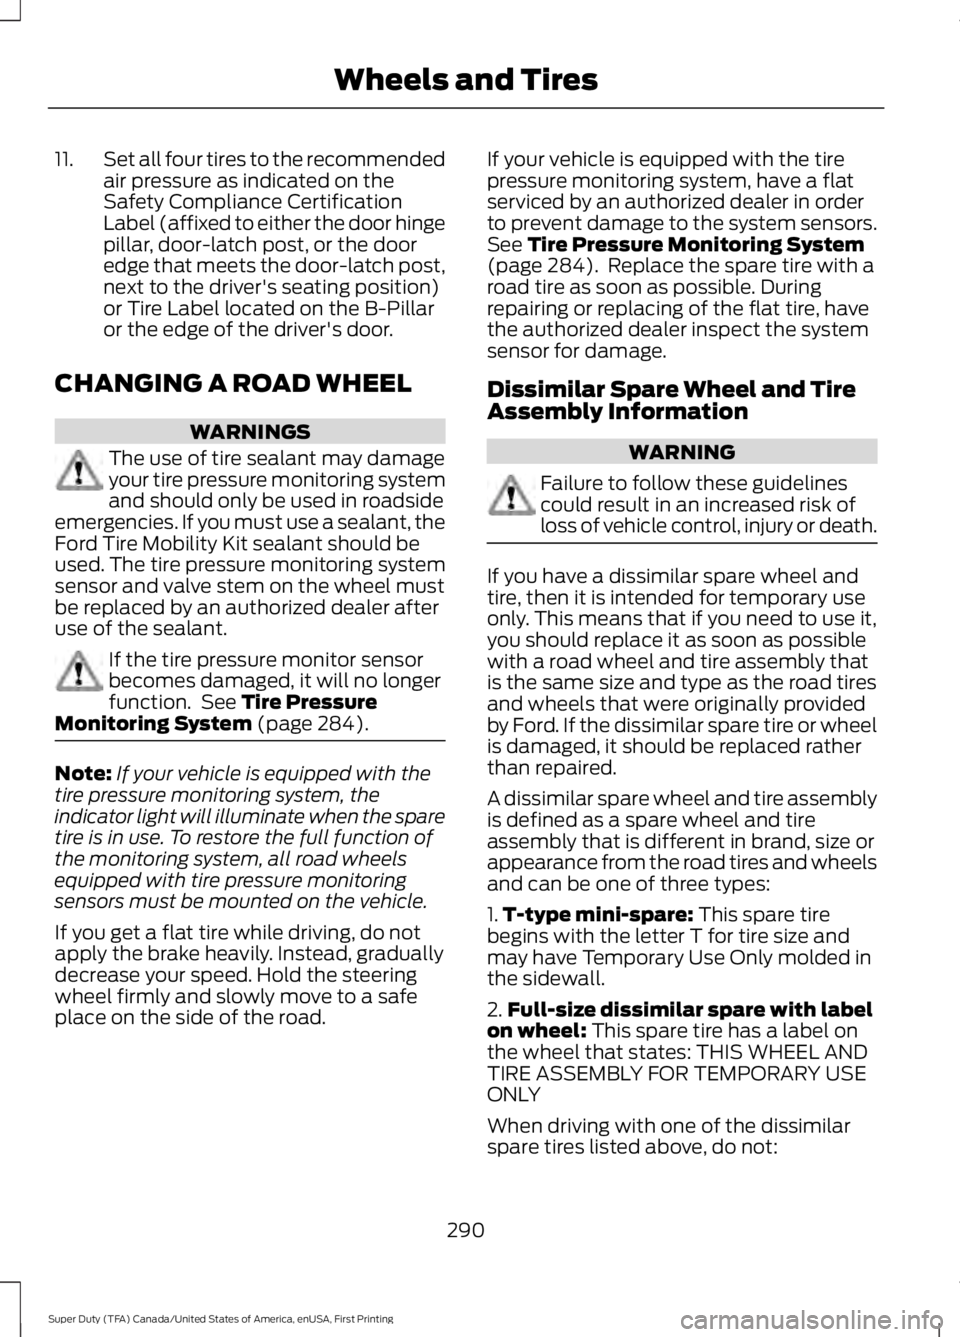
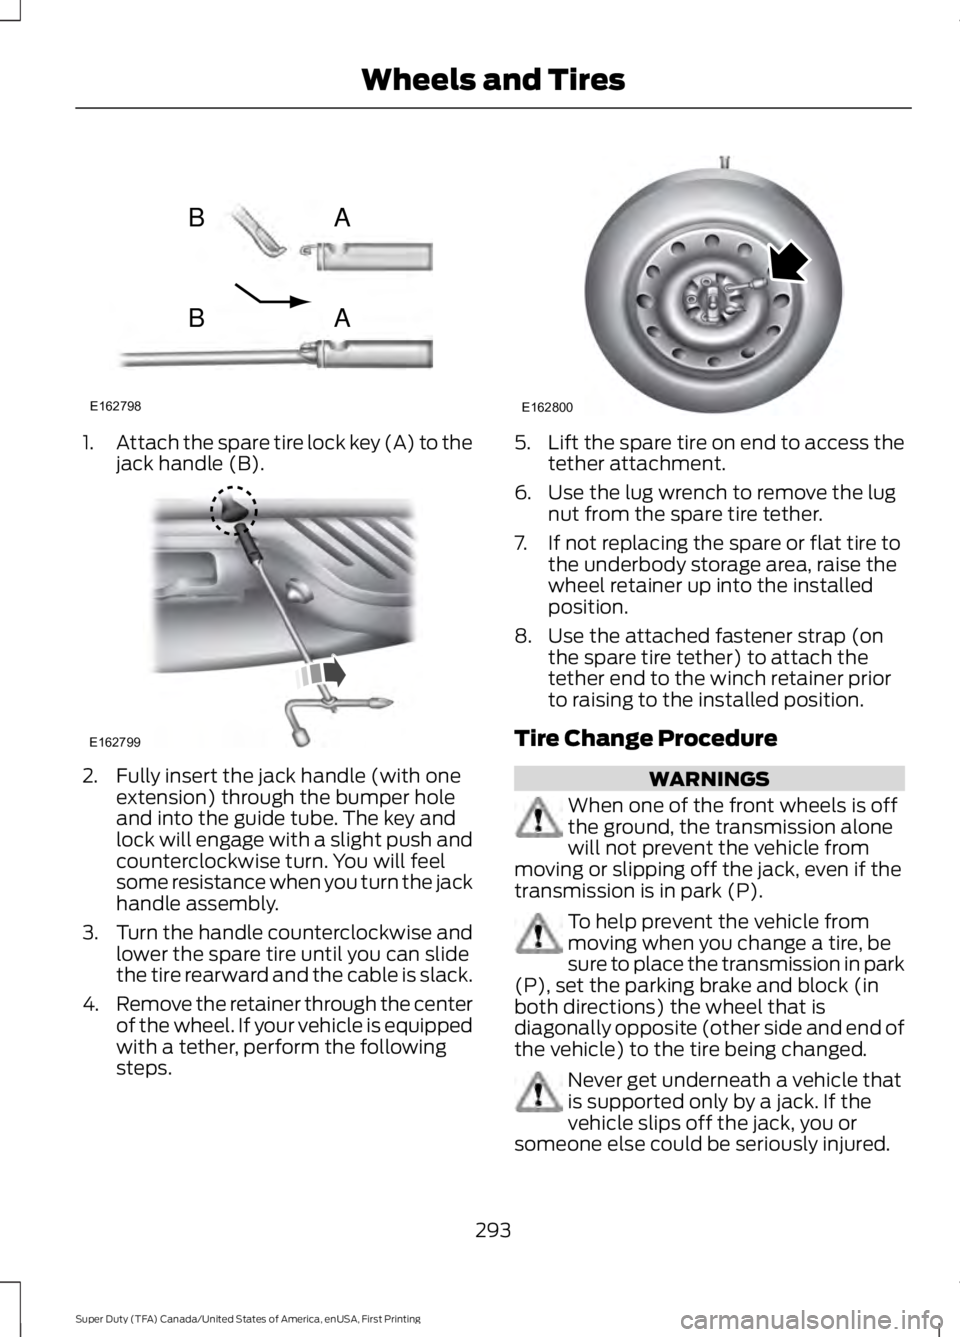
1.Attach the spare tire lock key (A) to thejack handle (B).
2. Fully insert the jack handle (with oneextension) through the bumper holeand into the guide tube. The key andlock will engage with a slight push andcounterclockwise turn. You will feelsome resistance when you turn the jackhandle assembly.
3.Turn the handle counterclockwise andlower the spare tire until you can slidethe tire rearward and the cable is slack.
4.Remove the retainer through the centerof the wheel. If your vehicle is equippedwith a tether, perform the followingsteps.
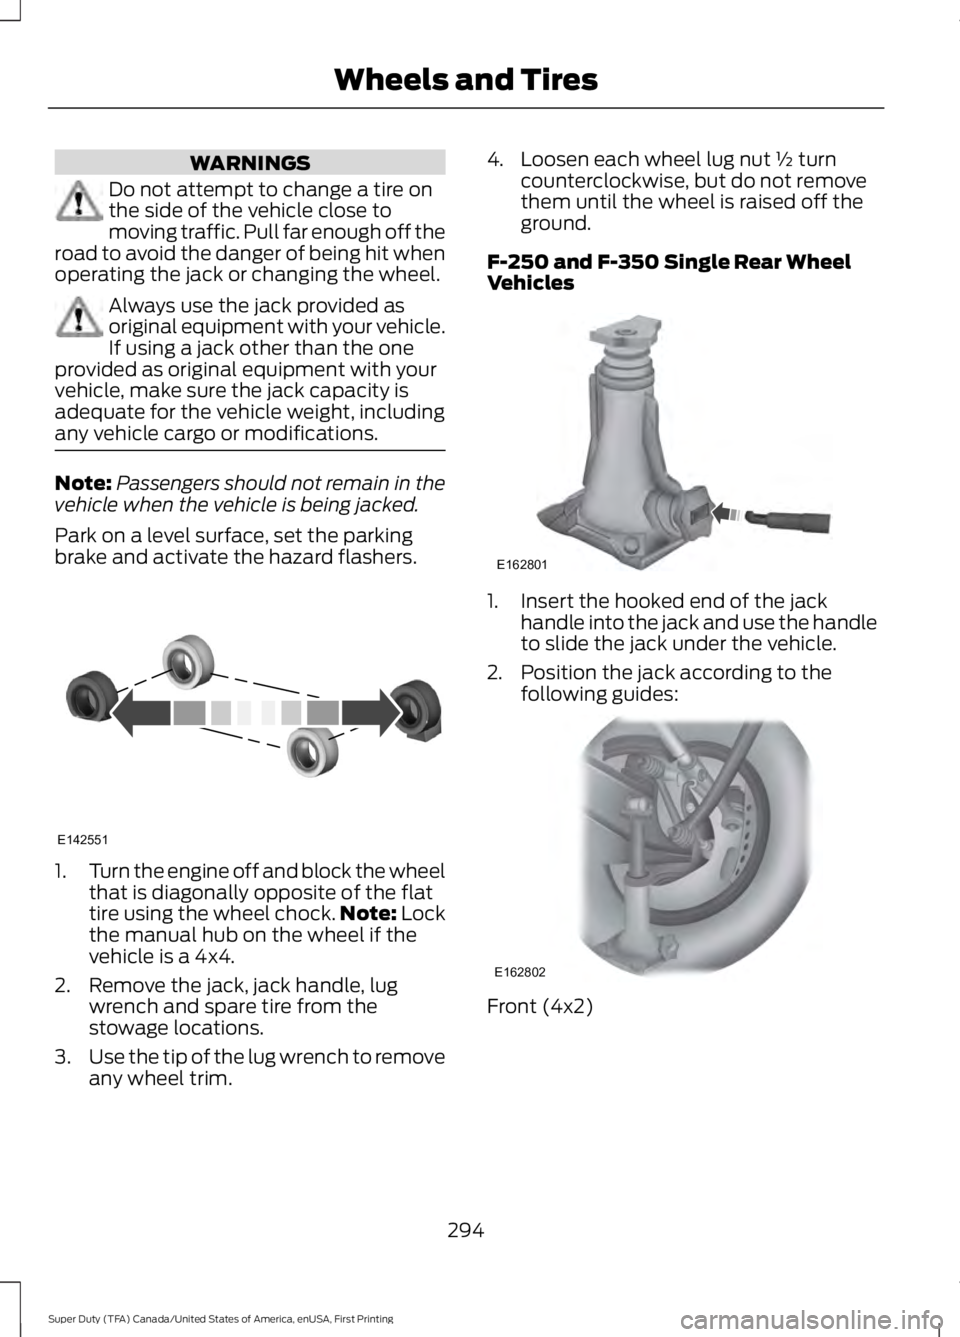
5.Lift the spare tire on end to access thetether attachment.
6. Use the lug wrench to remove the lugnut from the spare tire tether.
7. If not replacing the spare or flat tire tothe underbody storage area, raise thewheel retainer up into the installedposition.
8. Use the attached fastener strap (onthe spare tire tether) to attach thetether end to the winch retainer priorto raising to the installed position.
Tire Change Procedure
WARNINGS
When one of the front wheels is offthe ground, the transmission alonewill not prevent the vehicle frommoving or slipping off the jack, even if thetransmission is in park (P).
To help prevent the vehicle frommoving when you change a tire, besure to place the transmission in park(P), set the parking brake and block (inboth directions) the wheel that isdiagonally opposite (other side and end ofthe vehicle) to the tire being changed.
Never get underneath a vehicle thatis supported only by a jack. If thevehicle slips off the jack, you orsomeone else could be seriously injured.
293
Super Duty (TFA) Canada/United States of America, enUSA, First Printing
Wheels and TiresE162798
AB
AB E162799 E162800
Page 297 of 507

WARNINGS
Do not attempt to change a tire onthe side of the vehicle close tomoving traffic. Pull far enough off theroad to avoid the danger of being hit whenoperating the jack or changing the wheel.
Always use the jack provided asoriginal equipment with your vehicle.If using a jack other than the oneprovided as original equipment with yourvehicle, make sure the jack capacity isadequate for the vehicle weight, includingany vehicle cargo or modifications.
Note:Passengers should not remain in thevehicle when the vehicle is being jacked.
Park on a level surface, set the parkingbrake and activate the hazard flashers.
1.Turn the engine off and block the wheelthat is diagonally opposite of the flattire using the wheel chock.Note: Lockthe manual hub on the wheel if thevehicle is a 4x4.
2. Remove the jack, jack handle, lugwrench and spare tire from thestowage locations.
3.Use the tip of the lug wrench to removeany wheel trim.
4. Loosen each wheel lug nut ½ turncounterclockwise, but do not removethem until the wheel is raised off theground.
F-250 and F-350 Single Rear WheelVehicles
1. Insert the hooked end of the jackhandle into the jack and use the handleto slide the jack under the vehicle.
2. Position the jack according to thefollowing guides:
Front (4x2)
294
Super Duty (TFA) Canada/United States of America, enUSA, First Printing
Wheels and TiresE142551 E162801 E162802
Page 298 of 507

Front driver side (4x4)
Note:Make sure the jack fits onto the flatarea on the outboard side of the differential.
Front passenger side (4x4)
Note:View shown from the rear of thevehicle to clearly identify the jack point.Place the jack directly under the axle.
Rear
Note:Jack at the specified locations toavoid damage to the vehicle.
Jacking the Vehicle
1. Turn the jack handle clockwise untilthe wheel is completely off the groundand high enough to install the sparetire.
2. Remove the lug nuts with the lugwrench.
3.Replace the flat tire with the spare tire,making sure the valve stem is facingoutward for all front wheels and singlerear wheel vehicles. If you are replacingan inboard rear tire on dual rear wheelvehicles, the valve stem must be facingoutward. If you are replacing theoutboard wheel, the valve stem mustbe facing inward. Reinstall the lug nutsuntil the wheel is snug against the hub.Do not fully tighten the lug nuts untilthe wheel has been lowered.
4. Lower the wheel by turning the jackhandle counterclockwise.
5. Remove the jack and fully tighten thelug nuts in the order shown. SeeTechnical Specifications (page 301).
6. Stow the flat tire. See Stowing the flator spare tire if the vehicle is equippedwith a spare tire carrier.
295
Super Duty (TFA) Canada/United States of America, enUSA, First Printing
Wheels and TiresE162803 E162804 E162805 E162811
Page 300 of 507

1. Slide the notched end of the jackhandle over the release valve and usethe handle to slide the jack under thevehicle. Make sure the valve is closedby turning it clockwise.
2. Position the jack according to thefollowing guides:
Front (4x2): F-350 dual rear wheel
Note:Place the jack directly under theI-beam.
Front driver side (4x4): F-350 dual rearwheel
Note:Make sure the jack fits onto the flatarea on the outboard side of the differentialhousing.
Front passenger side (4x4): F-350 dualrear wheel
Note:View shown from the rear of thevehicle to clearly identify the jack point.
Note:Place the jack directly under the axleand inboard of the radius arm so that thejack clears the radius arm.
Front: F-450 and F-550
297
Super Duty (TFA) Canada/United States of America, enUSA, First Printing
Wheels and TiresE162813 E162814 E162815 E162816
Page 301 of 507

Rear: F-350 dual rear wheel
Rear: F-450 and F-550
Jacking the Vehicle
1. Insert the jack handle into the pumplinkage.
2. Use an up-and-down motion with thejack handle to raise the wheelcompletely off the ground.
Note:Hydraulic jacks are equipped with apressure release valve that prevents liftingloads which exceed the jack's ratedcapacity.
3. Remove the lug nuts with the lugwrench.
4.Replace the flat tire with the spare tire,making sure the valve stem is facingoutward on all front an inboard rearwheels. If you are replacing theoutboard wheel, the valve stem mustbe facing inward. Reinstall the lug nutsuntil the wheel is snug against the hub.Do not fully tighten the lug nuts untilthe wheel has been lowered.
5. Lower the wheel by slowly turning therelease valve counterclockwise.Opening the release valve slowly willprovide a more controlled rate ofdescent.
6. Remove the jack and fully tighten thelug nuts in the order shown. SeeTechnical Specifications (page 301).
7. Stow the flat tire. See Stowing the flator spare tire if the vehicle is equippedwith a spare tire carrier.
8. Stow the jack, jack handle and lugwrench. Make sure the jack is securelyfastened so it does not rattle whendriving.
9. Unblock the wheels.
298
Super Duty (TFA) Canada/United States of America, enUSA, First Printing
Wheels and TiresE162817 E162818 E162819
Page 303 of 507

Stowing the Flat or Spare Tire
Note:Failure to follow spare tire stowageinstructions may result in failure of cable orloss of spare tire.
Note:If you are stowing a tire that requiresreattaching it to the vehicle with a tether,perform these steps first, then proceed withthe following steps.
1. Place the tire on end with the valvestem facing toward the front of thevehicle.
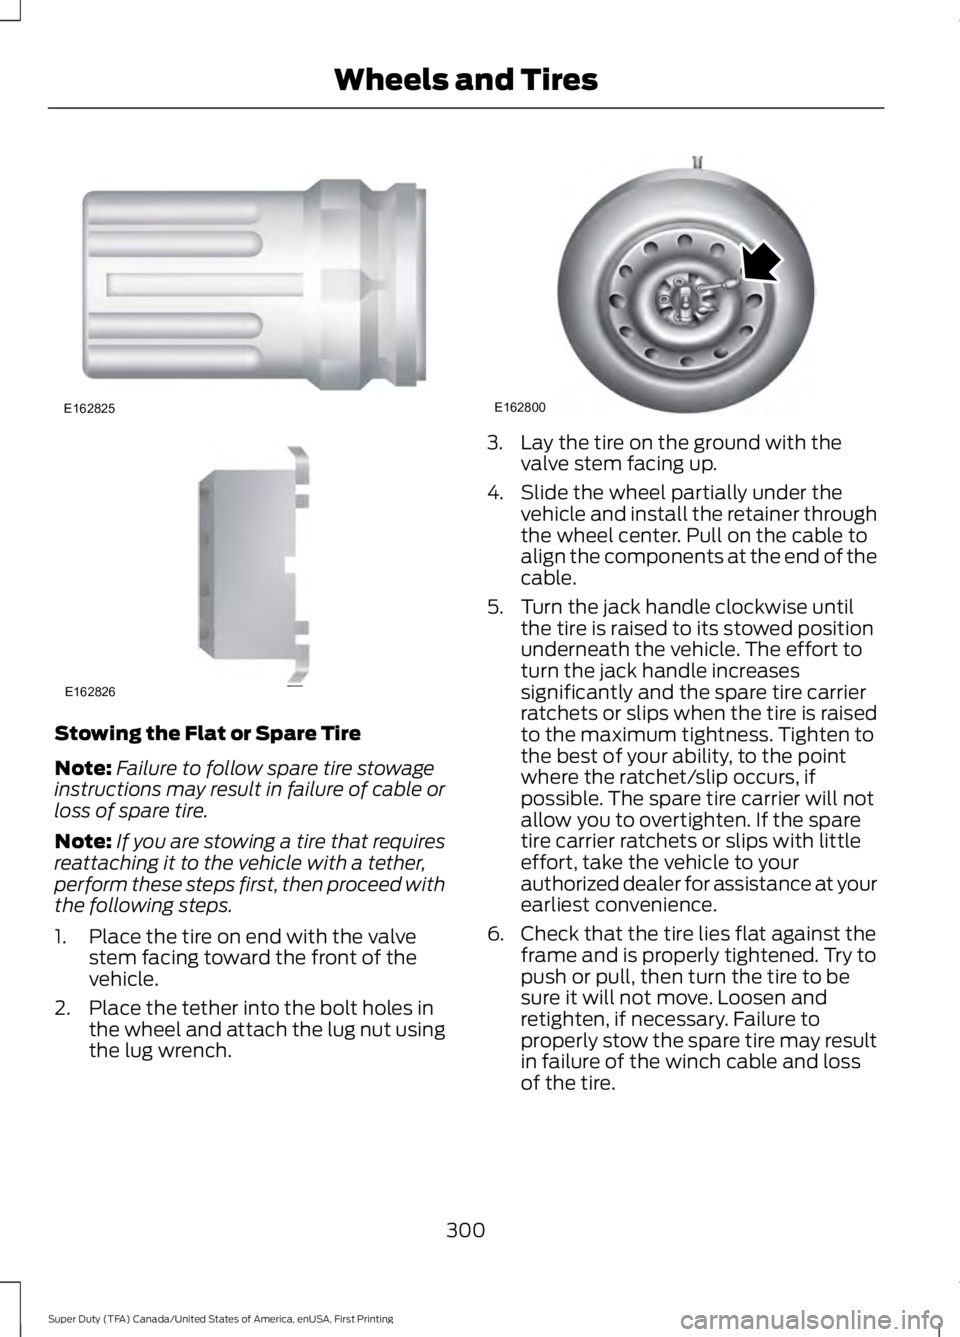
2. Place the tether into the bolt holes inthe wheel and attach the lug nut usingthe lug wrench.
3. Lay the tire on the ground with thevalve stem facing up.
4. Slide the wheel partially under thevehicle and install the retainer throughthe wheel center. Pull on the cable toalign the components at the end of thecable.
5. Turn the jack handle clockwise untilthe tire is raised to its stowed positionunderneath the vehicle. The effort toturn the jack handle increasessignificantly and the spare tire carrierratchets or slips when the tire is raisedto the maximum tightness. Tighten tothe best of your ability, to the pointwhere the ratchet/slip occurs, ifpossible. The spare tire carrier will notallow you to overtighten. If the sparetire carrier ratchets or slips with littleeffort, take the vehicle to yourauthorized dealer for assistance at yourearliest convenience.
6. Check that the tire lies flat against theframe and is properly tightened. Try topush or pull, then turn the tire to besure it will not move. Loosen andretighten, if necessary. Failure toproperly stow the spare tire may resultin failure of the winch cable and lossof the tire.
300
Super Duty (TFA) Canada/United States of America, enUSA, First Printing
Wheels and TiresE162825 E162826 E162800
Page 304 of 507

7.Repeat this tightness check procedurewhen servicing the spare tire pressure(every six months, per scheduledmaintenance information), or at anytime that the spare tire is disturbed
through service of other components.
8. If removed, install the spare tire lockinto the bumper drive tube with thespare tire lock key and jack handle.
TECHNICAL SPECIFICATIONS
Wheel Lug Nut Torque Specifications
WARNING
When a wheel is installed, always remove any corrosion, dirt or foreign materialspresent on the mounting surfaces of the wheel or the surface of the wheel hub,brake drum or brake disc that contacts the wheel. Make sure that any fastenersthat attach the rotor to the hub are secured so they do not interfere with the mountingsurfaces of the wheel. Installing wheels without correct metal-to-metal contact at thewheel mounting surfaces can cause the wheel nuts to loosen and the wheel to come offwhile the vehicle is in motion, resulting in loss of control.
lb.ft (Nm)Bolt size
165 lb.ft (224 Nm)M14 x 1.5
*Torque specifications are for nut and bolt threads free of dirt and rust. Use only Fordrecommended replacement fasteners.
On vehicles equipped with single rear wheels, retighten the lug nuts to the specified torqueat 100 miles (160 kilometers) after any wheel disturbance (such as tire rotation, changinga flat tire, wheel removal).
On vehicles equipped with dual rear wheels, retighten the wheel lug nuts to the specifiedtorque at 100 miles (160 kilometers), and again at 500 miles (800 kilometers) of newvehicle operation and after any wheel disturbance (such as tire rotation, changing a flattire, wheel removal).
It is important to follow the proper wheel mounting and lug nut torque procedures.
On all two-piece flat wheel nuts, apply one drop of motor oil between the flat washerand the nut. Do not apply motor oil to the wheel nut threads or the wheel stud threads.
301
Super Duty (TFA) Canada/United States of America, enUSA, First Printing
Wheels and TiresE161443