2016 FORD F150 parking brake
[x] Cancel search: parking brakePage 216 of 505

Certain vehicle conditions can also
deactivate the system, such as:
•
Traction control has activated on a
slippery or loose surface.
• There is an anti-lock brake system
activation or failure. If a problem occurs with the system, a
warning message displays, followed by a
tone. Occasional system messages may
occur in normal operation. For recurring or
frequent system faults, contact an
authorized dealer to have your vehicle
serviced.
Troubleshooting the System The system does not look for a space
The traction control system may be off.
The transmission is in reverse (R); your vehicle must be moving forward to detect a
parking space.
You recently disconnected or replaced the battery. After a battery disconnect, you must
drive your vehicle for a short period of time before Active Park Assist becomes functional. The system does not offer a particular space
Something may be contacting the sensors.
There is not enough room in the parking space for the vehicle to safely park.
There is not enough space for the parking maneuver on the opposite side of the parking
space.
Your vehicle is farther than 4.9 ft (1.5 m) from the parking space.
Your vehicle is closer than
16 in (40 cm) from neighboring parked vehicles.
The transmission is in reverse (R); your vehicle must be moving forward to detect a
parking space.
Your vehicle is going faster than
22 mph (35 km/h). The system does not position the vehicle where I want in the space
Your vehicle is rolling in the opposite direction of the transmission (rolling forward with
reverse (R) selected).
An irregular curb along the parking space prevents the system from aligning your vehicle
properly.
Vehicles or objects bordering the space may not be positioned correctly.
213
F-150 (TFC) Canada/United States of America, enUSA, Edition date: 08/2015, First Printing Parking Aids
Page 278 of 505

Trailer Lamps
WARNING
Never connect any trailer lamp wiring
to the vehicle's tail lamp wiring; this
may damage the electrical system
resulting in fire. Contact your authorized
dealer as soon as possible for assistance
in proper trailer tow wiring installation.
Additional electrical equipment may be
required. Trailer lamps are required on most towed
vehicles. Make sure all running lights, brake
lights, turn signals and hazard lights are
working.
Using a Step Bumper (If Equipped)
The rear bumper is equipped with an
integral hitch and only requires a ball with
a one-inch (25.4 millimeter) shank
diameter. The bumper has a 5000-pound
(2268 kilogram) trailer weight and a
500-pound (227 kilogram) tongue weight
capacity.
If it is necessary to relocate the hitch ball
position, you must install a frame-mounted
trailer hitch.
Before Towing a Trailer
Practice turning, stopping and backing up
to get the feel of your vehicle-trailer
combination before starting on a trip.
When turning, make wider turns so the
trailer wheels clear curbs and other
obstacles.
When Towing a Trailer
• Do not drive faster than 70 mph (113
km/h) during the first 500 miles (800
kilometers).
• Do not make full-throttle starts. •
Check your hitch, electrical connections
and trailer wheel lug nuts thoroughly
after you have traveled 50 miles (80
kilometers).
• When stopped in congested or heavy
traffic during hot weather, place the
gearshift in position P to aid engine and
transmission cooling and to help A/C
performance.
• Turn off the speed control with heavy
loads or in hilly terrain. The speed
control may turn off automatically
when you are towing on long, steep
grades.
• Shift to a lower gear when driving down
a long or steep hill. Do not apply the
brakes continuously, as they may
overheat and become less effective.
• If your transmission is equipped with a
Grade Assist or Tow/Haul feature, use
this feature when towing. This provides
engine braking and helps eliminate
excessive transmission shifting for
optimum fuel economy and
transmission cooling.
• If your vehicle is equipped with
AdvanceTrac with RSC, this system
may turn on during typical cornering
maneuvers with a heavily loaded trailer.
This is normal. Turning the corner at a
slower speed while towing may reduce
this tendency.
• If you are towing a trailer frequently in
hot weather, hilly conditions, at the
gross combined weight rating (or any
combination of these factors), consider
refilling your rear axle with synthetic
gear lubricant (if the axle is not already
filled with it). See
Capacities and
Specifications (page 370).
• Allow more distance for stopping with
a trailer attached. Anticipate stops and
brake gradually.
• Avoid parking on a grade. However, if
you must park on a grade:
275
F-150 (TFC) Canada/United States of America, enUSA, Edition date: 08/2015, First Printing Towing
Page 279 of 505

1. Turn the steering wheel to point your
vehicle tires away from traffic flow.
2. Set your vehicle parking brake.
3. Place the automatic transmission in position P.
4. Place wheel chocks in front and back of the trailer wheels. (Chocks not
included with vehicle.)
Your vehicle may be equipped with a
temporary or conventional spare tire. A
"temporary" spare tire is different in size
(diameter or width), tread-type
(All-Season or All Terrain) or is from a
different manufacturer than the road tires
on your vehicle. Consult information on the
tire label or Safety Compliance label for
limitations when using.
Launching or Retrieving a Boat or
Personal Watercraft (PWC)
Note: Disconnect the wiring to the trailer
before
backing the trailer into the water.
Note: Reconnect the wiring to the trailer
after
removing the trailer from the water.
When backing down a ramp during boat
launching or retrieval:
• Do not allow the static water level to
rise above the bottom edge of the rear
bumper.
• Do not allow waves to break higher
than 6 inches (15 centimeters) above
the bottom edge of the rear bumper.
Exceeding these limits may allow water to
enter vehicle components:
• Causing internal damage to the
components.
• Affecting driveability, emissions, and
reliability. Replace the rear axle lubricant anytime
the rear axle has been submerged in water.
Water may have contaminated the rear
axle lubricant, which is not normally
checked or changed unless a leak is
suspected or other axle repair is required.
TOWING POINTS WARNINGS
Using recovery hooks is dangerous
and should only be done by a person
familiar with proper vehicle recovery
safety practices. Improper use of recovery
hooks may cause hook failure or separation
from the vehicle and could result in serious
injury or death. Always slowly remove the slack from
the recovery strap prior to pulling.
Failure to do so can introduce
significantly higher loads which can cause
the recovery hooks to break off, or the
recovery strap to fail which can cause
serious injury or death. Never link two straps together with
a clevis pin. These heavy metal
objects could become projectiles if
the strap breaks and can cause serious
injury or death. Your vehicle comes equipped with
frame-mounted front recovery hooks.
These hooks should never have a load
applied to them greater than the gross
vehicle weight rating of your vehicle.
Before using recovery hooks:
•
Make sure all attaching points are
secure and capable of withstanding
the applied load.
• Never use chains, cables or tow straps
with metal hook ends.
276
F-150 (TFC) Canada/United States of America, enUSA, Edition date: 08/2015, First Printing Towing
Page 282 of 505

Note:
If completed successfully, the
information display shows NEUTRAL TOW
LEAVE IN N or NEUTRAL TOW ENABLED
LEAVE TRANSMISSION IN NEUTRAL.
This indicates that your vehicle is safe to
tow with all wheels on the ground.
Note: If you do not see the message in the
display, you must perform the procedure
again from the beginning.
Note: You may hear an audible noise as the
transfer case shifts into its neutral position.
This is normal.
6. Leave the transmission in position
N
and turn the ignition as far as it will go
toward the off position (it will not turn
fully off when the transmission is in
position
N). If your vehicle has an
ignition key, you must leave the key in
the ignition while towing. To lock and
unlock your vehicle, use the keyless
entry keypad or extra set of keys. If your
vehicle has intelligent access, press the
engine
START/STOP button once
without pressing the brake pedal. You
do not need to leave your keys in the
vehicle. You can lock and unlock your
vehicle as you normally do.
7. Release the brake pedal. WARNINGS
Do not disconnect the battery during
recreational towing. Doing so will
prevent the transfer case from
shifting properly and may cause the vehicle
to roll even if the transmission is in P
(Park). Shifting the transfer case to its
neutral position for recreational
towing may cause the vehicle to be
able to roll even if the transmission is in P
(Park). The driver or others could be
injured. Make sure the foot brake is
depressed and the vehicle is in a secure
and safe position while the transfer case
is being shifted to its neutral position. WARNINGS
Failing to put the transfer case in its
neutral position will damage vehicle
components.
Note:
You can check four-wheel-down
towing status at any time by opening the
driver's door or turning the ignition to the
accessory or on position and verifying the
NEUTRAL TOW ENABLED
message
displays in the cluster.
To exit four-wheel-down towing and return
the transfer case to its
2H position:
1. With your vehicle still properly secured
to the tow vehicle, put the ignition in
the on position, but do not start the
engine. If your vehicle has an ignition
key, turn the key to on. If your vehicle
has intelligent access, press the engine
START/STOP
button once without
pressing the brake pedal.
2. Press and hold the brake pedal.
3. Shift the transmission out of N and into
any gear.
4. Release the brake pedal.
Note: If completed successfully, the
instrument cluster displays
4X2, and
NEUTRAL TOW DISABLED.
Note: If the indicator light and message do
not display, you must perform the procedure
again from the beginning.
Note: You may hear an audible noise as the
transfer case shifts out of its neutral
position. This is normal.
Note: If
SHIFT DELAY PULL FORWARD
displays in the instrument cluster, transfer
case gear tooth blockage is present. See the
instructions after this section.
5. Apply the parking brake, and then disconnect the vehicle from the tow
vehicle.
279
F-150 (TFC) Canada/United States of America, enUSA, Edition date: 08/2015, First Printing Towing
Page 283 of 505

6. Release the parking brake, start the
engine, and shift the transmission to
position D to make sure the transfer
case is out of position N.
7. If the transfer case does not successfully shift out of position N, set
the parking brake until you can have
your vehicle serviced.
Resolving the SHIFT DELAY PULL
FORWARD Message
If the instrument cluster displays
SHIFT
DELAY PULL FORWARD perform the
following:
1. Press and hold the brake pedal.
2. Put the transmission into position
N,
and then start the engine.
3. With the engine running, shift the transmission to position
D and let the
vehicle roll forward, up to 3 feet (1
meter). You may hear an audible noise
as the transfer case shifts out of its
neutral position. This is normal.
4. Make sure the instrument cluster displays
NEUTRAL TOW DISABLED.
280
F-150 (TFC) Canada/United States of America, enUSA, Edition date: 08/2015, First Printing Towing
Page 304 of 505

Protected components
Fuse amp rating
Fuse or relay number
Body control module RP2 feed.
40A*
55
Fuel pump.
20A*
56
Right-hand EPB actuator.
30A*
57
Left-hand EPB actuator.
30A*
58
Starter.
30A*
59
Blower motor.
40A*
60
Brake control module.
30A*
61
Automatic brake system valves.
Power seat relay.
—
62
Heated mirrors.
15A**
63
Not used.
—
64
Starter relay.
—
65
Powertrain control module relay.
—
66
Windshield wiper relay.
—
67
Blower motor relay.
—
68
Power sliding back window relay.
—
69
Electric fan 1 relay.
—
70
Not used.
—
71
4x4.
25A*
72
Not used.
—
73
PDRG motor.
30A*
74
Horn relay.
—
75
Not used.
—
76
Steering column lock relay.
—
77
Not used.
—
78
Trailer tow parking lamp relay.
—
79
Rear window defroster relay.
—
80
301
F-150 (TFC) Canada/United States of America, enUSA, Edition date: 08/2015, First Printing Fuses
Page 310 of 505

GENERAL INFORMATION
Have your vehicle serviced regularly to help
maintain its roadworthiness and resale
value. There is a large network of
authorized dealers that are there to help
you with their professional servicing
expertise. We believe that their specially
trained technicians are best qualified to
service your vehicle properly and expertly.
They are supported by a wide range of
highly specialized tools developed
specifically for servicing your vehicle.
If your vehicle requires professional service,
an authorized dealer can provide the
necessary parts and service. Check your
warranty information to find out which
parts and services are covered.
Use only recommended fuels, lubricants,
fluids and service parts conforming to
specifications. Motorcraft® parts are
designed and built to provide the best
performance in your vehicle.
Precautions
•
Do not work on a hot engine.
• Make sure that nothing gets caught in
moving parts.
• Do not work on a vehicle with the
engine running in an enclosed space,
unless you are sure you have enough
ventilation.
• Keep all open flames and other burning
material (such as cigarettes) away
from the battery and all fuel related
parts.
Working with the Engine Off
1. Set the parking brake and shift to park
(P).
2. Switch off the engine.
3. Block the wheels. Working with the Engine On WARNING
To reduce the risk of vehicle damage
and/or personal burn injuries, do not
start your engine with the air cleaner
removed and do not remove it while the
engine is running. 1.
Set the parking brake and shift to park
(P).
2. Block the wheels.
OPENING AND CLOSING THE
HOOD
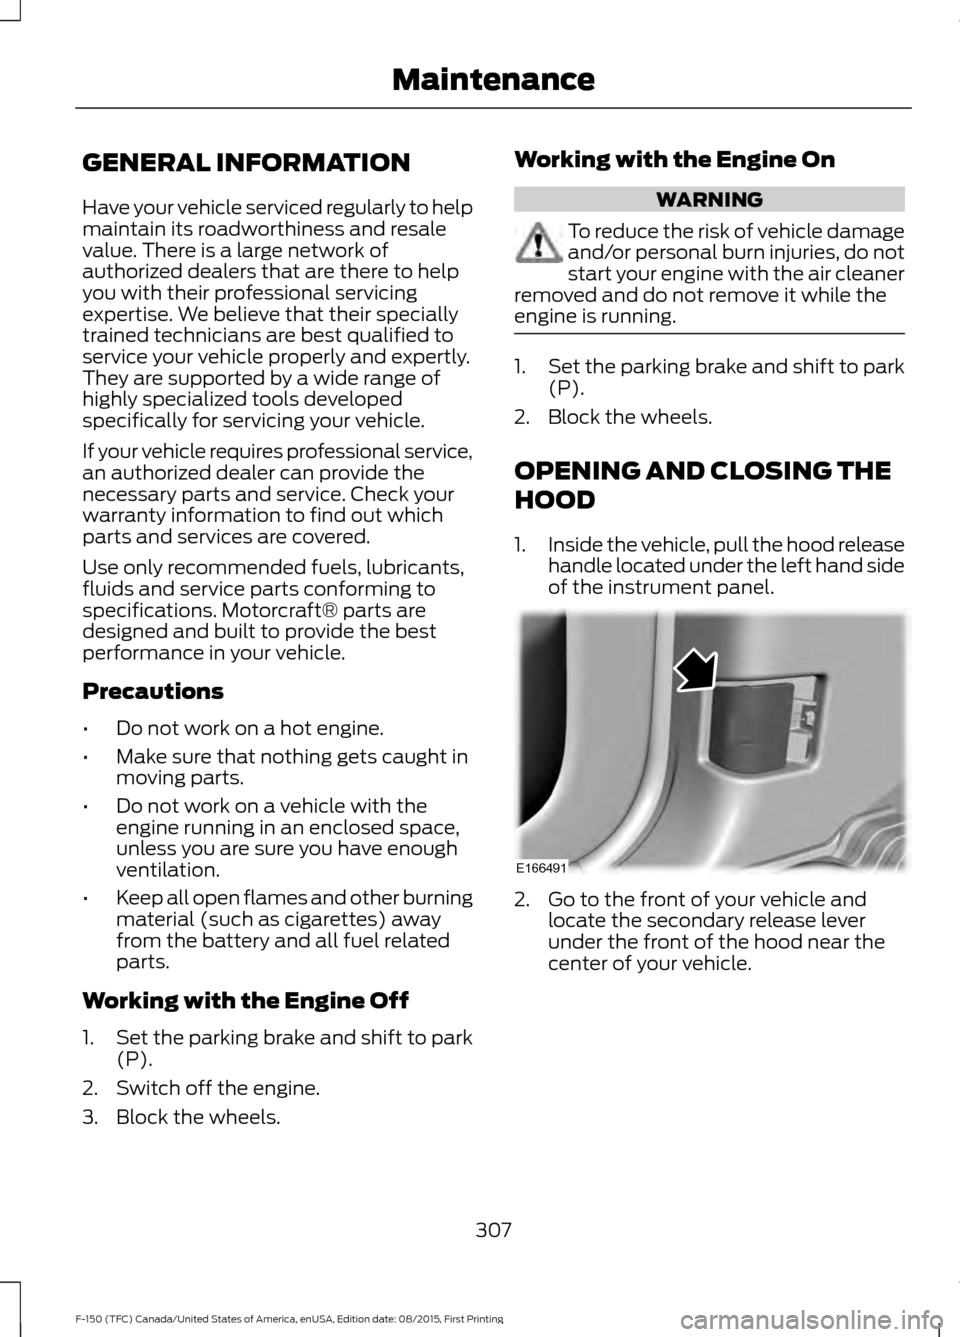
1. Inside the vehicle, pull the hood release
handle located under the left hand side
of the instrument panel. 2. Go to the front of your vehicle and
locate the secondary release lever
under the front of the hood near the
center of your vehicle.
307
F-150 (TFC) Canada/United States of America, enUSA, Edition date: 08/2015, First Printing MaintenanceE166491
Page 315 of 505

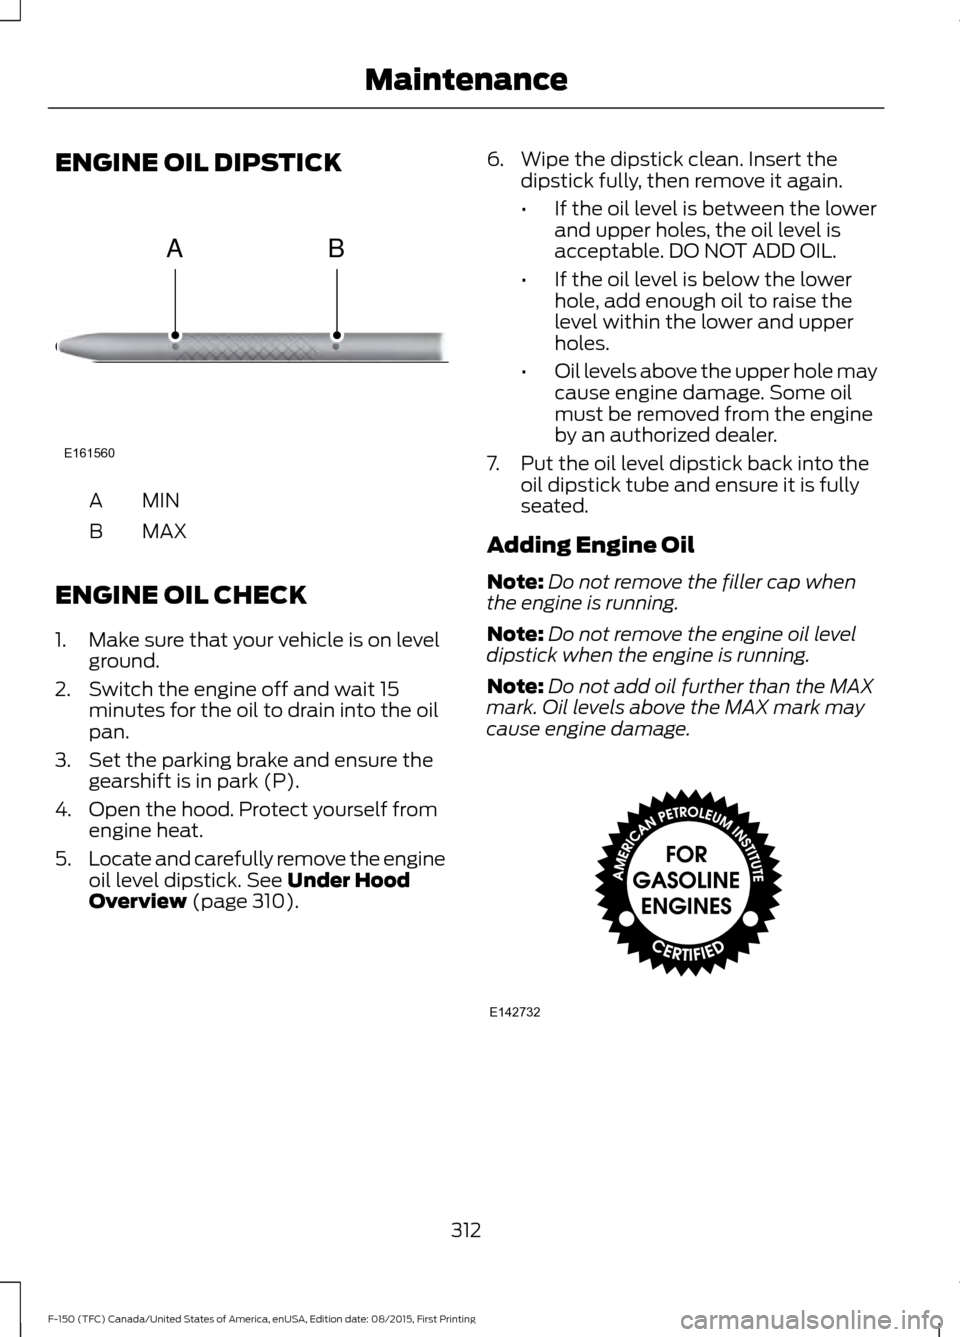
ENGINE OIL DIPSTICK
MINA
MAX
B
ENGINE OIL CHECK
1. Make sure that your vehicle is on level ground.
2. Switch the engine off and wait 15 minutes for the oil to drain into the oil
pan.
3. Set the parking brake and ensure the gearshift is in park (P).
4. Open the hood. Protect yourself from engine heat.
5. Locate and carefully remove the engine
oil level dipstick. See Under Hood
Overview (page 310). 6. Wipe the dipstick clean. Insert the
dipstick fully, then remove it again.
•If the oil level is between the lower
and upper holes, the oil level is
acceptable. DO NOT ADD OIL.
• If the oil level is below the lower
hole, add enough oil to raise the
level within the lower and upper
holes.
• Oil levels above the upper hole may
cause engine damage. Some oil
must be removed from the engine
by an authorized dealer.
7. Put the oil level dipstick back into the oil dipstick tube and ensure it is fully
seated.
Adding Engine Oil
Note: Do not remove the filler cap when
the engine is running.
Note: Do not remove the engine oil level
dipstick when the engine is running.
Note: Do not add oil further than the MAX
mark. Oil levels above the MAX mark may
cause engine damage. 312
F-150 (TFC) Canada/United States of America, enUSA, Edition date: 08/2015, First Printing MaintenanceE161560
AB E142732