2016 FORD F SERIES MOTORHOME AND COMMERCIAL CHASSIS instrument cluster
[x] Cancel search: instrument clusterPage 4 of 154
Introduction
About This Manual...........................................3
Symbols Glossary.............................................3
California Proposition 65...............................5
Perchlorate..........................................................5
Ford Credit...........................................................5
Replacement PartsRecommendation........................................6
Special Notices.................................................6
Mobile CommunicationsEquipment.......................................................7
Export Unique Options...................................7
Environment
Protecting the Environment.........................8
Steering Wheel
Adjusting the Steering Wheel......................9
Cruise Control....................................................9
Wipers and Washers
Windshield Wipers.........................................10
Windshield Washers......................................10
Lighting
Lighting Control................................................11
Instrument Lighting Dimmer........................11
Daytime Running Lamps..............................12
Direction Indicators.........................................12
Instrument Cluster
Gauges.................................................................13
Warning Lamps and Indicators..................15
Audible Warnings and Indicators...............17
Information Displays
General Information.......................................18
Information Messages..................................19
Starting and Stopping theEngine
General Information......................................22
Ignition Switch.................................................22
Starting a Gasoline Engine.........................22
Engine Block Heater......................................24
Fuel and Refueling
Safety Precautions........................................25
Fuel Quality......................................................26
Running Out of Fuel......................................26
Refueling............................................................27
Fuel Consumption.........................................28
Emission Control System............................29
Transmission
Automatic Transmission.............................32
Brakes
General Information......................................35
Hints on Driving With Anti-LockBrakes.............................................................35
Parking Brake...................................................36
Cruise Control
Principle of Operation...................................37
Using Cruise Control......................................37
Load Carrying
Load Limit.........................................................38
Towing
Towing a Trailer...............................................44
Recommended Towing Weights..............45
Essential Towing Checks.............................47
Transporting the Vehicle.............................49
Towing the Vehicle on Four Wheels.......50
1Motorhome (TY3) , enUSA, First PrintingTable of Contents
Page 16 of 154
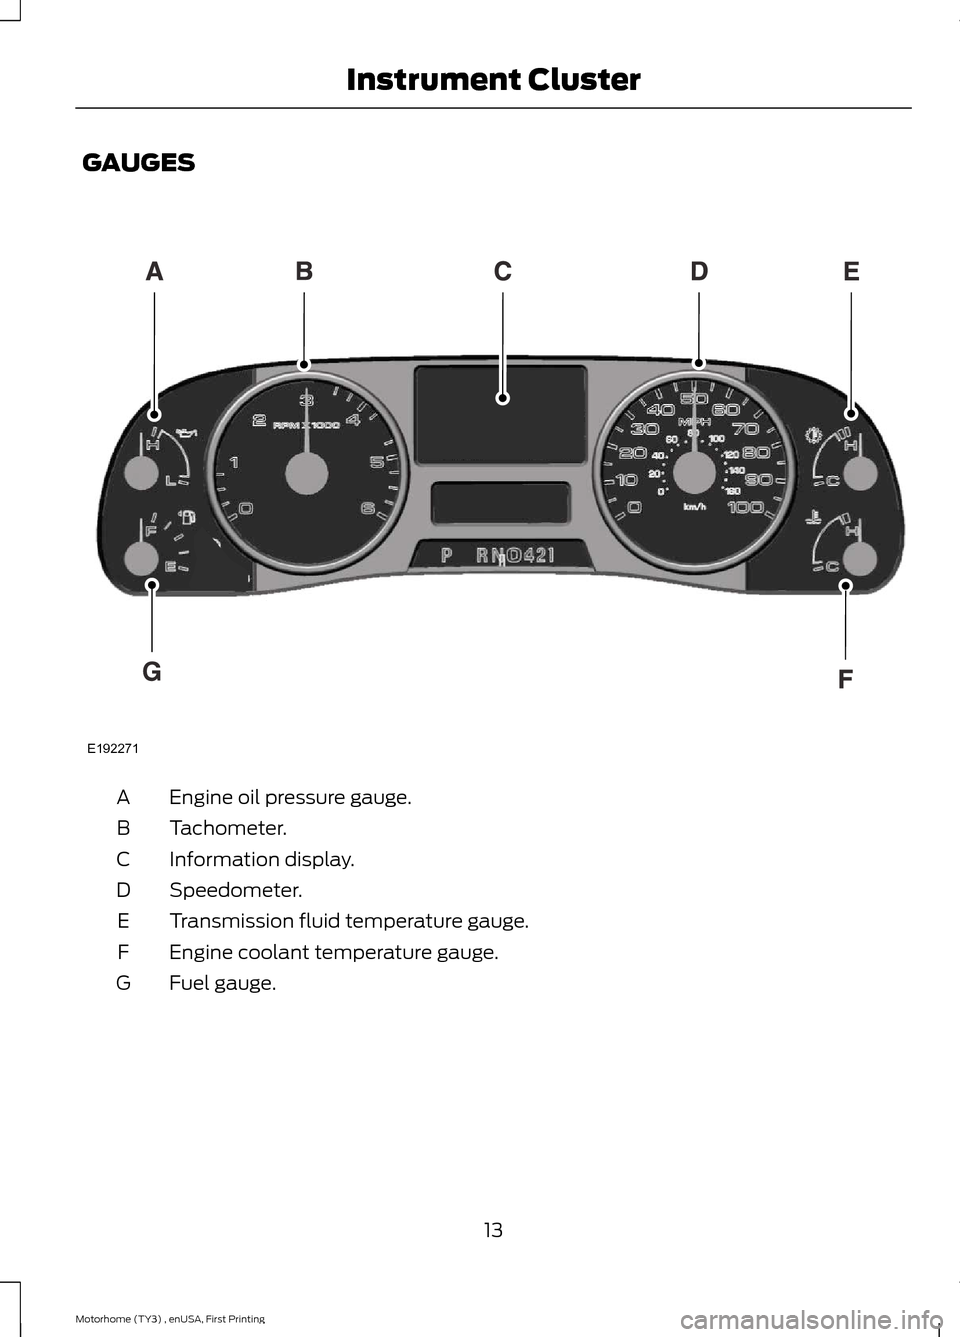
GAUGES
Engine oil pressure gauge.A
Tachometer.B
Information display.C
Speedometer.D
Transmission fluid temperature gauge.E
Engine coolant temperature gauge.F
Fuel gauge.G
13Motorhome (TY3) , enUSA, First PrintingInstrument ClusterE192271
Page 17 of 154
Engine Oil Pressure Gauge
Indicates engine oil pressure. The needleshould stay in the normal operating range(between L and H). If the needle fallsbelow the normal range, stop the vehicle,turn off the engine and check the engineoil level. Add oil if needed. If the oil level iscorrect, have your vehicle checked by yourauthorized dealer.
Speedometer
Indicates vehicle speed. Vehicle speed islimited to either 65 mph (105 km/h) or 75mph (120 km/h).
Transmission Fluid TemperatureGauge
Normal area
The transmission fluid is within the normaloperating temperature (between H andC).
Yellow area
The transmission fluid is higher thannormal operating temperature. This canbe caused by special operation conditions(i.e. snowplowing, towing or off-road use).Operating the transmission for extendedperiods of time with the gauge in theyellow area may cause internaltransmission damage. Altering the severityof the driving conditions is recommendedto lower the transmission temperature intothe normal range.
Red area
The transmission fluid is overheating. Stopthe vehicle to allow the temperature toreturn to normal range.
If the gauge is operating in the yellow orred area, stop the vehicle and verify theairflow is not restricted such as snow ordebris blocking airflow through the grill. Ifthe gauge continues to show hightemperatures, see your authorized dealer.
Engine Coolant TemperatureGauge
WARNING
Never remove the coolant reservoircap while the engine is running or hot.
At normal operating temperature, theneedle will remain in the center section.
Note:Do not restart the engine until thecause of overheating has been resolved.
If the needle enters the red section, theengine is overheating. Stop the engine,switch the ignition off and determine thecause once the engine has cooled down.
Fuel Gauge
Note:The fuel gauge may vary slightlywhen your vehicle is moving or on a slope.
Switch the ignition on. The fuel gaugeindicates approximately how much fuelyou have left in the fuel tank. The arrowadjacent to the fuel pump symbolindicates on which side of your vehicle thefuel filler door is located.
The needle should move toward F whenyou refuel your vehicle. If the needle pointsto E after adding fuel, have an authorizeddealer check the system soon.
After refueling, some variability in theposition of the needle is normal:
14Motorhome (TY3) , enUSA, First PrintingInstrument Cluster
Page 18 of 154
•It may take a short time for the needleto reach F after leaving the gas station.This is normal and depends upon theslope of the pavement at the gasstation.
•The fuel amount dispensed into thetank is a little less or more than thegauge indicated. This is normal anddepends upon the slope of thepavement at the gas station.
•If the gas station nozzle shuts offbefore the tank is full, try a differentgas pump nozzle.
•There is a small reserve left in the tankwhen the fuel gauge reaches empty.
Low Fuel Reminder
A low fuel reminder triggers when the fuelgauge needle is at one-sixteenth or about50 miles (80 km) to empty, whicheveroccurs first.
Variations:
Note:The low fuel warning and distance-to-empty warning can appear at different fuelgauge positions depending on fuel economy conditions. This variation is normal.
Distance-to-emptyFuel gauge positionDriving type (fuel economyconditions)
30 miles to 80 miles (48 kmto 129 km)1/16thHighway driving
10 miles to 35 miles (16 kmto 56 km)1/16th-1/4Severe duty driving (trailertowing, extended idle)
WARNING LAMPS AND
INDICATORS
The following warning lamps andindicators will alert you to a vehiclecondition that may become serious. Somelamps will illuminate when you start yourvehicle to make sure they work. If anylamps remain on after starting your vehicle,refer to the respective system warninglamp for further information.
Note:Some warning indicators appear inthe information display and function thesame as a warning lamp but do not displaywhen you start your vehicle.
Anti-Lock Braking System
If it illuminates when you aredriving, this indicates amalfunction. You will continueto have the normal braking system(without ABS) unless the brake systemwarning lamp is also illuminated. Have thesystem checked by your authorized dealer.
Battery
If it illuminates while driving, itindicates a malfunction. Switchoff all unnecessary electricalequipment and have the system checkedby your authorized dealer immediately.
15Motorhome (TY3) , enUSA, First PrintingInstrument Cluster
Page 19 of 154
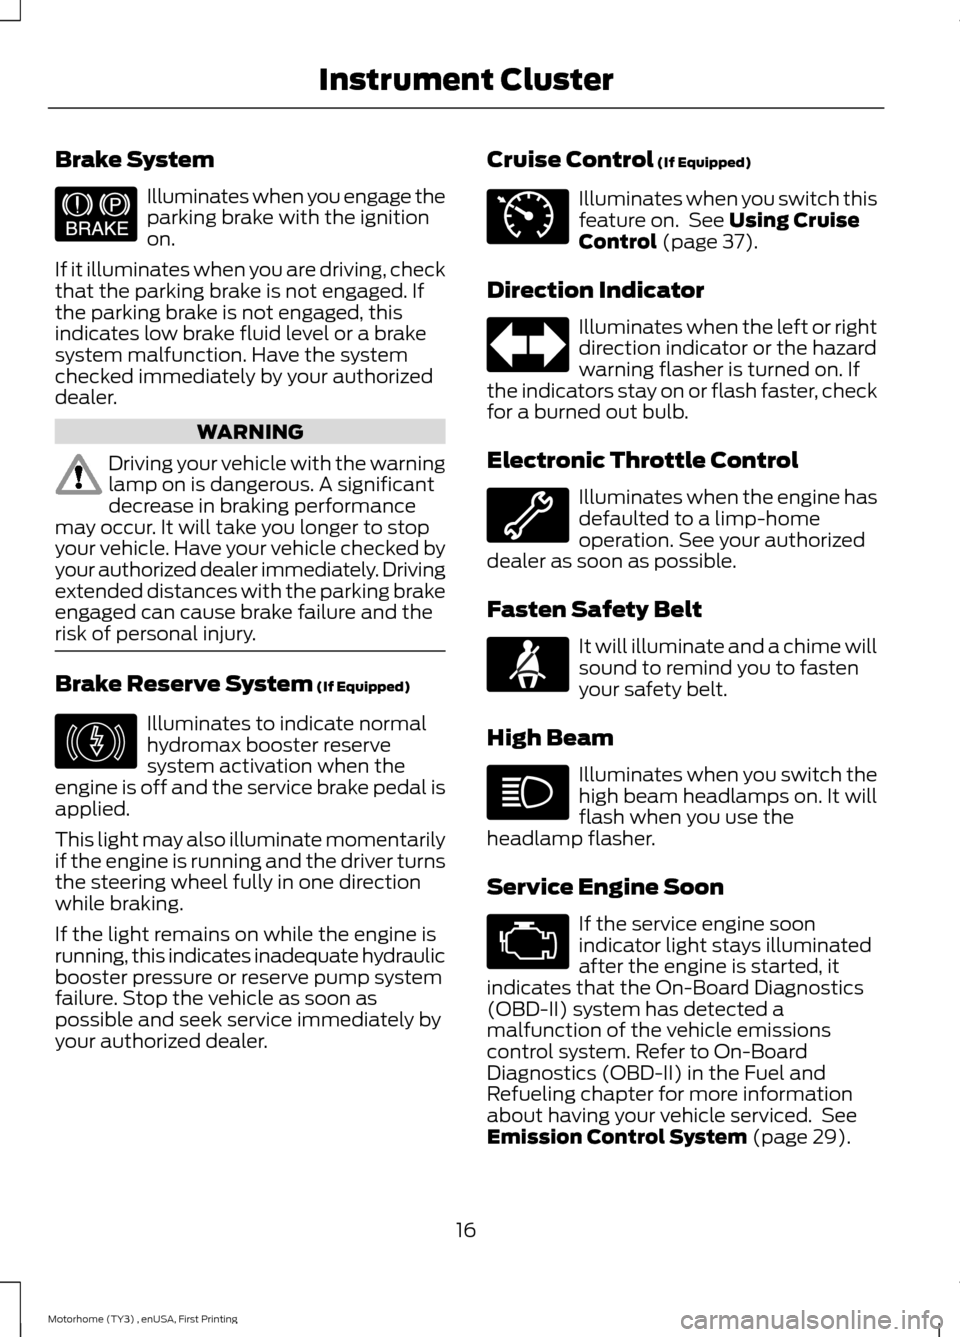
Brake System
Illuminates when you engage theparking brake with the ignitionon.
If it illuminates when you are driving, checkthat the parking brake is not engaged. Ifthe parking brake is not engaged, thisindicates low brake fluid level or a brakesystem malfunction. Have the systemchecked immediately by your authorizeddealer.
WARNING
Driving your vehicle with the warninglamp on is dangerous. A significantdecrease in braking performancemay occur. It will take you longer to stopyour vehicle. Have your vehicle checked byyour authorized dealer immediately. Drivingextended distances with the parking brakeengaged can cause brake failure and therisk of personal injury.
Brake Reserve System (If Equipped)
Illuminates to indicate normalhydromax booster reservesystem activation when theengine is off and the service brake pedal isapplied.
This light may also illuminate momentarilyif the engine is running and the driver turnsthe steering wheel fully in one directionwhile braking.
If the light remains on while the engine isrunning, this indicates inadequate hydraulicbooster pressure or reserve pump systemfailure. Stop the vehicle as soon aspossible and seek service immediately byyour authorized dealer.
Cruise Control (If Equipped)
Illuminates when you switch thisfeature on. See Using CruiseControl (page 37).
Direction Indicator
Illuminates when the left or rightdirection indicator or the hazardwarning flasher is turned on. Ifthe indicators stay on or flash faster, checkfor a burned out bulb.
Electronic Throttle Control
Illuminates when the engine hasdefaulted to a limp-homeoperation. See your authorizeddealer as soon as possible.
Fasten Safety Belt
It will illuminate and a chime willsound to remind you to fastenyour safety belt.
High Beam
Illuminates when you switch thehigh beam headlamps on. It willflash when you use theheadlamp flasher.
Service Engine Soon
If the service engine soonindicator light stays illuminatedafter the engine is started, itindicates that the On-Board Diagnostics(OBD-II) system has detected amalfunction of the vehicle emissionscontrol system. Refer to On-BoardDiagnostics (OBD-II) in the Fuel andRefueling chapter for more informationabout having your vehicle serviced. SeeEmission Control System (page 29).
16Motorhome (TY3) , enUSA, First PrintingInstrument ClusterE144522 E146190 E71340
Page 20 of 154
If the light is blinking, engine misfire isoccurring which could damage yourcatalytic converter. Drive in a moderatefashion (avoid heavy acceleration anddeceleration) and have your vehicleserviced immediately.
WARNING
Under engine misfire conditions,excessive exhaust temperaturescould damage the catalyticconverter, the fuel system, interior floorcoverings or other vehicle components,possibly causing a fire. Have your vehicleserviced immediately.
The service engine soon indicator lightilluminates when the ignition is first turnedon prior to engine start to check the bulband to indicate whether the vehicle is readyfor Inspection/Maintenance (I/M) testing.
Normally, the service engine soon light willstay on until the engine is cranked, thenturn itself off if no malfunctions arepresent. However, if after 15 seconds theservice engine soon light blinks eight times,it means that the vehicle is not ready forI/M testing. See Emission ControlSystem (page 29).
Transmission Tow/Haul (If Equipped)
Illuminates when the tow/haulfeature has been activated. If thelight flashes steadily, have thesystem serviced immediately, damage tothe transmission could occur.
AUDIBLE WARNINGS AND
INDICATORS
Fail-Safe Cooling Warning Chime
Sounds when the coolant gauge pointerhas moved to hot. There are three stagesof chimes:
•Stage 1 is a single chime when theengine temperature begins to overheat.
•Stage 2 is multiple chimes and enginepower becomes limited in order to helpcool the engine.
•Stage 3 is multiple chimes and theengine will shut down.
Headlamps On Warning Chime
Sounds when you remove the key from theignition and open the driver's door and youhave left the headlamps or parking lampson.
Key in Ignition Warning Chime
Sounds when you open the driver's doorand you have left the key in the ignition.
Parking Brake On Warning Chime
Sounds when you have left the parkingbrake on and drive your vehicle. If thewarning chime remains on after you havereleased the parking brake, have thesystem checked by your authorized dealerimmediately.
Shift to Park Warning Chime
Sounds when you open the driver's doorand your vehicle is not in park.
17Motorhome (TY3) , enUSA, First PrintingInstrument ClusterE161509
Page 31 of 154
5.To install the cap, align the tabs on thecap with the notches on the filler pipe.
6.Turn the filler cap clockwise 1/4 of aturn clockwise until it clicks at leastonce.
If the Check Fuel Cap light or a Check FuelCap message appears in the instrumentcluster and stays on after you start theengine, you may not have installed the fuelfiller properly.
If the fuel cap light remains on, at the nextopportunity, safely pull off of the road,remove the fuel filler cap, align the capproperly and reinstall it. The check fuel caplight or Check fuel cap message may notreset immediately. It may take severaldriving cycles for the indicators to turn off.A driving cycle consists of an enginestart-up (after four or more hours with theengine off) followed by normal city andhighway driving.
FUEL CONSUMPTION
Empty reserve is the amount of fuelremaining in the tank after the fuel gaugeindicates empty. The amount of usablefuel in the empty reserve varies and shouldnot be relied upon to increase driving range.
•The usable capacity of the fuel tank isthe amount of fuel that can be addedinto the tank after the gauge indicatesempty
•The advertised capacity is the total fueltank size. See Capacities andSpecifications (page 118). It is thecombined usable capacity plus theempty reserve.
•Due to the empty reserve, you may notbe able to refuel the full amount of theadvertised capacity of the fuel tankeven when the fuel gauge reads empty.
Filling the Tank
For consistent results when filling the fueltank:
•Turn the ignition off before fueling; aninaccurate reading results if the engineis left running.
•Use the same fill rate(low-medium-high) each time the tankis filled.
•Allow no more than two automaticclick-offs when filling.
Results are most accurate when the fillingmethod is consistent.
Calculating Fuel Economy
Do not measure fuel economy during thefirst 1000 miles (1600 kilometers) ofdriving (this is your engine’s break-inperiod); a more accurate measurement isobtained after 2000 miles - 3000 miles(3200 kilometers - 4800 kilometers). Also,fuel expense, frequency of fill ups or fuelgauge readings are not accurate ways tomeasure fuel economy.
1.Fill the fuel tank completely and recordthe initial odometer reading.
2.Each time you fill the tank, record theamount of fuel added.
3.After at least 3 to 5 tank fill ups, fill thefuel tank and record the currentodometer reading.
4.Subtract your initial odometer readingfrom the current odometer reading.
5.Calculate fuel economy by dividingmiles traveled by gallons used (ForMetric: Multiply liters used by 100, thendivide by kilometers traveled).
28Motorhome (TY3) , enUSA, First PrintingFuel and Refueling
Page 36 of 154
Tow/Haul Mode
WARNING
Do not use the tow/haul featurewhen driving in icy or slipperyconditions as the increased enginebraking can cause the wheels to slide andyour vehicle to swing around with thepossible loss of vehicle control.
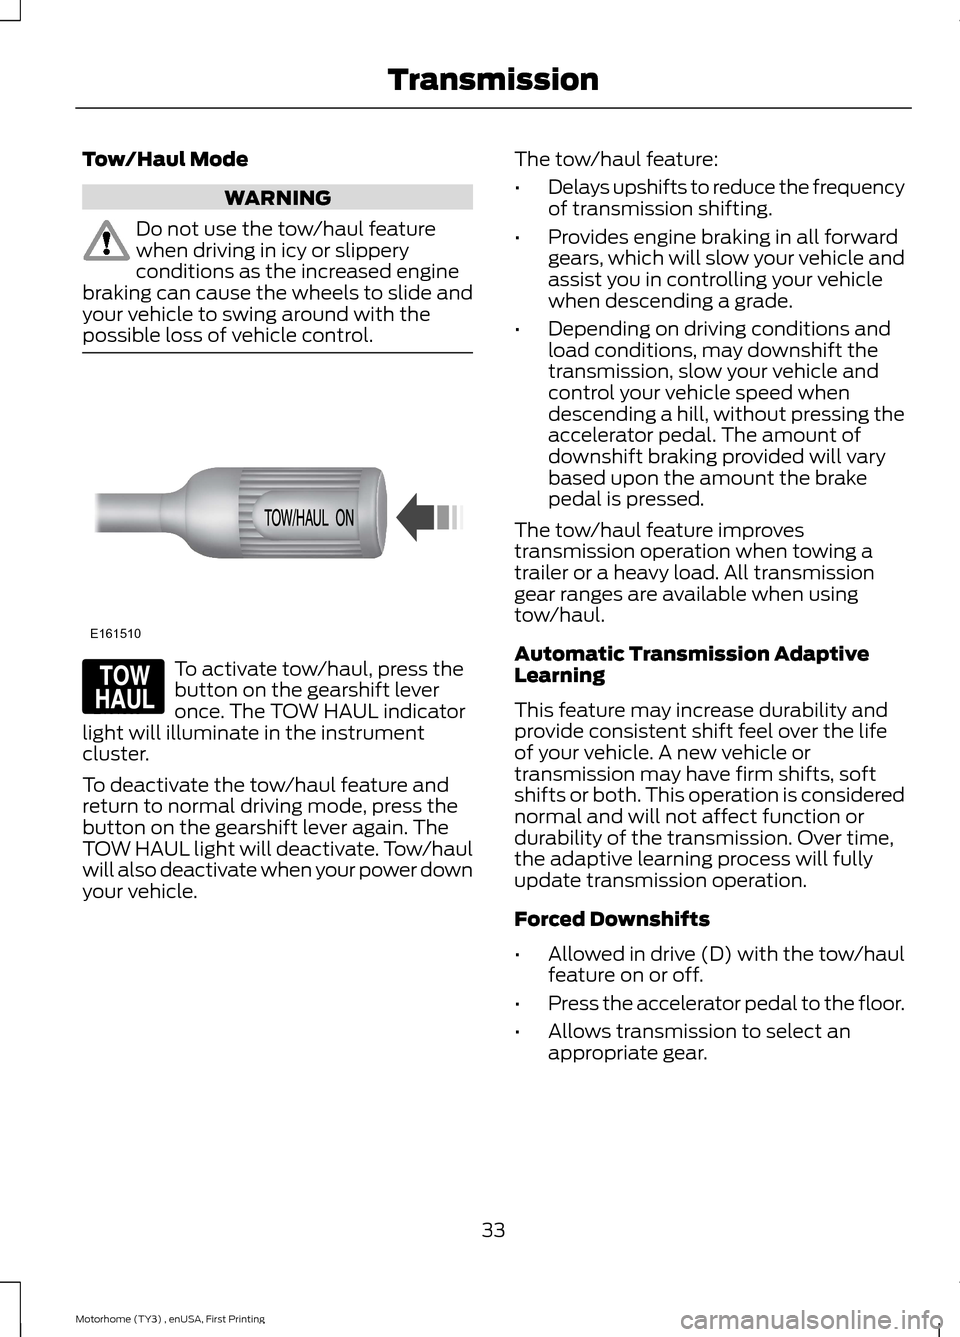
To activate tow/haul, press thebutton on the gearshift leveronce. The TOW HAUL indicatorlight will illuminate in the instrumentcluster.
To deactivate the tow/haul feature andreturn to normal driving mode, press thebutton on the gearshift lever again. TheTOW HAUL light will deactivate. Tow/haulwill also deactivate when your power downyour vehicle.
The tow/haul feature:
•Delays upshifts to reduce the frequencyof transmission shifting.
•Provides engine braking in all forwardgears, which will slow your vehicle andassist you in controlling your vehiclewhen descending a grade.
•Depending on driving conditions andload conditions, may downshift thetransmission, slow your vehicle andcontrol your vehicle speed whendescending a hill, without pressing theaccelerator pedal. The amount ofdownshift braking provided will varybased upon the amount the brakepedal is pressed.
The tow/haul feature improvestransmission operation when towing atrailer or a heavy load. All transmissiongear ranges are available when usingtow/haul.
Automatic Transmission AdaptiveLearning
This feature may increase durability andprovide consistent shift feel over the lifeof your vehicle. A new vehicle ortransmission may have firm shifts, softshifts or both. This operation is considerednormal and will not affect function ordurability of the transmission. Over time,the adaptive learning process will fullyupdate transmission operation.
Forced Downshifts
•Allowed in drive (D) with the tow/haulfeature on or off.
•Press the accelerator pedal to the floor.
•Allows transmission to select anappropriate gear.
33Motorhome (TY3) , enUSA, First PrintingTransmissionE161510 E161509