2016 FORD EXPLORER transmission
[x] Cancel search: transmissionPage 6 of 541

Storage Compartments
Center Console..............................................164
Overhead Console.......................................164
Starting and Stopping the Engine
General Information
....................................165
Ignition Switch
...............................................165
Keyless Starting............................................165
Starting a Gasoline Engine.......................166
Engine Block Heater....................................169
Fuel and Refueling
Safety Precautions
........................................171
Fuel Quality.....................................................172
Fuel Quality - E85.........................................172
Fuel Filler Funnel Location........................173
Running Out of Fuel
.....................................173
Refueling..........................................................174
Fuel Consumption
........................................176
Emission Control System...........................177
Transmission
Automatic Transmission...........................180
Four-Wheel Drive
Principle of Operation
................................184
Using Four-Wheel Drive.............................184
Brakes
General Information
....................................189
Hints on Driving With Anti-Lock Brakes...........................................................189
Parking Brake.................................................190
Hill Start Assist.............................................190
Traction Control
Principle of Operation.................................192
Using Traction Control................................192 Stability Control
Principle of Operation.................................193
Using Stability Control...............................194
Terrain Response
Using Terrain Response.............................195
Using Hill Descent Control........................196
Parking Aids
Principle of Operation................................198
Rear Parking Aid
...........................................198
Front Parking Aid..........................................199
Side Sensing System.................................200
Active Park Assist
........................................202
Rear View Camera
......................................208
180 Degree Parking Aid Camera..............211
Cruise Control
Principle of Operation.................................213
Using Cruise Control....................................213
Using Adaptive Cruise Control.................214
Driving Aids
Driver Alert
.....................................................220
Lane Keeping System
................................220
Blind Spot Information System..............224
Cross Traffic Alert.........................................227
Steering...........................................................229
Pre-Collision Assist.....................................230
Load Carrying
Rear Under Floor Storage.........................233
Cargo Nets
......................................................233
Luggage Covers
............................................234
Roof Racks and Load Carriers................234
Load Limit.......................................................235
Towing
Towing a Trailer
............................................243
3
Explorer (TUB), enUSA, First Printing Table of Contents
Page 7 of 541

Trailer Sway Control...................................244
Recommended Towing Weights...........244
Essential Towing Checks..........................246
Transporting the Vehicle
..........................248
Towing the Vehicle on Four Wheels - 2.3L EcoBoost™......................................249
Towing the Vehicle on Four Wheels - 3.5L Duratec/
3.5L Ecoboost™..........250
Driving Hints
Breaking-In.....................................................252
Economical Driving
.....................................252
Driving Through Water...............................253
Floor Mats
.......................................................253
Roadside Emergencies
Roadside Assistance..................................255
Hazard Warning Flashers.........................256
Fuel Shutoff...................................................256
Jump Starting the Vehicle.........................257
Post-Crash Alert System..........................259
Customer Assistance
Getting the Services You Need..............260
In California (U.S. Only).............................261
The Better Business Bureau (BBB) Auto Line Program (U.S. Only)......................262
Utilizing the Mediation/Arbitration Program (Canada Only).......................262
Getting Assistance Outside the U.S. and Canada........................................................263
Ordering Additional Owner's Literature....................................................264
Reporting Safety Defects (U.S. Only)............................................................264
Reporting Safety Defects (Canada Only)............................................................265
Fuses
Fuse Specification Chart..........................266
Changing a Fuse
...........................................274 Maintenance
General Information....................................275
Opening and Closing the Hood..............276
Under Hood Overview -
2.3L
EcoBoost™................................................278
Under Hood Overview -
3.5L
Duratec........................................................279
Under Hood Overview -
3.5L
Ecoboost™...............................................280
Engine Oil Dipstick -
2.3L
EcoBoost™.................................................281
Engine Oil Dipstick -
3.5L Duratec/3.5L
Ecoboost™.................................................281
Engine Oil Check...........................................281
Oil Change Indicator Reset......................282
Engine Coolant Check...............................282
Automatic Transmission Fluid Check - 2.3L EcoBoost™......................................286
Automatic Transmission Fluid Check - 3.5L Duratec/
3.5L Ecoboost™..........286
Brake Fluid Check........................................288
Power Steering Fluid Check....................288
Washer Fluid Check
....................................288
Fuel Filter
........................................................289
Changing the 12V Battery.........................289
Checking the Wiper Blades.....................290
Changing the Wiper Blades......................291
Adjusting the Headlamps..........................291
Removing a Headlamp..............................293
Changing a Bulb
...........................................293
Bulb Specification Chart...........................297
Changing the Engine Air Filter................299
Vehicle Care
General Information
..................................300
Cleaning Products
......................................300
Cleaning the Exterior
.................................300
Waxing
..............................................................301
Cleaning the Engine
....................................301
Cleaning the Windows and Wiper Blades..........................................................302
4
Explorer (TUB), enUSA, First Printing Table of Contents
Page 8 of 541

Cleaning the Interior...................................302
Cleaning the Instrument Panel and
Instrument Cluster Lens.......................303
Cleaning Leather Seats.............................303
Repairing Minor Paint Damage..............304
Cleaning the Alloy Wheels.......................304
Vehicle Storage
............................................304
Wheels and Tires
General Information
...................................307
Tire Care
...........................................................310
Using Summer Tires
...................................323
Using Snow Chains.....................................324
Tire Pressure Monitoring System...........325
Changing a Road Wheel
...........................328
Technical Specifications
...........................332
Capacities and Specific- ations
Engine Specifications -
2.3L
EcoBoost™................................................334
Engine Specifications -
3.5L
Duratec........................................................335
Engine Specifications -
3.5L
Ecoboost™................................................335
Motorcraft Parts - 2.3L EcoBoost™......336
Motorcraft Parts - 3.5L Duratec..............337
Motorcraft Parts - 3.5L Ecoboost™......338
Vehicle Identification Number................339
Vehicle Certification Label.......................340
Transmission Code Designation............340
Capacities and Specifications -
2.3L
EcoBoost™.................................................341
Capacities and Specifications -
3.5L
Duratec........................................................344
Capacities and Specifications -
3.5L
Ecoboost™................................................348
Audio System
General Information
...................................353 Audio Unit - Vehicles With: AM/FM/CD/
SYNC............................................................354
Audio Unit - Vehicles With: Premium AM/ FM/CD..........................................................357
Audio Unit - Vehicles With: Sony AM/FM/ CD..................................................................358
Digital Radio
..................................................362
Satellite Radio..............................................364
USB Port
..........................................................367
Media Hub......................................................367
SYNC™
General Information...................................368
Using Voice Recognition...........................370
Using SYNC™ With Your Phone.............372
SYNC™ Applications and Services
......384
Using SYNC™ With Your Media Player...........................................................389
SYNC™ Troubleshooting
.........................398
MyFord Touch ™
General Information
..................................406
Settings............................................................416
Entertainment..............................................429
Phone..............................................................445
Information....................................................453
Climate............................................................462
Navigation ......................................................
466
MyFord Touch ™ Troubleshooting
.........475
Accessories
Accessories
....................................................482
Extended Service Plan (ESP)
Extended Service Plan (ESP).................484
Scheduled Maintenance
General Maintenance Information
.......486
Normal Scheduled Maintenance..........489
5
Explorer (TUB), enUSA, First Printing Table of Contents
Page 41 of 541

Deactivating and Activating the
Belt-Minder Feature
WARNING
While the system allows you to
switch this feature off, the intent of
the system is to remind you to wear
your safety belt to improve your chance to
survive an accident. We recommend you
leave the system switched on for yourself
and others who may use the vehicle. Note:
The driver and front passenger
warnings switch on and off independently.
When you perform this procedure for one
seating position, do not buckle the other
position as this will terminate the process.
Read Steps 1–4 thoroughly before
proceeding with the programming
procedure.
Before following the procedure, make sure
that:
• The parking brake is set.
• The transmission is in park (P) or
neutral (N).
• The ignition is off.
• The driver and front passenger safety
belts are unbuckled.
1. Switch the ignition on. Do not start the
vehicle.
2. Wait until the safety belt warning light turns off (about 1 minute). After Step
2, wait an additional 5 seconds before
proceeding with Step 3. Once you start
Step 3, you must complete the
procedure within 20 seconds.
3. For the seating position you are switching off, buckle then unbuckle the
safety belt three times at a moderate
speed, ending in the unbuckled state.
After Step 3, the safety belt warning
light turns on. 4. While the safety belt warning light is
on, buckle and then unbuckle the
safety belt. After Step 4, the safety belt
warning light flashes for confirmation.
• This will switch the feature off for that
seating position if it is currently on.
• This will switch the feature on for that
seating position if it is currently off.
CHILD RESTRAINT AND
SAFETY BELT MAINTENANCE
Inspect the vehicle safety belts and child
safety seat systems periodically to make
sure they work properly and are not
damaged. Inspect the vehicle and child
seat safety belts to make sure there are no
nicks, tears or cuts. Replace if necessary.
All vehicle safety belt assemblies, including
retractors, buckles, front safety belt buckle
assemblies, buckle support assemblies
(slide bar-if equipped), shoulder belt
height adjusters (if equipped), shoulder
belt guide on seat back (if equipped), rear
inflatable safety belts (if equipped), child
safety seat LATCH and tether anchors, and
attaching hardware, should be inspected
after a crash. Read the child restraint
manufacturer's instructions for additional
inspection and maintenance information
specific to the child restraint.
We recommend that all safety belt
assemblies in use in vehicles involved in a
crash be replaced. However, if the crash
was minor and an authorized dealer finds
that the belts do not show damage and
continue to operate properly, they do not
need to be replaced. Safety belt
assemblies not in use during a crash should
also be inspected and replaced if either
damage or improper operation is noted.
Properly care for safety belts. See
Cleaning the Interior (page 302).
38
Explorer (TUB), enUSA, First Printing Safety Belts
Page 55 of 541

Press the unlock button on a linked remote
control to recall the memory positions. If
you enable the easy-entry-and-exit
feature, the seat moves to the easy-entry
position. The seat moves to the driver
memory position when you put the key in
the ignition.
Linking a Preset Position to your
Remote Control or Intelligent Access
Key Fob
See Memory Function (page 146).
Car Finder Press the button twice within
three seconds. The horn sounds
and the direction indicators
flash. We recommend you use this method
to locate your vehicle, rather than using
the panic alarm.
Sounding a Panic Alarm
Note: The panic alarm only operates when
the ignition is off. Press the button to activate the
alarm. Press the button again or
switch the ignition on to
deactivate.
Remote Start
(If Equipped) WARNING
To avoid exhaust fumes, do not use
remote start if your vehicle is parked
indoors or areas that are not well
ventilated. Note:
Do not use remote start if your vehicle
is low on fuel. The remote start button is on the
transmitter. This feature allows you to start your
vehicle from outside the vehicle. The
transmitter has an extended operating
range.
You can configure vehicles with automatic
climate control to turn on the automatic
climate control when you remote start your
vehicle. See Automatic Climate Control
(page
131). A manual climate control
system runs at the setting you set it to
when you switched off the vehicle.
Many states and provinces restrict the use
of remote start. Check your local and state
or provincial laws for specific requirements
regarding remote start systems.
The remote start system does not work if:
• The ignition is on.
• The alarm system triggers.
• You disable the feature.
• The hood is open.
• The transmission is not in
P.
• The vehicle battery voltage is too low.
• The service engine soon light is on.
Remote Control Feedback
An LED on the remote control provides
status feedback of remote start or stop
commands. Status
LED
Remote start orextension
successful
Solid green
Remote stop
successful; vehicle off
Solid red
Remote start orstop failed
Blinking red
Waiting for statusupdate
Blinking green
52
Explorer (TUB), enUSA, First Printing Keys and Remote ControlsE138623 E138624 E138625
Page 64 of 541

Activating Intelligent Access (If
Equipped)
The intelligent access key must be within
3 ft (1 m)
of your vehicle.
At a Door
Pull a front exterior door handle to unlock
and open the door. Do not touch the lock
sensor on the front of the handle. The locking sensors are on the front door
handles.
Touch the locking area on the front of the
door handle to lock your vehicle. There is
a brief delay before you can unlock your
vehicle again.
Note:
Keep the door handle clean to make
sure the system operates correctly.
Note: Your vehicle does not automatically
lock. If you do not touch a locking sensor
your vehicle will remain unlocked.
At the Liftgate
Press the exterior liftgate release button
on the top of the liftgate pull-cup handle.
See
Manual Liftgate (page 63). Smart Unlocks for Integrated
Keyhead Transmitter
This helps to prevent you from locking
yourself out of your vehicle if the key is still
in the ignition.
When you open one of the front doors and
lock your vehicle with the power door lock
control, all the doors will lock then unlock
and the horn will sound twice if the key is
still in the ignition.
You can still lock your vehicle with the key
in the ignition by either:
•
Using the keyless entry keypad with the
driver door closed.
• Pressing the lock button on the remote
control even if the doors are not closed.
If both front doors are closed, you can lock
your vehicle by any method, regardless of
whether the key is in the ignition or not.
Smart Unlocks for Intelligent
Access Keys
(If Equipped)
This helps to prevent you from locking your
key inside the passenger compartment or
rear cargo area.
When you electronically lock your vehicle
with any door open, transmission in park
(P) and the ignition off, the system will
search for an intelligent access key in the
passenger compartment after you close
the last door. If the system finds a key, all
of the doors will immediately unlock and
the horn sounds twice, indicating that a
key is inside.
You can override the smart unlock feature
and intentionally lock the intelligent access
key inside your vehicle.
61
Explorer (TUB), enUSA, First Printing LocksE185863
Page 65 of 541

To override smart unlock, lock your vehicle
after you have closed all doors by:
•
Using the keyless entry keypad.
• Pressing the lock button on another
intelligent access key.
• Touching the locking area on the front
of the door handle with another
intelligent access key in your hand.
When you open one of the front doors and
lock your vehicle using the power door lock
control, all doors will lock then unlock if:
• The ignition is on.
• The ignition is off and the transmission
is not in park (P).
Autolock (If Equipped)
Autolock locks all the doors when:
• All doors are closed.
• The ignition is on.
• You shift into any gear putting your
vehicle in motion.
• Your vehicle attains a speed greater
than
4 mph (7 km/h).
Autounlock
(If Equipped)
Autounlock unlocks all the doors when:
• The ignition is on, all the doors are
closed and your vehicle has been in
motion at a speed greater than
4 mph
(7 km/h).
• Your vehicle comes to a stop and you
switch the ignition off or to accessory.
• You open the driver door within 10
minutes of switching the ignition off or
to accessory.
Note: If you electronically lock your vehicle
after you switch the ignition off with the
driver door closed, the doors will not
autounlock. Enabling or Disabling Autolock and
Autounlock
You can switch autounlock and autolock
on or off independently of each other.
To enable or disable autolock, do the
following:
1. Switch the ignition on.
2. Press the power door unlock control
three times.
3. Switch the ignition off.
4. Press the power door unlock control three times.
5. Switch the ignition on. The horn sounds
indicating your vehicle is in
programming mode.
6. Press the power door unlock control and within five seconds, press the
power door lock control. The horn
sounds once if disabled or twice if
enabled.
7. Switch the ignition off. The horn sounds
indicating programming is complete.
To enable or disable autounlock, do the
following:
1. Switch the ignition on.
2. Press the power door unlock control three times.
3. Switch the ignition off.
4. Press the power door unlock control three times.
5. Switch the ignition on. The horn sounds
indicating your vehicle is in
programming mode.
6. Press the power door lock control and within five seconds, press the power
door unlock control. The horn sounds
once if disabled or twice if enabled.
7. Switch the ignition off. The horn sounds
indicating programming is complete.
62
Explorer (TUB), enUSA, First Printing Locks
Page 67 of 541

Opening the Liftgate
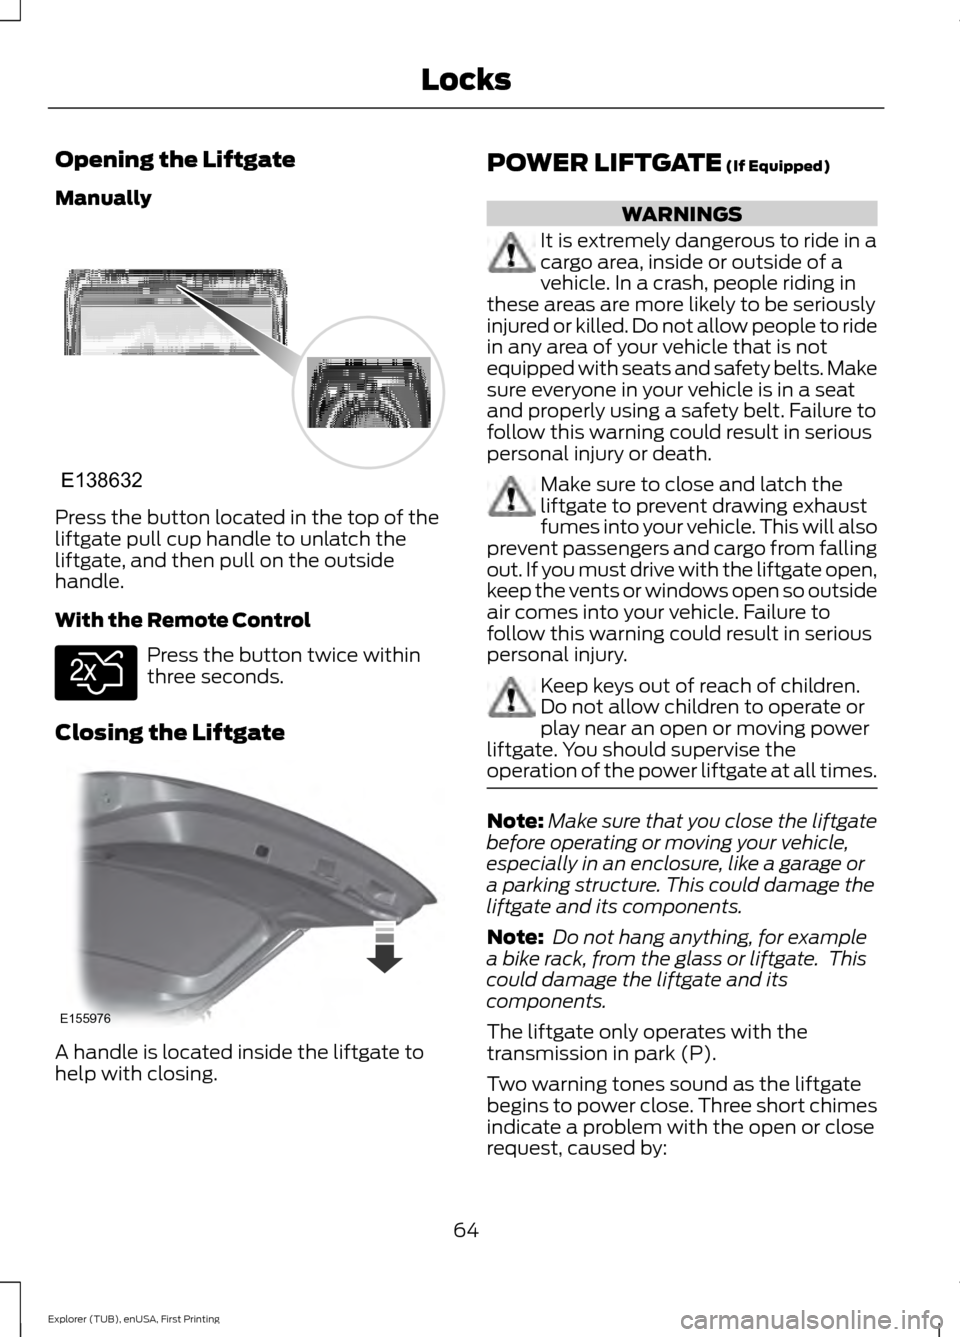
Manually
Press the button located in the top of the
liftgate pull cup handle to unlatch the
liftgate, and then pull on the outside
handle.
With the Remote Control
Press the button twice within
three seconds.
Closing the Liftgate A handle is located inside the liftgate to
help with closing. POWER LIFTGATE (If Equipped) WARNINGS
It is extremely dangerous to ride in a
cargo area, inside or outside of a
vehicle. In a crash, people riding in
these areas are more likely to be seriously
injured or killed. Do not allow people to ride
in any area of your vehicle that is not
equipped with seats and safety belts. Make
sure everyone in your vehicle is in a seat
and properly using a safety belt. Failure to
follow this warning could result in serious
personal injury or death. Make sure to close and latch the
liftgate to prevent drawing exhaust
fumes into your vehicle. This will also
prevent passengers and cargo from falling
out. If you must drive with the liftgate open,
keep the vents or windows open so outside
air comes into your vehicle. Failure to
follow this warning could result in serious
personal injury. Keep keys out of reach of children.
Do not allow children to operate or
play near an open or moving power
liftgate. You should supervise the
operation of the power liftgate at all times. Note:
Make sure that you close the liftgate
before operating or moving your vehicle,
especially in an enclosure, like a garage or
a parking structure. This could damage the
liftgate and its components.
Note: Do not hang anything, for example
a bike rack, from the glass or liftgate. This
could damage the liftgate and its
components.
The liftgate only operates with the
transmission in park (P).
Two warning tones sound as the liftgate
begins to power close. Three short chimes
indicate a problem with the open or close
request, caused by:
64
Explorer (TUB), enUSA, First Printing LocksE138632 E138630 E155976