2016 FORD EXPLORER lights
[x] Cancel search: lightsPage 158 of 541
Press the heated seat symbol to cycle
through the various heat settings and off.
More indicator lights indicate warmer
settings.
Rear Seats (If Equipped)
WARNING
Persons who are unable to feel pain
to the skin because of advanced age,
chronic illness, diabetes, spinal cord
injury, medication, alcohol use, exhaustion,
or other physical conditions, must exercise
care when using the seat heater. The seat
heater may cause burns even at low
temperatures, especially if used for long
periods of time. Do not place anything on
the seat that insulates against heat, such
as a blanket or cushion, because this may
cause the seat heater to overheat. Do not
puncture the seat with pins, needles, or
other pointed objects because this may
damage the heating element which may
cause the seat heater to overheat. An
overheated seat may cause serious
personal injury. Do not do the following:
•
Place heavy objects on the seat.
• Operate the seat heater if water or any
other liquid is spilled on the seat. Allow
the seat to dry thoroughly.
• Operate the heated seats unless the
engine is running. Doing so can cause
the battery to lose charge. The rear seat heat controls are located on
the rear of the center console.
Press the heated seat symbol to cycle
through the various heat settings and off.
More indicator lights indicate warmer
settings.
The heated seat module resets at every
ignition run cycle. While the ignition is on,
press the high or low heated seat switch
to enable heating mode. When activated,
they will turn off automatically when you
turn the engine off.
CLIMATE CONTROLLED SEATS
(If Equipped)
Heated Seats
155
Explorer (TUB), enUSA, First Printing SeatsE146322 E146322
Page 159 of 541
WARNING
Persons who are unable to feel pain
to the skin because of advanced age,
chronic illness, diabetes, spinal cord
injury, medication, alcohol use, exhaustion,
or other physical conditions, must exercise
care when using the seat heater. The seat
heater may cause burns even at low
temperatures, especially if used for long
periods of time. Do not place anything on
the seat that insulates against heat, such
as a blanket or cushion, because this may
cause the seat heater to overheat. Do not
puncture the seat with pins, needles, or
other pointed objects because this may
damage the heating element which may
cause the seat heater to overheat. An
overheated seat may cause serious
personal injury. Note:
Do not do the following:
• Place heavy objects on the seat.
• Operate the seat heater if water or any
other liquid spills on the seat. Allow the
seat to dry thoroughly.
• Operate the heated seats unless the
engine is running. Doing so can cause
the battery to lose charge. Touch the heated seat symbol to cycle
through the various heat settings and off.
More indicator lights indicate warmer
settings. Cooled Seats
The cooled seats only function when the
engine is running.
To operate the cooled seats:
Touch the cooled seat symbol to cycle
through the various cooling settings and
off. More indicator lights indicate cooler
settings.
If the engine falls below 350 RPM while
the cooled seats are on, the feature turns
itself off. You need to reactivate it.
Climate controlled seat air filter
replacement
Your vehicle is equipped with lifetime air
filters that are integrated with the seats.
Regular maintenance or replacement is
not needed.
156
Explorer (TUB), enUSA, First Printing SeatsE146322 E146309
Page 162 of 541
Gate Operator / Canadian
Programming
Canadian radio-frequency laws require
transmitter signals to
“time-out” (or quit)
after several seconds of transmission –
which may not be long enough for
HomeLink to pick up the signal during
programming. Similar to this Canadian law,
some U.S. gate operators are designed to
“time-out” in the same manner.
Note: If programming a garage door opener
or gate operator, it is advised to unplug the
device during the “cycling” process to
prevent possible overheating.
1. Press and hold the HomeLink button while you press and release, every two
seconds, your hand-held transmitter
until the HomeLink indicator light
changes from a slow to a rapidly
blinking light.
2. Release both the HomeLink and hand-held transmitter buttons.
3. Continue programing HomeLink. See In-Vehicle Programming
.
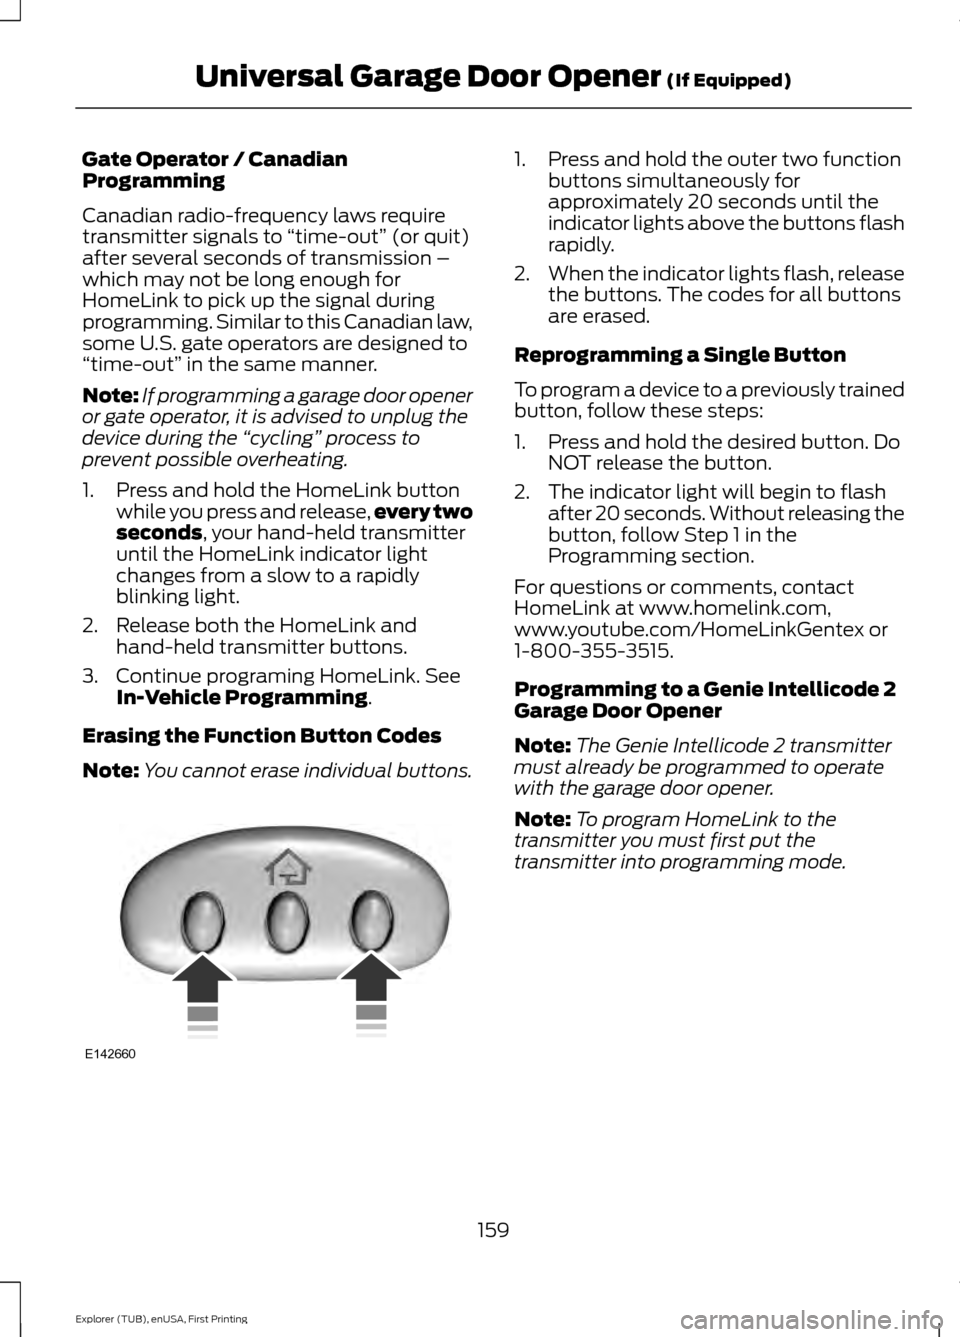
Erasing the Function Button Codes
Note: You cannot erase individual buttons. 1. Press and hold the outer two function
buttons simultaneously for
approximately 20 seconds until the
indicator lights above the buttons flash
rapidly.
2. When the indicator lights flash, release
the buttons. The codes for all buttons
are erased.
Reprogramming a Single Button
To program a device to a previously trained
button, follow these steps:
1. Press and hold the desired button. Do NOT release the button.
2. The indicator light will begin to flash after 20 seconds. Without releasing the
button, follow Step 1 in the
Programming section.
For questions or comments, contact
HomeLink at www.homelink.com,
www.youtube.com/HomeLinkGentex or
1-800-355-3515.
Programming to a Genie Intellicode 2
Garage Door Opener
Note: The Genie Intellicode 2 transmitter
must already be programmed to operate
with the garage door opener.
Note: To program HomeLink to the
transmitter you must first put the
transmitter into programming mode.
159
Explorer (TUB), enUSA, First Printing Universal Garage Door Opener
(If Equipped)E142660
Page 163 of 541
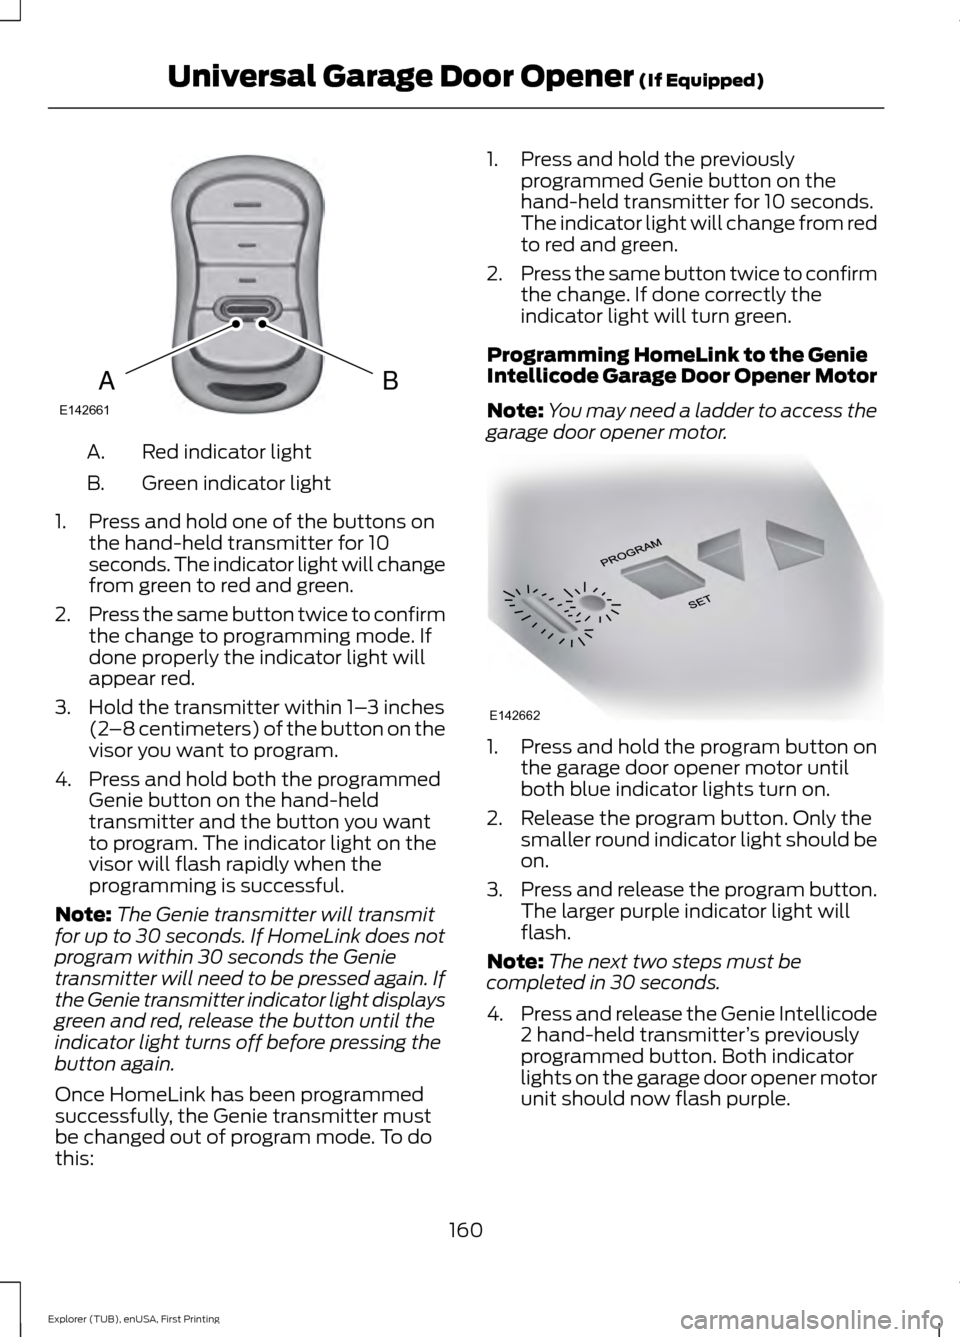
Red indicator light
A.
Green indicator light
B.
1. Press and hold one of the buttons on the hand-held transmitter for 10
seconds. The indicator light will change
from green to red and green.
2. Press the same button twice to confirm
the change to programming mode. If
done properly the indicator light will
appear red.
3. Hold the transmitter within 1– 3 inches
(2 –8 centimeters) of the button on the
visor you want to program.
4. Press and hold both the programmed Genie button on the hand-held
transmitter and the button you want
to program. The indicator light on the
visor will flash rapidly when the
programming is successful.
Note: The Genie transmitter will transmit
for up to 30 seconds. If HomeLink does not
program within 30 seconds the Genie
transmitter will need to be pressed again. If
the Genie transmitter indicator light displays
green and red, release the button until the
indicator light turns off before pressing the
button again.
Once HomeLink has been programmed
successfully, the Genie transmitter must
be changed out of program mode. To do
this: 1. Press and hold the previously
programmed Genie button on the
hand-held transmitter for 10 seconds.
The indicator light will change from red
to red and green.
2. Press the same button twice to confirm
the change. If done correctly the
indicator light will turn green.
Programming HomeLink to the Genie
Intellicode Garage Door Opener Motor
Note: You may need a ladder to access the
garage door opener motor. 1. Press and hold the program button on
the garage door opener motor until
both blue indicator lights turn on.
2. Release the program button. Only the smaller round indicator light should be
on.
3. Press and release the program button.
The larger purple indicator light will
flash.
Note: The next two steps must be
completed in 30 seconds.
4. Press and release the Genie Intellicode
2 hand-held transmitter ’s previously
programmed button. Both indicator
lights on the garage door opener motor
unit should now flash purple.
160
Explorer (TUB), enUSA, First Printing Universal Garage Door Opener (If Equipped)BAE142661 E142662
Page 193 of 541
PARKING BRAKE
WARNING
Always set the parking brake fully
and make sure the transmission is
locked in park (P). Failure to set the
parking brake and engage park could result
in vehicle roll-away, property damage or
bodily injury. To set the parking brake, press the parking
brake pedal down to its fullest extent. The
brake warning lamp in the instrument
cluster will illuminate and remains
illuminated until the parking brake is
released.
To release the parking brake, press the
parking brake pedal down again.
If you are parking your vehicle on a grade
or with a trailer, press and hold the brake
pedal down, then set the parking brake.
There may be a little vehicle movement as
the parking brake sets to hold the vehicle's
weight. This is normal and should be no
reason for concern. If needed, press and
hold the service brake pedal down, then
try reapplying the parking brake. Chock the
wheels if required. If the parking brake
cannot hold the weight of the vehicle, the
parking brake may need to be serviced or
the vehicle may be overloaded.
HILL START ASSIST
WARNINGS
The system does not replace the
parking brake. When you leave your
vehicle, always apply the parking
brake. Failure to leave your vehicle securely
parked may lead to a crash or injury. See
Parking Brake (page 190). WARNINGS
You must remain in your vehicle
when the system turns on. At all
times, you are responsible for
controlling your vehicle, supervising the
system and intervening, if required. Failure
to take care may result in the loss of
control of your vehicle, serious personal
injury or death. The system will turn off if a
malfunction is apparent or if you rev
the engine excessively. Failure to
take care may result in the loss of control
of your vehicle, serious personal injury or
death. The system makes it easier to pull away
when your vehicle is on a slope without the
need to use the parking brake.
When the system is active, your vehicle
remains stationary on the slope for two to
three seconds after you release the brake
pedal. This allows time to move your foot
from the brake to the accelerator pedal.
The system releases the brakes
automatically once the engine has
developed sufficient drive to prevent your
vehicle from rolling down the slope. This
is an advantage when pulling away on a
slope, for example from a car park ramp,
traffic lights or when reversing uphill into
a parking space.
Note:
The system only functions when you
bring your vehicle to a complete standstill
in an uphill gear (for example, drive when
facing uphill or reverse when facing
downhill).
Note: There is no warning light to indicate
the system is either on or off.
Using Hill Start Assist
1. Press the brake pedal to bring your vehicle to a complete standstill. Keep
the brake pedal pressed.
190
Explorer (TUB), enUSA, First Printing Brakes
Page 195 of 541
PRINCIPLE OF OPERATION
The traction control system helps avoid
drive wheel spin and loss of traction.
If your vehicle begins to slide, the system
applies the brakes to individual wheels
and, when needed, reduces engine power
at the same time. If the wheels spin when
accelerating on slippery or loose surfaces,
the system reduces engine power in order
to increase traction.
USING TRACTION CONTROL
WARNING
The stability and traction control
light illuminates steadily if the
system detects a failure. Make sure
you did not manually disable the traction
control system using the information
display controls or the switch. If the
stability control and traction control light
is still illuminating steadily, have the
system serviced by an authorized dealer
immediately. Operating your vehicle with
the traction control disabled could lead to
an increased risk of loss of vehicle control,
vehicle rollover, personal injury and death. The system automatically turns on each
time you switch the ignition on.
If your vehicle is stuck in mud or snow,
switching traction control off may be
beneficial as this allows the wheels to spin.
Note:
When you switch traction control off,
stability control remains fully active.
Switching the System Off
When you switch the system off or on, a
message appears in the information
display showing system status.
You can switch the system off by either
using the information display controls or
the switch. Using the Information Display
Controls
You can switch this feature off or on in the
information display. See General
Information (page 101).
Using a Switch
(If Equipped)
The switch for the stability control system
and traction control system is on the
instrument panel.
Use the switch to turn the system off or
on.
System Indicator Lights and
Messages The stability and traction control
light temporarily illuminates on
engine start-up and flashes
when a driving condition activates either
of the systems. The stability and traction control
off light temporarily illuminates
on engine start-up and stays on:
• When you switch the traction control
system off.
• If a problem occurs in either of the
systems.
192
Explorer (TUB), enUSA, First Printing Traction ControlE138639
Page 213 of 541

The fixed and active guidelines fade in and
out depending on the steering wheel
position. The active guidelines do not
display when the steering wheel position
is straight.
Always use caution while reversing.
Objects in the red zone are closest to your
vehicle and objects in the green zone are
farther away. Objects are getting closer to
your vehicle as they move from the green
zone to the yellow or red zones. Use the
side view mirrors and rear view mirror to
get better coverage on both sides and rear
of the vehicle.
Manual Zoom
WARNING
When manual zoom is on, the full
area behind your vehicle may not
show. Be aware of your surroundings
when using the manual zoom feature. Note:
Manual zoom is only available when
the transmission is in reverse (R).
Note: When you enable manual zoom, only
the centerline is shown.
Selectable settings for this feature are
Zoom in (+) and Zoom out (-). Press the
symbol in the camera screen to change the
view. The default setting is Zoom OFF.
This allows you to get a closer view of an
object behind your vehicle. The zoomed
image keeps the bumper in the image to
provide a reference. The zoom is only
active while the transmission is in reverse
(R).
Camera System Settings
To access any of the rear view camera
system settings, make the following
selections in the multifunctional display
when the transmission is not in reverse (R): Main Menu
SettingsVehicle
Camera Settings
Enhanced Park Aids or Park Pilot
Selectable settings for this feature are ON
and OFF.
The system uses red, yellow and green
highlights that appear on top of the video
image when any of the sensing systems
detect an object.
Vehicles equipped with MyFord Touch ™
The system will provide an image of your
vehicle and the sensor zones. The zones
will highlight green, yellow and red when
the parking aid sensors detect an object in
the coverage area.
The coverage area is up to 6 ft (1.8 m) from
the rear bumper. There is decreased
coverage area at the outer corners of the
bumper. For additional information of the zone
coverage and the rear sensing system. See
Rear Parking Aid (page 198).
210
Explorer (TUB), enUSA, First Printing Parking AidsE130178
Page 228 of 541

Note:
The Blind Spot Information System
does not prevent contact with other vehicles
or objects; nor detect parked vehicles,
people, animals or infrastructure (fences,
guardrails, trees). It's only designed to alert
you to vehicles in the blind zones.
Note: Vehicles that pass through the blind
spot zone quickly (typically less than 2
seconds) will not trigger the alert.
Using the System
The Blind Spot Information System turns
on when you start the engine and you drive
your vehicle forward above approximately
6 mph (10 km/h).
Note: The Blind Spot Information System
does not function in reverse (R) or park (P)
or provide any additional warning when a
turn signal is on.
System Lights and Messages The system displays a yellow warning
indicator located in the exterior mirrors.
Note:
It will dim when the ambient light
decreases. System Sensors WARNING
Prior to the system recognizing a
blocked condition and issuing a
warning, the number of missed
objects will increase. Note:
It is possible to get a blockage
warning with no blockage present; this is
rare and known as a false blockage warning.
A false blocked condition either
self-corrects or clears after a key cycle. The system uses radar sensors which are
located behind the bumper fascia on each
side of your vehicle. Do not allow mud,
snow or bumper stickers to obstruct these
areas, this can cause degraded system
performance.
225
Explorer (TUB), enUSA, First Printing Driving AidsE142442 E205199