2016 FORD EXPLORER fog light
[x] Cancel search: fog lightPage 5 of 541
Steering Wheel
Adjusting the Steering Wheel - Vehicles
With: Manual Adjustable Steering
Column...........................................................72
Adjusting the Steering Wheel -
Vehicles
With: Power Adjustable Steering
Column...........................................................72
Audio Control...................................................73
Voice Control
....................................................74
Cruise Control
..................................................74
Information Display Control.......................75
Heated Steering Wheel................................75
Pedals
Adjusting the Pedals
.....................................76
Wipers and Washers
Windshield Wipers
.........................................77
Autowipers........................................................77
Windshield Washers
.....................................78
Rear Window Wiper and Washers...........78
Lighting
General Information
.....................................80
Lighting Control
..............................................80
Autolamps
.........................................................81
Instrument Lighting Dimmer.....................82
Headlamp Exit Delay
....................................82
Daytime Running Lamps
.............................82
Automatic High Beam Control.................83
Front Fog Lamps............................................84
Direction Indicators
.......................................85
Interior Lamps
.................................................85
Windows and Mirrors
Power Windows
..............................................87
Exterior Mirrors
................................................88
Interior Mirror...................................................90
Sun Visors
..........................................................91
Moonroof............................................................91 Instrument Cluster
Gauges...............................................................93
Warning Lamps and Indicators................96
Audible Warnings and Indicators
...........100
Information Displays
General Information.....................................101
Information Messages
.................................115
Climate Control
Manual Climate Control.............................129
Automatic Climate Control -
Vehicles
With: Premium AM/FM/CD...................131
Automatic Climate Control -
Vehicles
With: Sony Audio System......................132
Hints on Controlling the Interior Climate.........................................................134
Rear Passenger Climate Controls...........137
Heated Windows and Mirrors..................138
Cabin Air Filter
...............................................138
Remote Start.................................................139
Seats
Sitting in the Correct Position
.................140
Head Restraints............................................140
Manual Seats
.................................................143
Power Seats
...................................................144
Memory Function
.........................................146
Rear Seats
.......................................................147
Heated Seats.................................................154
Climate Controlled Seats..........................155
Universal Garage Door Opener
Universal Garage Door Opener................157
Auxiliary Power Points
Auxiliary Power Points................................162
2
Explorer (TUB), enUSA, First Printing Table of Contents
Page 11 of 541

Brake system
Cabin air filter
Check fuel cap
Child safety door lock or unlock
Child seat lower anchor
Child seat tether anchor
Cruise control
Do not open when hot
Engine air filter
Engine coolant
Engine coolant temperature
Engine oil
Explosive gas
Fan warning Fasten safety belt
Front airbag
Front fog lamps
Fuel pump reset
Fuse compartment
Hazard warning flashers
Heated rear window
Heated windshield
Interior luggage compartment
release
Jack
Keep out of reach of children
Lighting control
Low tire pressure warning
Maintain correct fluid level
Note operating instructions
8
Explorer (TUB), enUSA, First Printing Introduction E71340 E161353
Page 84 of 541
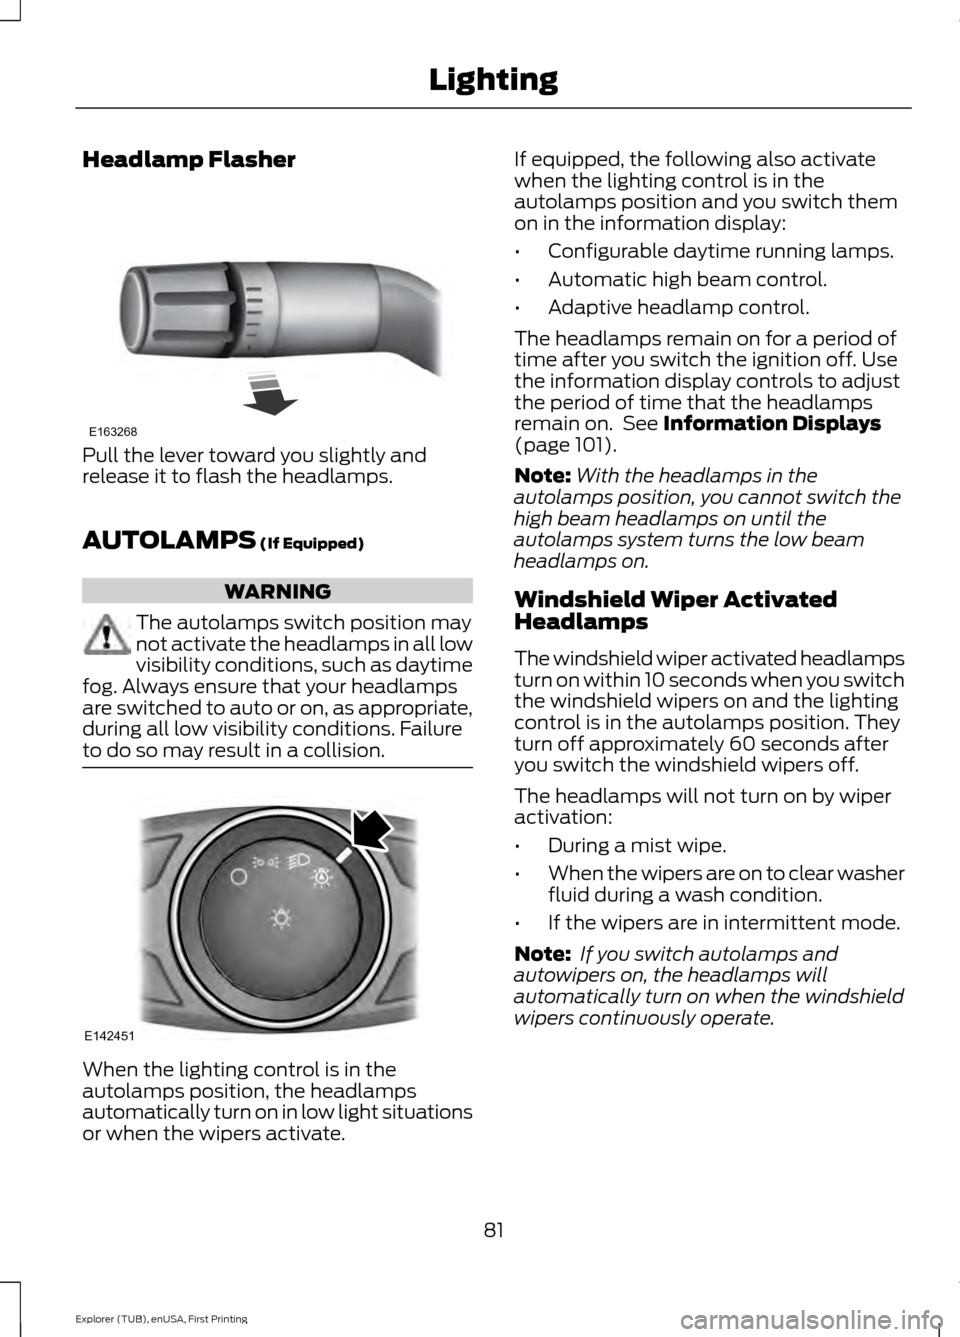
Headlamp Flasher
Pull the lever toward you slightly and
release it to flash the headlamps.
AUTOLAMPS (If Equipped)
WARNING
The autolamps switch position may
not activate the headlamps in all low
visibility conditions, such as daytime
fog. Always ensure that your headlamps
are switched to auto or on, as appropriate,
during all low visibility conditions. Failure
to do so may result in a collision. When the lighting control is in the
autolamps position, the headlamps
automatically turn on in low light situations
or when the wipers activate. If equipped, the following also activate
when the lighting control is in the
autolamps position and you switch them
on in the information display:
•
Configurable daytime running lamps.
• Automatic high beam control.
• Adaptive headlamp control.
The headlamps remain on for a period of
time after you switch the ignition off. Use
the information display controls to adjust
the period of time that the headlamps
remain on. See
Information Displays
(page 101).
Note: With the headlamps in the
autolamps position, you cannot switch the
high beam headlamps on until the
autolamps system turns the low beam
headlamps on.
Windshield Wiper Activated
Headlamps
The windshield wiper activated headlamps
turn on within 10 seconds when you switch
the windshield wipers on and the lighting
control is in the autolamps position. They
turn off approximately 60 seconds after
you switch the windshield wipers off.
The headlamps will not turn on by wiper
activation:
• During a mist wipe.
• When the wipers are on to clear washer
fluid during a wash condition.
• If the wipers are in intermittent mode.
Note: If you switch autolamps and
autowipers on, the headlamps will
automatically turn on when the windshield
wipers continuously operate.
81
Explorer (TUB), enUSA, First Printing LightingE163268 E142451
Page 85 of 541
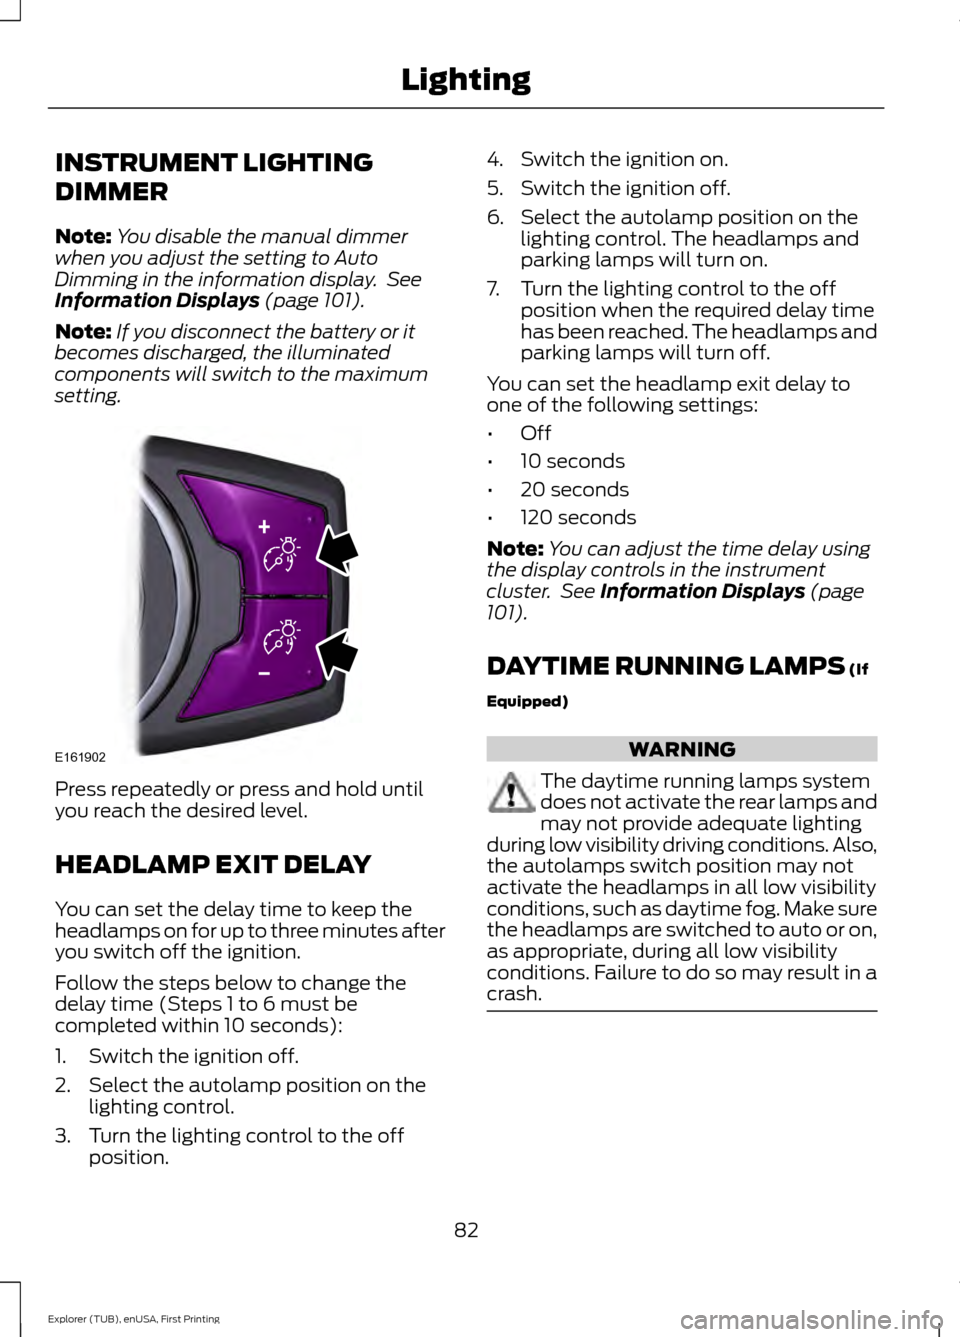
INSTRUMENT LIGHTING
DIMMER
Note:
You disable the manual dimmer
when you adjust the setting to Auto
Dimming in the information display. See
Information Displays (page 101).
Note: If you disconnect the battery or it
becomes discharged, the illuminated
components will switch to the maximum
setting. Press repeatedly or press and hold until
you reach the desired level.
HEADLAMP EXIT DELAY
You can set the delay time to keep the
headlamps on for up to three minutes after
you switch off the ignition.
Follow the steps below to change the
delay time (Steps 1 to 6 must be
completed within 10 seconds):
1. Switch the ignition off.
2. Select the autolamp position on the
lighting control.
3. Turn the lighting control to the off position. 4. Switch the ignition on.
5. Switch the ignition off.
6. Select the autolamp position on the
lighting control. The headlamps and
parking lamps will turn on.
7. Turn the lighting control to the off position when the required delay time
has been reached. The headlamps and
parking lamps will turn off.
You can set the headlamp exit delay to
one of the following settings:
• Off
• 10 seconds
• 20 seconds
• 120 seconds
Note: You can adjust the time delay using
the display controls in the instrument
cluster. See
Information Displays (page
101).
DAYTIME RUNNING LAMPS
(If
Equipped) WARNING
The daytime running lamps system
does not activate the rear lamps and
may not provide adequate lighting
during low visibility driving conditions. Also,
the autolamps switch position may not
activate the headlamps in all low visibility
conditions, such as daytime fog. Make sure
the headlamps are switched to auto or on,
as appropriate, during all low visibility
conditions. Failure to do so may result in a
crash. 82
Explorer (TUB), enUSA, First Printing LightingE161902
Page 87 of 541

A camera sensor, centrally mounted
behind the windshield of your vehicle,
continuously monitors conditions to decide
when to switch the high beams off and on.
Once the system is active, the high beams
switch on if:
•
The outside light level is low enough.
• There is no traffic in front of your
vehicle.
• The vehicle speed is greater than
32 mph (52 km/h).
The high beams switch off if:
• The system detects the headlamps of
an approaching vehicle or the rear
lamps vehicle in front of you.
• Vehicle speed falls below
27 mph
(44 km/h).
• The outside light level is high enough
that high beams are not required.
• The system detects severe rain, snow
or fog.
• The camera is blocked.
Activating the System
Switch on automatic high beam control
using the information display and
autolamps. See
Information Displays
(page 101). Switch the lighting control to the
autolamps position. Manually Overriding the System
When automatic high beam control has
activated the high beams, pushing or
pulling the stalk provides a temporary
override to low beam.
Use the information display menu to
permanently deactivate the system, or
switch the lighting control from autolamps
to headlamps.
FRONT FOG LAMPS
Press the button to switch the fog lamps
on or off.
You can switch the fog lamps on when the
lighting control is in any position except off
and the high beams are not on.
84
Explorer (TUB), enUSA, First Printing LightingE142451 E202426
Page 88 of 541
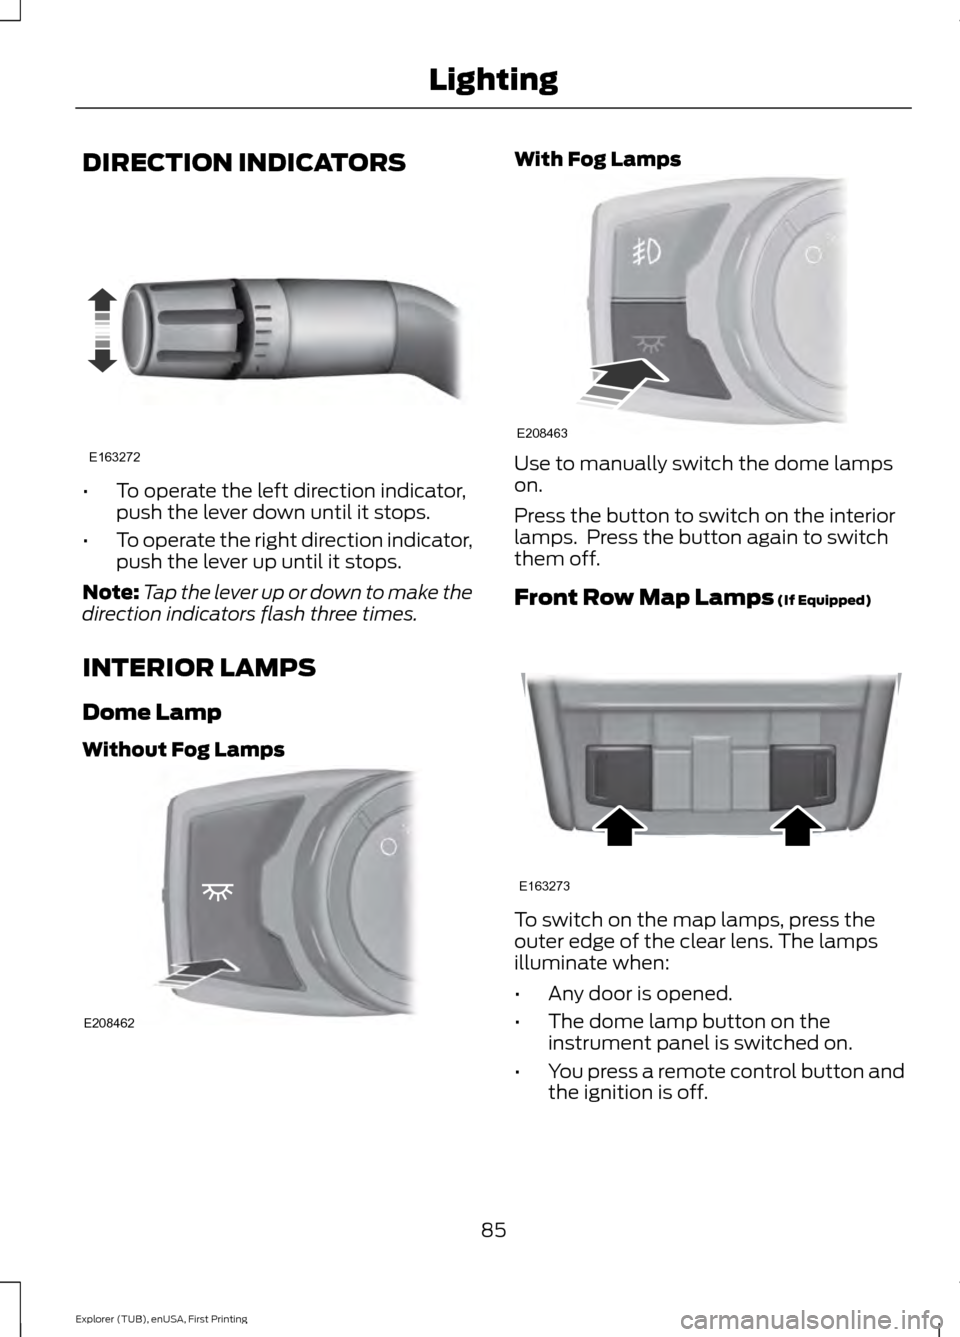
DIRECTION INDICATORS
•
To operate the left direction indicator,
push the lever down until it stops.
• To operate the right direction indicator,
push the lever up until it stops.
Note: Tap the lever up or down to make the
direction indicators flash three times.
INTERIOR LAMPS
Dome Lamp
Without Fog Lamps With Fog Lamps
Use to manually switch the dome lamps
on.
Press the button to switch on the interior
lamps. Press the button again to switch
them off.
Front Row Map Lamps (If Equipped)
To switch on the map lamps, press the
outer edge of the clear lens. The lamps
illuminate when:
•
Any door is opened.
• The dome lamp button on the
instrument panel is switched on.
• You press a remote control button and
the ignition is off.
85
Explorer (TUB), enUSA, First Printing LightingE163272 E208462 E208463 E163273
Page 101 of 541

Engine Oil
If it illuminates with the engine
running or when you are driving,
this indicates a malfunction.
Stop your vehicle as soon as it is safe to
do so and switch the engine off. Check the
engine oil level. See Engine Oil Check
(page 281).
Note: Do not resume your journey if it
illuminates despite the level being correct.
Have the system checked by an authorized
dealer immediately.
Fasten Safety Belt It illuminates and a chime
sounds to remind you to fasten
your safety belt. See
Safety
Belt Minder (page 37).
Front Airbag If it fails to illuminate when you
start your vehicle, continues to
flash or remains on, it indicates
a malfunction. Have the system checked
by an authorized dealer.
Front Fog Lamps
(If Equipped) Lights when you switch the front
fog lamps on.
Heads Up Display
(If Equipped) A red beam of lights illuminates
on the windshield in certain
instances when using adaptive
cruise control and/or the collision warning
system. It also illuminates momentarily
when you start your vehicle to make sure
the display works. High Beam It illuminates when you switch
the high beam headlamps on. It
flashes when you use the
headlamp flasher.
Hood Ajar Displays when the ignition is on
and the hood is not completely
closed.
Lane Keeping Aid
(If Equipped) Lights when the lane keeping
system is activated.
Liftgate Ajar Lights when the liftgate is not
completely closed.
Low Fuel Level It illuminates when the fuel level
is low or the fuel tank is nearly
empty. Refuel as soon as
possible.
Low Tire Pressure Warning It illuminates when your tire
pressure is low. If the lamp
remains on with the engine
running or when driving, check
your tire pressure as soon as possible.
It also illuminates momentarily when you
switch the ignition on to confirm the lamp
is functional. If it does not illuminate when
you switch the ignition on, or begins to
flash at any time, have the system checked
by an authorized dealer.
98
Explorer (TUB), enUSA, First Printing Instrument Cluster E156133 E159324 E144813 E162453
Page 226 of 541
•
The road has no or poor lane markings
in the camera field-of-view.
• The camera is obscured or unable to
detect the lane markings due to
environmental conditions (significant
sun angles, shadows, snow, heavy rain
or fog), traffic conditions (following a
large vehicle that is blocking or
shadowing the lane), or vehicle
conditions (poor headlamp
illumination).
See Troubleshooting for additional
information.
Green: Indicates that the system is
available or ready to provide a warning or
intervention, on the indicated side(s). Yellow: Indicates that the system is
providing or has just provided a lane
keeping aid intervention.
Red: Indicates that the system is providing
or has just provided a lane keeping alert
warning.
The system can be temporarily suppressed
at any time by the following:
•
Quick braking.
• Fast acceleration.
• Using the turn signal indicator.
• Evasive steering maneuver.
Troubleshooting Why is the feature not available (line markings are gray) when I can see the lane markings
on the road?
Vehicle speed is outside the operational range of the feature
Sun is shining directly into the camera lens
Quick intentional lane change
Staying too close to the lane marking
Driving at high speeds in curves
The last Alert warning or Aid intervention occurred a short time ago
Ambiguous lane markings (mainly in construction zones)
Rapid transition from light to dark or vice versa
Sudden offset in lane markings
ABS or AdvanceTrac activation
Camera blockage due to dirt, grime, fog, frost or water on the windshield
Driving too close to the vehicle in front of you
Transitioning between no lane markings to lane markings or vice versa
Standing water on the road
Faint lane markings (partial yellow lane markings on concrete roads)
223
Explorer (TUB), enUSA, First Printing Driving Aids