2016 FORD EXPEDITION wheel
[x] Cancel search: wheelPage 302 of 421

Park on a level surface, activate the hazard
flashers and set the parking brake. Then,
place the transmission in park (P) and turn
the engine off.
Removing the Jack and Tools
Note:
Pay close attention to the orientation
of the bag, because it will have to be
reinstalled after changing the tire.
1. Open the liftgate, then locate the access panel on the floor behind the
third row seat. Unlatch and remove the
panel. 2. Remove the jack and tools assembly
tray from the compartment by turning
the wing-nut counterclockwise.
Remove the bag from the jack and
tools assembly tray by loosening the
strap.
3. Unsnap the wheel lug nut wrench, jack
extension and handle from the plastic
tray.
4. Remove the hack from the tray assembly.
Removing the Spare Tire
1. Remove the jack handle and winch extension from the tray and assemble
them.
2. Open the spare tire winch access plug at the bottom of the compartment for
the jack and tools tray. 3. Insert the winch extension tool
assembly through the access hole in
the floor and engage the winch. 4. To remove the spare tire, turn the
handle counterclockwise until the tire
is lowered to the ground and the cable
is slightly slack.
5. Slide the retainer through the center of
the spare tire wheel and remove the
spare tire.
Jacking the Vehicle
Note: Jack at the specified locations to
avoid damaging your vehicle. Front jacking point
299
Expedition (TB7) Canada/United States of America, enUSA, First Printing Wheels and TiresE208640 E208655 E208656
Page 303 of 421

Rear jacking point
1.
With the vehicle on level ground, block
both sides of the wheel diagonally
opposite (other side and end of the
vehicle) to the wheel being changed.
Do not jack the vehicle on a hill or
incline.
2. Obtain the spare tire and jack tools from their storage locations.
3. Use the tip of the jack handle to remove any wheel trim.
4. Loosen each wheel lug nut one-half turn counterclockwise but do not
remove them until the wheel is raised
off the ground.
5. Position the jack according to the jack locator arrows found on the frame and
turn the jack handle and extension tool
assembly clockwise. 6. Raise the vehicle to provide sufficient
ground clearance when installing the
spare tire, about 1/4 inch (6
millimeters).
Installing the Spare Tire 1. Remove the lug nuts with the lug
wrench.
2. Replace the flat tire with the spare tire,
making sure the valve stem is facing
outward.
3. Reinstall the lug nuts until the wheel is
snug against the hub. Do not fully
tighten the lug nuts until the wheel has
been lowered.
4. Lower the wheel by turning the jack handle counterclockwise. 300
Expedition (TB7) Canada/United States of America, enUSA, First Printing Wheels and TiresE208657 E175447 E175447 E166719
1
3
5 4
6
2
Page 304 of 421

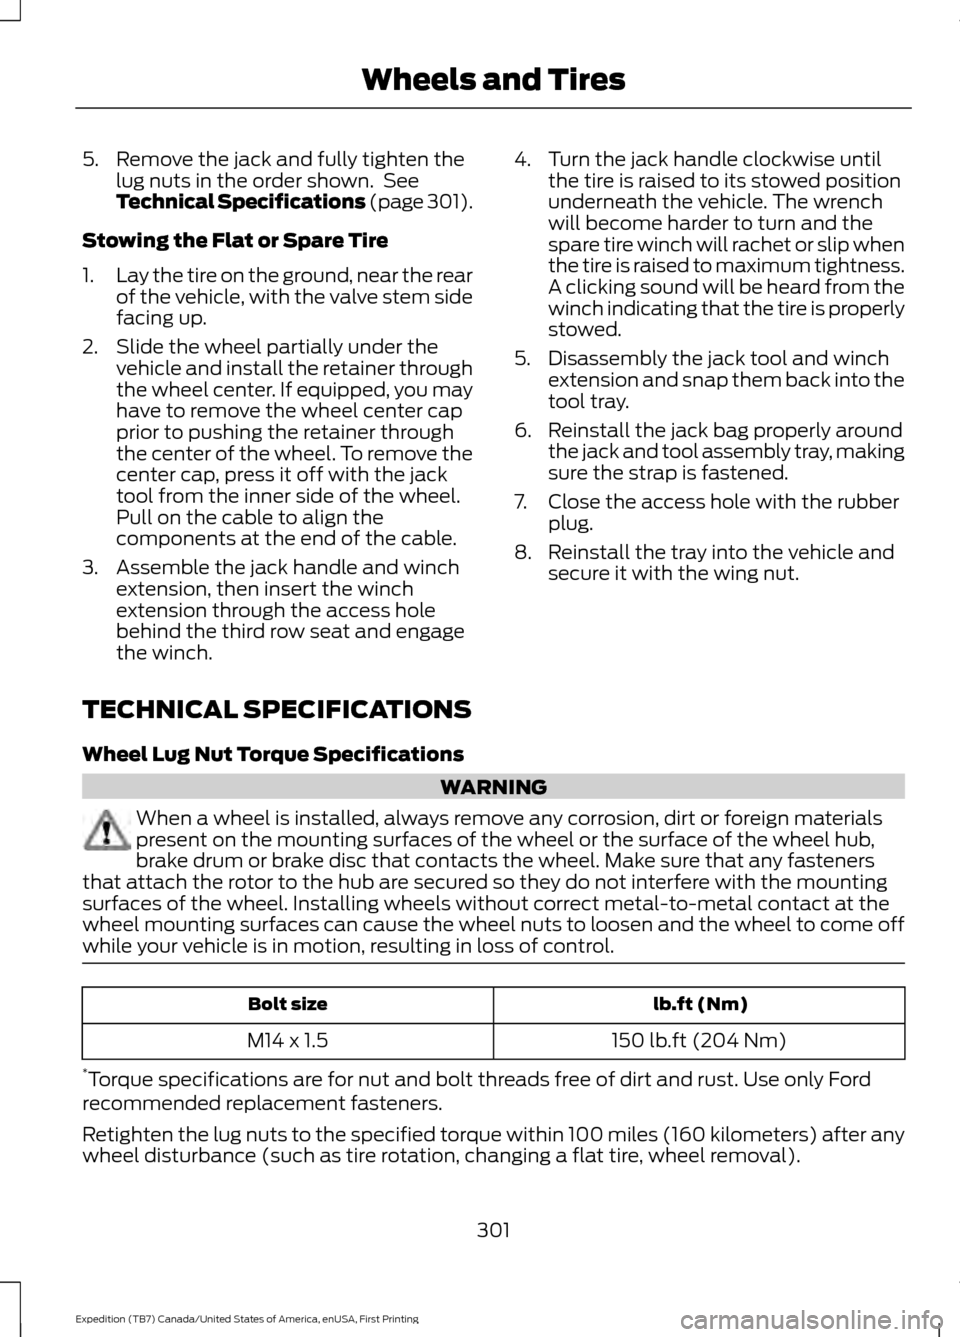
5. Remove the jack and fully tighten the
lug nuts in the order shown. See
Technical Specifications (page 301).
Stowing the Flat or Spare Tire
1. Lay the tire on the ground, near the rear
of the vehicle, with the valve stem side
facing up.
2. Slide the wheel partially under the vehicle and install the retainer through
the wheel center. If equipped, you may
have to remove the wheel center cap
prior to pushing the retainer through
the center of the wheel. To remove the
center cap, press it off with the jack
tool from the inner side of the wheel.
Pull on the cable to align the
components at the end of the cable.
3. Assemble the jack handle and winch extension, then insert the winch
extension through the access hole
behind the third row seat and engage
the winch. 4. Turn the jack handle clockwise until
the tire is raised to its stowed position
underneath the vehicle. The wrench
will become harder to turn and the
spare tire winch will rachet or slip when
the tire is raised to maximum tightness.
A clicking sound will be heard from the
winch indicating that the tire is properly
stowed.
5. Disassembly the jack tool and winch extension and snap them back into the
tool tray.
6. Reinstall the jack bag properly around the jack and tool assembly tray, making
sure the strap is fastened.
7. Close the access hole with the rubber plug.
8. Reinstall the tray into the vehicle and secure it with the wing nut.
TECHNICAL SPECIFICATIONS
Wheel Lug Nut Torque Specifications WARNING
When a wheel is installed, always remove any corrosion, dirt or foreign materials
present on the mounting surfaces of the wheel or the surface of the wheel hub,
brake drum or brake disc that contacts the wheel. Make sure that any fasteners
that attach the rotor to the hub are secured so they do not interfere with the mounting
surfaces of the wheel. Installing wheels without correct metal-to-metal contact at the
wheel mounting surfaces can cause the wheel nuts to loosen and the wheel to come off
while your vehicle is in motion, resulting in loss of control. lb.ft (Nm)
Bolt size
150 lb.ft (204 Nm)
M14 x 1.5
* Torque specifications are for nut and bolt threads free of dirt and rust. Use only Ford
recommended replacement fasteners.
Retighten the lug nuts to the specified torque within 100 miles (160 kilometers) after any
wheel disturbance (such as tire rotation, changing a flat tire, wheel removal).
301
Expedition (TB7) Canada/United States of America, enUSA, First Printing Wheels and Tires
Page 305 of 421

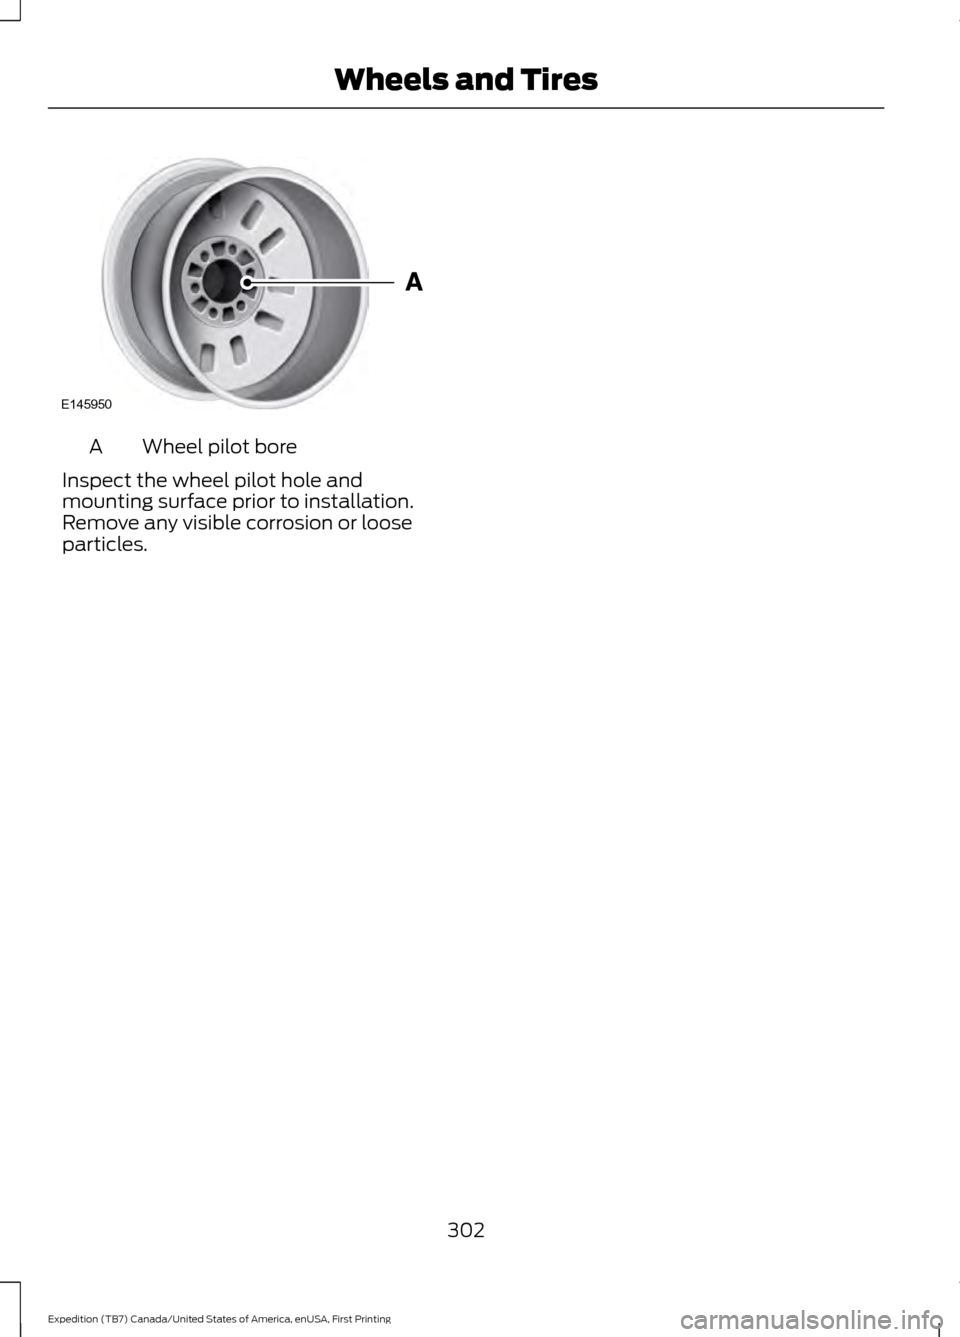
Wheel pilot bore
A
Inspect the wheel pilot hole and
mounting surface prior to installation.
Remove any visible corrosion or loose
particles.
302
Expedition (TB7) Canada/United States of America, enUSA, First Printing Wheels and TiresE145950
Page 328 of 421

System data cannot be accessed without
special equipment and access to the
vehicle's SYNC module. Ford Motor
Company and Ford of Canada will not
access the system data for any purpose
other than as described absent consent, a
court order, or where required by law
enforcement, other government
authorities, or other third parties acting
with lawful authority. Other parties may
seek to access the information
independently of Ford Motor Company and
Ford of Canada. For further privacy
information, see the sections on 911 Assist,
Vehicle Health Report, and Traffic,
Directions and Information.
USING VOICE RECOGNITION
This system helps you control many
features using voice commands. This
allows you to keep your hands on the
wheel and focus on what is in front of you.
Helpful Hints
•
Make sure the interior of your vehicle is
as quiet as possible. Wind noise from
open windows and road vibrations may
prevent the system from correctly
recognizing spoken commands.
• After pressing the voice button, wait
until after the tone sounds and
Listening appears before saying a
command. Any command spoken
before this does not register with the
system.
• Speak naturally, without long pauses
between words.
• At any time, you can interrupt the
system while it is speaking by pressing
the voice button.
Initiating a Voice Session Initiate a voice session by
pressing the voice button on the
steering wheel controls. See
Voice Control (page 69).
When prompted you can say any of the following: If you want the system to carry out the following
Voice command
Stream audio from your phone.
Bluetooth Audio
Cancel the requested action.
Cancel
Access mobile applications.
mobile (apps | applica-
tions)
Make calls.
Phone
Access the device connected to your USB port.
USB [1]
Run a vehicle health report.
Vehicle Health (Report)
325
Expedition (TB7) Canada/United States of America, enUSA, First Printing SYNC™
(If Equipped)E142599
Page 329 of 421

If you want the system to carry out the following
Voice command
Adjust the level of voice interaction and feedback.
Voice Settings | Voice
Preferences
Hear a list of voice commands available in the current mode.
Help
You can say any of the voice commands that appear within open and close brackets that
are separated by |. For example, where (cancel | stop | exit) appears you say; cancel or
stop or exit.
You must say any of the voice commands that appear outside of open and close brackets.
For example, where mobile (apps | applications) appears, you must say mobile followed
by either apps or applications.
You do not need to say words that appear within square brackets. For example, for where
(USB [stick] | iPOD | MP3 [player]) appears, you can say USB or USB stick.
Note: SYNC Services and Vehicle health report are only available in the United States of
America.
System Interaction and Feedback
The system provides feedback through
audible tones, prompts, questions and
spoken confirmations depending on the
situation and the chosen level of
interaction (voice settings). You can
customize the voice recognition system to
provide more or less instruction and
feedback. The default setting is to a higher level of
interaction in order to help you learn to use
the system. You can change these settings
at any time.
Adjusting the Interaction Level Initiate a voice session by
pressing the voice button on the
steering wheel controls. See
Voice Control (page 69).
When prompted say the following: If you want the system to carry out the following
Voice command
Voice Settings | Voice Preferences
Followed by either of the following: Provide more detailed interaction and guidance.
Interaction Mode
Standard
Provide less audible interaction and more tone prompts.
Interaction Mode
Advanced
The system defaults to the standard interaction mode.
326
Expedition (TB7) Canada/United States of America, enUSA, First Printing SYNC™
(If Equipped)E142599
Page 345 of 421

In the Event of a Crash
Not all crashes will deploy an airbag or
activate the fuel pump shut-off (the
triggers for 911 Assist). If a connected cell
phone sustains damage or loses its
connection to SYNC during a crash, SYNC
will search for and try to connect to a
previously paired cell phone; SYNC will
then attempt to call the emergency
services.
Before making the call:
•
SYNC provides a short window of time
(about 10 seconds) to cancel the call.
If you fail to cancel the call, SYNC
attempts to dial 911.
• SYNC says the following, or a similar
message: "SYNC will attempt to call
911, to cancel the call, press Cancel on
your screen or press and hold the
phone button on your steering wheel."
If you do not cancel the call, and SYNC
makes a successful call, a pre-recorded
message plays for the 911 operator, and
then the occupant(s) in your vehicle is able
to talk with the operator. Be prepared to
provide your name, phone number and
location immediately, because not all 911
systems are capable of receiving this
information electronically.
911 Assist May Not Work If
• Your cellular phone or 911 Assist
hardware sustains damage in a crash.
• The vehicle's battery or the SYNC
system has no power.
• The phone(s) thrown from your vehicle
are the ones paired and connected to
the system. 911 Assist Privacy Notice
When you turn on 911 Assist, it may
disclose to emergency services that your
vehicle has been in a crash involving the
deployment of an airbag or activation of
the fuel pump shut-off. Certain versions or
updates to 911 Assist may also be capable
of electronically or verbally disclosing to
911 operators your vehicle location or other
details about your vehicle or crash to assist
911 operators to provide the most
appropriate emergency services. If you do
not want to disclose this information, do
not turn the feature on.
Vehicle Health Report (If
Equipped, United States Only)
WARNING
Always follow scheduled
maintenance instructions, regularly
inspect your vehicle, and seek repair
for any damage or problem you suspect.
Vehicle Health Report supplements, but
cannot replace, normal maintenance and
vehicle inspection. Vehicle Health Report
only monitors certain systems
electronically monitored by your vehicle
and will not monitor or report the status
of any other system, (such as brake lining
wear). Failure to perform scheduled
maintenance and regularly inspect your
vehicle may result in vehicle damage and
serious injury. Note:
This feature is only available in the
United States.
Note: Your Vehicle Health Report feature
requires activation before use. Visit
www.SYNCMyRide.com to register. There
is no fee or subscription associated with
Vehicle Health Report, but you must register
to use this feature.
342
Expedition (TB7) Canada/United States of America, enUSA, First Printing SYNC™ (If Equipped)
Page 350 of 421

Action and Description
Voice command
The live operator can assist you by searching for businesses
by name or by category, residential addresses by street
address or by name or specific street intersections.
The system may prompt you to speak with an operator when
it has difficulty matching your voice request. Operator Assist
is a feature of your SYNC Services subscription. For more
information on Operator Assist, visit www.SYNCMyRide.com/
support.
If you miss a turn, SYNC automatically asks if you want the
route updated. Say yes when prompted and the system sends
a new route to your vehicle.
Yes
*
* During an active route.
Disconnecting from SYNC Services
To disconnect from SYNC services, say: Action and Description
Voice command
From the SYNC Services main menu, or press and hold the
phone button on the steering wheel.
Goodbye
SYNC Services quick tips SYNC Services quick tips
You can personalize your Services feature to provide quicker
access to your most used or favorite information. You can
save address points, for example work or home. You can also
save favorite information like sports teams or a news
category. You can learn more about personalization by logging
onto www.SYNCMyRide.com.
Personalizing
Press the voice button at any time while connected to SYNC
Services to interrupt a voice prompt or an audio clip and say
your voice command.
Push to interrupt
Your subscription is associated with your Bluetooth-enabled
cellular phone number, not your VIN (Vehicle Identification
Number). You can pair and connect your phone to any vehicle
equipped with SYNC Services and continue enjoying your
personalized services.
Portable
347
Expedition (TB7) Canada/United States of America, enUSA, First Printing SYNC™ (If Equipped)