2016 FIAT TIPO 4DOORS lights
[x] Cancel search: lightsPage 25 of 204

pressed to the left (OFF): lights 2 and
5 are always switched off;
pressed to the right (): lights 2
and 5 are always switched on.
The lights switch on/off gradually.
Switch 3 switches on/off light 2.
Switch 4 switches on/off light 5.
Ceiling light timing
On certain versions, to facilitate getting
in/out of the vehicle at night or in
poorly-lit areas, two timed modes have
been provided:
Timing while getting into the vehicle;
Timing while getting out of the
vehicle.
WINDSCREEN
WASHER / WIPER
Operation is only possible with the
ignition device at MAR.
SCREEN WIPER/WASHER
Operation
22)
5) 6)
Ring nut 1 fig. 28 can be set to the
following positions:
windscreen wiper off
slow intermittent operation
fast intermittent operation
LOWslow continuous operation
HIGHfast continuous operation.
Move the stalk upwards (unstable
position) to activate the MIST function:operation is limited to the time for which
the stalk is held in this position. When
released, the stalk will return to its
default position and the windscreen
wiper will be stopped. This function is
useful to remove small deposits of dust
from the windscreen, or morning dew.
IMPORTANT This function does not
activate the windscreen washer;
windscreen washer fluid will not
therefore be sprayed onto the
windscreen. To spray windscreen
washer fluid onto the windscreen, the
washing function must be used.
With the ring nut 1 fig. 28 in positionO,
the windscreen wiper is not activated.
In position
, the pause time
between the strokes of the windscreen
wiper is about 10 seconds,
independently of the vehicle speed. In
position
, the pause time
between two strokes is set according to
the vehicle speed: when the speed
increases, the time between two
strokes decreases. In positionLOWor
HIGHthe windscreen wiper moves
continuously, i.e. without a pause
between two strokes.
“Smart washing” function
Pull the stalk towards the steering
wheel (unstable position) to operate the
windscreen washer.
When the stalk is held pulled for longer
2704136J0001EM
2804146J0001EM
23
Page 35 of 204

WARNING
28)It is absolutely forbidden to carry out
any after-market operation involving
steering system or steering column
modifications (e.g. installation of anti-theft
device) that could adversely affect
performance, invalidate the warranty, cause
serious safety problems and also result in
the car not meeting type-approval
requirements.
29)Before performing any maintenance
operations, always turn off the engine and
remove the key from the ignition to lock the
steering column (especially when the car
wheels are not touching the ground). If this
is not possible (for example if the key
needs to be turned to MAR or the engine
must be running), remove the main fuse
that protects the electric power steering.
BOOT
9)
IMPORTANT When travelling, do not
put any object on the rear parcel shelf
because they can injure passengers in
the event of an accident or sudden
braking.
OPENING
30)
Rear flap opening
When the central locking system is
unlocked, the rear boot flap can be
opened from outside the car using the
electric opening handle (where
provided) fig. 43 located under the
handle until the unlocking click is heard
or by pressing the
fig. 42 button on
the dashboard.The roof light inside the luggage
compartment will turn on when the rear
flap is opened; the roof light will
automatically switch off when the rear
flap is closed (see also "Interior lights").
If the rear flap is left open, the roof light
will automatically switch off to preserve
the battery charge.
Emergency opening from inside
Proceed as follows:
For versions with folding rear seat
backrests:
lower the head restraints and fold the
backrests;
4204206J0011EM
4304206J0001EM
33
Page 37 of 204

KNOWING THE INSTRUMENT PANEL
This section of the handbook gives you
all the information you need to
understand, interpret and use the
instrument panel correctly.CONTROL PANEL AND ON-BOARD
INSTRUMENTS..............36
DISPLAY..................38
TRIP COMPUTER.............41
WARNING LIGHTS AND
MESSAGES................42
35
Page 40 of 204

DISPLAY
DESCRIPTION
The vehicle is equipped with a display
that can show useful information to the
driver while driving.
GEAR SHIFT INDICATOR
The Gear Shift Indicator (GSI) system
advises the driver to change gear
through a special indication on the
display.
Through the GSI, the driver is informed
that the gear change will allow a
reduction in fuel consumption.
When the
icon appears on the
display, the GSI suggests switching to a
higher gear, while when the
icon is
displayed, the GSI suggests changing
to a lower gear.
The indication in the display remains
until a gear is shifted or the driving
conditions go back to a situation where
gearshifting is not required to improve
consumption.
MULTIFUNCTION
DISPLAY
The display fig. 48 will show the
following information:
1: Headlight alignment position (only
with dipped beam headlights on)
2: Gear Shift Indicator (GSI)
3: Engaged gear indication
4: Time
5: Outside temperature (for
versions/markets, where provided)
6: Odometer (display of distance
travelled in kilometres/miles)
7: Display of "Cruise Control" or
instantaneous speed (for
versions/markets, where provided)
CONTROL BUTTONS
These are located on the left side of the
steering wheel fig. 49.
They allow the driver to select and
interact with the items in the Main menu
of the display (see paragraph "Main
menu").
/: press and release the
buttons to access the Main menu and
to scroll the menu and the submenus
upwards or downwards.
: press briefly to access the
menu and/or go to next screen or to
confirm the required menu option.
: press and release the button to
return to the previous menu item.
: press and release the button
to display the "Trip computer"
information.
4805036J0001EM
4905036J0002EM
38
KNOWING THE INSTRUMENT PANEL
Page 41 of 204

MAIN MENU
The Menu includes the following items:
“Dimmer” (lighting)
“Speed“
“Hour“ (set time)
“Buzzer“ (acoustic signal)
“Units“
“Corner“ (Cornering lights)
“Bag P“ (Passenger airbag)
“DRL“ (Daytime Running Lights) (for
versions/markets where provided)
Bag P (Passenger airbag)
This function is used to activate/
deactivate the front passenger's airbag.
Proceed as follows:
press theMENU OKbutton and,
after the displaying of the message
(Bag pass: Off, to deactivate) or the
message "Bag pass: On, to activate) by
pressing
/, press thebutton;
a confirmation request message will
appear on the display;
press buttons/to select (Yes)
(confirming activation/deactivation) or
(No) (to abort);
press theMENU OKbutton briefly; a
message confirming the selection is
displayed and you can return to the
menu screen.
WithPassenger's protection not
activethe
LED comes on
constantly in the instrument panel
dashboard.NOTE With theUconnect™system,
some Menu items are shown and
managed on the display of the latter
and not on the instrument panel display
(refer to the dedicated Multimedia
chapter or to the supplement available
online).
RECONFIGURABLE
MULTIFUNCTION
DISPLAY
The display fig. 50 will show the
following information:
1: headlight alignment position,
indication of the gear engaged,
indication of the gear change
suggestion (GSI), outside temperature,
compass (where present), date.
2: vehicle speed, warning
messages/any failure indications
3: total kilometres (or miles) run and
icons of any failure indications.
5005036J0003EM
39
Page 42 of 204

CONTROL BUTTONS
These are located on the left side of the
steering wheel fig. 51.
They allow the driver to select and
interact with the items in the Main menu
of the display (see paragraph "Main
menu").
/: press and release the
buttons to access the Main menu and
to scroll the menu and the submenus
upwards or downwards.
/: press and release the
buttons to access the information
displays or the submenus of an item of
the Main menu.
OK: press this button to
access/select the info displays or the
submenus of an item of the Main menu.
Hold the button pressed for 1 second
to reset the displayed/selected
functions.
MAIN MENU
The Menu includes the following items:
TRIP
GSI
VEHICLE INFO
AUDIO
TELEPHONE
NAVIGATION
ALERTS
SYSTEM VEHICLE
System Vehicle
This menu item allows you to change
the settings for:
Display;
Units;
Clock & Date;
Safety
Safety & Assistance;
Lights;
Doors & Locks.
Display
By selecting item "Display" you can
access the settings/information
regarding: " Display settings”,
"Language", "See phone", "See
navigation", "Automatic Trip B reset",
“Display lighting”.
Unit of measurement
Select item "Units" to choose the unit of
measurement between: "Imperial",
"Metric", "Customised".Clock & Date
Select item "Clock & Date" to make the
following adjustments: "Set time", "Time
format", "Set date".
Safety
Select item "Security" to make the
following adjustments: "Passenger
AIRBAG", "Speed beep", "Seat belt
buzzer", "Hill Hold Control".
"Passenger AIRBAG" adjustment allows
you to activate/deactivate the
passenger airbag:Passenger's
protection not active: the
LED
comes on constantly in the instrument
panel dashboard.
Safety & Assistance
Select item "Safety & Assistance" to
make the following adjustments: Rain
sensor, Park Assist, Park Assist vol.
Lights
Select item "Lights" to make the
following adjustments: "Courtesy
lights", "Daytime running lights",
"Cornering lights", "Headlamp sensor",
"Follow me".
Doors & Locks
Select item "Doors & Locks" to make
the following adjustments: "Autoclose",
"Flash Lights w/Lock", "Auto unlock on
exit".
5105036J0004EM
40
KNOWING THE INSTRUMENT PANEL
Page 44 of 204

WARNING LIGHTS AND MESSAGES
IMPORTANT The warning light switches on in the instrument panel together with a dedicated message and/or acoustic signal
when applicable. These indications are indicative and precautionary and as such must not be considered as exhaustive and/or
alternative to the information contained in the Owner Handbook, which you are advised to read carefully in all cases. Always
refer to the information in this section in the event of a failure indication.
IMPORTANT Failure indications displayed are divided into two categories: very serious and less serious failures. Serious faults
are indicated by a repeated and prolonged warning "cycle". Less serious faults are indicated by a warning "cycle" with a shorter
duration. The display cycle of both categories can be interrupted. The instrument panel warning light will stay on until the cause
of the failure is eliminated.
NOTE The warning lights and icons described below are indicative and can change based on the version or market.
Warning light What it means
INSUFFICIENT BRAKE FLUID / PARKING BRAKE ON
Low brake fluid level
The warning light turns on when the level of the brake fluid in the reservoir falls below the minimum level,
possibly due to a leak in the circuit. Restore the brake fluid level, then check that the warning light has
switched off. If the warning light stays on, contact a Fiat Dealership.
POWER STEERING FAILURE
This warning light (or symbol in the display) switches on when the ignition device is brought to MAR, but it
should switch off after a few seconds. If the warning light (or symbol on the display) remains on, you
could not have steering assistance and the effort required to operate the steering wheel could be
increased; steering is, however, possible. Contact a Fiat Dealership as soon as possible.
LOW ENGINE OIL PRESSURE
The warning light or symbol switches on in the case of insufficient engine oil pressure.10)
IMPORTANT Do not use the vehicle until the failure has been solved. The switching on of the symbol
does not show the quantity of oil in the engine: the oil level must be checked manually.
42
KNOWING THE INSTRUMENT PANEL
Page 45 of 204

Warning light What it means
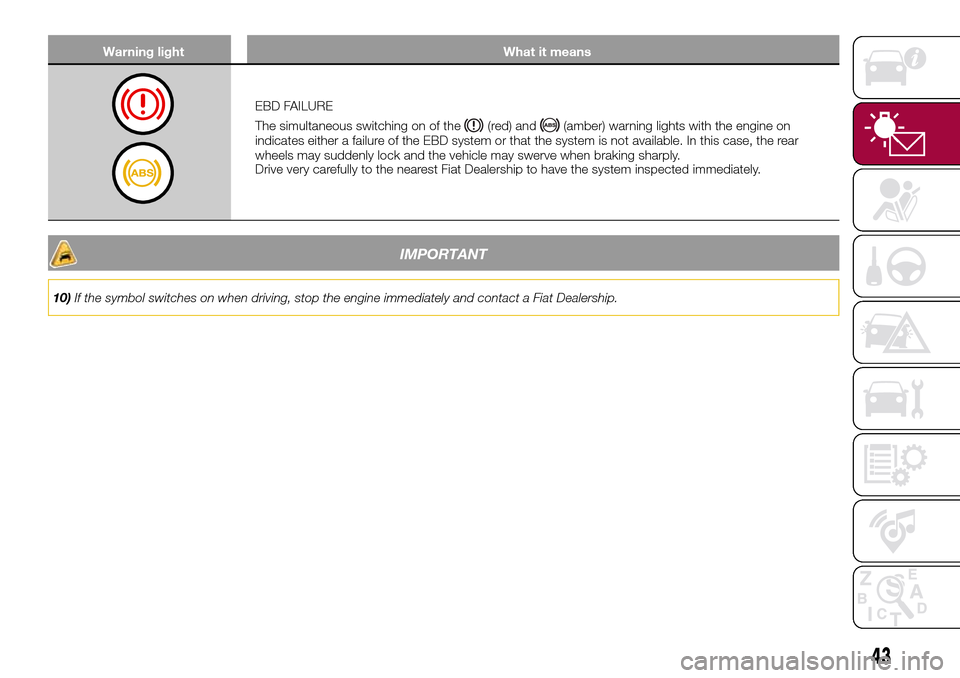
EBD FAILURE
The simultaneous switching on of the
(red) and(amber) warning lights with the engine on
indicates either a failure of the EBD system or that the system is not available. In this case, the rear
wheels may suddenly lock and the vehicle may swerve when braking sharply.
Drive very carefully to the nearest Fiat Dealership to have the system inspected immediately.
IMPORTANT
10)If the symbol switches on when driving, stop the engine immediately and contact a Fiat Dealership.
43