2016 FIAT DOBLO PANORAMA seat adjustment
[x] Cancel search: seat adjustmentPage 16 of 323

.
BONNET OPENING LEVER
❒Opening/closing .................................. 57
STEERING WHEEL ADJUSTMENT
UNLOCKING LEVER
❒Operation ........................................... 32
DOORS
❒Lock/Unlock ....................................... 19
SEATS
❒Adjustments ....................................... 23❒Driver’s seat adjustments .................... 23
❒Passenger seat adjustments ............... 24
❒Rear seat access ................................ 25
❒Seat that folds to table ........................ 25
❒Third row seats ................................... 26
4F0V0541
12
GRAPHICAL INDEX
Page 27 of 323

WARNING
8) Before opening a door, ensure
that you can do it in conditions
of safety.
9) You must not open the left-hand
sliding side door with the fuel cap
open while refuelling. Check that
the fuel cap is closed while
opening/closing the sliding side
door to avoid damage.
10) If you are parked on a slope, do
not leave the sliding door locked
in the open position. An
involuntary impact could unhook
the door, causing it to move.
11) Before leaving the vehicle
parked with the sliding doors
open, always check that they are
locked into place.
12) Always use this device when
carrying children.
13) The spring-loaded system was
designed for optimum usage.
Accidental knocks or a strong
gust of wind may release the
springs, forcing the doors to
close.14) When closing, shut the right
hand door fully before you close
the left hand door. Never shut the
two doors at the same time.
IMPORTANT
2) Make sure that the left sliding
side door is all closed before
refuelling to prevent damage to
the door and to the sliding locking
system with fuel filler cap open,
activated during refuelling.
SEATS
DRIVER’S SEAT
(for Cargo versions, where provided)
15)
Longitudinal adjustment
Raise the lever A fig. 24 and push
the seat forwards or backwards: in
driving position your arms should be
slightly bent and your hands should rest
on the rim of the steering wheel.
16)
Reclining backrest
adjustment
Lift lever B fig. 24 and, slightly
detaching the back from the backrest,
accompany the movement of the
backrest until it is in the desired
position.
24F0V0210
23
Page 28 of 323

DRIVER’S SEAT
(for Doblò/Doblò Combi/Cargo
versions, where provided)
15)
Lengthwise adjustment
Lift the lever A fig. 25 and push the seat
forwards or backwards: in the driving
position your arms should rest on
the rim of the steering wheel.
16)
Backrest angle
adjustment
Turn knob B fig. 25
Driver seat height
adjustment
(for versions/markets, where provided)
Operate lever C fig. 25 to lift or lower
the rear part of the cushion to achieve
the most comfortable driving position.
IMPORTANT Adjustment must be
carried out only when seated in the
relevant seat.
Driver seat lumbar
adjustment
(for versions/markets, where provided)
Turn knob D fig. 25 to adjust the
backrest support.
Heated seats
(for versions/markets, where provided)
With the key turned to MAR, press
button A fig. 26 to switch the function
on/off.
When the function is enabled, the LED
on the button turns on.FOLDAWAY PASSENGER
SEAT
(for versions/markets, where provided)
The passenger seat can be folded
away on some Cargo versions.
17)
Completely retract the seat for a total
folding down avoiding interference with
the dashboard.
Seat folding
To fold the seat, proceed as follows:
❒open the passenger side door;
❒pull levers A and fold the backrest
forwards in the direction indicated
by the arrow;
❒then push the backrest B fig.
28down: the seat is now completely
folded over on itself into the "table"
position;
25F0V0013
26F0V0208
24
KNOW YOUR VEHICLE
Page 32 of 323

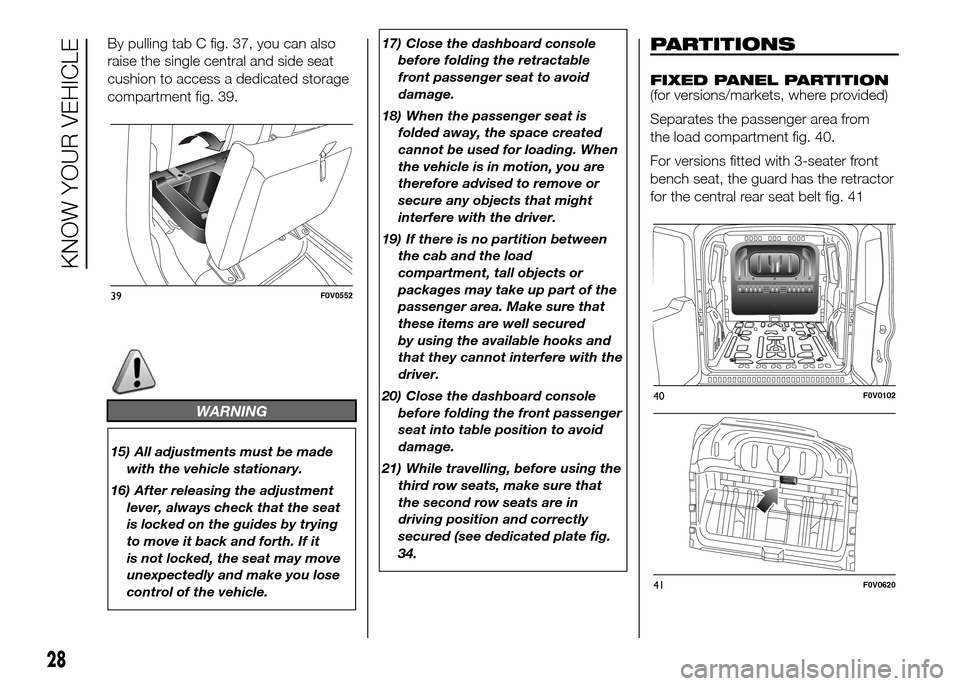
By pulling tab C fig. 37, you can also
raise the single central and side seat
cushion to access a dedicated storage
compartment fig. 39.
WARNING
15) All adjustments must be made
with the vehicle stationary.
16) After releasing the adjustment
lever, always check that the seat
is locked on the guides by trying
to move it back and forth. If it
is not locked, the seat may move
unexpectedly and make you lose
control of the vehicle.17) Close the dashboard console
before folding the retractable
front passenger seat to avoid
damage.
18) When the passenger seat is
folded away, the space created
cannot be used for loading. When
the vehicle is in motion, you are
therefore advised to remove or
secure any objects that might
interfere with the driver.
19) If there is no partition between
the cab and the load
compartment, tall objects or
packages may take up part of the
passenger area. Make sure that
these items are well secured
by using the available hooks and
that they cannot interfere with the
driver.
20) Close the dashboard console
before folding the front passenger
seat into table position to avoid
damage.
21) While travelling, before using the
third row seats, make sure that
the second row seats are in
driving position and correctly
secured (see dedicated plate fig.
34.
PARTITIONS
FIXED PANEL PARTITION
(for versions/markets, where provided)
Separates the passenger area from
the load compartment fig. 40.
For versions fitted with 3-seater front
bench seat, the guard has the retractor
for the central rear seat belt fig. 41
39F0V0552
40F0V0102
41F0V0620
28
KNOW YOUR VEHICLE
Page 35 of 323

Adjustment
❒upward adjustment: raise the head
restraint until it clicks into place.
❒downwards adjustment: press button
A fig. 49 - fig. 50 and lower the head
restraint.
22) 23)
REAR
(for versions/markets, where provided)
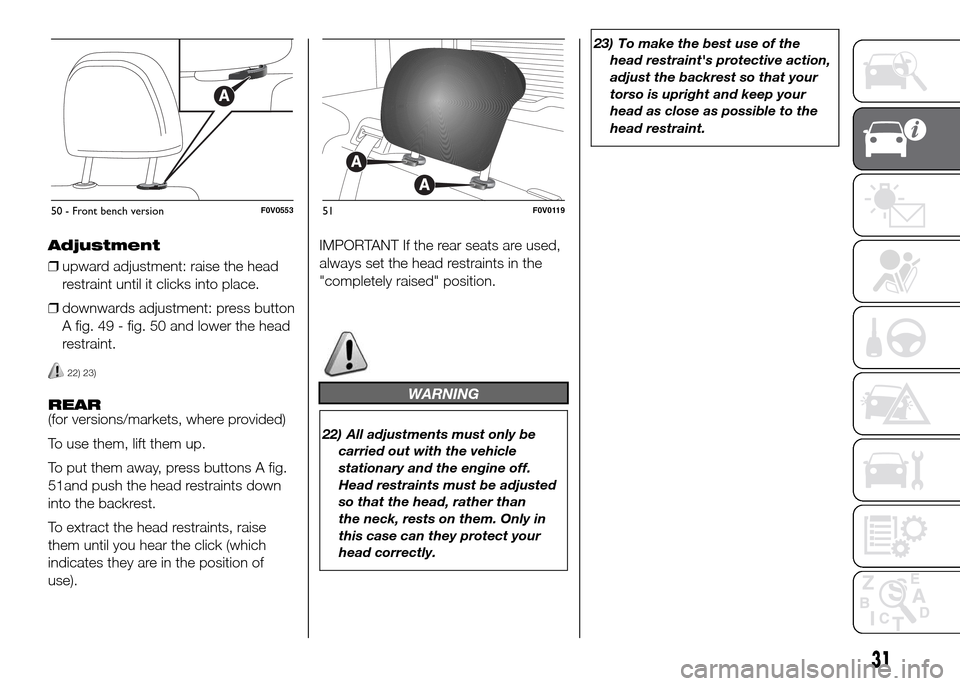
To use them, lift them up.
To put them away, press buttons A fig.
51and push the head restraints down
into the backrest.
To extract the head restraints, raise
them until you hear the click (which
indicates they are in the position of
use).IMPORTANT If the rear seats are used,
always set the head restraints in the
"completely raised" position.WARNING
22) All adjustments must only be
carried out with the vehicle
stationary and the engine off.
Head restraints must be adjusted
so that the head, rather than
the neck, rests on them. Only in
this case can they protect your
head correctly.23) To make the best use of the
head restraint's protective action,
adjust the backrest so that your
torso is upright and keep your
head as close as possible to the
head restraint.
50 - Front bench versionF0V055351F0V0119
31
Page 70 of 323

ROOF RACK/SKI
RACK
44) 45)
8) 9)
FASTENERS
The fasteners are located at points A, B
and C fig. 112.
ROOF RAILS
(for versions/markets, where provided)
On some versions, the vehicle has
two longitudinal bars which, with the
addition of special accessories, can be
used to carry various objects (e.g.
skis, surfboards, etc.).
WARNING
44) Strictly adhere to the laws in
force concerning maximum
clearance.
45) Check that the attachment fixing
screws are tight after a few
kilometres.
IMPORTANT
8) Evenly distribute the load and
take into account, when driving,
the increased responsiveness
of the vehicle to side wind.
9) Never exceed the maximum
permitted loads (see chapter
“Technical specifications”).
HEADLIGHTS
LIGHT BEAM ALIGNMENT
The correct alignment of the headlights
is essential for the comfort and safety
of the driver and other road users.
To ensure the best visibility when
travelling with the headlights on, the
headlight alignment must be correct.
Contact a Fiat Dealership to have
the headlights checked and adjusted.
HEADLIGHT ALIGNMENT
CORRECTOR
This device works with the ignition key
in the MAR position and the dipped
beam headlights on.
The vehicle tilts backwards when it is
laden, raising the beam. The beams
must therefore be realigned in this case.
Headlight alignment
adjustment
Press the
andfig. 113 buttons
on the control panel to adjust.
The display located on the instrument
panel provides a visual indication of the
adjustment position.
Position 0 - one or two people in the
front seats.
Position 1 - five people.
112F0V0123
66
KNOW YOUR VEHICLE
Page 116 of 323

63)
ADJUSTING THE SEAT
BELT HEIGHT
64) 65)
The seat belt height can be adjusted to
various positions using the regulator
on the central pillar.
Always adjust the height of the seat
belts to fit the person wearing it: this
precaution could greatly reduce the risk
of injury in the event of collision.
Correct adjustment is obtained when
the belt passes approximately half way
between the shoulder and the neck.
WARNING
61) Never press button C fig. 123
when travelling.
62) Remember that, in the event of a
violent collision, back-seat
passengers not wearing seat belts
represent a serious danger to
the front-seat passengers as well
as to themselves.63) Make sure that the backrest is
correctly secured on both sides
(red bands B not visible) to
prevent it from moving forward in
the event of sharp braking,
causing injuries to passengers.
64) The height of the seat belts must
be adjusted with the vehicle
stationary.
65) After the height adjustment,
always check that the regulator is
locked in one of the preset
positions. To do this, push
downwards to enable the locking
device to click if the grip has
not been released in one of the
possible positions.
SBR SYSTEM
This system consists of a device which,
through the
warning light coming
on the instrument panel and,
depending on vehicle conditions, an
acoustic signal, warns the driver and
front passenger if their seat belts have
not been fastened (for versions where
provided).
If the driver side and/or the passenger
side seat belts are not fastened (with
passenger seated), when 20 km/h
is exceeded or when travelling at
a speed between 10 and 20 km/h for
longer than 5 seconds, an acoustic
signal sequence will be started
(continuous acoustic signal for the first
6 seconds followed by about 90
seconds of intermittent beeping and the
warning light will flash).
At the end of the cycle the
warning
light will stay on fixed until the engine is
switched off or the seat belts are
fastened.
For permanent deactivation, contact a
Fiat Dealership.
The SBR system can also be
reactivated through the setup menu.
112
SAFETY
Page 170 of 323

CHANGING A WHEEL
The vehicle is originally equipped with
the Fix&Go automatic quick tyre repair
kit (see instructions in the next section).
As an alternative, the vehicle may
have a normal-sized spare wheel.
Wheel changing and correct use of the
jack and spare wheel call for some
precautions, as listed below.
108) 109) 110) 111)
Note for one-way tyres
One-way tyres have a few arrows
on the side indicating the rotation
direction. If a wheel is changed (when
punctured, for example) the direction of
the arrows on the spare wheel tyre
may not coincide with the rotation
direction of the wheel to be replaced.
In these conditions, too, the tyre still
maintains its safety features.
Anyway, it is recommended to have the
wheel repaired and refitted as soon as
possible, as the best performance is
achieved when the rotation direction of
all tyres coincides with the one
indicated by the arrows.
Please note that:
❒the jack weight is 4 kg;
❒the jack requires no adjustment;❒the jack cannot be repaired and in
the event of a fault it must be
replaced by another original one;
❒no tool other than its cranking device
may be fitted on the jack.
To change a wheel, proceed as follows:
❒stop the vehicle in a position that is
not dangerous for oncoming traffic
where you can change the wheel
safely. The ground should be flat
if possible, and sufficiently firm;
❒stop the engine and pull the
handbrake;
❒engage first gear or reverse;
❒wear the reflective safety jacket
(compulsory by law in certain
countries) before getting out of the
vehicle;
❒indicate that the vehicle has broken
down using the devices required by
the law in the current country (e.g.
warning triangle, hazard lights, etc.);
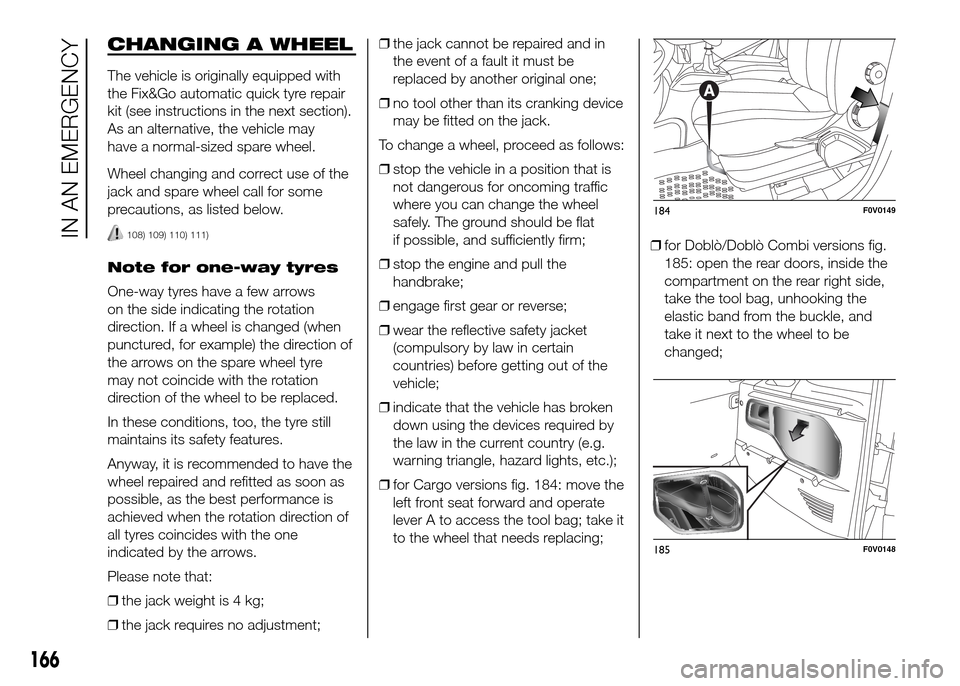
❒for Cargo versions fig. 184: move the
left front seat forward and operate
lever A to access the tool bag; take it
to the wheel that needs replacing;❒for Doblò/Doblò Combi versions fig.
185: open the rear doors, inside the
compartment on the rear right side,
take the tool bag, unhooking the
elastic band from the buckle, and
take it next to the wheel to be
changed;
184F0V0149
185F0V0148
166
IN AN EMERGENCY