2016 CITROEN RELAY light
[x] Cancel search: lightPage 283 of 308

5
3
EASE OF US
E and
COMFORT
Steering mounted controls
Activation
Operation
Once the function is activated, the system
operates as follows:
If the ambient light level is sufficient and/or if
the traffic conditions do not allow illumination
of the main beam headlamps:
Refer to the "Technology on board -
Vehicle configuration" section.
Flash the headlamps (going beyond the
point of resistance) to activate the function.
If the situation requires a change of
headlamp beam, the driver can take over at
any time.
Flashing the headlamps again pauses
the function and the system changes to
"automatic illumination of headlamps"
mode.
The function is deactivated automatically
below 9 mph (15 km/h).
If main beam is still needed, flash the
headlamps again; main beam will then
remain on until the vehicle reaches a speed
of 25 mph (40 km/h).
Above 25 mph (40 km/h), the function is
reactivated automatically (provided that the
headlamps have not been flashed again in
the meantime, to change to dipped beam).
Deactivation
Turn the lighting control stalk ring to the
" Dipped beam " position.
The system may suffer interference or
not work correctly:
- Under conditions of poor visibility
(falling snow, heavy rain or dense
fog, ...),
- If the windscreen is dirty, misted or
obscured (by a sticker, ...) in front
of the camera,
- If the vehicle is facing highly
reflective signs.
The system is not able to detect:
- Road users that do not have their
own lighting, such as pedestrians,
- Vehicles whose lighting is
obscured, such as when running
behind a safety barrier on a
motorway, for example,
- Vehicles at the top or bottom of a
steep slope, on winding roads, on
crossroads. - Dipped beam is maintained,
this indicator lamp comes on
in the instrument panel.
If the ambient light level is very low and the
traffic conditions permit:
- Main beam comes on
automatically: these
indicator lamps come
on in the instrument
panel.
Turn the lighting control stalk
ring to this position.
Activate the function with the MODE
button; in the "Automatic headlamp
dipping" menu, select "ON".
Page 288 of 308

10
Vehicle configuration
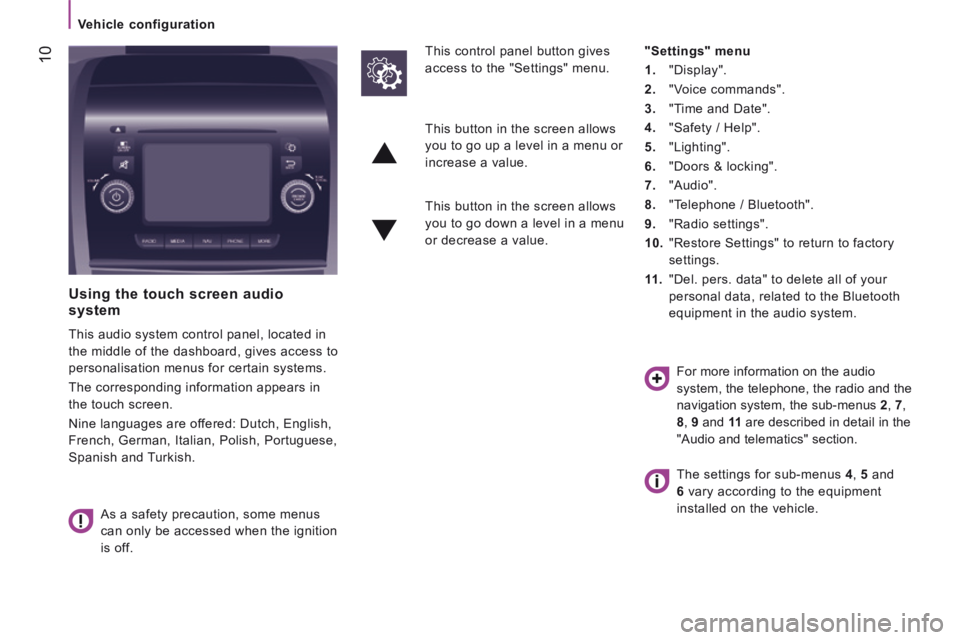
Using the touch screen audio system
This audio system control panel, located in
the middle of the dashboard, gives access to
personalisation menus for certain systems.
The corresponding information appears in
the touch screen.
Nine languages are offered: Dutch, English,
French, German, Italian, Polish, Portuguese,
Spanish and Turkish.
As a safety precaution, some menus
can only be accessed when the ignition
is off.
This control panel button gives
access to the "Settings" menu.
"Settings" menu
1. "Display".
2. "Voice commands".
3. "Time and Date".
4. "Safety / Help".
5. "Lighting".
6. "Doors & locking".
7. "Audio".
8. "Telephone / Bluetooth".
9. "Radio settings".
10. "Restore Settings" to return to factory
settings.
11 . "Del. pers. data" to delete all of your
personal data, related to the Bluetooth
equipment in the audio system.
This button in the screen allows
you to go up a level in a menu or
increase a value.
This button in the screen allows
you to go down a level in a menu
or decrease a value.
For more information on the audio
system, the telephone, the radio and the
navigation system, the sub-menus 2 , 7 ,
8 , 9 and 11 are described in detail in the
"Audio and telematics" section.
The settings for sub-menus 4 , 5 and
6 vary according to the equipment
installed on the vehicle.
Page 289 of 308

11
4
TECHNOLOGY
on
BOARD
Vehicle configuration
From the "Safety / Help" sub menu, you can:
- select "Parkview Camera", then
"Reversing camera" to activate or
deactivate its use (On, Off),
- select "Parkview Camera", then
"Camera delay" to activate or
deactivate the maintaining of the
display for 10 seconds or up to 11 mph
(18 km/h) (On, Off),
- select "Traffic Sign" to activate or
deactivate its use (On, Off),
- select "Passenger airbag" to activate or
deactivate its use (On, Off).
From the "Lighting" sub-menu, you can:
- select "Daytime running lamps" to
activate or deactivate their use (On, Off),
- select "Auto headlamp dipping" to
activate or deactivate its use (On, Off),
- select "Headlamp sensor" to adjust its
sensitivity (1, 2, 3).
From the "Doors & locking" sub-menu, you
can:
- select "Autoclose" to activate or
deactivate its use (On, Off).
From the "Display" sub-menu, you can:
- select "Languages" and choose one of
the languages listed above,
- select "Units of measurement" to
choose the units for fuel consumption
(l/100 km, mpg), distance (miles, km)
and temperature (°C, °F),
- select "Display Trip B" to switch trip B
On or Off in the trip computer.
From the "Time and Date" sub-menu, you
can:
- select "Adjust time and format" to set the
hour, minutes and seconds and choose
the format (24 h, 12 h with am or pm),
- select "Adjust Date" to set the day,
month and year.
To set the time manually, "Synch Time"
must be Off.
Page 292 of 308

14
Driving safely
Activation / Deactivation
The function is set with the MODE button;
in the "Traffic Sign" menu, select "ON"
or "OFF".
Operating limits
The legislation on speed limits is specific to
each country.
The system does not take account of
reduced speed limits in the following cases:
- poor weather (rain, snow),
- atmospheric pollution,
- trailer, caravan,
- driving with snow chains fitted,
- driving with a non-genuine
suspension kit,
- puncture repair using the temporary
repair kit,
- young drivers,
- ...
The system may suffer interference
or not work at all in the following
situations:
- poor visibility (dazzling sun, inadequate
street lighting, falling snow, heavy rain,
dense fog, vehicle too far from the traffic
sign),
- low temperatures and particularly severe
climatic conditions,
- windscreen area ahead of the camera
dirty, misty, frosty, covered with snow,
damaged or masked by a sticker,
- fault with the camera,
- obsolete or incorrect mapping,
- hidden road signs (other vehicles,
vegetation, snow),
- traffic signs that do not conform to the
standard, are damaged or distorted,
- variation of load, placing the camera at a
large angle (the system may not work for
a moment while the camera recalibrates
itself).
Refer to the "Technology on board -
Vehicle configuration" section.
AN. 15JPR.T030
Page 298 of 308

4
Steering mounted controls
AUTOMATIC HEADLAMP DIPPING
System which automatically changes to main
beam according to the ambient light level
and the driving conditions, using a camera
located at the top of the windscreen
This system is a driving aid.
The driver remains responsible for
the vehicle's lighting, its correct use for the
prevailing conditions of light, visibility and
traffic and observation of driving and vehicle
regulations.
Page 299 of 308

5
3
EASE OF US
E and
COMFORT
Steering mounted controls
Activation
Operation
Once the function is activated, the system
operates as follows:
If the ambient light level is sufficient and/or if
the traffic conditions do not allow illumination
of the main beam headlamps:
Refer to the "Technology on board -
Vehicle configuration" section.
Flash the headlamps (going beyond the
point of resistance) to activate the function.
If the situation requires a change of
headlamp beam, the driver can take over at
any time.
Flashing the headlamps again pauses
the function and the system changes to
"automatic illumination of headlamps"
mode.
The function is deactivated automatically
below 9 mph (15 km/h).
If main beam is still needed, flash the
headlamps again; main beam will then
remain on until the vehicle reaches a speed
of 25 mph (40 km/h).
Above 25 mph (40 km/h), the function is
reactivated automatically (provided that the
headlamps have not been flashed again in
the meantime, to change to dipped beam).
Deactivation
Turn the lighting control stalk ring to the
" Dipped beam " position.
The system may suffer interference or
not work correctly:
- Under conditions of poor visibility
(falling snow, heavy rain or dense
fog, ...),
- If the windscreen is dirty, misted or
obscured (by a sticker, ...) in front
of the camera,
- If the vehicle is facing highly
reflective signs.
The system is not able to detect:
- Road users that do not have their
own lighting, such as pedestrians,
- Vehicles whose lighting is
obscured, such as when running
behind a safety barrier on a
motorway, for example,
- Vehicles at the top or bottom of a
steep slope, on winding roads, on
crossroads. - Dipped beam is maintained,
this indicator lamp comes on
in the instrument panel.
If the ambient light level is very low and the
traffic conditions permit:
- Main beam comes on
automatically: these
indicator lamps come
on in the instrument
panel.
Turn the lighting control stalk
ring to this position.
Activate the function with the MODE
button; in the "Automatic headlamp
dipping" menu, select "ON".
Page 304 of 308

10
Vehicle configuration
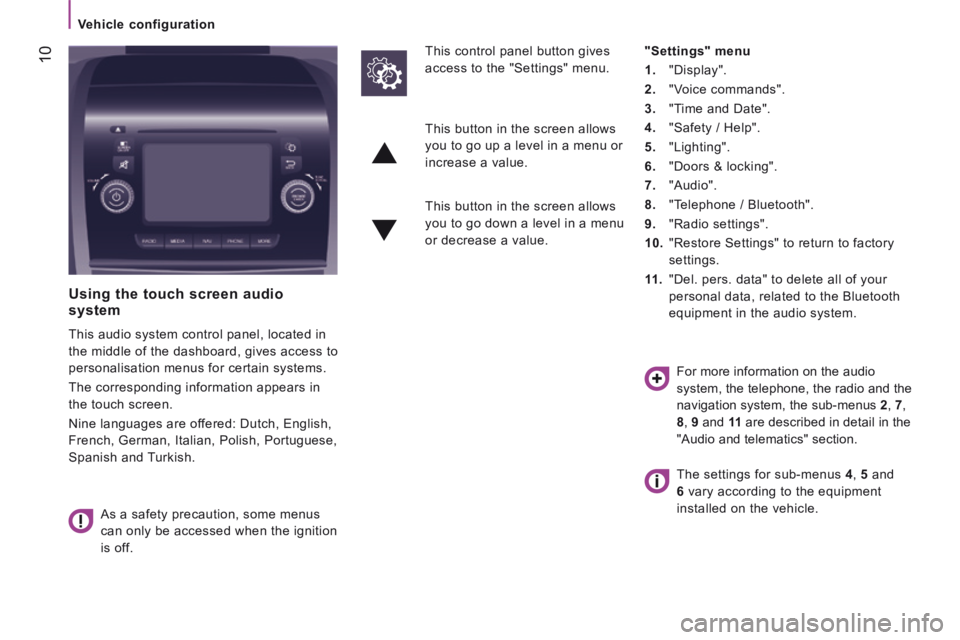
Using the touch screen audio system
This audio system control panel, located in
the middle of the dashboard, gives access to
personalisation menus for certain systems.
The corresponding information appears in
the touch screen.
Nine languages are offered: Dutch, English,
French, German, Italian, Polish, Portuguese,
Spanish and Turkish.
As a safety precaution, some menus
can only be accessed when the ignition
is off.
This control panel button gives
access to the "Settings" menu.
"Settings" menu
1. "Display".
2. "Voice commands".
3. "Time and Date".
4. "Safety / Help".
5. "Lighting".
6. "Doors & locking".
7. "Audio".
8. "Telephone / Bluetooth".
9. "Radio settings".
10. "Restore Settings" to return to factory
settings.
11 . "Del. pers. data" to delete all of your
personal data, related to the Bluetooth
equipment in the audio system.
This button in the screen allows
you to go up a level in a menu or
increase a value.
This button in the screen allows
you to go down a level in a menu
or decrease a value.
For more information on the audio
system, the telephone, the radio and the
navigation system, the sub-menus 2 , 7 ,
8 , 9 and 11 are described in detail in the
"Audio and telematics" section.
The settings for sub-menus 4 , 5 and
6 vary according to the equipment
installed on the vehicle.
Page 305 of 308

11
4
TECHNOLOGY
on
BOARD
Vehicle configuration
From the "Safety / Help" sub menu, you can:
- select "Parkview Camera", then
"Reversing camera" to activate or
deactivate its use (On, Off),
- select "Parkview Camera", then
"Camera delay" to activate or
deactivate the maintaining of the
display for 10 seconds or up to 11 mph
(18 km/h) (On, Off),
- select "Traffic Sign" to activate or
deactivate its use (On, Off),
- select "Passenger airbag" to activate or
deactivate its use (On, Off).
From the "Lighting" sub-menu, you can:
- select "Daytime running lamps" to
activate or deactivate their use (On, Off),
- select "Auto headlamp dipping" to
activate or deactivate its use (On, Off),
- select "Headlamp sensor" to adjust its
sensitivity (1, 2, 3).
From the "Doors & locking" sub-menu, you
can:
- select "Autoclose" to activate or
deactivate its use (On, Off).
From the "Display" sub-menu, you can:
- select "Languages" and choose one of
the languages listed above,
- select "Units of measurement" to
choose the units for fuel consumption
(l/100 km, mpg), distance (miles, km)
and temperature (°C, °F),
- select "Display Trip B" to switch trip B
On or Off in the trip computer.
From the "Time and Date" sub-menu, you
can:
- select "Adjust time and format" to set the
hour, minutes and seconds and choose
the format (24 h, 12 h with am or pm),
- select "Adjust Date" to set the day,
month and year.
To set the time manually, "Synch Time"
must be Off.