2016 Citroen C5 towing
[x] Cancel search: towingPage 5 of 366

.
C5_en_Chap00a_sommaire_ed01-2015
Direction indicators 148
Hazard warning lamps 148
Hor n 149
Emergency or assistance call 149
Braking assistance systems 150
Trajectory control systems 151
Seat belts 154
Airbags 157Fuel tank
177
Misfuel prevention (Diesel) 178
Running out of fuel (Diesel) 180
Temporary puncture repair kit 181
Changing a wheel 185
Snow chains 192
Changing a bulb 193
Changing a fuse 204
12 V battery 210
Energy economy mode 213
Towing the vehicle 214
Towing a trailer 216
Roof bars 218
Very cold climate protection 219
Cold climate screen 220
a ccessories 221
Bonnet 224
Petrol engines 225
Diesel engines 226
Checking levels 227
Checks 231
ad blue
® additive and SCR system
(BlueHDi Diesel) 234Petrol engines
242
Petrol weights 243
Diesel engines 244
Diesel weights 245
Dimensions 246
Identification markings 250
Emergency or assistance 251
7-inch touch screen tablet 253
Audio system 315
Audio and telematics
Lighting controls 136
Automatic illumination of headlamps 140
Headlamp adjustment 141
Directional lighting 142
Wiper controls 144
Automatic rain sensitive windscreen wipers 14 6
Alphabetical index
Child safety Practical information
Checks
Visibility
Safety Technical data
Child seats
162
Deactivating the passenger's front airbag 165
ISOFIX child seats 172
Child lock 176
Contents
Page 6 of 366

4
C5_en_Chap00b_vue-ensemble_ed01-2015
Exterior (Saloon)
Sunroof 61
Roof bars 218
a ccessories 221-222
Changing bulbs 197-198, 201
- rear lamps
- 3
rd brake lamp
- number plate lamps
Boot
58
Temporary puncture
repair kit 181-184
Changing a wheel 185 -191
- tools
- removing
AdBlue additive, topping-up 239 -241
Tyre under-inflation detection 118 -119
Braking assistance 150
Trajectory control 151-153
Tyre pressures 118, 250
Snow chains 192Fuel tank
177, 179
Misfuel prevention 178
Remote control key
45 - 49
- opening / closing
- battery
Ignition switch / Steering lock / Starting 97- 9 9
Alarm 50-52
Door mirrors 69
Exterior lighting
c o nt r o ls 13 6 -14 0
Headlamp adjustment 141
Changing bulbs 193-196
- front lamps
- Xenon headlamps
- foglamps
- direction indicator repeaters
Lane departure warning system 128
Stop & Start 115 -118
Very cold climate screen 220
Doors 55 -57
- opening / closing
- central locking
- emergency control
Child lock 176
Electric windows 53 -54 Front and/or rear
parking sensors 131-132
Towbar 216 -217
Towing 214 -215
over view
Page 7 of 366

5
C5_en_Chap00b_vue-ensemble_ed01-2015
Exterior (Tourer)
Panoramic sunroof 62- 63
Roof bars 218
a ccessories 221-222
Changing bulbs 199-201
- rear lamps
- 3rd brake lamp
- number plate lamps
Boot
59-60
Reversing camera 133
Temporary puncture
repair kit 181-184
Changing a wheel 185 -191
- tools
- removing
AdBlue additive, topping-up 239 -241
Tyre under-inflation detection 118 -119
Braking assistance 150
Trajectory control 151-153
Tyre pressures 118, 250
Snow chains 192
Remote control key
45 - 49
- opening / closing
- battery
Ignition switch / Steering lock / Starting 97- 9 9
Alarm 50-52
Fuel tank 177, 179
Misfuel prevention 178
Door mirrors 69
Exterior lighting
c o nt r o ls 13 6 -14 0
Headlamp adjustment 141
Changing bulbs 193-196
- front lamps
- Xenon headlamps
- foglamps
- direction indicator repeaters
Lane departure warning system 128
Stop & Start 115 -118
Very cold climate screen 220
Doors 55 -57
- opening / closing
- central locking
- emergency control
Child lock 176
Electric windows 53 -54 Front and/or rear
parking sensors 131-132
Towbar 216 -217
Towing 214 -215
.
over view
Page 8 of 366

6
C5_en_Chap00b_vue-ensemble_ed01-2015
Interior
Boot fittings (Saloon) 91
- stowing rings
Boot fittings (Tourer) 92
- stowing rings
- hooks
- storage net...
Load space cover (Tourer) 93
Luggage retaining net (Tourer) 94-95
Temporary puncture
repair kit 181-184
a ccess to the spare
wheel / tools 185 -187
Child seats 162-171
ISOFIX mountings 172-175
Child lock 176Rear seats
71-72
Rear fittings 89 -90
- rear armrest
- ski flap
- 12 V socket...
Front seats 64- 67
Seat belts 154-156Airbags
157-161
Side blinds
90
Front fittingst 86 - 88
- sun visor
- glove box
- mats
- front armrest
- USB port/Jack auxiliary socket...
over view
Page 76 of 366

74
C5_en_Chap03_ergo-et-confort_ed01-2015
We recommend use of the automatic regulation
of the air conditioning.
It permits automatic and optimised control
of all of the following functions: air flow,
temperature in the passenger compartment
and air distribution, by means of various
sensors (ambient temperature, sunshine).
This eliminates any need for you to change
your settings other than the temperature value
displayed.
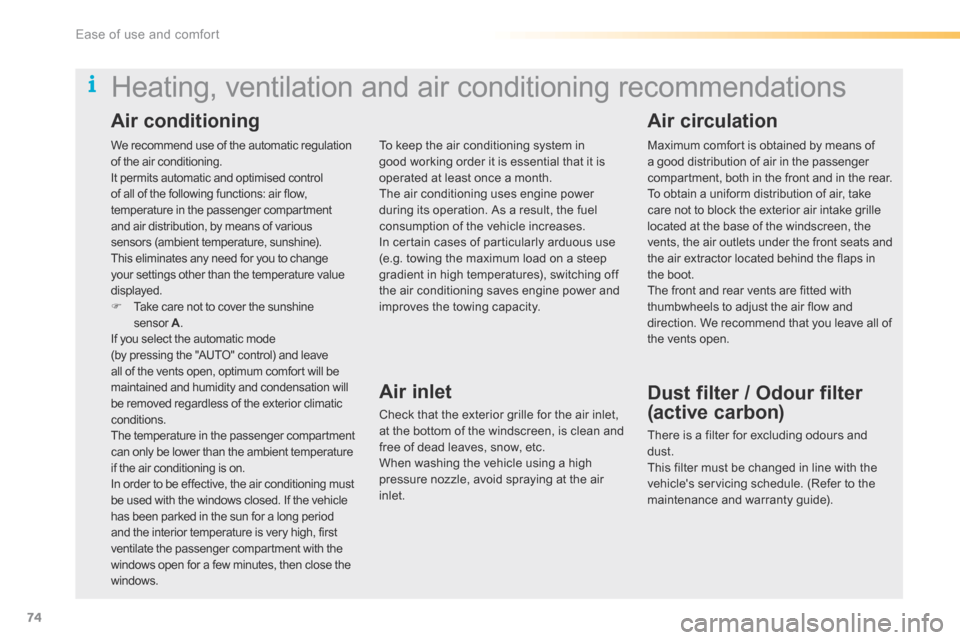
F Take care not to cover the sunshine
sensor A.
If you select the automatic mode
(by pressing the "AUTO" control) and leave
all of the vents open, optimum comfort will be
maintained and humidity and condensation will
be removed regardless of the exterior climatic
conditions.
The temperature in the passenger compartment
can only be lower than the ambient temperature
if the air conditioning is on.
In order to be effective, the air conditioning must
be used with the windows closed. If the vehicle
has been parked in the sun for a long period
and the interior temperature is very high, first
ventilate the passenger compartment with the
windows open for a few minutes, then close the
windows.
Heating, ventilation and air conditioning recommendations
To keep the air conditioning system in
good working order it is essential that it is
operated at least once a month.
The air conditioning uses engine power
during its operation. As a result, the fuel
consumption of the vehicle increases.
In certain cases of particularly arduous use
(e.g. towing the maximum load on a steep
gradient in high temperatures), switching off
the air conditioning saves engine power and
improves the towing capacity.
Air inlet
Check that the exterior grille for the air inlet,
at the bottom of the windscreen, is clean and
free of dead leaves, snow, etc.
When washing the vehicle using a high
pressure nozzle, avoid spraying at the air
inlet. Maximum comfort is obtained by means of
a good distribution of air in the passenger
compartment, both in the front and in the rear.
To obtain a uniform distribution of air, take
care not to block the exterior air intake grille
located at the base of the windscreen, the
vents, the air outlets under the front seats and
the air extractor located behind the flaps in
the boot.
The front and rear vents are fitted with
thumbwheels to adjust the air flow and
direction. We recommend that you leave all of
the vents open.
Dust filter / Odour filter
(active carbon)
There is a filter for excluding odours and
dust.
This filter must be changed in line with the
vehicle's servicing schedule. (Refer to the
maintenance and warranty guide).
Air conditioning
Air circulation
Ease of use and comfort
Page 94 of 366

92
C5_en_Chap03_ergo-et-confort_ed01-2015
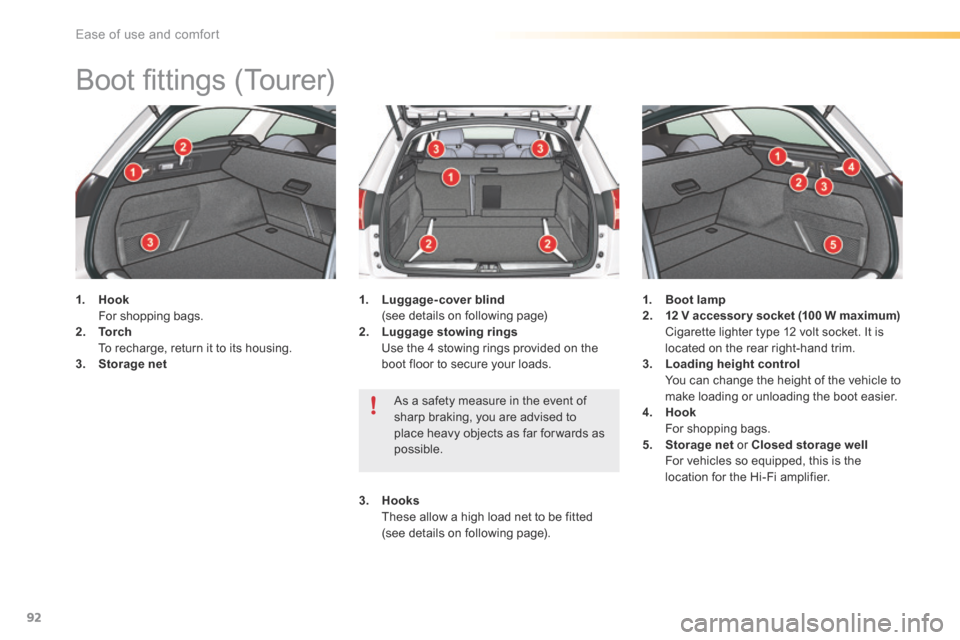
Boot fittings (Tourer)
1. Hook
For shopping bags.
2. To r c h
To recharge, return it to its housing.
3. Storage net 1.
Luggage-cover blind
(see details on following page)
2. Luggage stowing rings
Use the 4 stowing rings provided on the
boot floor to secure your loads. 1.
Boot lamp
2. 12 V accessor y socket (100 W maximum)
Cigarette lighter type 12 volt socket. It is
located on the rear right-hand trim.
3. Loading height control
You can change the height of the vehicle to
make loading or unloading the boot easier.
4. Hook
For shopping bags.
5. Storage net or Closed storage well
For vehicles so equipped, this is the
location for the Hi-Fi amplifier.
As a safety measure in the event of
sharp braking, you are advised to
place heavy objects as far for wards as
possible.
3. Hooks
These allow a high load net to be fitted
(see details on following page).
Ease of use and comfort
Page 104 of 366

102
C5_en_Chap04_conduite_ed01-2015
Release
The electric parking brake releases
automatically and progressively when you
press the accelerator :
F with a manual gearbox (first gear or
reverse gear engaged), press down fully
on the clutch pedal then press on the
accelerator pedal and move off.
F with an automatic gearbox , accelerate
with the selector in position D , M or R.
Full release of the parking brake is
confirmed by: - warning lamp P in the control
lever A going off,
- display of a message " Parking brake
released " in the instrument panel screen.
Activation / Deactivation of the
automatic functions
Depending on the country of sale, automatic
application when switching off the engine and
automatic release when moving off can be
deactivated. The activation / deactivation is
done in the vehicle parameters menu.
deactivation of these functions is
signalled by this warning lamp in the
instrument panel.
- this warning lamp in the
instrument panel going off, In some special circumstances, with
the engine not running, (towing, icy
conditions...) the automatic parking
brake can be released manually, with
the key in the running position.
If the vehicle parameters menu does
not have the option to activate /
deactivate the automatic functions, this
can be done by a CITR
oËn dealer or a
qualified workshop.
With the automatic functions deactivated, the
parking brake must be applied and released
manually.
When stationary, with the engine
running, do not press the accelerator
pedal unnecessarily (particularly when
starting the engine, including in neutral),
as you may release the parking brake.
Do not place any object (packet of
cigarettes, telephone...) between the
gear lever and the electric parking
brake control.
Driving
Page 106 of 366

104
C5_en_Chap04_conduite_ed01-2015
Maximum application
If necessary, you can make a maximum
application of the parking brake. It is obtained
by means of a long pull on control lever A,
until you see the message " Max application
of the parking brake " and an audible signal
is heard.
Maximum application is essential:
- in the case of a vehicle towing a caravan
or a trailer, if the automatic functions are
activated but you are applying the parking
brake manually,
- when the effective gradient you are parked
on is variable (e.g. on a ferry, in a lorry,
during towing).
Particular situations
In certain situations (starting the engine...), the
parking brake can automatically alter its level of
application. This is normal operation.
To advance your vehicle a few centimetres
without starting the engine, but with the ignition
on, press on the brake pedal and release the
parking brake by pushing then releasing
control lever A .
The full release of the parking brake is
confirmed by the warning lamp P in the control
lever and the warning lamp in the instrument
panel going off and the display of a message
" Parking brake released" in the instrument
panel screen.
To ensure correct operation of the parking
brake and therefore your safety, the number of
successive application/release operations is
limited to eight.
If this number is exceeded, you are warned by
the message " Parking brake faulty " and a
warning lamp flashes. In the event of a battery failure, it will
not be possible to operate the electric
parking brake.
As a safety measure if the parking
brake is not applied, immobilise the
vehicle by engaging a gear or by
placing a chock against one of the
wheels.
Contact a CITR
oËn dealer or a
qualified workshop.
Please note...
- in the case of towing, a loaded vehicle or
parking on a gradient, turn the front wheels
towards the pavement and engage a gear
when you park.
- after a maximum application, the release
time will be longer.
Driving