2016 CITROEN C-ELYSÉE heating
[x] Cancel search: heatingPage 4 of 260

.
.
C-elysee_en_Chap00a_sommaire_ed01-2016
Instrument panel 10
Indicator and warning lamps
1
1
Service
indicator
2
3
Distance
recorders
2
5
Setting
the date and time
2
6
Trip
computer
2
7
Monochrome
screen C
(Audio
system / Bluetooth)
2
9
MonitoringOver view
Remote control key 3
3
Alarm
3
7
Doors
39
Boo
t
4
0
Windows
4
2
Access
Front seats 43
Rear seats
4
5
Mirrors
4
6
Steering
wheel adjustment
4
8
Ventilation
4
9
Heating
5
1
Manual
a
ir
c
onditioning
(
without display screen)
5
1
Electronic
air conditioning
(with
display screen)
5
3
Front
demist - defrost
5
6
Rear
screen demist - defrost
5
7
Comfort
Driving recommendations 63
Starting-switching off the engine
6
4
Parking
brake
6
7
Manual
g
earbox
6
8
Electronic
gearbox
6
9
Automatic
gearbox
7
3
Automatic
gearbox (EAT6)
7
7
Gear
ef ficiency indicator
8
1
Stop
& Start
8
2
Speed
limiter
8
5
Cruise
control
87
R
ear parking sensors
8
9
Driving
Lighting control 91
Headlamp beam height adjustment
9
6
Wiper
control stalk
9
7
Courtesy
lamps
9
9
Visibility
Eco-drivingInterior fittings 5
8
Boot fittings
6
1
Fittings
Contents
Page 15 of 260

13
C-elysee_en_Chap01_controle-de-marche_ed01-2016
C-elysee_en_Chap01_controle-de-marche_ed01-2016
Warning / indicator lampStateCause Action / Observations
Diesel engine
pre-heating fixed.
The
key is at position 2 (ignition on) in
t
he ignition switch.Wait
until the warning lamp goes off before starting.
The
period of illumination of the warning lamp is
d
etermined by the ambient conditions (up to about
t
hirty seconds in very low temperatures).
If
the engine does not start, switch the ignition off and
t
hen on, wait until the warning lamp goes off again,
t
hen start the engine.
Parking
brake fixed.
The
parking brake is applied or not
p
roperly
r
eleased.Release
the parking brake to switch off the warning
l
amp, keeping your foot on the brake pedal.
Observe
the safety recommendations.
For
further information on the parking brake, refer to
t
he "Driving" section.
Foot on the
brake pedal fixed.
The
brake pedal must be pressed. With an electronic gearbox, press the brake pedal to
s
tart the engine (lever in position N).
W
ith an automatic gearbox, with the engine running,
p
ress the brake pedal before releasing the parking
b
rake, to unlock the lever and come out of position P.
If
you wish to release the parking brake without
p
ressing the brake pedal, this warning lamp will
r
emain on.
flashing. With
an electronic gearbox, if you
h
old the vehicle on an incline using
t
he accelerator for too long, the
c
lutch overheats.Use
the brake pedal and/or the parking brake.
1
Monitoring
Page 51 of 260

49
C-elysee_en_Chap03_confort_ed01-2016
Ventilation
Air intake flow
The incoming air follows various paths depending on the controls selected by
t
he driver:
-
d
irect arrival in the passenger
c
ompartment (air intake),
-
p
assage through a heating circuit (heating),
-
p
assage through a cooling circuit (air
c
onditioning).
Control panel
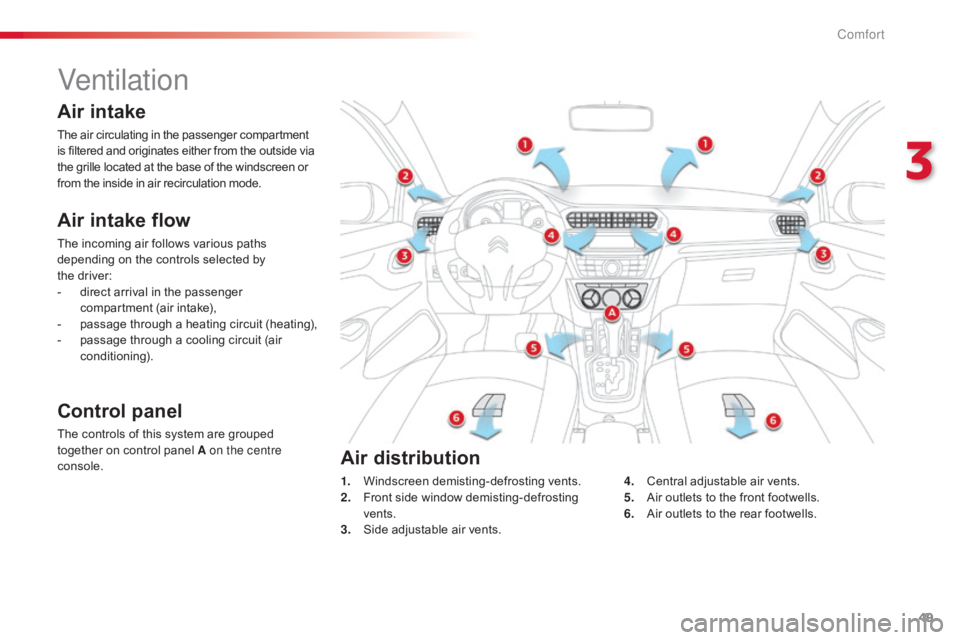
The controls of this system are grouped together on control panel A on the centre
console. 1.
W
indscreen
d
emisting-defrosting
v
ents.
2.
F
ront side window demisting-defrosting
ve
nts.
3.
S
ide adjustable air vents.4.
C
entral adjustable air vents.
5.
A
ir outlets to the front footwells.
6.
A
ir outlets to the rear footwells.
Air distribution
Air intake
The air circulating in the passenger compartment i
s filtered and originates either from the outside via t
he grille located at the base of the windscreen or
f
rom the inside in air recirculation mode.
3
Comfort
Page 53 of 260

51
C-elysee_en_Chap03_confort_ed01-2016
1. Temperature level adjustment
F Turn the control knob from b
lue (cold) to red (hot) to
a
djust the temperature to your
r
equirements. This
system only operates with the engine running.
2. Air flow adjustment
F Turn
the control knob from p
osition 1 to position 4 to obtain
a
comfortable air flow. If you put the air flow control in
position 0
(system off), the temperature
i
s no longer controlled. However,
a
slight flow of air can still be felt,
r
esulting from the movement of
t
he vehicle.
Manual air conditioning
( without display screen)
Heating
/
Ventilation
This system only operates when the engine is running.
3
Comfort
Page 58 of 260

56
C-elysee_en_Chap03_confort_ed01-2016
Front demist - defrost
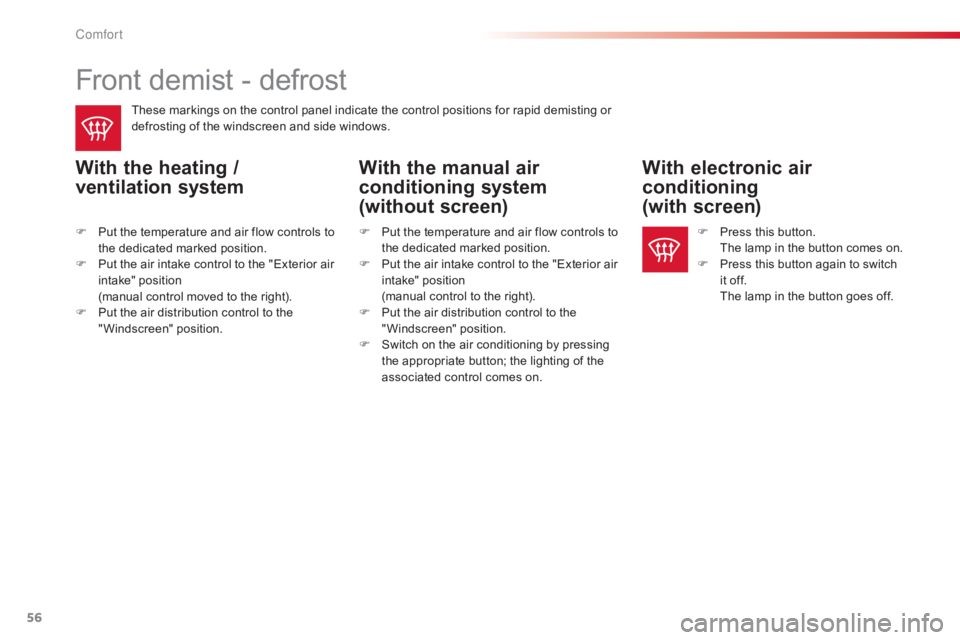
These markings on the control panel indicate the control positions for rapid demisting or defrosting of the windscreen and side windows.
With the heating /
ventilation systemWith the manual air
conditioning system
(without screen)With electronic air
conditioning
(with screen)
F Put the temperature and air flow controls to t
he dedicated marked position.
F
P
ut the air intake control to the "Exterior air
i
ntake" position
(
manual control moved to the right).
F
P
ut the air distribution control to the
"
Windscreen"
p
osition. F
P ress this button. T
he l amp i n t he b utton c omes o n.
F
P
ress this button again to switch
i
t off.
T
he lamp in the button goes off.
F
P ut the temperature and air flow controls to t
he dedicated marked position.
F
P
ut the air intake control to the "Exterior air
i
ntake" position
(
manual control to the right).
F
P
ut the air distribution control to the
"
Windscreen"
p
osition.
F
S
witch on the air conditioning by pressing
t
he appropriate button; the lighting of the
a
ssociated control comes on.
Comfort
Page 59 of 260

57
C-elysee_en_Chap03_confort_ed01-2016
Rear screen demist - defrost
The control button is located on the heating / ventilation or air conditioning system control panel.
Switching on
The rear screen demisting/defrosting can only operate when the engine is running.
F
P
ress this button to demist /defrost the
r
ear screen and (depending on version)
t
he door mirrors. The indicator lamp
a
ssociated with the button comes on.
Switching off
The demisting/defrosting switches off automatically to prevent an excessive
c
onsumption of current.
F
I
t is possible to stop the demisting/
defrosting
operation before it is switched
o
ff automatically by pressing the button
a
gain. The indicator lamp associated with
t
he button goes off.
F
S
witch off the demisting/defrosting of the
r
ear screen and door mirrors, if fitted,
a
s soon as appropriate, as lower current
consumption
results in reduced fuel
c
onsumption.
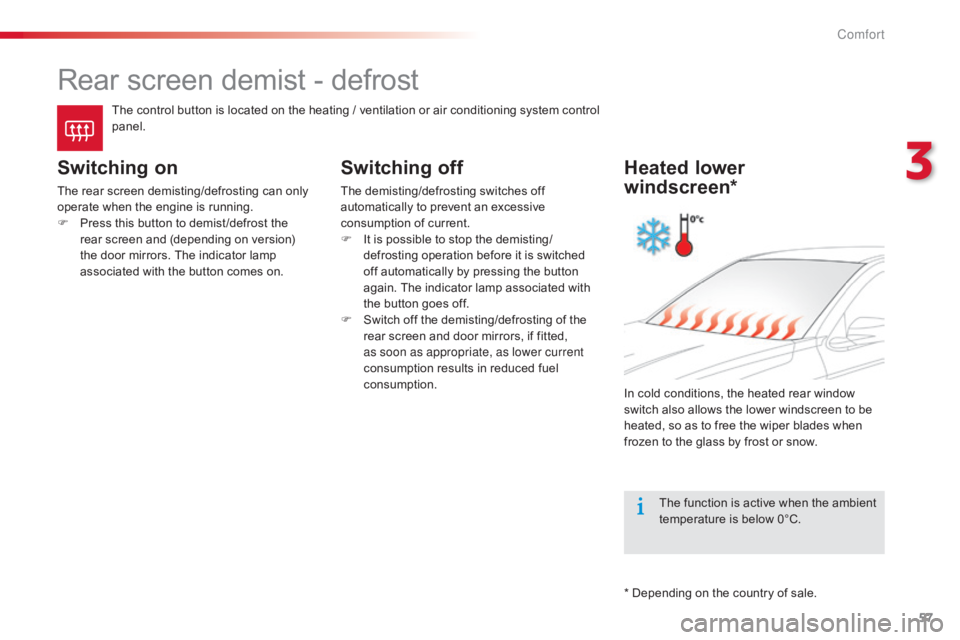
Heated lower
windscreen*
In cold conditions, the heated rear window s
witch also allows the lower windscreen to be
h
eated, so as to free the wiper blades when
f
rozen to the glass by frost or snow.
The
function is active when the ambient
t
emperature is below 0°C.
*
Depending on the country of sale.
3
Comfort
Page 65 of 260

63
C-elysee_en_Chap05_conduite_ed01-2016
Never drive with the parking brake applied - Risk of overheating and
d
amage to the braking system!
Do
not park or run the engine when
s
tationary in areas where inflammable
s
ubstances and materials (dry grass,
d
ead leaves...) might come into contact
w
ith the hot exhaust system - Risk of
f
ire!
Never
leave a vehicle unsupervised
w
ith the engine running. If you have
t
o leave your vehicle with the engine
r
unning, apply the parking brake
a
nd put the gearbox into neutral or
p
osition
N or P,
depending on the type
o
f gearbox.
Driving recommendations
Observe the driving regulations and remain vigilant whatever the traffic conditions.
Pay
close attention to the traffic and keep your
h
ands on the wheel so that you are ready to
r
eact at any time to any eventuality.
On
a long journey, a break every two hours is
s
trongly
re
commended.
In
difficult weather, drive smoothly, anticipate
t
he need to brake and increase the distance
f
rom other vehicles. If
you are obliged to drive through water:
-
c
heck that the depth of water does not
e
xceed 15 cm, taking account of waves
t
hat might be generated by other users,
-
d
eactivate the Stop & Start system,
-
d
rive as slowly as possible without
s
talling. In all cases, do not exceed 6 mph
(
10 km/h),
-
d
o not stop and do not switch off the
e
ngine.
On
leaving the flooded road, as soon as
c
ircumstances allow, make several light brake
a
pplications to dry the brake discs and pads.
If
in doubt on the state of your vehicle, contact
a
CITROËN dealer or a qualified workshop.Important!
Driving on flooded
roads
We strongly advise against driving on flooded r
oads, as this could cause serious damage
t
o the engine or gearbox, as well as to the
e
lectrical systems of your vehicle.
5
Driving
Page 66 of 260

64
C-elysee_en_Chap05_conduite_ed01-2016
Starting-switching off the engine
It has 3 positions:
- p osition 1 (Stop):
insert and removing the
k
ey,
-
p
osition 2 (Ignition on) :
steering column
u
nlocked, ignition on, Diesel preheating,
e
ngine
r
unning,
-
p
osition 3 (Star ting).
Ignition switch
It allows the use of the vehicle's electric e
quipment or portable devices to be charged.
Once
the state of charge of the battery drops
t
o the reserve level, the system switches to
e
nergy economy mode: the power supply is
c
ut off automatically to preserve the remaining
b
attery charge.
Ignition on positionAnti-theft protection
Electronic engine immobiliser
The key contains an electronic chip which has a special code. When the ignition is switched
o
n, this code must be recognised in order for
s
tarting to be possible.
This
electronic engine immobiliser locks the
e
ngine management system a few moments
a
fter the ignition is switched off and prevents
s
tarting of the engine by anyone who does not
h
ave the key.In the event of a fault, you are
informed
by illumination of this
w
arning lamp, an audible signal and a message
i
n the screen.
In
this case, your vehicle will not start; contact
a
CITROËN dealer as soon as possible.
Keep
safely, away from your vehicle,
t
he label attached to the keys given to
y
ou on acquisition of the vehicle. Avoid
attaching heavy objects to the
k
ey, which would weigh down on its
b
lade in the ignition switch and could
c
ause a malfunction.
Driving