2016 CITROEN C-ELYSÉE Brake
[x] Cancel search: BrakePage 108 of 260

106
C-elysee_en_Chap07_securite_ed01-2016
Anti-slip regulation (ASR)
and electronic stability
programme (ESP)
The anti-slip regulation (also known as Traction Control) optimises traction to prevent skidding o
f the wheels, by acting on the brakes of the
d
riving wheels and on the engine.
The
electronic stability programme acts on the
b
rake of one or more wheels and on the engine
t
o keep the vehicle on the trajectory required by
t
he driver, within the limits of the laws of physics.
This
is indicated by flashing of this
w
arning lamp in the instrument panel. The
ASR /ESP systems offer
e
xceptional safety in normal driving, but
t
his should not encourage the driver to
t
ake extra risks or drive at high speed.
The
correct functioning of these
s
ystems depends on observation of
t
he
ma
nufacturer's
r
ecommendations
r
egarding the wheels (tyres and rims),
t
he braking components, the electronic
c
omponents and the assembly
a
nd repair procedures used by the
C
ITROËN dealer network.
After
an impact, have these systems
c
hecked by a CITROËN dealer or a
q
ualified
w
orkshop.
Operating fault
Illumination of the warning lamp, accompanid by a message in the
s
creen indicates a malfunction of
t
hese systems.
Reactivation
These systems are reactivated automatically every time the ignition is switched of, or from
3
0 mph (50 km/h).
F
P
ress this button again to reactivate them
m
anually.
T
he lamp in the button goes off.
The
symbol going off in the instrument panel
i
ndicates the reactivation of the ASR and
ES
P systems.
Deactivation
In exceptional conditions (starting a vehicle which is bogged down, stuck in snow, on soft
g
round, ...), it may be advisable to deactivate
t
he ASR and ESP systems, so that the wheels
c
an move freely and regain grip.
Trajectory control systems
Activation
These systems are activated automatically each time the vehicle is started.
They
come into operation in the event of a grip
o
r
t
rajectory
pro
blem. The
display of this symbol indicates
t
hat the ASR and ESP systems are
d
eactivated.
F
P
ress this button button, located on
t
he dashboard (driver's side), until the
c
orresponding symbol appears in the i
nstrument panel screen. T
he lamp in the button comes on.Contact
a CITROËN dealer or a qualified
w
orkshop to have the ASR /ESP systems
c
hecked.
Coasting with the engine off results in a
l
oss of power assistance for the steering.
S
Page 150 of 260

148
C-elysee_en_Chap09_info-pratiques_ed01-2016
Removing a wheel
Parking the vehicle
Immobilise the vehicle where it does not block traffic: the ground must be level,
s
table and not slippery.
Apply
the parking brake, switch off the
i
gnition and engage first gear* to block
t
he wheels.
Check
that the parking brake warning
l
amp in the instrument panel comes on.
The
occupants must get out of the
v
ehicle and wait where they are safe.
Ensure
that the jack is correctly
p
ositioned at one of the vehicle's
j
acking points.
Incorrect
use of the jack could cause
t
he vehicle to drop.
Never
go underneath a vehicle raised
u
sing a jack; use an axle stand.
List of operations
Do not use a jack other than the one supplied by the manufacturer.
*
P
osition
R
for
an
electronic
gearbox;
P for an
automatic
gearbox.
Wheel with wheel trim
When removing the wheel , first
remove the wheel trim using the
w
heelbrace 1 by pulling at the valve
a
perture.
When refitting the wheel , refit the
wheel
trim, starting by placing its cutout
i
n line with the valve and then pressing
r
ound its edge with the palm of your
han
d. F
R
emove the wheel bolt cover using the
t
ool 3 (alloy wheels).
F
S
lacken the bolts using the wheelbrace 1
o n l y.
Practical information
Page 154 of 260

152
C-elysee_en_Chap09_info-pratiques_ed01-2016
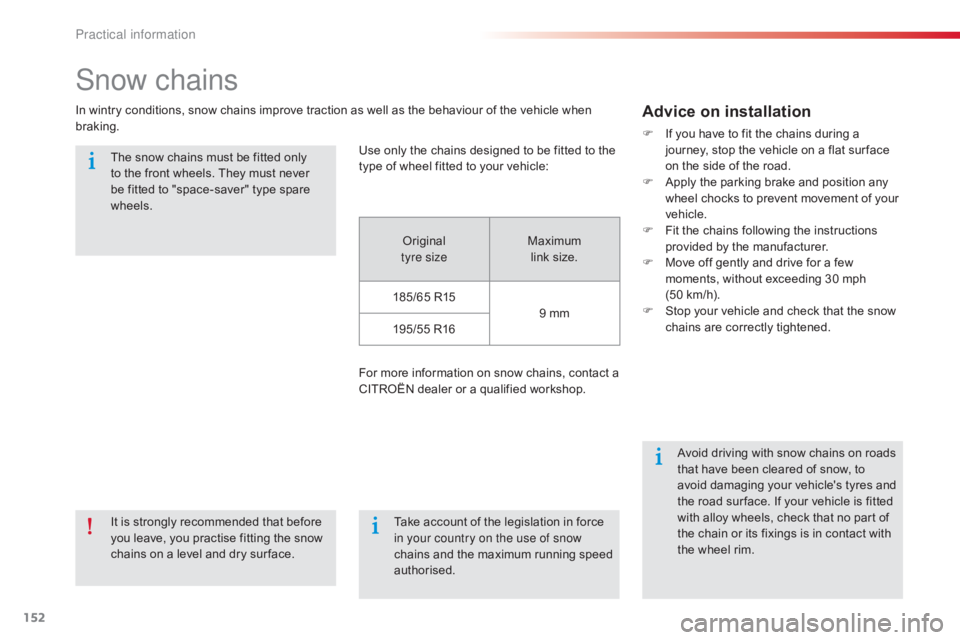
Snow chains
In wintry conditions, snow chains improve traction as well as the behaviour of the vehicle when braking.Advice on installation
F If you have to fit the chains during a j
ourney, stop the vehicle on a flat sur face
o
n the side of the road.
F
A
pply the parking brake and position any
w
heel chocks to prevent movement of your
v
ehicle.
F
F
it the chains following the instructions
p
rovided by the manufacturer.
F
M
ove off gently and drive for a few
m
oments, without exceeding 30 mph
(
50 km/h).
F
S
top your vehicle and check that the snow
c
hains are correctly tightened.
Use
only
the
chains
designed
to
be
fitted
to
the
t
ype
of
wheel
fitted
to
your
vehicle:
Original
t
yre size Maximum
l
ink
size.
185/65
R15 9
mm
195/55
R16
For
more
information
on
snow
chains,
contact
a
C
ITROËN
dealer
or
a
qualified
workshop.
It
is
strongly
recommended
that
before
y
ou
leave,
you
practise
fitting
the
snow
c
hains
on
a
level
and
dry
sur face. Avoid
driving with snow chains on roads
t
hat have been cleared of snow, to
a
void damaging your vehicle's tyres and
t
he road sur face. If your vehicle is fitted
w
ith alloy wheels, check that no part of
t
he chain or its fixings is in contact with
t
he wheel rim.
Take
account
of
the
legislation
in
force
i
n your country on the use of snow
chains
and
the
maximum
running
speed
a
uthorised.
The
snow
chains
must
be
fitted
only
t
o
the
front
wheels.
They
must
never
b
e
fitted
to
"space-saver"
type
spare
w
heels.
Practical information
Page 160 of 260

158
C-elysee_en_Chap09_info-pratiques_ed01-2016
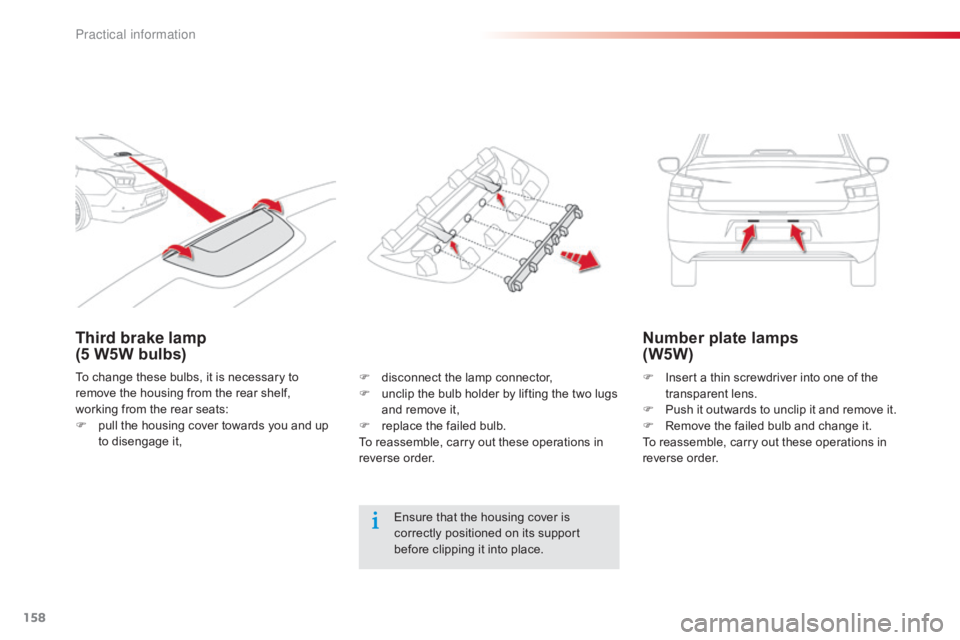
Third brake lamp
(5 W5W bulbs)Number plate lamps
(W5W)
F Insert
a thin screwdriver into one of the t
ransparent l ens.
F
P
ush it outwards to unclip it and remove it.
F
R
emove the failed bulb and change it.
To
reassemble, carry out these operations in
r
everse
o
rder.
Ensure
that
the
housing
cover
is
c
orrectly
positioned
on
its
support
b
efore
clipping
it
into
place.
To
change
these
bulbs,
it
is
necessary
to
r
emove
the
housing
from
the
rear
shelf,
w
orking
from
the
rear
seats:
F
p
ull
the
housing
cover
towards
you
and
up
t
o
d
isengage
i
t, F
d
isconnect
the
lamp
connector,
F
u
nclip
the
bulb
holder
by
lifting
the
two
lugs
a
nd
remove
it,
F
r
eplace
the
failed
bulb.
To
reassemble,
carry
out
these
operations
in
r
everse
o
rder.
Practical information
Page 172 of 260

170
C-elysee_en_Chap09_info-pratiques_ed01-2016
Towing the vehicle
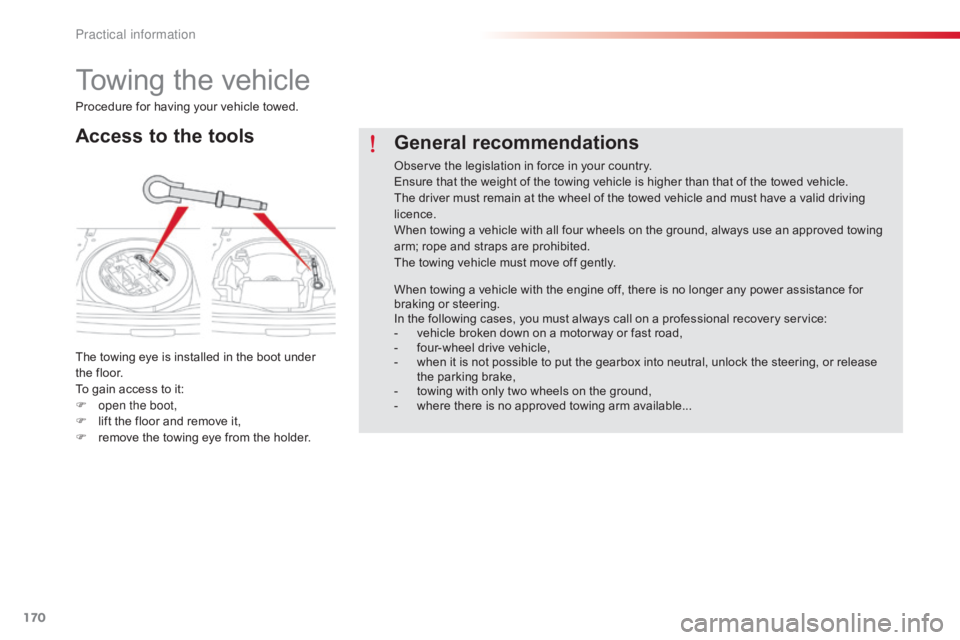
Access to the tools
The towing eye is installed in the boot under the floor.
To
gain access to it:
F
o
pen the boot,
F
l
ift the floor and remove it,
F
r
emove the towing eye from the holder.
General recommendations
Observe the legislation in force in your country.
E nsure that the weight of the towing vehicle is higher than that of the towed vehicle.
The
driver must remain at the wheel of the towed vehicle and must have a valid driving
l
icence.
When
towing a vehicle with all four wheels on the ground, always use an approved towing
a
rm; rope and straps are prohibited.
The
towing vehicle must move off gently.
When
towing a vehicle with the engine off, there is no longer any power assistance for
b
raking or steering.
In
the following cases, you must always call on a professional recovery service:
-
v
ehicle broken down on a motor way or fast road,
-
f
our-wheel drive vehicle,
-
w
hen it is not possible to put the gearbox into neutral, unlock the steering, or release
t
he parking brake,
-
t
owing with only two wheels on the ground,
-
w
here there is no approved towing arm available...
Procedure
for
having
your
vehicle
towed.
Practical information
Page 175 of 260

173
C-elysee_en_Chap09_info-pratiques_ed01-2016
Driving advice
Distribution of loads
F Distribute the load in the trailer so that the h
eaviest items are as close as possible to
t
he axle and the nose weight approaches
t
he maximum permitted without
e
xceeding it.
Air
density decreases with altitude, thus
r
educing engine per formance. Above
1 0
00 metres, the maximum towed load must
b
e reduced by 10 % for every 1 000 metres of
al
titude.
Side wind
F Take into account the increased sensitivity t
o side wind.
Cooling
Towing a trailer on a slope increases the temperature of the coolant.
As
the fan is electrically controlled, its cooling
c
apacity is not dependent on the engine speed.
F
T
o lower the engine speed, reduce your
s
peed.
The
maximum towed load on a long incline
d
epends on the gradient and the ambient
t
emperature.
In
all cases, keep a check on the coolant
t
emperature. F
I
f the warning lamp and
t
he STOP
warning lamp come
o
n, stop the vehicle and switch
o
ff the engine as soon as
p
ossible.
Braking
Towing a trailer increases the braking distance.
T o avoid overheating of the brakes on a long
m
ountain type of descent, the use of engine
b
raking is recommended.
Ty r e s
F Check the tyre pressures of the towing v
ehicle and of the trailer, observing the
re
commended
p
ressures.
Lighting
F Check the electrical lighting and signalling o
n the trailer.
Refer
to
the
"Technical
data"
section
for
details
o
f
the
weights
and
towed
loads
which
apply
to
y
our
vehicle.
The rear parking sensors will be
d
eactivated automatically if a genuine
C
ITROËN towbar is used.
9
Practical information
Page 177 of 260

175
C-elysee_en_Chap09_info-pratiques_ed01-2016
Accessories
A wide range of accessories and genuine parts is available from the CITROËN dealer network.
T hese accessories and parts are all suitable for your vehicle and benefit from CITROËN's
r
ecommendation and warranty.
"Comfort":
door deflectors, side blinds and rear screen blind, smoker kit, portable scented air
f
reshener, boot dividers, coat hanger, armrest,
i
nsulated module, reading lamp, cruise control,
b
oot storage, front and rear parking sensors,
g
love box lid...
"Transport solutions":
towbars, towbar harnesses, roof bars, bicycle
carrier on towbar, bicycle carrier on roof bars,
ski carrier, roof boxes...
"Security and safety":
wheel security bolts, child seats, breathalyzer, first aid kit, warning triangle, high visibility vest,
s
now chains, non-slip covers, foglamp kit, fire
e
xtinguisher...
Tow
bar,
which
mst
be
fitted
by
C
ITROËN
dealer
or
a
qualified
w
orkshop.
Advice on care an d m aintenance
Recommendations on the care and m
aintenance your vehicle are given in the
m
aintenance
an
d
w
arranty
g
uide.
"Styling":
gear lever knob, spoiler, parking brake lever grip, spoiler, alloy wheels, foglamp trims,
c
hromed mirror shells, aluminium footrest,
c
hrome exhaust tailpipes, door sill finishers,
w
heel
t
rims...
9
Practical information
Page 186 of 260

184
C-elysee_en_Chap10_verifications_ed01-2016
The brake fluid level should be close to the "MA X" mark. If it is not, check
t
he brake pad wear.
Brake fluid level
Changing the fluid
Refer to the manufacturer's service schedule for details of the interval for this operation.
Fluid specification
The brake fluid must conform to the manufacturer's r ecommendations.
Topping-up the engine oil
Oil grade
The oil must be the correct grade for your
e
ngine and conform to the manufacturer's
r
ecommendations.
Refer
to the under-bonnet view for the location
o
f the oil filler cap on your vehicle.
F
U
nscrew the filler cap for access to the
filler
orifice.
F
P
our in the oil in small quantities, avoiding
s
pills onto the engine (risk of fire).
F
W
ait a few minutes before checking the
l
evel again using the dipstick.
F
T
op-up again if necessary.
F
A
fter checking and topping up, carefully
r
efit the oil filler cap and the dipstick to its
h
ousing.
Engine oil change
Refer to the manufacturer's service schedule for details of the interval for this operation.
In
order to maintain the reliability of the engine
a
nd emissions control system, never use
a
dditives in the engine oil.
Checks