2016 CHEVROLET SUBURBAN warning lights
[x] Cancel search: warning lightsPage 72 of 453
Chevrolet Tahoe/Suburban Owner Manual (GMNA-Localizing-U.S./Canada/
Mexico-9159366) - 2016 - crc - 5/19/15
Seats and Restraints 71
Press the button once for the
highest setting. With each press of
the button, the seat will change to
the next lower setting, and then to
the off setting. The indicator lights
next to the buttons indicate three for
the highest setting and one for the
lowest. If the heated seats are on
high for an extended time, their level
may automatically be lowered.
The passenger seat may take
longer to heat up.
Remote Start Auto Heated and
Cooled Seats
During a remote start, the heated or
cooled seats can be turned on
automatically. When it is cold
outside, the heated seats turn on,
and when it is hot outside the
cooled seats turn on. The heated or
cooled seats are canceled when the
ignition is turned on. Press the
heated or cooled seat button to use
the heated or cooled seats after the
vehicle is started.The heated or cooled seat indicator
lights do not turn on during a remote
start.
The temperature performance of an
unoccupied seat may be reduced.
This is normal.
The heated or cooled seats will not
turn on during a remote start unless
they are enabled in the vehicle
personalization menu. See
Remote
Vehicle Start 043 and Vehicle
Personalization 0173.Rear Seats
Heated Rear Seats
{Warning
If you cannot feel temperature
change or pain to the skin, the
seat heater may cause burns.
See the Warning under Heated
and Cooled Front Seats 070.
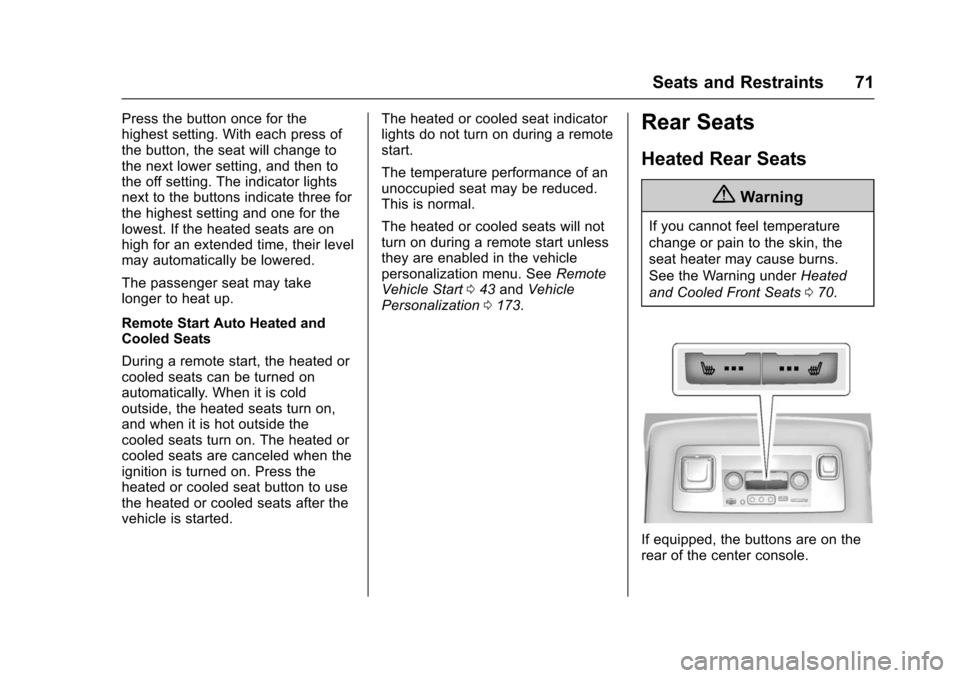
If equipped, the buttons are on the
rear of the center console.
Page 73 of 453
Chevrolet Tahoe/Suburban Owner Manual (GMNA-Localizing-U.S./Canada/
Mexico-9159366) - 2016 - crc - 5/19/15
72 Seats and Restraints
PressMorLto heat the left
outboard or right outboard seat
cushion.
Press the button once for the
highest setting. With each press of
the button, the heated seat changes
to the next lower setting, and then
the off setting. Indicator lights on the
button show the setting: three for
high, two for medium, and one
for low.
If heated seats are on high for an
extended time, their level may
automatically be lowered.
Second Row Seats
Reclining Seatbacks
To recline the seatback:
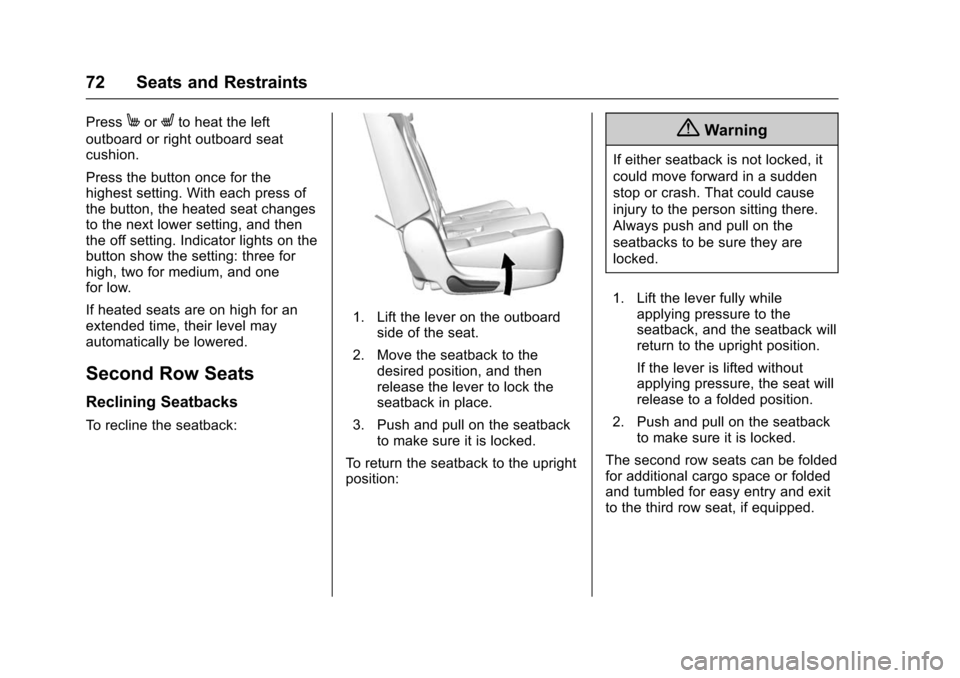
1. Lift the lever on the outboard side of the seat.
2. Move the seatback to the desired position, and then
release the lever to lock the
seatback in place.
3. Push and pull on the seatback to make sure it is locked.
To return the seatback to the upright
position:
{Warning
If either seatback is not locked, it
could move forward in a sudden
stop or crash. That could cause
injury to the person sitting there.
Always push and pull on the
seatbacks to be sure they are
locked.
1. Lift the lever fully while applying pressure to the
seatback, and the seatback will
return to the upright position.
If the lever is lifted without
applying pressure, the seat will
release to a folded position.
2. Push and pull on the seatback to make sure it is locked.
The second row seats can be folded
for additional cargo space or folded
and tumbled for easy entry and exit
to the third row seat, if equipped.
Page 127 of 453

Chevrolet Tahoe/Suburban Owner Manual (GMNA-Localizing-U.S./Canada/
Mexico-9159366) - 2016 - crc - 5/20/15
126 Instruments and Controls
Instruments and
Controls
Controls
Steering Wheel Adjustment . . . 127
Steering Wheel Controls . . . . . . 128
Heated Steering Wheel . . . . . . . 129
Horn . . . . . . . . . . . . . . . . . . . . . . . . . . 129
Windshield Wiper/Washer . . . . 129
Rear Window Wiper/Washer . . . . . . . . . . . . . . . . . . . . . 131
Compass . . . . . . . . . . . . . . . . . . . . . 132
Clock . . . . . . . . . . . . . . . . . . . . . . . . . 132
Power Outlets . . . . . . . . . . . . . . . . 133
Wireless Charging . . . . . . . . . . . . 135
Warning Lights, Gauges, and
Indicators
Warning Lights, Gauges, and Indicators . . . . . . . . . . . . . . . . . . . 136
Instrument Cluster . . . . . . . . . . . . 137
Speedometer . . . . . . . . . . . . . . . . . 140
Odometer . . . . . . . . . . . . . . . . . . . . . 140
Trip Odometer . . . . . . . . . . . . . . . . 140
Tachometer . . . . . . . . . . . . . . . . . . . 140
Fuel Gauge . . . . . . . . . . . . . . . . . . . 140
Engine Oil Pressure
Gauge . . . . . . . . . . . . . . . . . . . . . . 141 Engine Coolant Temperature
Gauge . . . . . . . . . . . . . . . . . . . . . . 142
Voltmeter Gauge . . . . . . . . . . . . . 143
Safety Belt Reminders . . . . . . . . 144
Airbag Readiness Light . . . . . . . 144
Passenger Airbag Status Indicator . . . . . . . . . . . . . . . . . . . . 145
Charging System Light . . . . . . . 146
Malfunction Indicator Lamp (Check Engine Light) . . . . . . . . 146
Brake System Warning Light . . . . . . . . . . . . . . . . . . . . . . . . 148
Antilock Brake System (ABS) Warning Light . . . . . . . . . . . . . . . 149
Tow/Haul Mode Light . . . . . . . . . 149
Lane Keep Assist (LKA) Light . . . . . . . . . . . . . . . . . . . . . . . . 149
Vehicle Ahead Indicator . . . . . . 150
Traction Off Light . . . . . . . . . . . . . 150
StabiliTrak
®OFF Light . . . . . . . . 150
Traction Control System (TCS)/ StabiliTrak
®Light . . . . . . . . . . . 150
Tire Pressure Light . . . . . . . . . . . 151
Low Fuel Warning Light . . . . . . 151
Security Light . . . . . . . . . . . . . . . . . 151
High-Beam On Light . . . . . . . . . . 152
Front Fog Lamp Light . . . . . . . . . 152
Lamps On Reminder . . . . . . . . . 152
Cruise Control Light . . . . . . . . . . 152
Information Displays
Driver Information Center (DIC) (Base Level) . . . . . . . . . . . . . . . . 153
Driver Information Center (DIC) (Uplevel) . . . . . . . . . . . . . . . . . . . . 155
Head-Up Display (HUD) . . . . . . 157
Vehicle Messages
Vehicle Messages . . . . . . . . . . . . 161
Battery Voltage and Charging
Messages . . . . . . . . . . . . . . . . . . . 161
Brake System Messages . . . . . 162
Compass Messages . . . . . . . . . . 162
Cruise Control Messages . . . . . 162
Door Ajar Messages . . . . . . . . . . 163
Engine Cooling System Messages . . . . . . . . . . . . . . . . . . . 163
Engine Oil Messages . . . . . . . . . 164
Engine Power Messages . . . . . 164
Fuel System Messages . . . . . . . 165
Key and Lock Messages . . . . . 165
Lamp Messages . . . . . . . . . . . . . . 165
Object Detection System
Messages . . . . . . . . . . . . . . . . . . . 166
Ride Control System Messages . . . . . . . . . . . . . . . . . . . 167
Airbag System Messages . . . . 169
Security Messages . . . . . . . . . . . 169
Steering System Messages . . . . . . . . . . . . . . . . . . . 169
Page 137 of 453
Chevrolet Tahoe/Suburban Owner Manual (GMNA-Localizing-U.S./Canada/
Mexico-9159366) - 2016 - crc - 5/20/15
136 Instruments and Controls
Warning (Continued)
such as coins, keys, rings,
or paper clips, between the phone
and charging pad will become
very hot. On the rare occasion
that the charging system does not
detect a metal object, and the
object gets wedged between the
phone and charger, remove the
phone and allow the metallic
object to cool before removing it
from the charging pad, to prevent
burns.
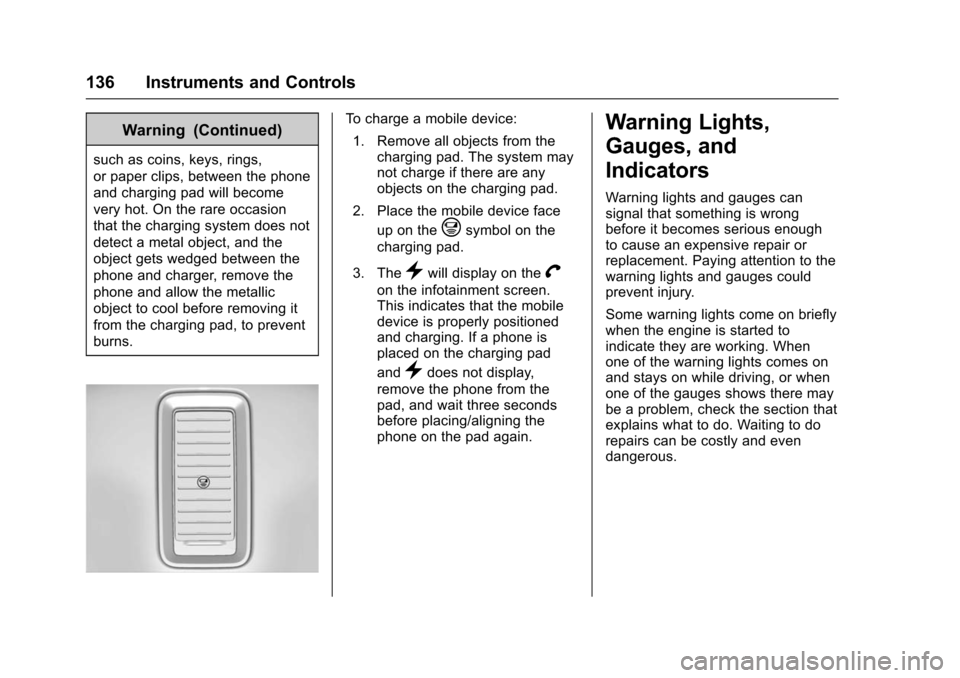
To charge a mobile device:1. Remove all objects from the charging pad. The system may
not charge if there are any
objects on the charging pad.
2. Place the mobile device face up on the
@symbol on the
charging pad.
3. The
}will display on theV
on the infotainment screen.
This indicates that the mobile
device is properly positioned
and charging. If a phone is
placed on the charging pad
and
}does not display,
remove the phone from the
pad, and wait three seconds
before placing/aligning the
phone on the pad again.
Warning Lights,
Gauges, and
Indicators
Warning lights and gauges can
signal that something is wrong
before it becomes serious enough
to cause an expensive repair or
replacement. Paying attention to the
warning lights and gauges could
prevent injury.
Some warning lights come on briefly
when the engine is started to
indicate they are working. When
one of the warning lights comes on
and stays on while driving, or when
one of the gauges shows there may
be a problem, check the section that
explains what to do. Waiting to do
repairs can be costly and even
dangerous.
Page 146 of 453
Chevrolet Tahoe/Suburban Owner Manual (GMNA-Localizing-U.S./Canada/
Mexico-9159366) - 2016 - crc - 5/20/15
Instruments and Controls 145
The airbag readiness light comes on
for several seconds when the
vehicle is started. If the light does
not come on then, have it fixed
immediately.
{Warning
If the airbag readiness light stays
on after the vehicle is started or
comes on while driving, it means
the airbag system might not be
working properly. The airbags in
the vehicle might not inflate in a
crash, or they could even inflate
without a crash. To help avoid
injury, have the vehicle serviced
right away.
If there is a problem with the airbag
system, a Driver Information Center
(DIC) message may also come on.
See Airbag System Messages
0 169.
Passenger Airbag Status
Indicator
The vehicle has a passenger
sensing system. See Passenger
Sensing System 096 for important
safety information. The passenger
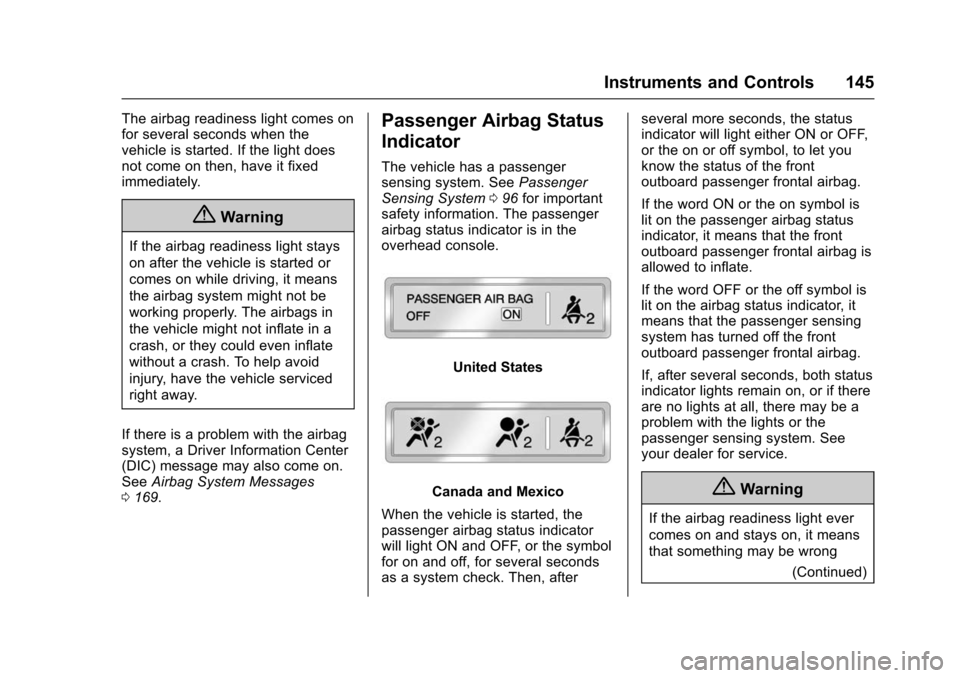
airbag status indicator is in the
overhead console.
United States
Canada and Mexico
When the vehicle is started, the
passenger airbag status indicator
will light ON and OFF, or the symbol
for on and off, for several seconds
as a system check. Then, after several more seconds, the status
indicator will light either ON or OFF,
or the on or off symbol, to let you
know the status of the front
outboard passenger frontal airbag.
If the word ON or the on symbol is
lit on the passenger airbag status
indicator, it means that the front
outboard passenger frontal airbag is
allowed to inflate.
If the word OFF or the off symbol is
lit on the airbag status indicator, it
means that the passenger sensing
system has turned off the front
outboard passenger frontal airbag.
If, after several seconds, both status
indicator lights remain on, or if there
are no lights at all, there may be a
problem with the lights or the
passenger sensing system. See
your dealer for service.{Warning
If the airbag readiness light ever
comes on and stays on, it means
that something may be wrong
(Continued)
Page 184 of 453
Chevrolet Tahoe/Suburban Owner Manual (GMNA-Localizing-U.S./Canada/
Mexico-9159366) - 2016 - crc - 5/19/15
Lighting 183
Lighting
Exterior Lighting
Exterior Lamp Controls . . . . . . . 183
Exterior Lamps OffReminder . . . . . . . . . . . . . . . . . . . 185
Headlamp High/Low-Beam Changer . . . . . . . . . . . . . . . . . . . . 185
Flash-to-Pass . . . . . . . . . . . . . . . . 185
Daytime Running Lamps (DRL) . . . . . . . . . . . . . . . 186
Automatic Headlamp System . . . . . . . . . . . . . . . . . . . . . . 186
Hazard Warning Flashers . . . . . 187
Turn and Lane-Change Signals . . . . . . . . . . . . . . . . . . . . . . 187
Fog Lamps . . . . . . . . . . . . . . . . . . . 188
Interior Lighting
Instrument Panel Illumination Control . . . . . . . . . . . . . . . . . . . . . . 188
Dome Lamps . . . . . . . . . . . . . . . . . 189
Reading Lamps . . . . . . . . . . . . . . 189
Lighting Features
Entry Lighting . . . . . . . . . . . . . . . . 190
Exit Lighting . . . . . . . . . . . . . . . . . . 190
Battery Load Management . . . 190
Battery Power Protection . . . . . 191
Exterior Lighting
Exterior Lamp Controls
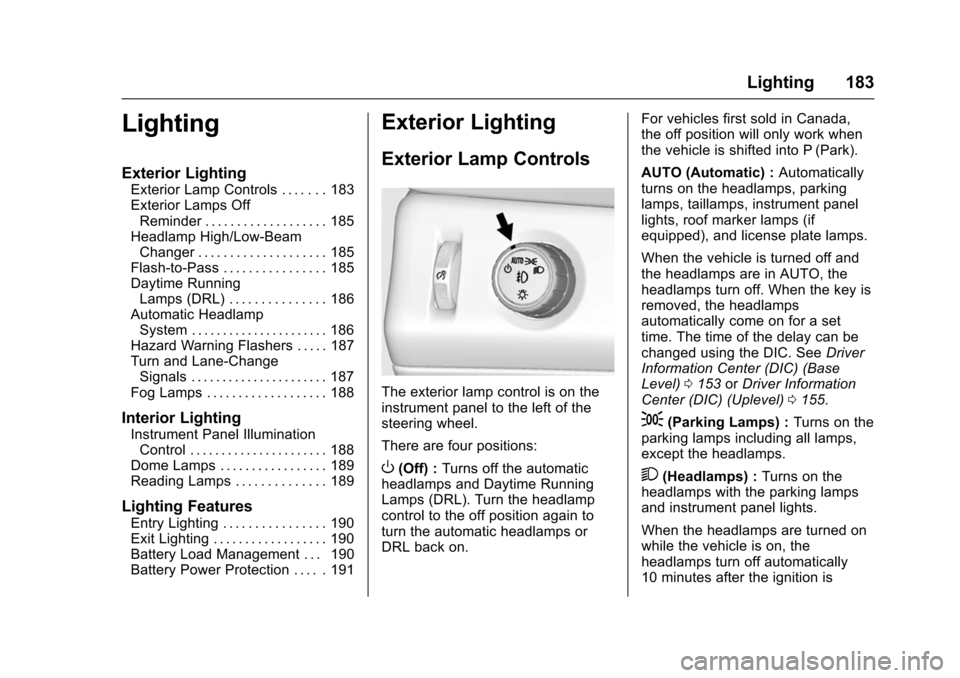
The exterior lamp control is on the
instrument panel to the left of the
steering wheel.
There are four positions:
O(Off) : Turns off the automatic
headlamps and Daytime Running
Lamps (DRL). Turn the headlamp
control to the off position again to
turn the automatic headlamps or
DRL back on. For vehicles first sold in Canada,
the off position will only work when
the vehicle is shifted into P (Park).
AUTO (Automatic) :
Automatically
turns on the headlamps, parking
lamps, taillamps, instrument panel
lights, roof marker lamps (if
equipped), and license plate lamps.
When the vehicle is turned off and
the headlamps are in AUTO, the
headlamps turn off. When the key is
removed, the headlamps
automatically come on for a set
time. The time of the delay can be
changed using the DIC. See Driver
Information Center (DIC) (Base
Level) 0153 orDriver Information
Center (DIC) (Uplevel) 0155.
;(Parking Lamps) : Turns on the
parking lamps including all lamps,
except the headlamps.
2(Headlamps) : Turns on the
headlamps with the parking lamps
and instrument panel lights.
When the headlamps are turned on
while the vehicle is on, the
headlamps turn off automatically
10 minutes after the ignition is
Page 188 of 453
Chevrolet Tahoe/Suburban Owner Manual (GMNA-Localizing-U.S./Canada/
Mexico-9159366) - 2016 - crc - 5/19/15
Lighting 187
Lights On with Wipers
If the windshield wipers are
activated in daylight with the engine
on, and the exterior lamp control is
in AUTO, the headlamps, parking
lamps, and other exterior lamps
come on. The transition time for the
lamps coming on varies based on
wiper speed. When the wipers are
not operating, these lamps turn off.
Move the exterior lamp control to
O
or;to disable this feature.
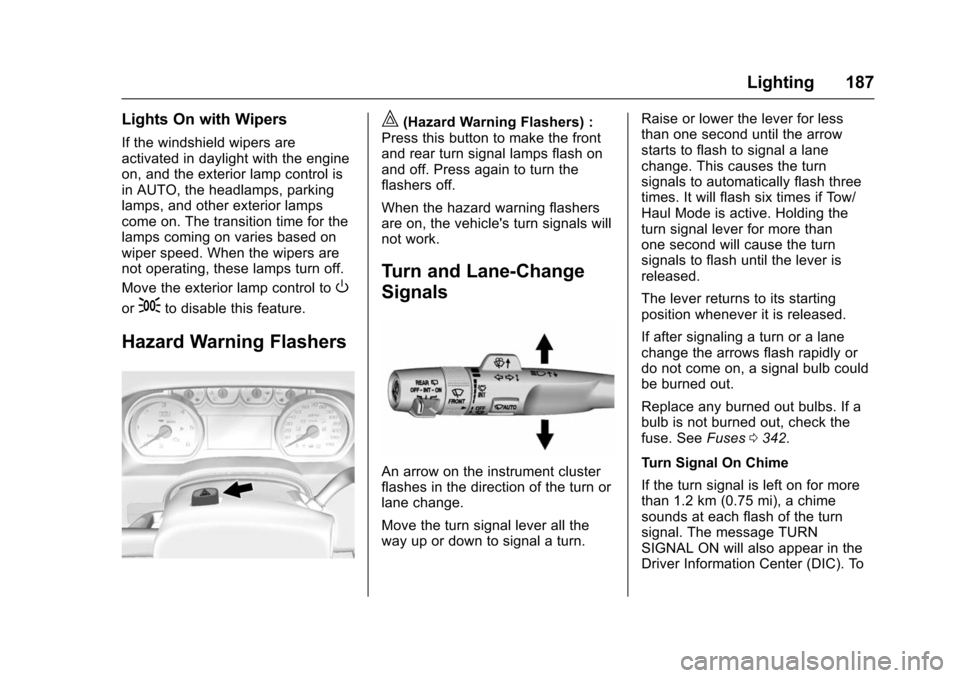
Hazard Warning Flashers
|(Hazard Warning Flashers) :
Press this button to make the front
and rear turn signal lamps flash on
and off. Press again to turn the
flashers off.
When the hazard warning flashers
are on, the vehicle's turn signals will
not work.
Turn and Lane-Change
Signals
An arrow on the instrument cluster
flashes in the direction of the turn or
lane change.
Move the turn signal lever all the
way up or down to signal a turn. Raise or lower the lever for less
than one second until the arrow
starts to flash to signal a lane
change. This causes the turn
signals to automatically flash three
times. It will flash six times if Tow/
Haul Mode is active. Holding the
turn signal lever for more than
one second will cause the turn
signals to flash until the lever is
released.
The lever returns to its starting
position whenever it is released.
If after signaling a turn or a lane
change the arrows flash rapidly or
do not come on, a signal bulb could
be burned out.
Replace any burned out bulbs. If a
bulb is not burned out, check the
fuse. See
Fuses0342.
Turn Signal On Chime
If the turn signal is left on for more
than 1.2 km (0.75 mi), a chime
sounds at each flash of the turn
signal. The message TURN
SIGNAL ON will also appear in the
Driver Information Center (DIC). To
Page 249 of 453
Chevrolet Tahoe/Suburban Owner Manual (GMNA-Localizing-U.S./Canada/
Mexico-9159366) - 2016 - crc - 5/20/15
248 Driving and Operating
{Warning
Turning off the vehicle while
moving may cause loss of power
assist in the brake and steering
systems and disable the airbags.
While driving, only shut the
vehicle off in an emergency.
If the vehicle cannot be pulled over,
and must be shut off while driving,
turn the ignition to ACC/
ACCESSORY.
Caution
Using a tool to force the key to
turn in the ignition could cause
damage to the switch or break the
key. Use the correct key, make
sure it is all the way in, and turn it
only with your hand. If the key
cannot be turned by hand, see
your dealer.
1 (ACC/ACCESSORY) : This
position lets things like the radio
and the windshield wipers operate while the engine is off. It also
unlocks the steering wheel. Use this
position if the vehicle must be
pushed or towed.
2 (ON/RUN) :
This position can be
used to operate the electrical
accessories and to display some
instrument cluster warning and
indicator lights. This position can
also be used for service and
diagnostics, and to verify the proper
operation of the malfunction
indicator lamp as may be required
for emission inspection purposes.
The switch stays in this position
when the engine is running. The
transmission is also unlocked in this
position on automatic transmission
vehicles.
If the key is left in the ACC/
ACCESSORY or ON/RUN position
with the engine off, the battery could
be drained. The vehicle may not
start if the battery is allowed to drain
for an extended period of time. 3 (START) :
This is the position that
starts the engine. When the engine
starts, release the key. The ignition
switch returns to ON/RUN for
driving.
A warning tone will sound when the
driver door is opened and the
ignition is in ACC/ACCESSORY or
LOCK/OFF, and the key is in the
ignition.
Starting the Engine
For a heavy–duty Suburban, see
the Suburban Heavy–Duty Package
supplement.
Move the shift lever to P (Park) or
N (Neutral). The engine will not start
in any other position. To restart the
engine when the vehicle is already
moving, use N (Neutral) only.
Caution
Do not try to shift to P (Park) if the
vehicle is moving. If you do, you
could damage the transmission.
Shift to P (Park) only when the
vehicle is stopped.