2016 CHEVROLET SUBURBAN seats
[x] Cancel search: seatsPage 27 of 453
Chevrolet Tahoe/Suburban Owner Manual (GMNA-Localizing-U.S./Canada/
Mexico-9159366) - 2016 - crc - 5/19/15
26 In Brief
Rear Vision
Camera (RVC)
If equipped, RVC displays a view of
the area behind the vehicle on the
center stack display when the
vehicle is shifted into R (Reverse) to
aid with parking and low-speed
backing maneuvers.
SeeAssistance Systems for Parking
or Backing 0281.
Rear Cross Traffic Alert
(RCTA) System
If equipped, the RCTA system uses
a triangle with an arrow displayed
on the RVC screen to warn of traffic
behind your vehicle that may cross
your vehicle's path while in
R (Reverse). In addition, beeps will
sound, or the driver seat will pulse.
See Assistance Systems for Parking
or Backing 0281.
Parking Assist
If equipped, Rear Parking Assist
(RPA) uses sensors on the rear
bumper to assist with parking and avoiding objects while in
R (Reverse). It operates at speeds
less than 8 km/h (5 mph). RPA may
display a warning triangle on the
Rear Vision Camera screen and a
graphic on the instrument cluster to
provide the object distance. In
addition, multiple beeps or seat
pulses may occur if very close to an
object.
The vehicle may also have the Front
Parking Assist system.
See
Assistance Systems for Parking
or Backing 0281.
Power Outlets
Power Outlets 12 Volt Direct
Current
Accessory power outlets can be
used to plug in electrical equipment,
such as a cell phone, MP3
player, etc.
The vehicle may have up to five
accessory power outlets:
Vehicles with a Center Console
.
One in front of the cupholders on
the center console. .
One inside the center storage
console.
. One on the rear of the center
storage console.
. One in the third row seat on the
driver side.
. One in the rear cargo area on
the passenger side.
Vehicles with Bench Seats
. One on the center stack below
the climate control system.
. One in the storage area on the
bench seat.
. One on the rear of the center
armrest storage.
. One in the third row seat area on
the driver side.
. One in the rear cargo area on
the passenger side.
Lift the cover to access and replace
when not in use.
See Power Outlets 0133.
Page 41 of 453

Chevrolet Tahoe/Suburban Owner Manual (GMNA-Localizing-U.S./Canada/
Mexico-9159366) - 2016 - crc - 5/19/15
40 Keys, Doors, and Windows
Keyless Liftgate Opening
Press the touch pad on the
underside of the liftgate handle to
open the liftgate when all doors are
unlocked, or when the transmitter is
within 1 m (3 ft).
Keyless Liftglass Opening
Press the exterior liftglass button to
open the liftglass when all doors are
unlocked, or when the transmitter is
within 1 m (3 ft).
SeeLiftgate 047.
Keyed Access
To access a vehicle with a dead
transmitter battery, see Door Locks
0 44.
Programming Transmitters to
the Vehicle
Only RKE transmitters programmed
to the vehicle will work. If a
transmitter is lost or stolen, a
replacement can be purchased and
programmed through your dealer.
The vehicle can be reprogrammed
so that lost or stolen transmitters no longer work. Each vehicle can have
up to eight transmitters matched
to it.
Programming with a Recognized
Transmitter (Keyless Access
Vehicles Only)
A new transmitter can be
programmed to the vehicle when
there is one recognized transmitter.
To program, the vehicle must be off
and all transmitters, both currently
recognized and new, must be
with you.
1. Remove the key from the recognized transmitter.
2. Place the recognized transmitter(s) in the cupholder
or on the passenger seat.
3. Insert the vehicle key into the key lock cylinder on the driver
door handle. Then turn the key
counterclockwise, to the unlock
position, five times within
10 seconds.
The Driver Information Center
(DIC) displays READY FOR
REMOTE#2, 3, 4, ETC.
4. Place the new transmitter inthe transmitter pocket/insert.
Open the center console
storage area and the storage
tray. The transmitter pocket/
insert is in front of the storage
area next to the center console
storage area between the
driver and front passenger
seats.
5. Press the ENGINE START/ STOP button. When the
transmitter is learned, the DIC
display will show that it is ready
to program the next transmitter.
Page 42 of 453

Chevrolet Tahoe/Suburban Owner Manual (GMNA-Localizing-U.S./Canada/
Mexico-9159366) - 2016 - crc - 5/19/15
Keys, Doors, and Windows 41
6. Remove the transmitter fromthe transmitter pocket and
press
KorQon the
transmitter.
To program additional
transmitters, repeat Steps 4–6.
When all additional transmitters
are programmed, press and
hold the ENGINE START/
STOP button for approximately
12 seconds to exit
programming mode.
7. Return the key back into the transmitter.
Programming without a
Recognized Transmitter (Keyless
Access Vehicles Only)
If there are no currently recognized
transmitters available, follow this
procedure to program up to eight
transmitters. This feature is not
available in Canada. This procedure
will take approximately 30 minutes
to complete. The vehicle must be off
and all transmitters to be
programmed must be with you. 1. Remove the vehicle key from the transmitter. 2. Insert the vehicle key into the
key lock cylinder on the driver
door handle; then turn the key
counterclockwise, to the unlock
position, five times within
10 seconds.
The Driver Information Center
(DIC) displays REMOTE
LEARN PENDING,
PLEASE WAIT.
3. Wait for 10 minutes until the DIC displays PRESS ENGINE
START BUTTON TO LEARN,
then press the ENGINE
START/STOP button.
The DIC display will again
show REMOTE LEARN
PENDING, PLEASE WAIT.
4. Repeat Step 3 two additional times. After the third time all
previously known transmitters
will no longer work with the
vehicle. Remaining transmitters
can be relearned during the
next steps.
The DIC display should now
show READY FOR REMOTE
# 1.
5. Place the new transmitter in
the transmitter pocket/insert.
Open the center console
storage area and the storage
tray. The transmitter pocket/
insert is in front of the storage
area next to the center console
storage area between the
driver and front passenger
seats.
6. Press the ENGINE START/ STOP button. When the
transmitter is learned, the DIC
display will show that it is ready
to program the next transmitter.
Page 44 of 453

Chevrolet Tahoe/Suburban Owner Manual (GMNA-Localizing-U.S./Canada/
Mexico-9159366) - 2016 - crc - 5/19/15
Keys, Doors, and Windows 43
1. With the key removed, insert aflat, thin object in the center of
the transmitter to separate and
remove the back cover.
2. Lift the battery with a flat
object.
3. Remove the battery.
4. Insert the new battery, positive side toward the back cover.
Replace with a CR2032 or
equivalent battery.
5. Push together the transmitter.
Remote Vehicle Start
If equipped with the remote start
feature, the climate control system
will come on when the vehicle is
started remotely depending on the
outside temperature.
The rear defog and heated and
cooled seats, if equipped, may also
come on. See Heated and Cooled
Front Seats 070 and Vehicle
Personalization 0173.
Laws in some communities may
restrict the use of remote starters.
Check local regulations for any
requirements on remote starting of
vehicles.
Do not use remote start if the
vehicle is low on fuel.
The vehicle cannot be remote
started if:
. The key is in the ignition (Key
Access) or the transmitter is in
the vehicle (Keyless Access).
. The hood is not closed.
. There is an emission control
system malfunction and the
malfunction indicator lamp is on. The engine will turn off during a
remote vehicle start if:
.
The coolant temperature gets
too high.
. The oil pressure gets low.
The RKE transmitter range may be
reduced while the vehicle is running.
Other conditions can affect the
performance of the transmitter. See
Remote Keyless Entry (RKE)
System 035 orVehicle
Personalization 0173.
Starting the Engine Using Remote
Start
1. Press and release
Q.
2. Immediately press and hold
/
until the turn signal lamps flash
or for at least four seconds.
When the vehicle starts, the
parking lamps will turn on. The
doors will be locked and the
climate control system may
come on.
Page 56 of 453
Chevrolet Tahoe/Suburban Owner Manual (GMNA-Localizing-U.S./Canada/
Mexico-9159366) - 2016 - crc - 5/19/15
Keys, Doors, and Windows 55
The immobilization system is
disarmed when the ignition button is
pressed in and a valid transmitter is
found in the vehicle.
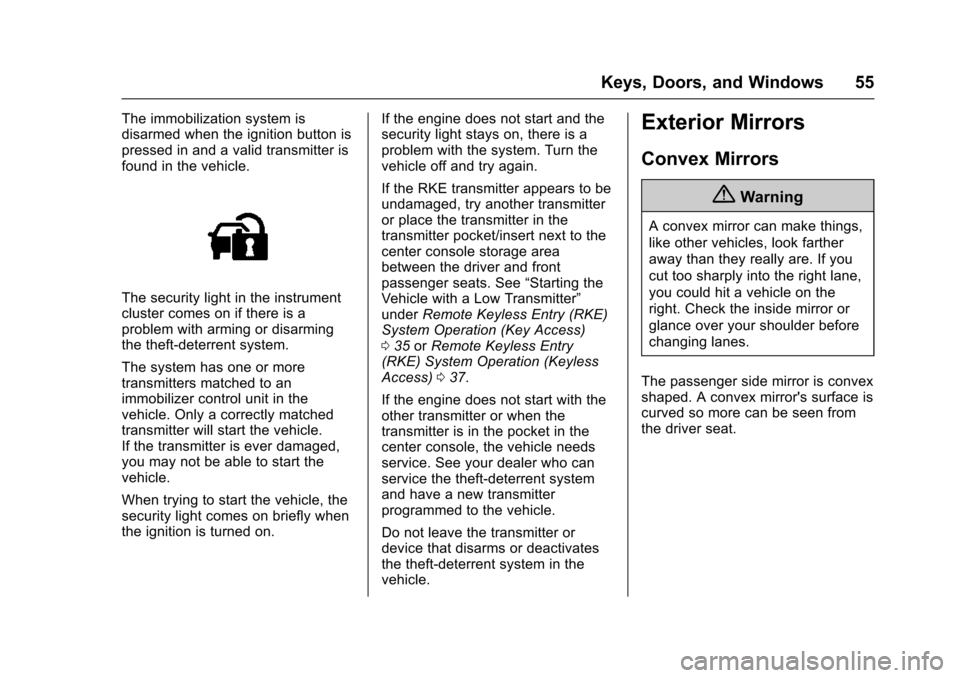
The security light in the instrument
cluster comes on if there is a
problem with arming or disarming
the theft-deterrent system.
The system has one or more
transmitters matched to an
immobilizer control unit in the
vehicle. Only a correctly matched
transmitter will start the vehicle.
If the transmitter is ever damaged,
you may not be able to start the
vehicle.
When trying to start the vehicle, the
security light comes on briefly when
the ignition is turned on.If the engine does not start and the
security light stays on, there is a
problem with the system. Turn the
vehicle off and try again.
If the RKE transmitter appears to be
undamaged, try another transmitter
or place the transmitter in the
transmitter pocket/insert next to the
center console storage area
between the driver and front
passenger seats. See
“Starting the
Vehicle with a Low Transmitter”
under Remote Keyless Entry (RKE)
System Operation (Key Access)
0 35 orRemote Keyless Entry
(RKE) System Operation (Keyless
Access) 037.
If the engine does not start with the
other transmitter or when the
transmitter is in the pocket in the
center console, the vehicle needs
service. See your dealer who can
service the theft-deterrent system
and have a new transmitter
programmed to the vehicle.
Do not leave the transmitter or
device that disarms or deactivates
the theft-deterrent system in the
vehicle.
Exterior Mirrors
Convex Mirrors
{Warning
A convex mirror can make things,
like other vehicles, look farther
away than they really are. If you
cut too sharply into the right lane,
you could hit a vehicle on the
right. Check the inside mirror or
glance over your shoulder before
changing lanes.
The passenger side mirror is convex
shaped. A convex mirror's surface is
curved so more can be seen from
the driver seat.
Page 59 of 453
Chevrolet Tahoe/Suburban Owner Manual (GMNA-Localizing-U.S./Canada/
Mexico-9159366) - 2016 - crc - 5/19/15
58 Keys, Doors, and Windows
1. When the approaching vehicleis a long distance away, the
image in the main mirror is
small and near the inboard
edge of the mirror.
2. As the vehicle gets closer, the image in the main mirror gets
larger and moves outboard.
3. As the vehicle enters the blind zone, the image transitions
from the main mirror to the
blind spot mirror.
4. When the vehicle is in the blind zone, the image only appears
in the blind spot mirror.
Using the Outside Mirror with
the Blind Spot Mirror
1. Set the main mirror so that theside of the vehicle can just be
seen and the blind spot mirror
has an unobstructed view.
2. When checking for traffic or before changing a lane, look at
the main driver/passenger side
mirror to observe traffic in the
adjacent lane, behind your
vehicle. Check the blind spot
mirror for a vehicle in the blind zone. Then, glance over your
shoulder to double check
before moving slowly into the
adjacent lane.
Reverse Tilt Mirrors
If equipped with memory seats, the
passenger and/or driver mirror tilts
to a preselected position when the
vehicle is in R (Reverse). This
allows the curb to be seen when
parallel parking.
The mirror(s) return to the original
position when:
.
The vehicle is shifted out of
R (Reverse), or remains in
R (Reverse) for about
30 seconds.
. The ignition is turned off.
. The vehicle is driven in
R (Reverse) above a set speed.
To turn this feature on or off, see
Vehicle Personalization 0173.
Interior Mirrors
Interior Rearview Mirrors
Adjust the rearview mirror for a clear
view of the area behind your
vehicle.
If equipped with OnStar, there are
three buttons at the bottom of the
mirror. See your dealer for more
information on the system and how
to subscribe to OnStar. See OnStar
Overview 0431.
To avoid accidental OnStar calls,
clean the mirror with the ignition off.
Do not spray glass cleaner directly
on the mirror. Use a soft towel
dampened with water.
Manual Rearview Mirror
Push the tab forward for daytime
use and pull it rearward for
nighttime use to avoid glare of the
headlamps from behind.
Page 64 of 453
Chevrolet Tahoe/Suburban Owner Manual (GMNA-Localizing-U.S./Canada/
Mexico-9159366) - 2016 - crc - 5/19/15
Seats and Restraints 63
Seats and
Restraints
Head Restraints
Head Restraints . . . . . . . . . . . . . . . 64
Front Seats
Seat Adjustment . . . . . . . . . . . . . . . 65
Center Seat . . . . . . . . . . . . . . . . . . . . 66
Power Seat Adjustment . . . . . . . . 66
Lumbar Adjustment . . . . . . . . . . . . 66
Reclining Seatbacks . . . . . . . . . . . 67
Memory Seats . . . . . . . . . . . . . . . . . 68
Heated and Cooled FrontSeats . . . . . . . . . . . . . . . . . . . . . . . . . 70
Rear Seats
Heated Rear Seats . . . . . . . . . . . . 71
Second Row Seats . . . . . . . . . . . . 72
Third Row Seats . . . . . . . . . . . . . . . 76
Safety Belts
Safety Belts . . . . . . . . . . . . . . . . . . . . 80
How to Wear Safety BeltsProperly . . . . . . . . . . . . . . . . . . . . . . 81
Lap-Shoulder Belt . . . . . . . . . . . . . 82
Safety Belt Use During Pregnancy . . . . . . . . . . . . . . . . . . . . 87
Lap Belt . . . . . . . . . . . . . . . . . . . . . . . 87 Safety Belt Extender . . . . . . . . . . . 88
Safety System Check . . . . . . . . . . 88
Safety Belt Care . . . . . . . . . . . . . . . 88
Replacing Safety Belt System
Parts after a Crash . . . . . . . . . . . 89
Airbag System
Airbag System . . . . . . . . . . . . . . . . . 89
Where Are the Airbags? . . . . . . . 91
When Should an Airbag
Inflate? . . . . . . . . . . . . . . . . . . . . . . . 92
What Makes an Airbag Inflate? . . . . . . . . . . . . . . . . . . . . . . . 94
How Does an Airbag Restrain? . . . . . . . . . . . . . . . . . . . . . 94
What Will You See after an Airbag Inflates? . . . . . . . . . . . . . . 94
Passenger Sensing System . . . 96
Servicing the Airbag-Equipped Vehicle . . . . . . . . . . . . . . . . . . . . . . 100
Adding Equipment to the Airbag-Equipped Vehicle . . . . 100
Airbag System Check . . . . . . . . 101
Replacing Airbag System Parts after a Crash . . . . . . . . . . . . . . . . 101
Child Restraints
Older Children . . . . . . . . . . . . . . . . 102
Infants and Young Children . . . 103
Child Restraint Systems . . . . . . 106
Where to Put the Restraint . . . 107 Lower Anchors and Tethers for
Children (LATCH System) . . . 109
Replacing LATCH System Parts After a Crash . . . . . . . . . . 116
Securing Child Restraints
(Center Front Seat) . . . . . . . . . 117
Securing Child Restraints (Rear Seat) . . . . . . . . . . . . . . . . . 117
Securing Child Restraints (Front Passenger Seat) . . . . . 119
Page 65 of 453
Chevrolet Tahoe/Suburban Owner Manual (GMNA-Localizing-U.S./Canada/
Mexico-9159366) - 2016 - crc - 5/19/15
64 Seats and Restraints
Head Restraints
Front Seats
The vehicle’s front seats have
adjustable head restraints in the
outboard seating positions.
{Warning
With head restraints that are not
installed and adjusted properly,
there is a greater chance that
occupants will suffer a neck/
spinal injury in a crash. Do not
drive until the head restraints for
all occupants are installed and
adjusted properly.
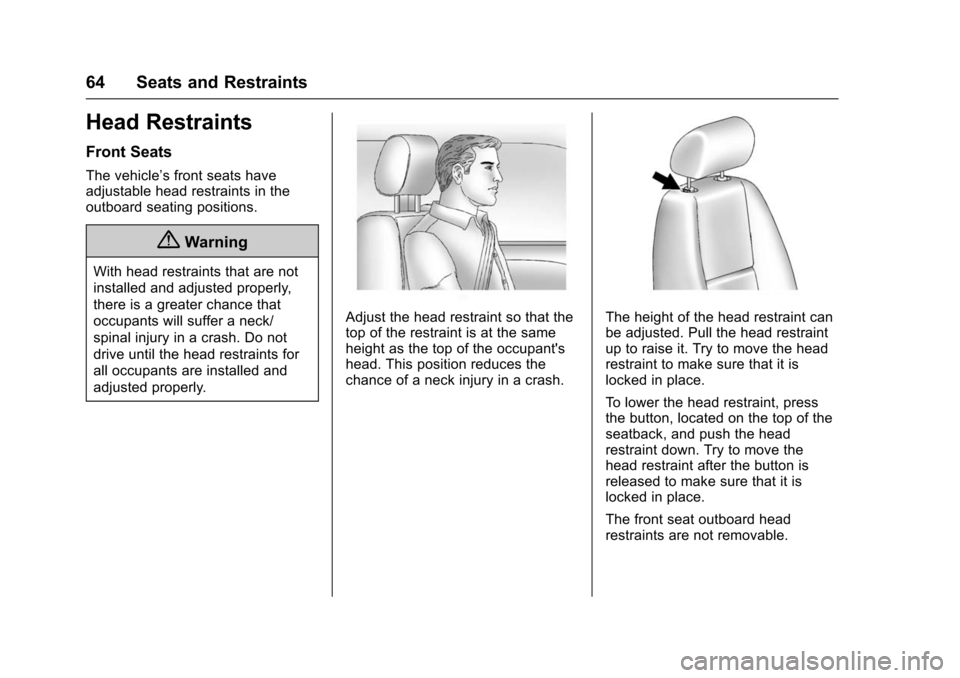
Adjust the head restraint so that the
top of the restraint is at the same
height as the top of the occupant's
head. This position reduces the
chance of a neck injury in a crash.The height of the head restraint can
be adjusted. Pull the head restraint
up to raise it. Try to move the head
restraint to make sure that it is
locked in place.
To lower the head restraint, press
the button, located on the top of the
seatback, and push the head
restraint down. Try to move the
head restraint after the button is
released to make sure that it is
locked in place.
The front seat outboard head
restraints are not removable.