2016 CHEVROLET SUBURBAN buttons
[x] Cancel search: buttonsPage 71 of 453
Chevrolet Tahoe/Suburban Owner Manual (GMNA-Localizing-U.S./Canada/
Mexico-9159366) - 2016 - crc - 5/19/15
70 Seats and Restraints
RKE transmitters are not labeled
with a number. If your memory seat
position is stored to 1 or 2, but this
position is not automatically
recalling, then change the stored
position or switch RKE transmitters
with the other driver.
Obstructions
If something has blocked the driver
seat, power tilt and telescoping
steering column, and/or adjustable
pedals (if equipped) while recalling
the exit position, the recall may
stop. Remove the obstruction; then
press and hold the appropriate
manual control for the exit feature
not recalling for two seconds. Try
recalling the memory position again
by opening the driver door and
pressing
Kon the RKE transmitter.
If the exit position is still not
recalling, see your dealer for
service.
Heated and Cooled Front
Seats
If equipped, the vehicle may have
heated or heated and cooled seats.
{Warning
If you cannot feel temperature
change or pain to the skin, the
seat heater may cause burns. To
reduce the risk of burns, people
with such a condition should use
care when using the seat heater,
especially for long periods of
time. Do not place anything on
the seat that insulates against
heat, such as a blanket, cushion,
cover, or similar item. This may
cause the seat heater to
overheat. An overheated seat
heater may cause a burn or may
damage the seat.
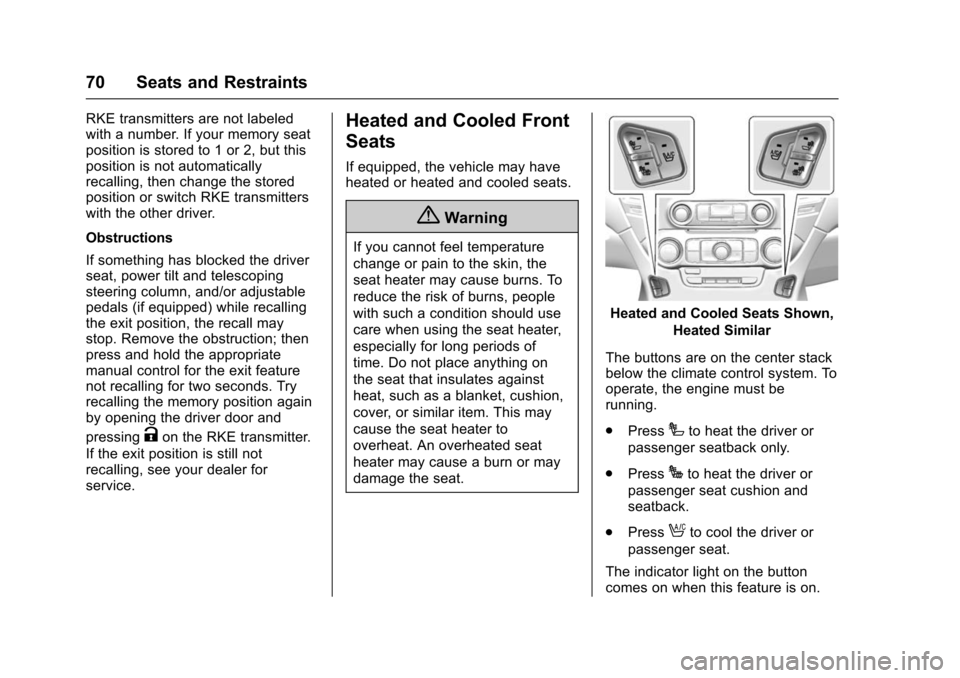
Heated and Cooled Seats Shown,
Heated Similar
The buttons are on the center stack
below the climate control system. To
operate, the engine must be
running.
. Press
Ito heat the driver or
passenger seatback only.
. Press
Jto heat the driver or
passenger seat cushion and
seatback.
. Press
Ato cool the driver or
passenger seat.
The indicator light on the button
comes on when this feature is on.
Page 72 of 453
Chevrolet Tahoe/Suburban Owner Manual (GMNA-Localizing-U.S./Canada/
Mexico-9159366) - 2016 - crc - 5/19/15
Seats and Restraints 71
Press the button once for the
highest setting. With each press of
the button, the seat will change to
the next lower setting, and then to
the off setting. The indicator lights
next to the buttons indicate three for
the highest setting and one for the
lowest. If the heated seats are on
high for an extended time, their level
may automatically be lowered.
The passenger seat may take
longer to heat up.
Remote Start Auto Heated and
Cooled Seats
During a remote start, the heated or
cooled seats can be turned on
automatically. When it is cold
outside, the heated seats turn on,
and when it is hot outside the
cooled seats turn on. The heated or
cooled seats are canceled when the
ignition is turned on. Press the
heated or cooled seat button to use
the heated or cooled seats after the
vehicle is started.The heated or cooled seat indicator
lights do not turn on during a remote
start.
The temperature performance of an
unoccupied seat may be reduced.
This is normal.
The heated or cooled seats will not
turn on during a remote start unless
they are enabled in the vehicle
personalization menu. See
Remote
Vehicle Start 043 and Vehicle
Personalization 0173.Rear Seats
Heated Rear Seats
{Warning
If you cannot feel temperature
change or pain to the skin, the
seat heater may cause burns.
See the Warning under Heated
and Cooled Front Seats 070.
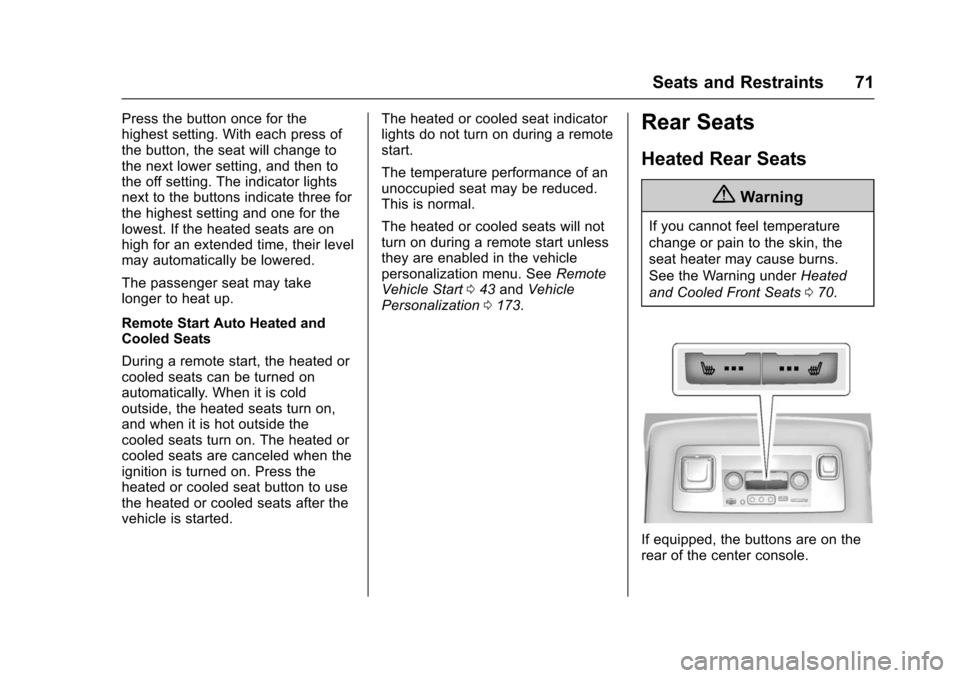
If equipped, the buttons are on the
rear of the center console.
Page 77 of 453
Chevrolet Tahoe/Suburban Owner Manual (GMNA-Localizing-U.S./Canada/
Mexico-9159366) - 2016 - crc - 5/19/15
76 Seats and Restraints
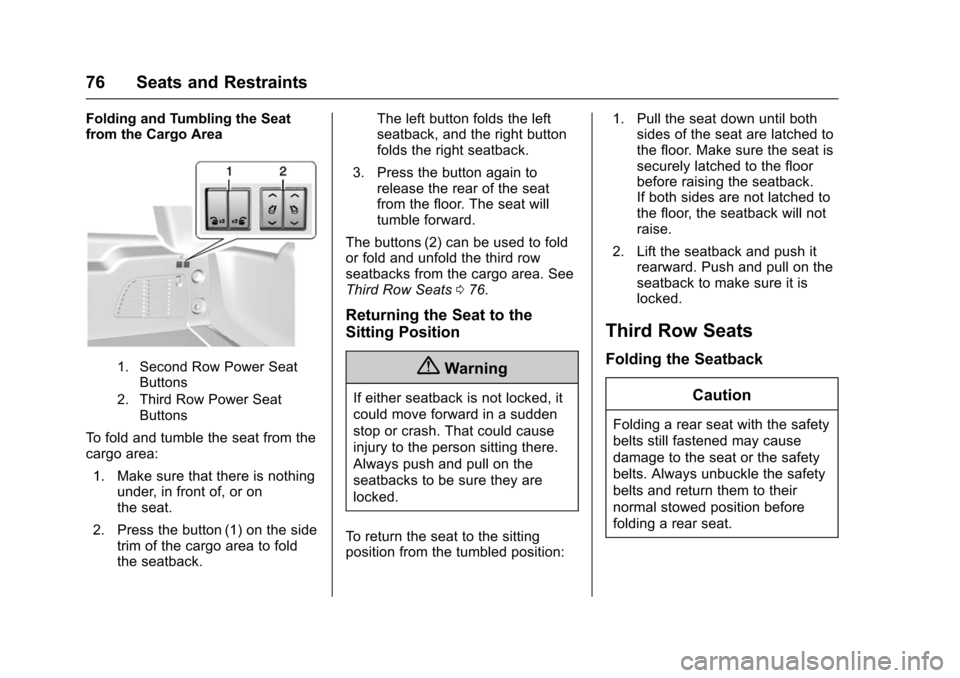
Folding and Tumbling the Seat
from the Cargo Area
1. Second Row Power SeatButtons
2. Third Row Power Seat Buttons
To fold and tumble the seat from the
cargo area:
1. Make sure that there is nothing under, in front of, or on
the seat.
2. Press the button (1) on the side trim of the cargo area to fold
the seatback. The left button folds the left
seatback, and the right button
folds the right seatback.
3. Press the button again to release the rear of the seat
from the floor. The seat will
tumble forward.
The buttons (2) can be used to fold
or fold and unfold the third row
seatbacks from the cargo area. See
Third Row Seats 076.
Returning the Seat to the
Sitting Position
{Warning
If either seatback is not locked, it
could move forward in a sudden
stop or crash. That could cause
injury to the person sitting there.
Always push and pull on the
seatbacks to be sure they are
locked.
To return the seat to the sitting
position from the tumbled position: 1. Pull the seat down until both
sides of the seat are latched to
the floor. Make sure the seat is
securely latched to the floor
before raising the seatback.
If both sides are not latched to
the floor, the seatback will not
raise.
2. Lift the seatback and push it rearward. Push and pull on the
seatback to make sure it is
locked.
Third Row Seats
Folding the Seatback
Caution
Folding a rear seat with the safety
belts still fastened may cause
damage to the seat or the safety
belts. Always unbuckle the safety
belts and return them to their
normal stowed position before
folding a rear seat.
Page 79 of 453
Chevrolet Tahoe/Suburban Owner Manual (GMNA-Localizing-U.S./Canada/
Mexico-9159366) - 2016 - crc - 5/19/15
78 Seats and Restraints
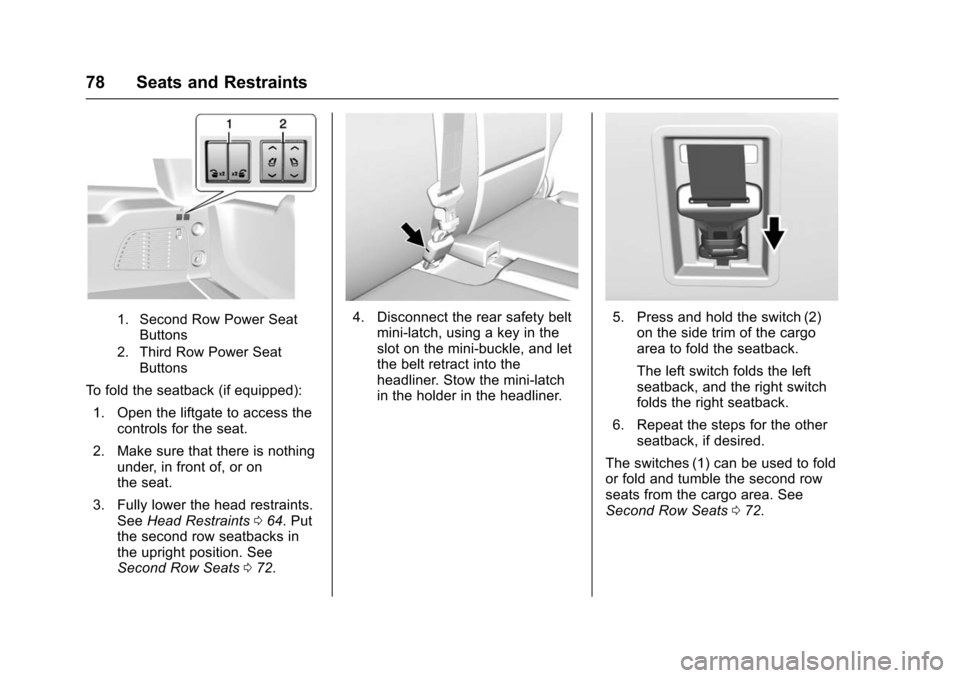
1. Second Row Power SeatButtons
2. Third Row Power Seat Buttons
To fold the seatback (if equipped):
1. Open the liftgate to access the controls for the seat.
2. Make sure that there is nothing under, in front of, or on
the seat.
3. Fully lower the head restraints. See Head Restraints 064. Put
the second row seatbacks in
the upright position. See
Second Row Seats 072.
4. Disconnect the rear safety belt
mini-latch, using a key in the
slot on the mini-buckle, and let
the belt retract into the
headliner. Stow the mini-latch
in the holder in the headliner.5. Press and hold the switch (2)on the side trim of the cargo
area to fold the seatback.
The left switch folds the left
seatback, and the right switch
folds the right seatback.
6. Repeat the steps for the other seatback, if desired.
The switches (1) can be used to fold
or fold and tumble the second row
seats from the cargo area. See
Second Row Seats 072.
Page 81 of 453
Chevrolet Tahoe/Suburban Owner Manual (GMNA-Localizing-U.S./Canada/
Mexico-9159366) - 2016 - crc - 5/19/15
80 Seats and Restraints
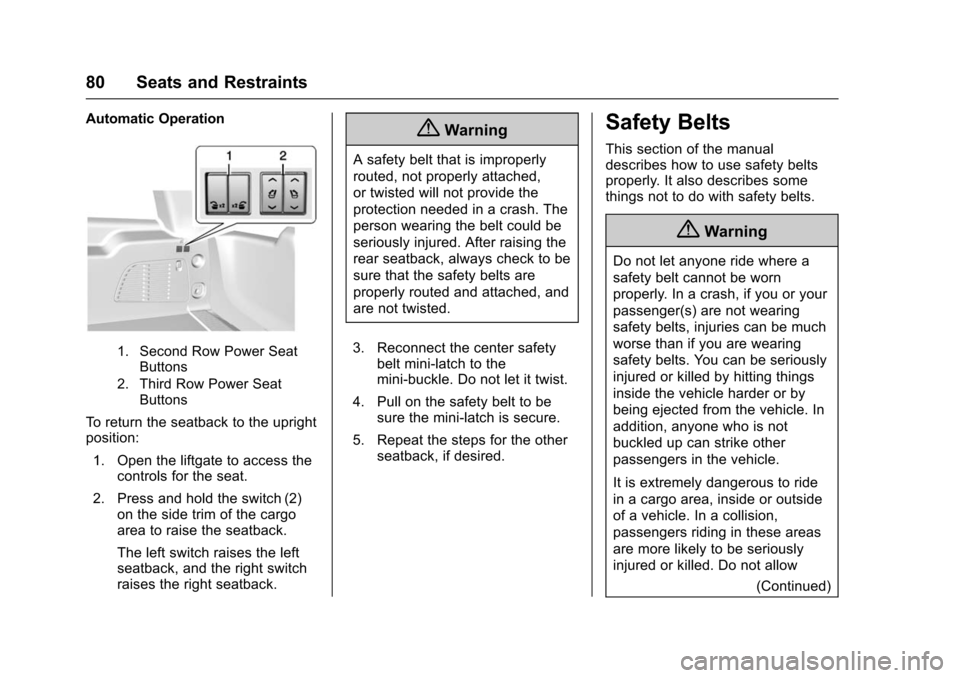
Automatic Operation
1. Second Row Power SeatButtons
2. Third Row Power Seat Buttons
To return the seatback to the upright
position:
1. Open the liftgate to access the controls for the seat.
2. Press and hold the switch (2) on the side trim of the cargo
area to raise the seatback.
The left switch raises the left
seatback, and the right switch
raises the right seatback.
{Warning
A safety belt that is improperly
routed, not properly attached,
or twisted will not provide the
protection needed in a crash. The
person wearing the belt could be
seriously injured. After raising the
rear seatback, always check to be
sure that the safety belts are
properly routed and attached, and
are not twisted.
3. Reconnect the center safety belt mini-latch to the
mini-buckle. Do not let it twist.
4. Pull on the safety belt to be sure the mini-latch is secure.
5. Repeat the steps for the other seatback, if desired.
Safety Belts
This section of the manual
describes how to use safety belts
properly. It also describes some
things not to do with safety belts.
{Warning
Do not let anyone ride where a
safety belt cannot be worn
properly. In a crash, if you or your
passenger(s) are not wearing
safety belts, injuries can be much
worse than if you are wearing
safety belts. You can be seriously
injured or killed by hitting things
inside the vehicle harder or by
being ejected from the vehicle. In
addition, anyone who is not
buckled up can strike other
passengers in the vehicle.
It is extremely dangerous to ride
in a cargo area, inside or outside
of a vehicle. In a collision,
passengers riding in these areas
are more likely to be seriously
injured or killed. Do not allow
(Continued)
Page 117 of 453
Chevrolet Tahoe/Suburban Owner Manual (GMNA-Localizing-U.S./Canada/
Mexico-9159366) - 2016 - crc - 5/19/15
116 Seats and Restraints
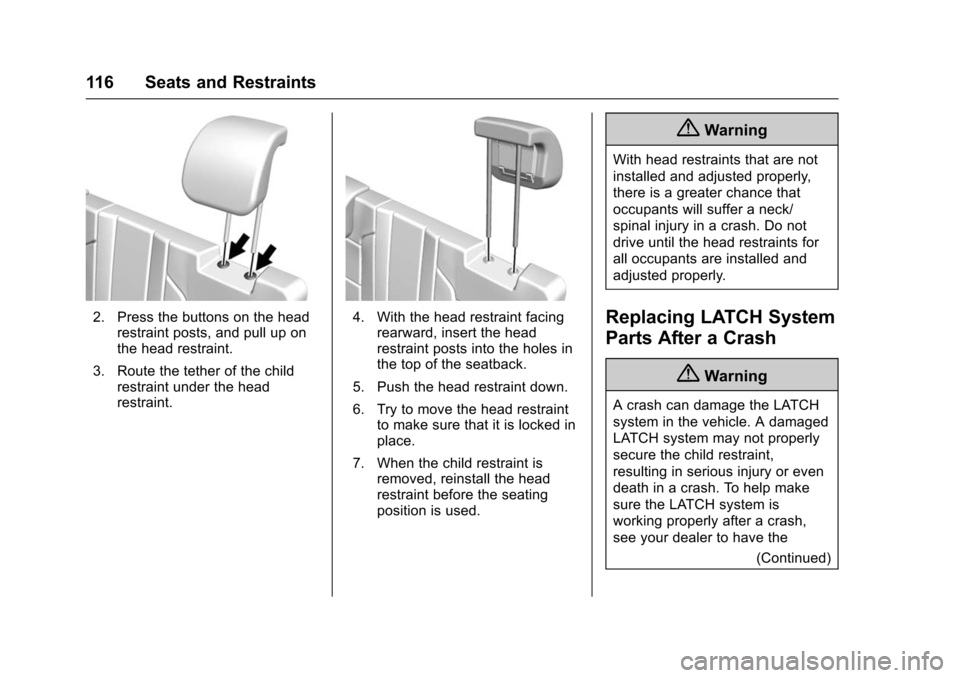
2. Press the buttons on the headrestraint posts, and pull up on
the head restraint.
3. Route the tether of the child restraint under the head
restraint.4. With the head restraint facingrearward, insert the head
restraint posts into the holes in
the top of the seatback.
5. Push the head restraint down.
6. Try to move the head restraint to make sure that it is locked in
place.
7. When the child restraint is removed, reinstall the head
restraint before the seating
position is used.
{Warning
With head restraints that are not
installed and adjusted properly,
there is a greater chance that
occupants will suffer a neck/
spinal injury in a crash. Do not
drive until the head restraints for
all occupants are installed and
adjusted properly.
Replacing LATCH System
Parts After a Crash
{Warning
A crash can damage the LATCH
system in the vehicle. A damaged
LATCH system may not properly
secure the child restraint,
resulting in serious injury or even
death in a crash. To help make
sure the LATCH system is
working properly after a crash,
see your dealer to have the
(Continued)
Page 180 of 453
Chevrolet Tahoe/Suburban Owner Manual (GMNA-Localizing-U.S./Canada/
Mexico-9159366) - 2016 - crc - 5/20/15
Instruments and Controls 179
Guidance Lines
Select to turn Off or On. See
Assistance Systems for Parking or
Backing0281.
Rear Park Assist Symbols
Select to turn Off or On. See
Assistance Systems for Parking or
Backing 0281.
Return to Factory Settings
Select and the following may
display:
.
Restore Vehicle Settings
. Clear All Private Data
. Restore Radio Settings Restore Vehicle Settings
This allows selection of restoring
vehicle settings.
Select Restore or Cancel.
Clear All Private Data
This allows selection to clear all
private information from the vehicle.
Select Delete or Cancel.
Restore Radio Settings
This allows selection to restore
radio settings.
Select Restore or Cancel.
Software Information
Select to view the infotainment
system current software information.
Universal Remote
System
See
Radio Frequency Statement
0 427.
Universal Remote System
Programming
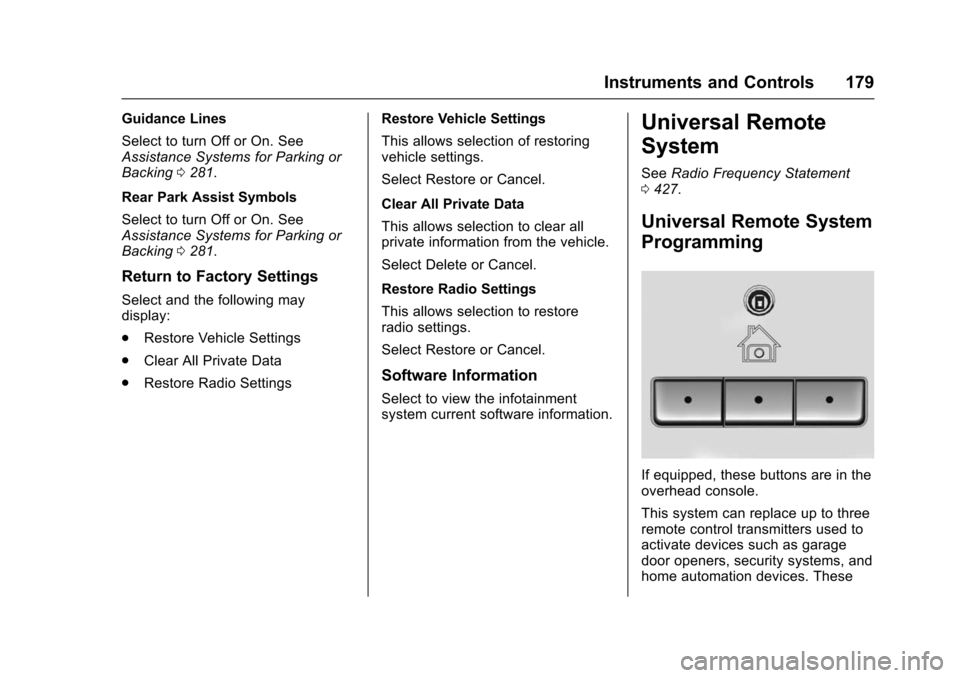
If equipped, these buttons are in the
overhead console.
This system can replace up to three
remote control transmitters used to
activate devices such as garage
door openers, security systems, and
home automation devices. These
Page 181 of 453
Chevrolet Tahoe/Suburban Owner Manual (GMNA-Localizing-U.S./Canada/
Mexico-9159366) - 2016 - crc - 5/20/15
180 Instruments and Controls
instructions refer to a garage door
opener, but can be used for other
devices.
Do not use the Universal Remote
system with any garage door opener
that does not have the stop and
reverse feature. This includes any
garage door opener model
manufactured before April 1, 1982.
Read the instructions completely
before programming the Universal
Remote system. It may help to have
another person assist with the
programming process.
Keep the original hand-held
transmitter for use in other vehicles
as well as for future programming.
Erase the programming when
vehicle ownership is terminated.
See“Erasing Universal Remote
System Buttons” later in this
section.
To program a garage door opener,
park outside directly in line with and
facing the garage door opener
receiver. Clear all people and
objects near the garage door. Make sure the hand-held transmitter
has a new battery for quick and
accurate transmission of the
radio-frequency signal.
Programming the Universal
Remote System
For questions or help programming
the Universal Remote system, call
1-800-355-3515 or see
www.homelink.com.
Programming involves
time-sensitive actions, and may time
out causing the procedure to be
repeated.
To program up to three devices:
1. Hold the end of the hand-held transmitter about 3 to 8 cm (1
to 3 in) away from the
Universal Remote system
buttons with the indicator light
in view. The hand-held
transmitter was supplied by the
manufacturer of the garage
door opener receiver.
2. At the same time, press and hold both the hand-held
transmitter button and one of
the three Universal Remote system buttons to be used to
operate the garage door. Do
not release either button until
the indicator light goes from a
slow to a rapid flashing light.
Then release both buttons.
Some garage door openers
may require substitution of
Step 2 with the procedure
under
“Radio Signals for
Canada and Some Gate
Operators” later in this section.
3. Press and hold the newly programmed Universal Remote
system button for five seconds
while watching the indicator
light and garage door
activation.
.If the indicator light stays on
continuously or the garage
door moves when the
button is pressed, then
programming is complete.
There is no need to
complete Steps 4–6.
. If the indicator light does
not come on or the garage
door does not move, a
second button press may