2016 CHEVROLET SILVERADO replacement parts
[x] Cancel search: replacement partsPage 74 of 533
Chevrolet Silverado Owner Manual (GMNA-Localizing-U.S./Canada/Mexico-
9159338) - 2016 - crc - 10/21/15
Seats and Restraints 73
will wear, so the extender will be
long enough for you. To help avoid
personal injury, do not let someone
else use it, and use it only for the
seat it is made to fit. The extender
has been designed for adults. Never
use it for securing child seats. To
wear it, attach it to the regular safety
belt. For more information, see the
instruction sheet that comes with
the extender.
Safety System Check
Now and then, check that the safety
belt reminder light, safety belts,
buckles, latch plates, retractors, and
anchorages are all working properly.
Look for any other loose or
damaged safety belt system parts
that might keep a safety belt system
from doing its job. See your dealer
to have it repaired. Torn or frayed
safety belts may not protect you in a
crash. They can rip apart under
impact forces. If a belt is torn or
frayed, get a new one right away.Make sure the safety belt reminder
light is working. See
Safety Belt
Reminders 0139.
Keep safety belts clean and dry.
See Safety Belt Care 073.
Safety Belt Care
Keep belts clean and dry.
{Warning
Do not bleach or dye safety belt
webbing. It may severely weaken
the webbing. In a crash, they
might not be able to provide
adequate protection. Clean and
rinse safety belt webbing only
with mild soap and lukewarm
water. Allow the webbing to dry.
Replacing Safety Belt
System Parts after a
Crash
{Warning
A crash can damage the safety
belt system in the vehicle.
A damaged safety belt system
may not properly protect the
person using it, resulting in
serious injury or even death in a
crash. To help make sure the
safety belt systems are working
properly after a crash, have them
inspected and any necessary
replacements made as soon as
possible.
After a minor crash, replacement of
safety belts may not be necessary.
But the safety belt assemblies that
were used during any crash may
have been stressed or damaged.
See your dealer to have the safety
belt assemblies inspected or
replaced.
Page 89 of 533
Chevrolet Silverado Owner Manual (GMNA-Localizing-U.S./Canada/Mexico-
9159338) - 2016 - crc - 10/21/15
88 Seats and Restraints
turning off the passenger airbag(s).
SeePassenger Sensing
System 082.
If the vehicle has rollover roof-rail
airbags, see Different Size Tires
and Wheels 0427 for additional
important information.
If a snow plow is added to the
vehicle, the airbags should still work
properly. The airbag systems were
designed to work properly under a
wide range of conditions, including
snow plowing with vehicles that
have the optional snow plow prep
package (RPO VYU). Do not
change or defeat the snow plow's
“tripping mechanism.” If you do, it
can damage the snow plow and the
vehicle, and may cause an airbag
deployment.
If you have to modify your vehicle
because you have a disability and
you have questions about whether
the modifications will affect the
vehicle's airbag system, or if you
have questions about whether the
airbag system will be affected if the
vehicle is modified for any other
reason, call Customer Assistance. See
Customer Assistance Offices
0 485 orCustomer Assistance
Offices 0485.
Airbag System Check
The airbag system does not need
regularly scheduled maintenance or
replacement. Make sure the airbag
readiness light is working. See
Airbag Readiness Light 0139.
Caution
If an airbag covering is damaged,
opened, or broken, the airbag
may not work properly. Do not
open or break the airbag
coverings. If there are any
opened or broken airbag
coverings, have the airbag
covering and/or airbag module
replaced. For the location of the
airbags, see Where Are the
Airbags? 076. See your dealer
for service.
Replacing Airbag System
Parts after a Crash
{Warning
A crash can damage the airbag
systems in the vehicle.
A damaged airbag system may
not work properly and may not
protect you and your
passenger(s) in a crash, resulting
in serious injury or even death. To
help make sure the airbag
systems are working properly
after a crash, have them
inspected and any necessary
replacements made as soon as
possible.
If an airbag inflates, you will need to
replace airbag system parts. See
your dealer for service.
If the airbag readiness light stays on
after the vehicle is started or comes
on when you are driving, the airbag
system may not work properly. Have
the vehicle serviced right away. See
Airbag Readiness Light 0139.
Page 107 of 533
Chevrolet Silverado Owner Manual (GMNA-Localizing-U.S./Canada/Mexico-
9159338) - 2016 - crc - 10/21/15
106 Seats and Restraints
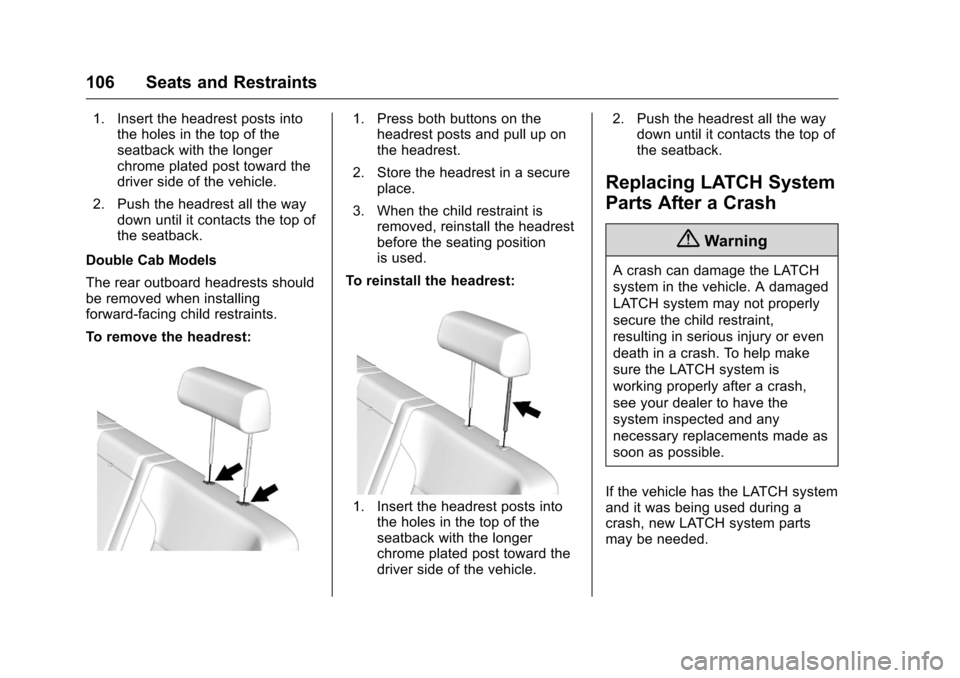
1. Insert the headrest posts intothe holes in the top of the
seatback with the longer
chrome plated post toward the
driver side of the vehicle.
2. Push the headrest all the way down until it contacts the top of
the seatback.
Double Cab Models
The rear outboard headrests should
be removed when installing
forward-facing child restraints.
To remove the headrest:1. Press both buttons on the headrest posts and pull up on
the headrest.
2. Store the headrest in a secure place.
3. When the child restraint is removed, reinstall the headrest
before the seating position
is used.
To reinstall the headrest:
1. Insert the headrest posts into the holes in the top of the
seatback with the longer
chrome plated post toward the
driver side of the vehicle. 2. Push the headrest all the way
down until it contacts the top of
the seatback.
Replacing LATCH System
Parts After a Crash
{Warning
A crash can damage the LATCH
system in the vehicle. A damaged
LATCH system may not properly
secure the child restraint,
resulting in serious injury or even
death in a crash. To help make
sure the LATCH system is
working properly after a crash,
see your dealer to have the
system inspected and any
necessary replacements made as
soon as possible.
If the vehicle has the LATCH system
and it was being used during a
crash, new LATCH system parts
may be needed.
Page 258 of 533
Chevrolet Silverado Owner Manual (GMNA-Localizing-U.S./Canada/Mexico-
9159338) - 2016 - crc - 10/21/15
Climate Controls 257
Air Vents
Use the air vents in the center and
on the side of the instrument panel
to direct airflow. Use the
thumbwheels near the air vents to
open or close off the airflow.
Air vents blow warm air on the side
windows in cold weather. If Floor,
Defog, or Defrost modes are
selected, a small amount of air will
come from the vents close to the
window. If the airflow is shut off
using the thumbwheels, warm air
will be directed to the other
instrument panel vents. This is
normal operation.
Use the thumbwheels to turn vent
airflow on or off based on the mode
selected.
Operation Tips
.Clear away any ice, snow,
or leaves from air inlets at the
base of the windshield that could
block the flow of air into the
vehicle. .
Keep the path under the front
seats clear of objects to help
circulate the air inside of the
vehicle more effectively.
. Use of non-GM approved hood
deflectors can adversely affect
the performance of the system.
Check with your dealer before
adding equipment to the outside
of the vehicle.
Maintenance
Passenger Compartment
Air Filter
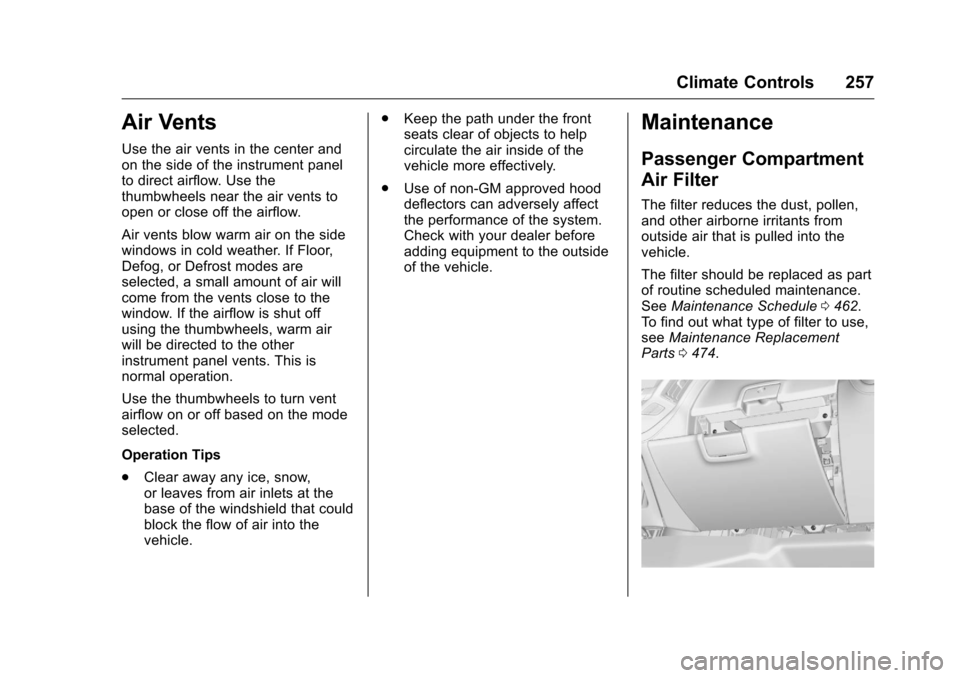
The filter reduces the dust, pollen,
and other airborne irritants from
outside air that is pulled into the
vehicle.
The filter should be replaced as part
of routine scheduled maintenance.
See Maintenance Schedule 0462.
To find out what type of filter to use,
see Maintenance Replacement
Parts 0474.
Page 286 of 533
Chevrolet Silverado Owner Manual (GMNA-Localizing-U.S./Canada/Mexico-
9159338) - 2016 - crc - 10/27/15
Driving and Operating 285
Engine Coolant Heater
The engine heater can provide
easier starting and better fuel
economy during engine warm-up in
cold weather conditions at or below
−18 °C (0 °F). Vehicles with an
engine heater should be plugged in
at least four hours before starting.
An internal thermostat in the
plug-end of the cord may exist,
which will prevent engine coolant
heater operation at temperatures
above−18 °C (0 °F).
If the vehicle has a diesel engine,
see the Duramax diesel
supplement.
To Use the Engine Coolant
Heater
1. Turn off the engine.
2. Open the hood and unwrap the electrical cord. The cord is
secured to the driver side
fender with a clip, next to the
engine compartment fuse
block. Carefully remove the
wire tie that bundles the
electrical plug. Do not cut the
electrical cord. Check the heater cord for
damage. If it is damaged, do
not use it. See your dealer for
a replacement. Inspect the
cord for damage yearly.
3. Plug the cord into a normal, grounded 110-volt AC outlet.
{Warning
Improper use of the heater cord
or an extension cord can damage
the cord and may result in
overheating and fire.
. Plug the cord into a
three-prong electrical utility
receptacle that is protected
by a ground fault detection
function. An ungrounded
outlet could cause an
electric shock.
. Use a weatherproof,
heavy-duty, 15 amp-rated
extension cord if needed.
Failure to use the
recommended extension
cord in good operating
(Continued)
Warning (Continued)
condition, or using a
damaged heater or
extension cord, could make
it overheat and cause a fire,
property damage, electric
shock, and injury.
. Do not operate the vehicle
with the heater cord
permanently attached to the
vehicle. Possible heater
cord and thermostat
damage could occur.
. While in use, do not let the
heater cord touch vehicle
parts or sharp edges. Never
close the hood on the
heater cord.
. Before starting the vehicle,
unplug the cord, reattach
the cover to the plug, and
securely fasten the cord.
Keep the cord away from
any moving parts.
Page 362 of 533
Chevrolet Silverado Owner Manual (GMNA-Localizing-U.S./Canada/Mexico-
9159338) - 2016 - crc - 10/21/15
Vehicle Care 361
Wheels and Tires
Tires . . . . . . . . . . . . . . . . . . . . . . . . . . 407
All-Season Tires . . . . . . . . . . . . . . 408
Winter Tires . . . . . . . . . . . . . . . . . . 408
Low-Profile Tires . . . . . . . . . . . . . 409
All-Terrain Tires . . . . . . . . . . . . . . . 409
Tire Sidewall Labeling . . . . . . . . 409
Tire Designations . . . . . . . . . . . . . 412
Tire Terminology andDefinitions . . . . . . . . . . . . . . . . . . 413
Tire Pressure . . . . . . . . . . . . . . . . . 416
Tire Pressure for High-Speed Operation . . . . . . . . . . . . . . . . . . . 417
Tire Pressure Monitor System . . . . . . . . . . . . . . . . . . . . . . 417
Tire Pressure Monitor Operation . . . . . . . . . . . . . . . . . . . 418
Tire Inspection . . . . . . . . . . . . . . . . 422
Tire Rotation . . . . . . . . . . . . . . . . . 422
When It Is Time for New Tires . . . . . . . . . . . . . . . . . . . . . . . . 424
Buying New Tires . . . . . . . . . . . . . 425
Different Size Tires and Wheels . . . . . . . . . . . . . . . . . . . . . . 427
Uniform Tire Quality Grading . . . . . . . . . . . . . . . . . . . . . 427
Wheel Alignment and Tire Balance . . . . . . . . . . . . . . . . . . . . . 429
Wheel Replacement . . . . . . . . . . 429
Tire Chains . . . . . . . . . . . . . . . . . . . 430
If a Tire Goes Flat . . . . . . . . . . . . 431 Tire Changing . . . . . . . . . . . . . . . . 432
Full-Size Spare Tire . . . . . . . . . . 441
Jump Starting
Jump Starting - North
America . . . . . . . . . . . . . . . . . . . . . 442
Towing the Vehicle
Towing the Vehicle . . . . . . . . . . . 447
Recreational VehicleTowing . . . . . . . . . . . . . . . . . . . . . . 447
Appearance Care
Exterior Care . . . . . . . . . . . . . . . . . 452
Interior Care . . . . . . . . . . . . . . . . . . 457
Floor Mats . . . . . . . . . . . . . . . . . . . . 460
General Information
For service and parts needs, visit
your dealer. You will receive
genuine GM parts and GM-trained
and supported service people.
Genuine GM parts have one of
these marks:
California Proposition
65 Warning
WARNING: Most motor vehicles,
including this one, contain and/or
emit chemicals known to the State
of California to cause cancer and
birth defects or other reproductive
Page 388 of 533
Chevrolet Silverado Owner Manual (GMNA-Localizing-U.S./Canada/Mexico-
9159338) - 2016 - crc - 10/21/15
Vehicle Care 387
Caution
Continuing to drive with worn-out
brake pads could result in costly
brake repair.
Some driving conditions or climates
can cause a brake squeal when the
brakes are first applied or lightly
applied. This does not mean
something is wrong with the brakes.
Properly torqued wheel nuts are
necessary to help prevent brake
pulsation. When tires are rotated,
inspect brake pads for wear and
evenly tighten wheel nuts in the
proper sequence to torque
specifications in Capacities and
Specifications 0478.
Brake linings should always be
replaced as complete axle sets.
Brake Pedal Travel
See your dealer if the brake pedal
does not return to normal height,
or if there is a rapid increase in
pedal travel. This could be a sign
that brake service may be required.
Replacing Brake System Parts
Always replace brake system parts
with new, approved replacement
parts. If this is not done, the brakes
may not work properly. The braking
performance expected can change
in many other ways if the wrong
replacement brake parts are
installed or parts are improperly
installed.
Brake Fluid
The brake master cylinder reservoir
is filled with DOT 3 brake fluid. See
Engine Compartment Overview
0 364 for the location of the
reservoir. There are only two reasons why the
brake fluid level in the reservoir may
go down:
.
Normal brake lining wear. When
new linings are installed, the
fluid level goes back up.
. A fluid leak in the brake
hydraulic system. Have the
brake hydraulic system fixed.
With a leak, the brakes will not
work well.
Always clean the brake fluid
reservoir cap and the area around
the cap before removing it.
Do not top off the brake fluid.
Adding fluid does not correct a leak.
If fluid is added when the linings are
worn, there will be too much fluid
when new brake linings are
installed. Add or remove fluid, as
necessary, only when work is done
on the brake hydraulic system.
Page 395 of 533
Chevrolet Silverado Owner Manual (GMNA-Localizing-U.S./Canada/Mexico-
9159338) - 2016 - crc - 10/21/15
394 Vehicle Care
On all vehicles, the ignition key
should come out only in LOCK/OFF.
Contact your dealer if service is
required.
Park Brake and P (Park)
Mechanism Check
{Warning
When you are doing this check,
the vehicle could begin to move.
You or others could be injured
and property could be damaged.
Make sure there is room in front
of the vehicle in case it begins to
roll. Be ready to apply the regular
brake at once should the vehicle
begin to move.
Park on a fairly steep hill, with the
vehicle facing downhill. Keeping
your foot on the regular brake, set
the parking brake.
. To check the parking brake's
holding ability: With the engine
running and the transmission in
N (Neutral), slowly remove foot pressure from the regular brake
pedal. Do this until the vehicle is
held by the parking brake only.
. To check the P (Park)
mechanism's holding ability:
With the engine running, shift to
P (Park). Then release the
parking brake followed by the
regular brake.
Contact your dealer if service is
required.
Wiper Blade Replacement
Windshield wiper blades should be
inspected for wear or cracking.
Replacement blades come in
different types and are removed in
different ways. For proper
windshield wiper blade length and
type, see Maintenance
Replacement Parts 0474.
Caution
Allowing the wiper arm to touch
the windshield when no wiper
blade is installed could damage
(Continued)
Caution (Continued)
the windshield. Any damage that
occurs would not be covered by
the vehicle warranty. Do not allow
the wiper arm to touch the
windshield.
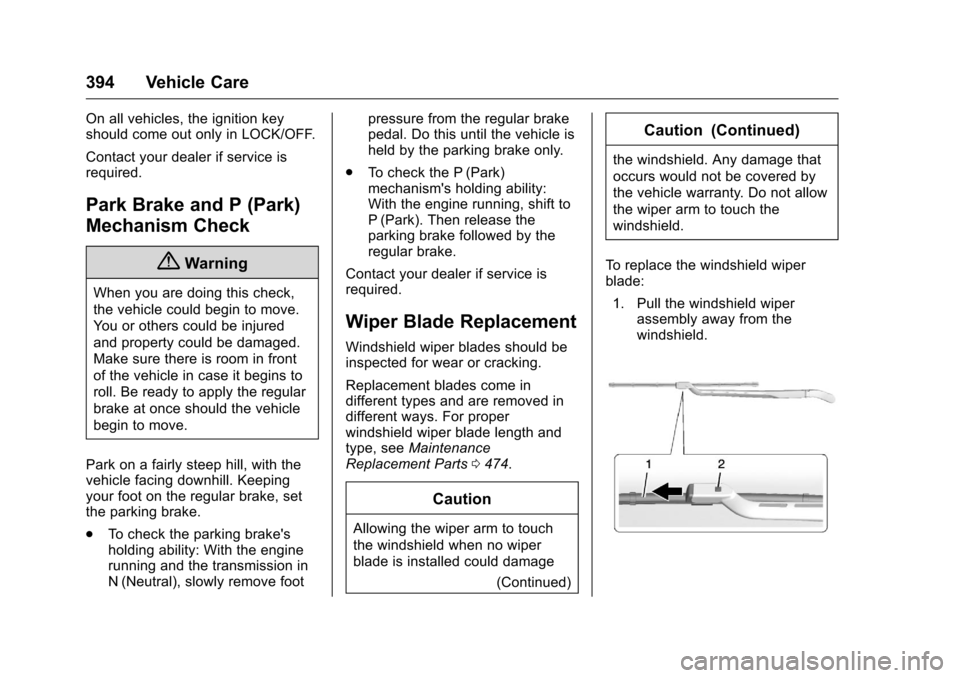
To replace the windshield wiper
blade: 1. Pull the windshield wiper assembly away from the
windshield.