2016 CHEVROLET SILVERADO battery
[x] Cancel search: batteryPage 37 of 533

Chevrolet Silverado Owner Manual (GMNA-Localizing-U.S./Canada/Mexico-
9159338) - 2016 - crc - 10/21/15
36 Keys, Doors, and Windows
The key has a bar-coded key tag
that the dealer or qualified locksmith
can use to make new keys. Store
this information in a safe place, not
in the vehicle.
See your dealer if a replacement
key or additional key is needed.
If it becomes difficult to turn a key,
inspect the key blade for debris.
Periodically clean with a brush
or pick.
With an active OnStar subscription,
an OnStar Advisor may remotely
unlock the vehicle. SeeOnStar
Overview 0501 orOnStar
Overview 0501.
Remote Keyless Entry
(RKE) System
See Radio Frequency Statement
0 496 orRadio Frequency
Statement 0496.
If there is a decrease in the RKE
operating range:
. Check the distance. The
transmitter may be too far from
the vehicle. .
Check the location. Other
vehicles or objects may be
blocking the signal.
. Check the transmitter's battery.
See “Battery Replacement” later
in this section.
. If the transmitter is still not
working correctly, see your
dealer or a qualified technician
for service.
Remote Keyless Entry
(RKE) System Operation
The RKE transmitter functions may
work up to 60 m (197 ft) away from
the vehicle.
Other conditions can affect the
performance of the transmitter. See
Remote Keyless Entry (RKE)
System 036.
With Remote Start (without
Remote Start Similar)
/(Remote Vehicle Start) :
If equipped,
/is used to start the
engine from outside the vehicle
using the RKE transmitter. See
Remote Vehicle Start 038.
Q(Lock) : Press to lock all doors
and the tailgate.
If enabled in Vehicle
Personalization, the turn signal
lamps flash once to indicate locking
has occurred. If enabled through the
DIC, the horn chirps when
Qis
pressed again within three seconds.
See Vehicle Personalization 0165.
Page 38 of 533
Chevrolet Silverado Owner Manual (GMNA-Localizing-U.S./Canada/Mexico-
9159338) - 2016 - crc - 10/21/15
Keys, Doors, and Windows 37
PressingQarms the alarm system.
See Vehicle Alarm System 044.
If equipped with auto mirror folding,
pressing and holding
Qfor
one second will fold the mirrors. The
auto mirror folding feature will not
operate unless it is enabled. See
Folding Mirrors 049 and Vehicle
Personalization 0165.
K(Unlock) : Press once to unlock
only the driver door. If
Kis pressed
again within three seconds, all
remaining doors and the tailgate
unlock. The interior lamps may
come on and stay on for 20 seconds
or until the ignition is turned on.
If enabled in Vehicle
Personalization, the turn signal
lamps flash twice to indicate
unlocking has occurred. See Vehicle
Personalization 0165. If enabled
through the DIC, the exterior lamps
may turn on. See Vehicle
Personalization 0165.
Pressing
Kon the RKE transmitter
disarms the alarm system. See
Vehicle Personalization 0165. If equipped with auto mirror folding,
pressing and holding
Kfor
one second will unfold the mirrors.
The auto mirror folding feature will
not operate unless it is enabled.
See Folding Mirrors 049 and
Vehicle Personalization 0165.
On some models, press, release
and then press and hold
Kto open
all of the windows. Pressing the
button again will stop the windows.
See Vehicle Alarm System 044.
7(Vehicle Locator/Panic
Alarm) : Press and release one
time to initiate vehicle locator. The
turn signal lamps flash and the horn
sounds three times.
Press and hold
7for at least
three seconds to sound the panic
alarm. The turn signal lamps flash
and the horn sounds repeatedly for
30 seconds. The alarm turns off
when the ignition is moved to ON/
RUN or
7is pressed again. The
ignition must be in LOCK/OFF for
the panic alarm to work.
Programming Transmitters to
the Vehicle
Only RKE transmitters programmed
to this vehicle will work. If a
transmitter is lost or stolen, a
replacement can be purchased and
programmed through your dealer.
Each vehicle can have up to
eight transmitters programmed to it.
See your dealer for transmitter
programming.
Battery Replacement
Replace the battery in the
transmitter soon if the REPLACE
BATTERY IN REMOTE KEY
message displays in the DIC.
Caution
When replacing the battery, do
not touch any of the circuitry on
the transmitter. Static from your
body could damage the
transmitter.
Page 39 of 533

Chevrolet Silverado Owner Manual (GMNA-Localizing-U.S./Canada/Mexico-
9159338) - 2016 - crc - 10/21/15
38 Keys, Doors, and Windows
To replace the battery:
1. Separate and remove the backcover of the transmitter with a
flat, thin object, such as a coin.
2. Press and slide the batterydown toward the pocket of the
transmitter in the direction of
the key ring. Do not use a
metal object.
3. Remove the battery.
4. Insert the new battery, positive side facing up. Replace with a
CR2032 or equivalent battery.
5. Push together the transmitter back cover top side first, and
then the bottom toward the
key ring.
Remote Vehicle Start
If equipped with the remote start
feature, the climate control system
will come on when the vehicle is
started remotely, depending on the
outside temperature.
The rear defog and heated and
ventilated seats, if equipped, may
also come on. See Heated and
Ventilated Front Seats 063 and
Vehicle Personalization 0165.
Laws in some communities may
restrict the use of remote starters.
Check local regulations for any
requirements on remote starting of
vehicles.
Do not use remote start if the
vehicle is low on fuel.
The vehicle cannot be remote
started if:
. The key is in the ignition.
. The hood is not closed.
. There is an emission control
system malfunction and the
malfunction indicator lamp is on.
Page 54 of 533
Chevrolet Silverado Owner Manual (GMNA-Localizing-U.S./Canada/Mexico-
9159338) - 2016 - crc - 10/21/15
Keys, Doors, and Windows 53
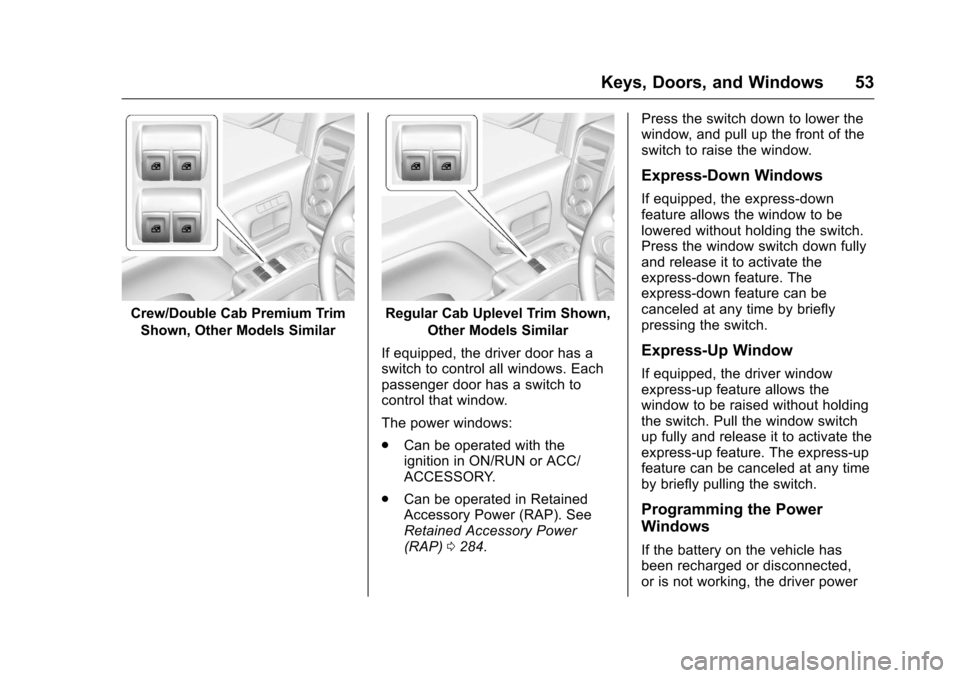
Crew/Double Cab Premium TrimShown, Other Models SimilarRegular Cab Uplevel Trim Shown, Other Models Similar
If equipped, the driver door has a
switch to control all windows. Each
passenger door has a switch to
control that window.
The power windows:
. Can be operated with the
ignition in ON/RUN or ACC/
ACCESSORY.
. Can be operated in Retained
Accessory Power (RAP). See
Retained Accessory Power
(RAP) 0284. Press the switch down to lower the
window, and pull up the front of the
switch to raise the window.
Express-Down Windows
If equipped, the express-down
feature allows the window to be
lowered without holding the switch.
Press the window switch down fully
and release it to activate the
express-down feature. The
express-down feature can be
canceled at any time by briefly
pressing the switch.
Express-Up Window
If equipped, the driver window
express-up feature allows the
window to be raised without holding
the switch. Pull the window switch
up fully and release it to activate the
express-up feature. The express-up
feature can be canceled at any time
by briefly pulling the switch.
Programming the Power
Windows
If the battery on the vehicle has
been recharged or disconnected,
or is not working, the driver power
Page 88 of 533

Chevrolet Silverado Owner Manual (GMNA-Localizing-U.S./Canada/Mexico-
9159338) - 2016 - crc - 10/21/15
Seats and Restraints 87
{Warning
Stowing of articles under the
passenger seat or between the
passenger seat cushion and
seatback may interfere with the
proper operation of the passenger
sensing system.
Servicing the
Airbag-Equipped Vehicle
Airbags affect how the vehicle
should be serviced. There are parts
of the airbag system in several
places around the vehicle. Your
dealer and the service manual have
information about servicing the
vehicle and the airbag system. To
purchase a service manual, see
Service Publications Ordering
Information0495.
{Warning
For up to 10 seconds after the
vehicle is turned off and the
battery is disconnected, an airbag
can still inflate during improper
service. You can be injured if you
are close to an airbag when it
inflates. Avoid yellow connectors.
They are probably part of the
airbag system. Be sure to follow
proper service procedures, and
make sure the person performing
work for you is qualified to do so.
Adding Equipment to the
Airbag-Equipped Vehicle
Adding accessories that change the
vehicle's frame, bumper system,
height, front end, or side sheet
metal, may keep the airbag system
from working properly. The
operation of the airbag system can
also be affected by changing or
moving any parts of the front seats,
safety belts, the airbag sensing and
diagnostic module, steering wheel,
instrument panel, roof-rail airbag modules, ceiling headliner or pillar
garnish trim, overhead console,
front sensors, side impact sensors,
or airbag wiring.
Your dealer and the service manual
have information about the location
of the airbag sensors, sensing and
diagnostic module, and airbag
wiring.
In addition, the vehicle may have a
passenger sensing system for the
front outboard passenger position,
which includes sensors that are part
of the passenger seat. The
passenger sensing system may not
operate properly if the original seat
trim is replaced with non-GM
covers, upholstery, or trim; or with
GM covers, upholstery, or trim
designed for a different vehicle. Any
object, such as an aftermarket seat
heater or a comfort-enhancing pad
or device, installed under or on top
of the seat fabric, could also
interfere with the operation of the
passenger sensing system. This
could either prevent proper
deployment of the passenger
airbag(s) or prevent the passenger
sensing system from properly
Page 124 of 533
Chevrolet Silverado Owner Manual (GMNA-Localizing-U.S./Canada/Mexico-
9159338) - 2016 - crc - 10/21/15
Instruments and Controls 123
Instruments and
Controls
Controls
Steering Wheel Adjustment . . . 124
Steering Wheel Controls . . . . . . 125
Heated Steering Wheel . . . . . . . 126
Horn . . . . . . . . . . . . . . . . . . . . . . . . . . 126
Windshield Wiper/Washer . . . . 126
Compass . . . . . . . . . . . . . . . . . . . . . 127
Clock . . . . . . . . . . . . . . . . . . . . . . . . . 127
Power Outlets . . . . . . . . . . . . . . . . 128
Wireless Charging . . . . . . . . . . . . 130
Warning Lights, Gauges, and
Indicators
Warning Lights, Gauges, andIndicators . . . . . . . . . . . . . . . . . . . 131
Instrument Cluster . . . . . . . . . . . . 132
Speedometer . . . . . . . . . . . . . . . . . 135
Odometer . . . . . . . . . . . . . . . . . . . . . 135
Trip Odometer . . . . . . . . . . . . . . . . 135
Tachometer . . . . . . . . . . . . . . . . . . . 135
Fuel Gauge . . . . . . . . . . . . . . . . . . . 135
Engine Oil Pressure Gauge . . . . . . . . . . . . . . . . . . . . . . 136
Engine Coolant Temperature Gauge . . . . . . . . . . . . . . . . . . . . . . 137
Voltmeter Gauge . . . . . . . . . . . . . 138 Safety Belt Reminders . . . . . . . . 139
Airbag Readiness Light . . . . . . . 139
Airbag On-Off Light . . . . . . . . . . . 140
Passenger Airbag Status
Indicator . . . . . . . . . . . . . . . . . . . . 141
Charging System Light . . . . . . . 142
Malfunction Indicator Lamp (Check Engine Light) . . . . . . . . 143
Brake System Warning Light . . . . . . . . . . . . . . . . . . . . . . . . 144
Antilock Brake System (ABS) Warning Light . . . . . . . . . . . . . . . 145
Four-Wheel-Drive Light . . . . . . . 145
Tow/Haul Mode Light . . . . . . . . . 146
Hill Descent Control Light . . . . 146
Lane Departure Warning (LDW) Light (2500/3500
Series) . . . . . . . . . . . . . . . . . . . . . . 146
Lane Keep Assist (LKA) Light (1500 Series) . . . . . . . . . . . . . . . 146
Vehicle Ahead Indicator . . . . . . 147
Traction Off Light . . . . . . . . . . . . . 147
StabiliTrak
®OFF Light . . . . . . . . 147
Traction Control System (TCS)/ StabiliTrak
®Light . . . . . . . . . . . 148
Tire Pressure Light . . . . . . . . . . . 148
Low Fuel Warning Light . . . . . . 148
Security Light . . . . . . . . . . . . . . . . . 149
High-Beam On Light . . . . . . . . . . 149
Front Fog Lamp Light . . . . . . . . . 149
Lamps On Reminder . . . . . . . . . 149 Cruise Control Light . . . . . . . . . . 150
Information Displays
Driver Information Center (DIC)
(Base Level) . . . . . . . . . . . . . . . . 150
Driver Information Center (DIC) (Uplevel) . . . . . . . . . . . . . . . . . . . . 152
Vehicle Messages
Vehicle Messages . . . . . . . . . . . . 155
Battery Voltage and ChargingMessages . . . . . . . . . . . . . . . . . . . 155
Brake System Messages . . . . . 156
Compass Messages . . . . . . . . . . 156
Door Ajar Messages . . . . . . . . . . 156
Engine Cooling System Messages . . . . . . . . . . . . . . . . . . . 156
Engine Oil Messages . . . . . . . . . 157
Engine Power Messages . . . . . 157
Fuel System Messages . . . . . . . 158
Key and Lock Messages . . . . . 158
Lamp Messages . . . . . . . . . . . . . . 158
Object Detection System Messages . . . . . . . . . . . . . . . . . . . 158
Ride Control System Messages . . . . . . . . . . . . . . . . . . . 159
Airbag System Messages . . . . 160
Safety Belt Messages . . . . . . . . 160
Security Messages . . . . . . . . . . . 161
Steering System Messages . . . . . . . . . . . . . . . . . . . 161
Page 130 of 533
Chevrolet Silverado Owner Manual (GMNA-Localizing-U.S./Canada/Mexico-
9159338) - 2016 - crc - 10/21/15
Instruments and Controls 129
The power outlets on the center
stack and in front of the cupholders
are powered at all times. The power
outlets inside the storage area and
on the rear of the console are
powered when the ignition is in ON/
RUN or ACC/ACCESSORY,
or when RAP is active.
{Warning
Power is always supplied to the
outlets. Do not leave electrical
equipment plugged in when the
vehicle is not in use because the
vehicle could catch fire and cause
injury or death.
Caution
Leaving electrical equipment
plugged in for an extended period
of time while the vehicle is off will
drain the battery. Always unplug
electrical equipment when not in
use and do not plug in equipment
that exceeds the maximum
15 amp rating.Certain power accessory plugs may
not be compatible with the
accessory power outlet and could
overload vehicle or adapter fuses.
If a problem is experienced, see
your dealer.
When adding electrical equipment,
be sure to follow the proper
installation instructions included with
the equipment. See
Add-On
Electrical Equipment 0355.
Caution
Hanging heavy equipment from
the power outlet can cause
damage not covered by the
vehicle warranty. The power
outlets are designed for
accessory power plugs only, such
as cell phone charge cords.
Power Outlet 110/120 Volt
Alternating Current
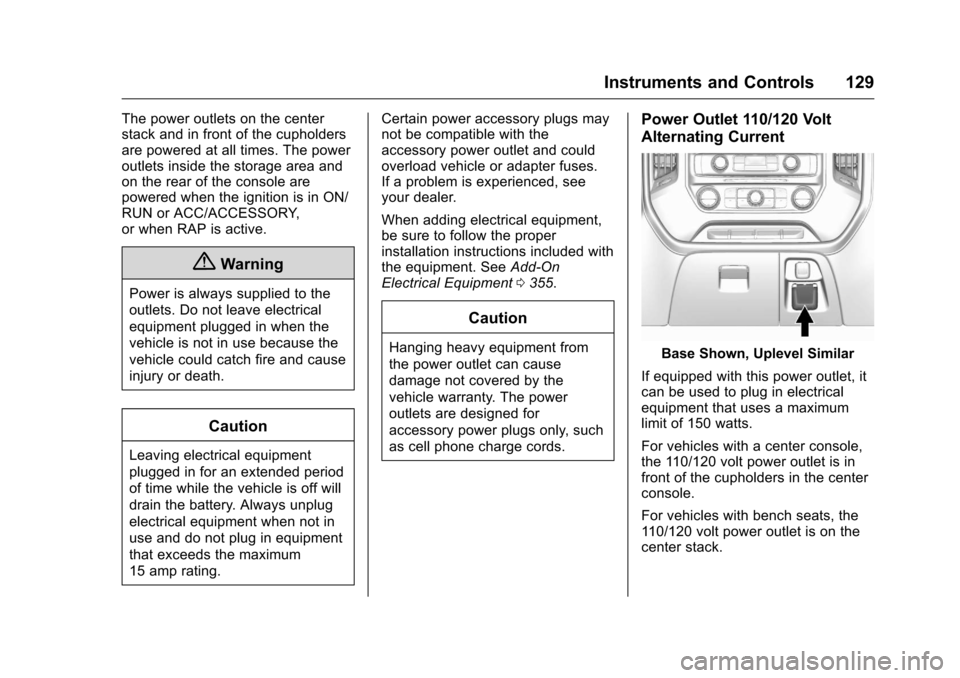
Base Shown, Uplevel Similar
If equipped with this power outlet, it
can be used to plug in electrical
equipment that uses a maximum
limit of 150 watts.
For vehicles with a center console,
the 110/120 volt power outlet is in
front of the cupholders in the center
console.
For vehicles with bench seats, the
110/120 volt power outlet is on the
center stack.
Page 139 of 533
Chevrolet Silverado Owner Manual (GMNA-Localizing-U.S./Canada/Mexico-
9159338) - 2016 - crc - 10/21/15
138 Instruments and Controls
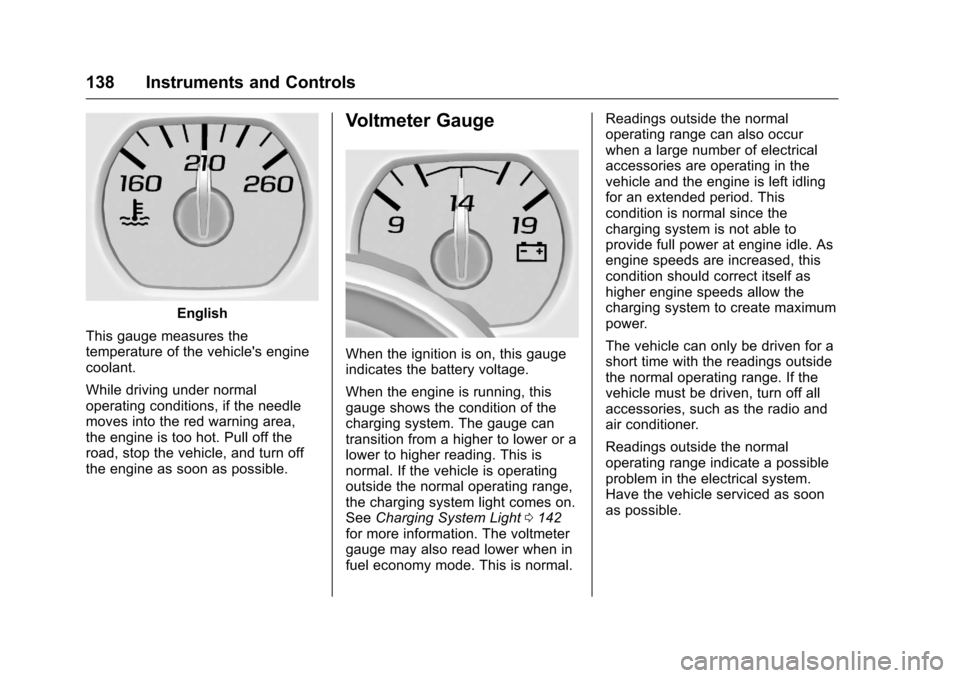
English
This gauge measures the
temperature of the vehicle's engine
coolant.
While driving under normal
operating conditions, if the needle
moves into the red warning area,
the engine is too hot. Pull off the
road, stop the vehicle, and turn off
the engine as soon as possible.
Voltmeter Gauge
When the ignition is on, this gauge
indicates the battery voltage.
When the engine is running, this
gauge shows the condition of the
charging system. The gauge can
transition from a higher to lower or a
lower to higher reading. This is
normal. If the vehicle is operating
outside the normal operating range,
the charging system light comes on.
See Charging System Light 0142
for more information. The voltmeter
gauge may also read lower when in
fuel economy mode. This is normal. Readings outside the normal
operating range can also occur
when a large number of electrical
accessories are operating in the
vehicle and the engine is left idling
for an extended period. This
condition is normal since the
charging system is not able to
provide full power at engine idle. As
engine speeds are increased, this
condition should correct itself as
higher engine speeds allow the
charging system to create maximum
power.
The vehicle can only be driven for a
short time with the readings outside
the normal operating range. If the
vehicle must be driven, turn off all
accessories, such as the radio and
air conditioner.
Readings outside the normal
operating range indicate a possible
problem in the electrical system.
Have the vehicle serviced as soon
as possible.