2016 CHEVROLET ORLANDO Servicing
[x] Cancel search: ServicingPage 47 of 372
Black plate (1,1)Chevrolet Orlando Owner Manual - 2013 - CRC - 6/5/12
Seats and Restraints 3-1
Seats and
Restraints
Head Restraints
Head Restraints . . . . . . . . . . . . . . . 3-2
Front Seats
Seat Adjustment . . . . . . . . . . . . . . 3-3
Power Seat Adjustment . . . . . . . 3-4
Reclining Seatbacks . . . . . . . . . . 3-4
Front Seat Armrest . . . . . . . . . . . . 3-6
Heated Front Seats . . . . . . . . . . . 3-6
Folding Seatback . . . . . . . . . . . . . 3-7
Rear Seats
Second Row Seats . . . . . . . . . . . 3-8
Third Row Seats . . . . . . . . . . . . . 3-12
Safety Belts
Safety Belts . . . . . . . . . . . . . . . . . . 3-15
How to Wear Safety BeltsProperly . . . . . . . . . . . . . . . . . . . . 3-16 Lap-Shoulder Belt . . . . . . . . . . . 3-17
Safety Belt Use During
Pregnancy . . . . . . . . . . . . . . . . . . 3-22
Safety Belt Extender . . . . . . . . . 3-22
Safety System Check . . . . . . . . 3-23
Safety Belt Care . . . . . . . . . . . . . 3-23
Replacing Safety Belt System Parts after a Crash . . . . . . . . . 3-23
Airbag System
Airbag System . . . . . . . . . . . . . . . 3-24
Where Are the Airbags? . . . . . 3-26
When Should an AirbagInflate? . . . . . . . . . . . . . . . . . . . . . 3-27
What Makes an Airbag Inflate? . . . . . . . . . . . . . . . . . . . . . 3-28
How Does an Airbag
Restrain? . . . . . . . . . . . . . . . . . . . 3-28
What Will You See after an Airbag Inflates? . . . . . . . . . . . . 3-29
Servicing the Airbag-Equipped Vehicle . . . . . . . . . . . . . . . . . . . . . 3-30 Adding Equipment to the
Airbag-Equipped Vehicle . . . 3-30
Airbag System Check . . . . . . . . 3-31
Replacing Airbag System Parts after a Crash . . . . . . . . . 3-31
Child Restraints
Older Children . . . . . . . . . . . . . . . 3-32
Infants and Young
Children . . . . . . . . . . . . . . . . . . . . 3-34
Child Restraint Systems . . . . . 3-36
Where to Put the Restraint . . . 3-38
Lower Anchors and Tethers for Children (LATCH
System) . . . . . . . . . . . . . . . . . . . . 3-39
Replacing LATCH System Parts After a Crash . . . . . . . . . 3-44
Securing Child Restraints (Rear Seat) . . . . . . . . . . . . . . . . . 3-44
Securing Child Restraints (Front Passenger Seat) . . . . 3-46
Page 76 of 372
Black plate (30,1)Chevrolet Orlando Owner Manual - 2013 - CRC - 6/5/12
3-30 Seats and Restraints
Additional windshield breakage may
also occur from the front outboard
passenger airbag.
.Airbags are designed to inflate
only once. After an airbag
inflates, you will need some new
parts for the airbag system.
If you do not get them, the
airbag system will not be there
to help protect you in another
crash. A new system will include
airbag modules and possibly
other parts. The service manual
for the vehicle covers the need
to replace other parts.
.The vehicle has a crash sensing
and diagnostic module which
records information after a
crash. SeeVehicle Data
Recording and Privacy on
page 13‑14 andEvent Data
Recorders on page 13‑14.
.Let only qualified technicians
work on the airbag systems.
Improper service can mean that an airbag system will not work
properly. See your dealer for
service.
Servicing the
Airbag-Equipped Vehicle
Airbags affect how the vehicle
should be serviced. There are parts
of the airbag system in several
places around the vehicle. Your
dealer and the service manual have
information about servicing the
vehicle and the airbag system. To
purchase a service manual, see
Service Publications Ordering
Information on page 13‑11.
{WARNING
For up to 10 seconds after the
vehicle is turned off and the
battery is disconnected, an airbag
can still inflate during improper
service. You can be injured if you
are close to an airbag when it
inflates. Avoid yellow connectors.
(Continued)
WARNING (Continued)
They are probably part of the
airbag system. Be sure to follow
proper service procedures, and
make sure the person performing
work for you is qualified to do so.
Adding Equipment to the
Airbag-Equipped Vehicle
Adding accessories that change the
vehicle's frame, bumper system,
height, front end or side sheet
metal, may keep the airbag system
from working properly. The
operation of the airbag system can
also be affected by changing or
moving any parts of the front seats,
safety belts, the airbag sensing and
diagnostic module, steering wheel,
instrument panel, roof-rail airbag
modules, ceiling headliner or pillar
garnish trim, overhead console,
front sensors, side impact sensors,
or airbag wiring.
Page 227 of 372
Black plate (47,1)Chevrolet Orlando Owner Manual - 2013 - CRC - 6/5/12
Driving and Operating 9-47
Trailer Brakes
Does the trailer have its own
brakes? Be sure to read and follow
the instructions for the trailer brakes
so they are installed, adjusted, and
maintained properly.
Because the vehicle has antilock
brakes, do not tap into the vehicle's
brake system. If this is done, both
brake systems will not work well,
or at all.
Conversions and
Add-Ons
Add-On Electrical
Equipment
Notice:Some electrical
equipment can damage the
vehicle or cause components to
not work and would not be
covered by the warranty. Always
check with your dealer before
adding electrical equipment. Add-on equipment can drain the
vehicle's 12-volt battery, even if the
vehicle is not operating.
The vehicle has an airbag system.
Before attempting to add anything
electrical to the vehicle, see
Servicing the Airbag-Equipped
Vehicle on page 3‑30
andAdding
Equipment to the Airbag-Equipped
Vehicle on page 3‑30.
Page 232 of 372
Black plate (4,1)Chevrolet Orlando Owner Manual - 2013 - CRC - 6/5/12
10-4 Vehicle Care
Vehicle Checks
Doing Your Own
Service Work
{WARNING
It can be dangerous to work on
your vehicle if you do not have
the proper knowledge, service
manual, tools, or parts. Always
follow owner manual procedures
and consult the service manual
for your vehicle before doing any
service work.
If doing some of your own service
work, use the proper service
manual. It tells you much more
about how to service the vehicle
than this manual can. To order the
proper service manual, see Service
Publications Ordering Information
on page 13‑11. This vehicle has an airbag system.
Before attempting to do your own
service work, see
Servicing the
Airbag-Equipped Vehicle on
page 3‑30.
Keep a record with all parts receipts
and list the mileage and the date of
any service work performed. See
Maintenance Records on
page 11‑14.
Notice: Even small amounts of
contamination can cause damage
to vehicle systems. Do not allow
contaminants to contact the
fluids, reservoir caps,
or dipsticks.
Hood
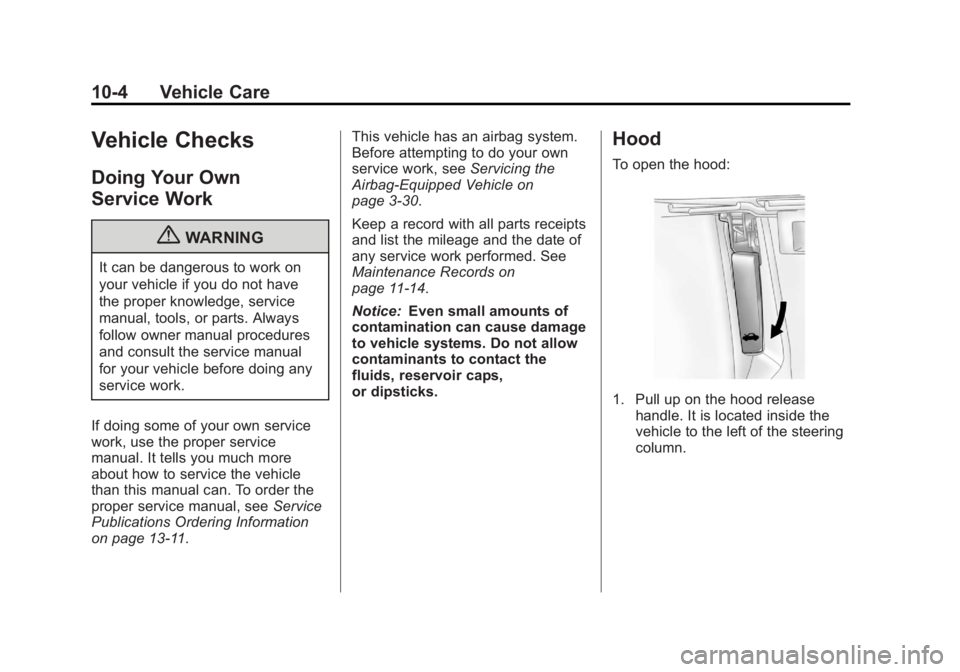
To open the hood:
1. Pull up on the hood release handle. It is located inside the
vehicle to the left of the steering
column.
Page 361 of 372
Black plate (1,1)Chevrolet Orlando Owner Manual - 2013 - CRC - 6/5/12
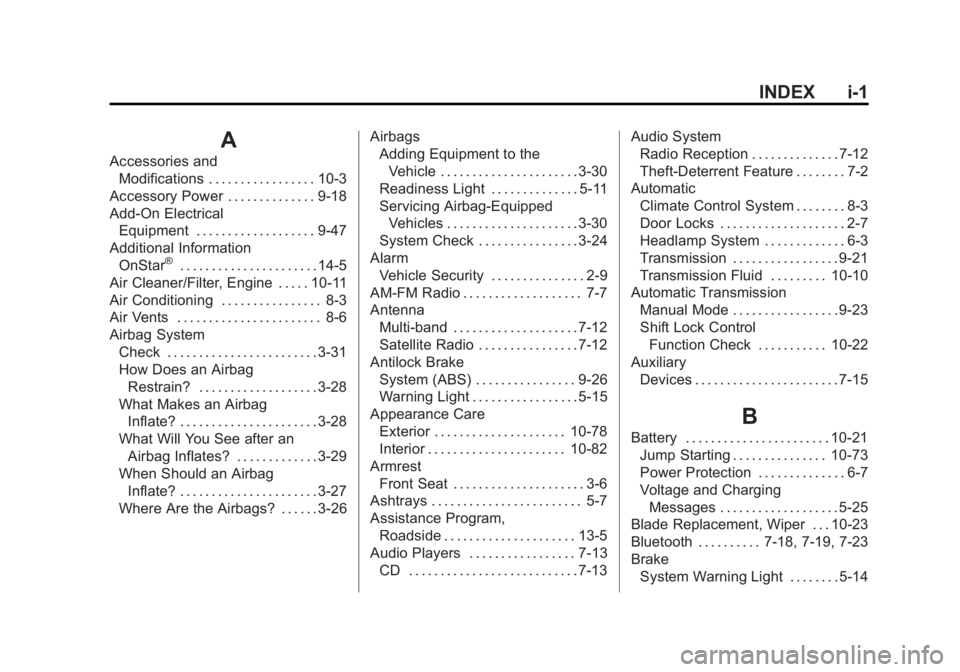
INDEX i-1
A
Accessories andModifications . . . . . . . . . . . . . . . . . 10-3
Accessory Power . . . . . . . . . . . . . . 9-18
Add-On Electrical Equipment . . . . . . . . . . . . . . . . . . . 9-47
Additional Information
OnStar
®. . . . . . . . . . . . . . . . . . . . . . 14-5
Air Cleaner/Filter, Engine . . . . . 10-11
Air Conditioning . . . . . . . . . . . . . . . . 8-3
Air Vents . . . . . . . . . . . . . . . . . . . . . . . 8-6
Airbag System Check . . . . . . . . . . . . . . . . . . . . . . . . 3-31
How Does an AirbagRestrain? . . . . . . . . . . . . . . . . . . . 3-28
What Makes an Airbag
Inflate? . . . . . . . . . . . . . . . . . . . . . . 3-28
What Will You See after an Airbag Inflates? . . . . . . . . . . . . . 3-29
When Should an Airbag
Inflate? . . . . . . . . . . . . . . . . . . . . . . 3-27
Where Are the Airbags? . . . . . . 3-26 Airbags
Adding Equipment to the
Vehicle . . . . . . . . . . . . . . . . . . . . . . 3-30
Readiness Light . . . . . . . . . . . . . . 5-11
Servicing Airbag-Equipped Vehicles . . . . . . . . . . . . . . . . . . . . . 3-30
System Check . . . . . . . . . . . . . . . . 3-24
Alarm Vehicle Security . . . . . . . . . . . . . . . 2-9
AM-FM Radio . . . . . . . . . . . . . . . . . . . 7-7
Antenna Multi-band . . . . . . . . . . . . . . . . . . . . 7-12
Satellite Radio . . . . . . . . . . . . . . . . 7-12
Antilock Brake System (ABS) . . . . . . . . . . . . . . . . 9-26
Warning Light . . . . . . . . . . . . . . . . . 5-15
Appearance Care Exterior . . . . . . . . . . . . . . . . . . . . . 10-78
Interior . . . . . . . . . . . . . . . . . . . . . . 10-82
Armrest Front Seat . . . . . . . . . . . . . . . . . . . . . 3-6
Ashtrays . . . . . . . . . . . . . . . . . . . . . . . . 5-7
Assistance Program, Roadside . . . . . . . . . . . . . . . . . . . . . 13-5
Audio Players . . . . . . . . . . . . . . . . . 7-13
CD . . . . . . . . . . . . . . . . . . . . . . . . . . . 7-13 Audio System
Radio Reception . . . . . . . . . . . . . . 7-12
Theft-Deterrent Feature . . . . . . . . 7-2
Automatic Climate Control System . . . . . . . . 8-3
Door Locks . . . . . . . . . . . . . . . . . . . . 2-7
Headlamp System . . . . . . . . . . . . . 6-3
Transmission . . . . . . . . . . . . . . . . . 9-21
Transmission Fluid . . . . . . . . . 10-10
Automatic Transmission Manual Mode . . . . . . . . . . . . . . . . . 9-23
Shift Lock Control
Function Check . . . . . . . . . . . 10-22
Auxiliary Devices . . . . . . . . . . . . . . . . . . . . . . . 7-15
B
Battery . . . . . . . . . . . . . . . . . . . . . . . 10-21Jump Starting . . . . . . . . . . . . . . . 10-73
Power Protection . . . . . . . . . . . . . . 6-7
Voltage and ChargingMessages . . . . . . . . . . . . . . . . . . . 5-25
Blade Replacement, Wiper . . . 10-23
Bluetooth . . . . . . . . . . 7-18, 7-19, 7-23
Brake
System Warning Light . . . . . . . . 5-14
Page 370 of 372
Black plate (10,1)Chevrolet Orlando Owner Manual - 2013 - CRC - 6/5/12
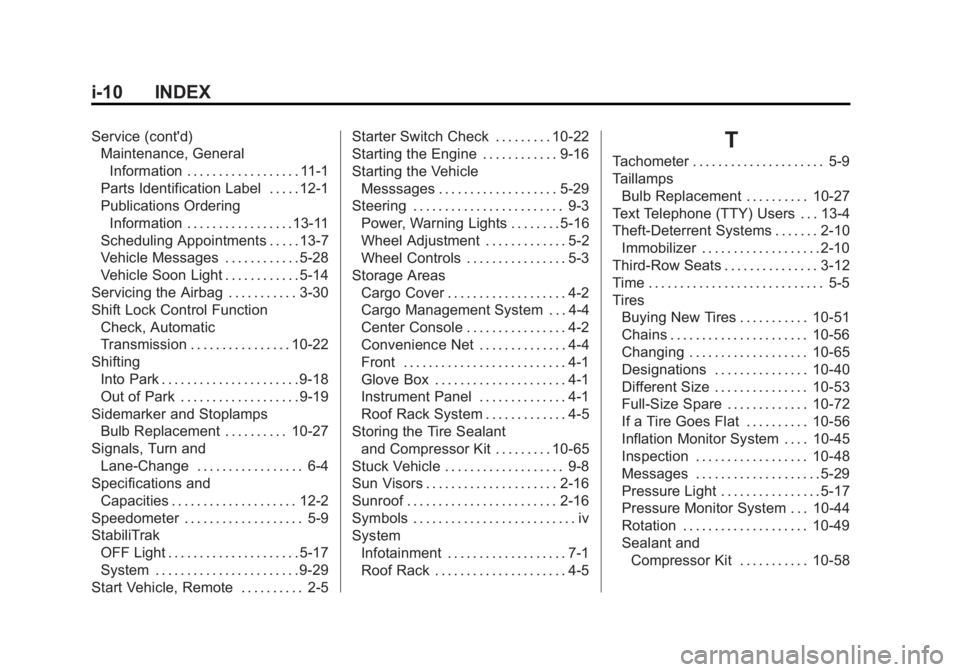
i-10 INDEX
Service (cont'd)Maintenance, General
Information . . . . . . . . . . . . . . . . . . 11-1
Parts Identification Label . . . . . 12-1
Publications Ordering
Information . . . . . . . . . . . . . . . . .13-11
Scheduling Appointments . . . . . 13-7
Vehicle Messages . . . . . . . . . . . . 5-28
Vehicle Soon Light . . . . . . . . . . . . 5-14
Servicing the Airbag . . . . . . . . . . . 3-30
Shift Lock Control Function Check, Automatic
Transmission . . . . . . . . . . . . . . . . 10-22
Shifting
Into Park . . . . . . . . . . . . . . . . . . . . . . 9-18
Out of Park . . . . . . . . . . . . . . . . . . . 9-19
Sidemarker and Stoplamps Bulb Replacement . . . . . . . . . . 10-27
Signals, Turn and Lane-Change . . . . . . . . . . . . . . . . . 6-4
Specifications and Capacities . . . . . . . . . . . . . . . . . . . . 12-2
Speedometer . . . . . . . . . . . . . . . . . . . 5-9
StabiliTrak
OFF Light . . . . . . . . . . . . . . . . . . . . . 5-17
System . . . . . . . . . . . . . . . . . . . . . . . 9-29
Start Vehicle, Remote . . . . . . . . . . 2-5 Starter Switch Check . . . . . . . . . 10-22
Starting the Engine . . . . . . . . . . . . 9-16
Starting the Vehicle
Messsages . . . . . . . . . . . . . . . . . . . 5-29
Steering . . . . . . . . . . . . . . . . . . . . . . . . 9-3 Power, Warning Lights . . . . . . . . 5-16
Wheel Adjustment . . . . . . . . . . . . . 5-2
Wheel Controls . . . . . . . . . . . . . . . . 5-3
Storage Areas Cargo Cover . . . . . . . . . . . . . . . . . . . 4-2
Cargo Management System . . . 4-4
Center Console . . . . . . . . . . . . . . . . 4-2
Convenience Net . . . . . . . . . . . . . . 4-4
Front . . . . . . . . . . . . . . . . . . . . . . . . . . 4-1
Glove Box . . . . . . . . . . . . . . . . . . . . . 4-1
Instrument Panel . . . . . . . . . . . . . . 4-1
Roof Rack System . . . . . . . . . . . . . 4-5
Storing the Tire Sealant and Compressor Kit . . . . . . . . . 10-65
Stuck Vehicle . . . . . . . . . . . . . . . . . . . 9-8
Sun Visors . . . . . . . . . . . . . . . . . . . . . 2-16
Sunroof . . . . . . . . . . . . . . . . . . . . . . . . 2-16
Symbols . . . . . . . . . . . . . . . . . . . . . . . . . . iv
System Infotainment . . . . . . . . . . . . . . . . . . . 7-1
Roof Rack . . . . . . . . . . . . . . . . . . . . . 4-5T
Tachometer . . . . . . . . . . . . . . . . . . . . . 5-9
Taillamps
Bulb Replacement . . . . . . . . . . 10-27
Text Telephone (TTY) Users . . . 13-4
Theft-Deterrent Systems . . . . . . . 2-10 Immobilizer . . . . . . . . . . . . . . . . . . . 2-10
Third-Row Seats . . . . . . . . . . . . . . . 3-12
Time . . . . . . . . . . . . . . . . . . . . . . . . . . . . 5-5
Tires Buying New Tires . . . . . . . . . . . 10-51
Chains . . . . . . . . . . . . . . . . . . . . . . 10-56
Changing . . . . . . . . . . . . . . . . . . . 10-65
Designations . . . . . . . . . . . . . . . 10-40
Different Size . . . . . . . . . . . . . . . 10-53
Full-Size Spare . . . . . . . . . . . . . 10-72
If a Tire Goes Flat . . . . . . . . . . 10-56
Inflation Monitor System . . . . 10-45
Inspection . . . . . . . . . . . . . . . . . . 10-48
Messages . . . . . . . . . . . . . . . . . . . . 5-29
Pressure Light . . . . . . . . . . . . . . . . 5-17
Pressure Monitor System . . . 10-44
Rotation . . . . . . . . . . . . . . . . . . . . 10-49
Sealant andCompressor Kit . . . . . . . . . . . 10-58