2016 CHEVROLET CRUZE LIMITED light
[x] Cancel search: lightPage 19 of 357
Chevrolet Cruze Limited Owner Manual (GMNA-Localizing-U.S./Canada-
9282844) - 2016 - crc - 9/3/15
18 In Brief
Storing a Favorite Station
Stations from all bands can be
stored in the favorite lists in any
order. Up to six stations can be
stored in each favorite page and the
number of available favorite pages
can be set.
To store the station to a position in
the list, press the corresponding
numeric button 1 to 6 until a beep is
heard.
See“Storing a Station as a
Favorite” inAM-FM Radio 0140
ii.
Setting the Clock
Adjusting the Time or Date
To set the time and date for the
radio with navigation:
1. Press CLOCK.
2. Select Set Time or Set Date.
3. Turn the MENU/SEL knob to adjust the highlighted number.
4. Press the MENU/SEL knob to select the next number.
5. To save the settings, press BACK on the radio faceplate. Setting the 12/24 Hour Format
To set the 12/24 hour format for the
radio with navigation:
1. Press CLOCK.
2. Highlight 12/24 Hour Format.
3. Press the MENU/SEL knob to select the 12 hour or 24 hour
display format.
4. To save the settings, press BACK on the radio faceplate.
For detailed instructions on setting
the clock for the vehicle's specific
audio system, see Clock096
ii.
Satellite Radio
If equipped, vehicles with a
SiriusXM®satellite radio tuner and a
valid SiriusXM satellite radio
subscription can receive SiriusXM
programming.
SiriusXM Satellite Radio
Service
SiriusXM is a satellite radio service
based in the 48 contiguous United
States and 10 Canadian provinces.
SiriusXM satellite radio has a wide variety of programming and
commercial-free music, coast to
coast, and in digital-quality sound.
A fee is required to receive the
SiriusXM service.
Refer to:
.
www.siriusxm.com or call
1-866-635-2349 (U.S.).
. www.xmradio.ca or call
1-877-209-0079 (Canada).
See Satellite Radio 0142
ii.
Portable Audio Devices
Some vehicles have a 3.5 mm
(1/8 in) auxiliary input and a USB
port in the center console. External
devices such as iPods
®, MP3
players, CD changers, and USB
drives may be connected,
depending on the audio system.
See Auxiliary Devices 0147
ii.
Page 21 of 357
Chevrolet Cruze Limited Owner Manual (GMNA-Localizing-U.S./Canada-
9282844) - 2016 - crc - 9/3/15
20 In Brief
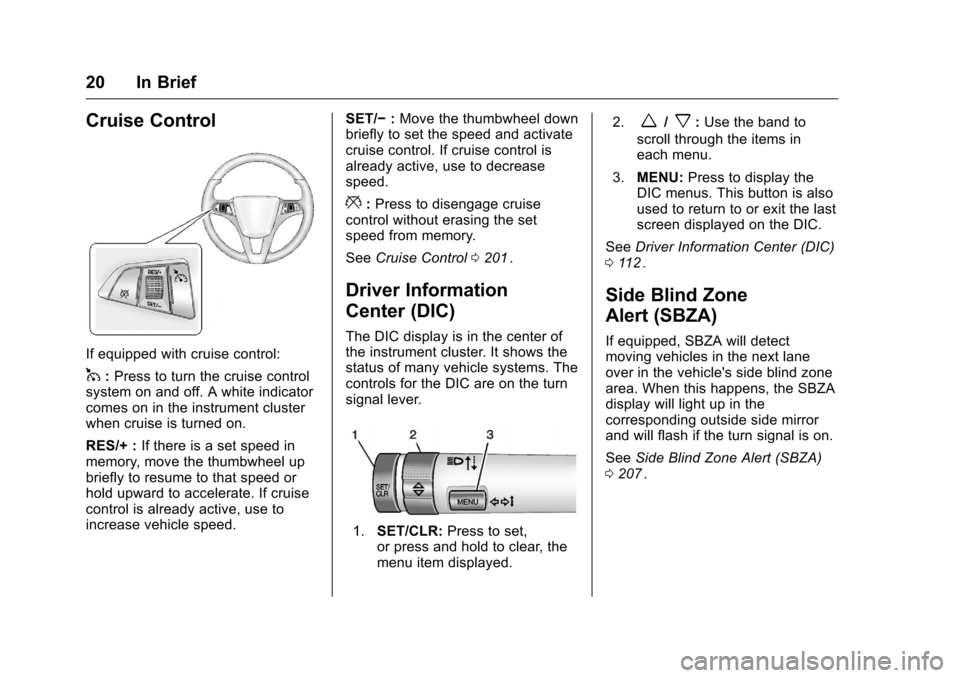
Cruise Control
If equipped with cruise control:
1:Press to turn the cruise control
system on and off. A white indicator
comes on in the instrument cluster
when cruise is turned on.
RES/+ : If there is a set speed in
memory, move the thumbwheel up
briefly to resume to that speed or
hold upward to accelerate. If cruise
control is already active, use to
increase vehicle speed. SET/−
:Move the thumbwheel down
briefly to set the speed and activate
cruise control. If cruise control is
already active, use to decrease
speed.
*: Press to disengage cruise
control without erasing the set
speed from memory.
See Cruise Control 0201
ii.
Driver Information
Center (DIC)
The DIC display is in the center of
the instrument cluster. It shows the
status of many vehicle systems. The
controls for the DIC are on the turn
signal lever.
1. SET/CLR: Press to set,
or press and hold to clear, the
menu item displayed. 2.
w/x:
Use the band to
scroll through the items in
each menu.
3. MENU: Press to display the
DIC menus. This button is also
used to return to or exit the last
screen displayed on the DIC.
See Driver Information Center (DIC)
0 112
ii.
Side Blind Zone
Alert (SBZA)
If equipped, SBZA will detect
moving vehicles in the next lane
over in the vehicle's side blind zone
area. When this happens, the SBZA
display will light up in the
corresponding outside side mirror
and will flash if the turn signal is on.
See Side Blind Zone Alert (SBZA)
0 207
ii.
Page 22 of 357
Chevrolet Cruze Limited Owner Manual (GMNA-Localizing-U.S./Canada-
9282844) - 2016 - crc - 9/3/15
In Brief 21
Rear Vision
Camera (RVC)
If equipped, RVC displays a view of
the area behind the vehicle, on the
infotainment system display, when
the vehicle is shifted into
R (Reverse).
SeeRear Vision Camera (RVC)
0 203
ii.
Rear Cross Traffic Alert
(RCTA) System
If equipped, the RCTA system uses
a triangle with an arrow displayed
on the RVC screen to warn of traffic
behind your vehicle that may cross
your vehicle's path while in
R (Reverse). In addition, beeps will
sound.
See “Rear Cross Traffic Alert
(RCTA)” underRear Vision Camera
(RVC) 0203
ii.
Parking Assist
If equipped, Rear Parking Assist
(RPA) uses sensors on the rear
bumper to assist with parking and avoiding objects while in
R (Reverse). It operates at speeds
less than 8 km/h (5 mph) and uses
audible beeps to provide distance
and system information.
Keep the sensors on the vehicle's
rear bumper clean to ensure proper
operation.
See
Parking Assist 0205
ii.
Power Outlets
The accessory power outlets can be
used to plug in electrical equipment,
such as a cell phone or MP3 player.
There is one accessory power outlet
located on the center floor console
and one on the rear of the center
floor console. These outlets are
powered when the key is in ON/
RUN or ACC/ACCESSORY, or until
the driver door is opened within
10 minutes of turning off the vehicle.
See Retained Accessory Power
(RAP) 0188
ii.
See Power Outlets 097
ii.
Performance and
Maintenance
Traction Control/
Electronic Stability
Control
The Traction Control System (TCS)
limits wheel spin. The system turns
on automatically every time the
vehicle is started.
The StabiliTrak system assists with
directional control of the vehicle in
difficult driving conditions. The
system also turns on automatically
every time the vehicle is started.
.
To turn off traction control, press
and release the
gbutton on the
center console. The traction off
light
iilluminates.
. To turn off both traction control
and StabiliTrak, press and hold
the
gbutton, until the traction off
light
iand the StabiliTrak OFF
light
gilluminate.
Page 23 of 357
Chevrolet Cruze Limited Owner Manual (GMNA-Localizing-U.S./Canada-
9282844) - 2016 - crc - 9/3/15
22 In Brief
.Press and release thegbutton
again to turn on both systems.
See Traction Control/Electronic
Stability Control 0199
ii.
Tire Pressure Monitor
This vehicle may have a Tire
Pressure Monitor System (TPMS).
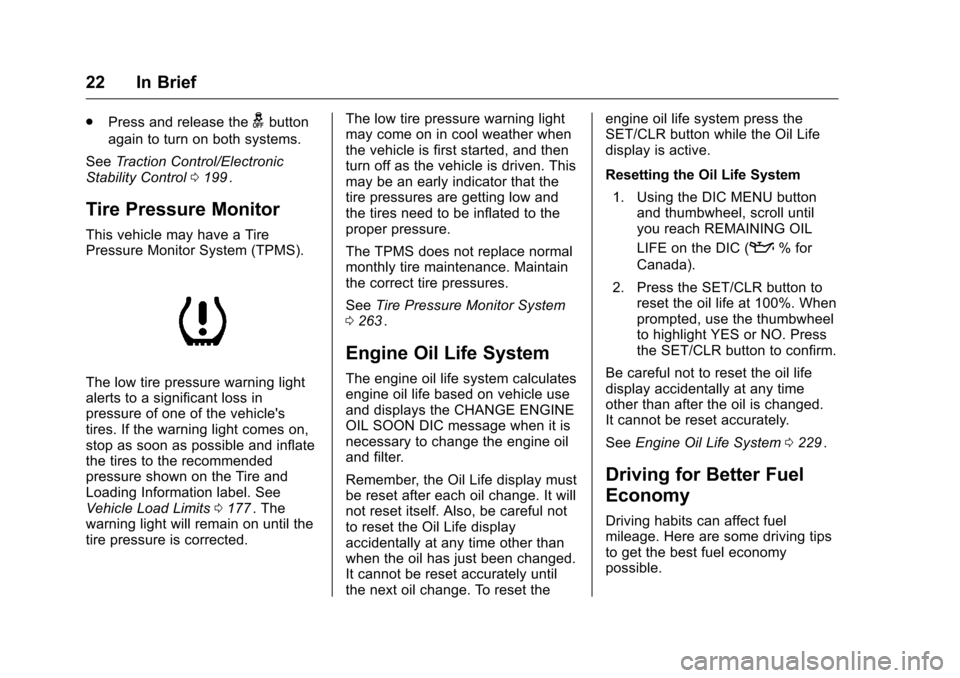
The low tire pressure warning light
alerts to a significant loss in
pressure of one of the vehicle's
tires. If the warning light comes on,
stop as soon as possible and inflate
the tires to the recommended
pressure shown on the Tire and
Loading Information label. See
Vehicle Load Limits 0177
ii. The
warning light will remain on until the
tire pressure is corrected. The low tire pressure warning light
may come on in cool weather when
the vehicle is first started, and then
turn off as the vehicle is driven. This
may be an early indicator that the
tire pressures are getting low and
the tires need to be inflated to the
proper pressure.
The TPMS does not replace normal
monthly tire maintenance. Maintain
the correct tire pressures.
See
Tire Pressure Monitor System
0 263
ii.
Engine Oil Life System
The engine oil life system calculates
engine oil life based on vehicle use
and displays the CHANGE ENGINE
OIL SOON DIC message when it is
necessary to change the engine oil
and filter.
Remember, the Oil Life display must
be reset after each oil change. It will
not reset itself. Also, be careful not
to reset the Oil Life display
accidentally at any time other than
when the oil has just been changed.
It cannot be reset accurately until
the next oil change. To reset the engine oil life system press the
SET/CLR button while the Oil Life
display is active.
Resetting the Oil Life System
1. Using the DIC MENU button and thumbwheel, scroll until
you reach REMAINING OIL
LIFE on the DIC (
:% for
Canada).
2. Press the SET/CLR button to reset the oil life at 100%. When
prompted, use the thumbwheel
to highlight YES or NO. Press
the SET/CLR button to confirm.
Be careful not to reset the oil life
display accidentally at any time
other than after the oil is changed.
It cannot be reset accurately.
See Engine Oil Life System 0229
ii.
Driving for Better Fuel
Economy
Driving habits can affect fuel
mileage. Here are some driving tips
to get the best fuel economy
possible.
Page 26 of 357
Chevrolet Cruze Limited Owner Manual (GMNA-Localizing-U.S./Canada-
9282844) - 2016 - crc - 9/3/15
Keys, Doors, and Windows 25
{Warning
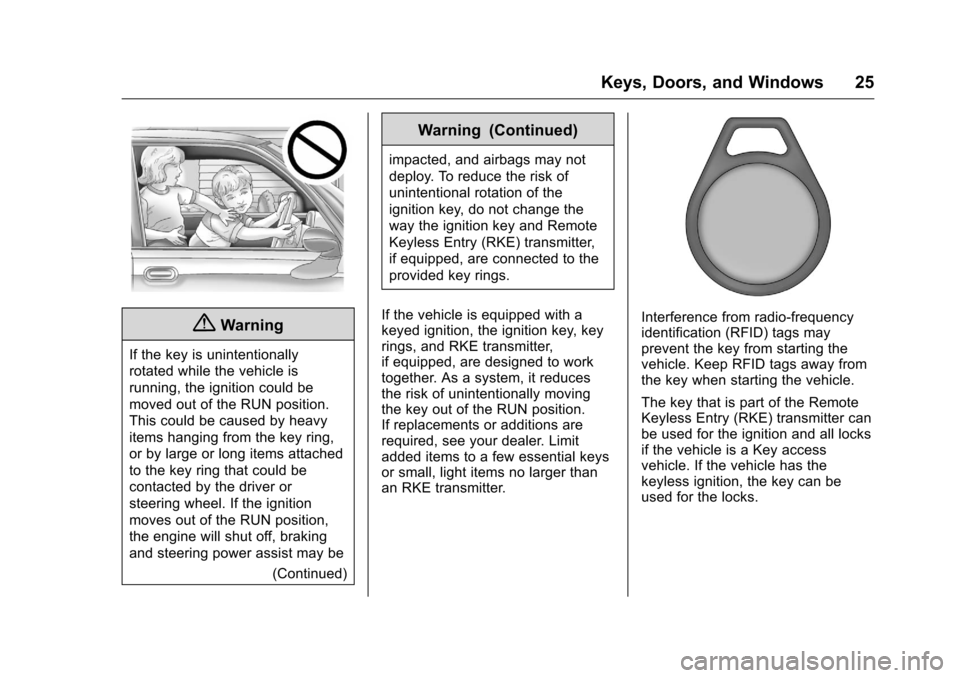
If the key is unintentionally
rotated while the vehicle is
running, the ignition could be
moved out of the RUN position.
This could be caused by heavy
items hanging from the key ring,
or by large or long items attached
to the key ring that could be
contacted by the driver or
steering wheel. If the ignition
moves out of the RUN position,
the engine will shut off, braking
and steering power assist may be(Continued)
Warning (Continued)
impacted, and airbags may not
deploy. To reduce the risk of
unintentional rotation of the
ignition key, do not change the
way the ignition key and Remote
Keyless Entry (RKE) transmitter,
if equipped, are connected to the
provided key rings.
If the vehicle is equipped with a
keyed ignition, the ignition key, key
rings, and RKE transmitter,
if equipped, are designed to work
together. As a system, it reduces
the risk of unintentionally moving
the key out of the RUN position.
If replacements or additions are
required, see your dealer. Limit
added items to a few essential keys
or small, light items no larger than
an RKE transmitter.
Interference from radio-frequency
identification (RFID) tags may
prevent the key from starting the
vehicle. Keep RFID tags away from
the key when starting the vehicle.
The key that is part of the Remote
Keyless Entry (RKE) transmitter can
be used for the ignition and all locks
if the vehicle is a Key access
vehicle. If the vehicle has the
keyless ignition, the key can be
used for the locks.
Page 30 of 357
Chevrolet Cruze Limited Owner Manual (GMNA-Localizing-U.S./Canada-
9282844) - 2016 - crc - 9/3/15
Keys, Doors, and Windows 29
Programming Transmitters to
the Vehicle
Only RKE transmitters programmed
to the vehicle will work. If a
transmitter is lost or stolen, a
replacement can be purchased and
programmed through your dealer.
The vehicle can be reprogrammed
so that lost or stolen transmitters no
longer work. Any remaining
transmitters will need to be
reprogrammed. Each vehicle can
have up to eight transmitters
matched to it.
Programming with a Recognized
Transmitter (Key Vehicles Only)
To program a new key:1. Insert the original, already programmed key in the ignition
and turn the key to the ON/
RUN position.
2. Turn the key to LOCK/OFF, and remove the key.
3. Insert the new key to be programmed and turn it to the
ON/RUN position within
five seconds. The security light will turn off
once the key has been
programmed.
4. Repeat Steps 1–3 if additional keys are to be programmed.
If a key is lost or damaged, see your
dealer to have a new key made.
Programming without a
Recognized Transmitter (Key
Vehicles Only)
Program a new key to the vehicle
when a recognized key is not
available. Canadian regulations
require that owners see their dealer.
If there are no currently recognized
keys available, follow this procedure
to program the first key.
This procedure will take
approximately 30 minutes to
complete for the first key. The
vehicle must be off and all of the
keys you wish to program must be
with you.
1. Insert the new vehicle key into the ignition.
2. Turn to ON/RUN. The security light will come on. 3. Wait 10 minutes until the
security light turns off.
4. Turn the ignition to LOCK/OFF.
5. Repeat Steps 2–4 two more times. After the third time, turn
to ON/RUN; the key is learned
and all previously known keys
will no longer work with the
vehicle.
Remaining keys can be learned by
following the procedure in
“Programming with a Recognized
Transmitter (Key Vehicles Only).”
Programming with a Recognized
Transmitter (Keyless Access
Vehicles Only)
A new transmitter can be
programmed to the vehicle when
there is one recognized transmitter.
To program, the vehicle must be off
and all of the transmitters, both
currently recognized and new, must
be with you.
Page 33 of 357
Chevrolet Cruze Limited Owner Manual (GMNA-Localizing-U.S./Canada-
9282844) - 2016 - crc - 9/3/15
32 Keys, Doors, and Windows
2. Press the button on therecognized transmitter to
extend the key blade. Insert the
key blade into the
transmitter slot.
3. With the vehicle in P (Park) or N (Neutral), press the brake
pedal and the ENGINE START/
STOP button. See Starting the
Engine 0185
iifor additional
information about the vehicle's
keyless ignition with
pushbutton start.
Replace the transmitter battery
as soon as possible.
Battery Replacement
Replace the battery if the REPLACE
BATTERY IN REMOTE KEY
message displays in the DIC. See
Key and Lock Messages 0118
ii.
Caution
When replacing the battery, do
not touch any of the circuitry on
the transmitter. Static from your
body could damage the
transmitter. The battery is not rechargeable. To
replace the battery:
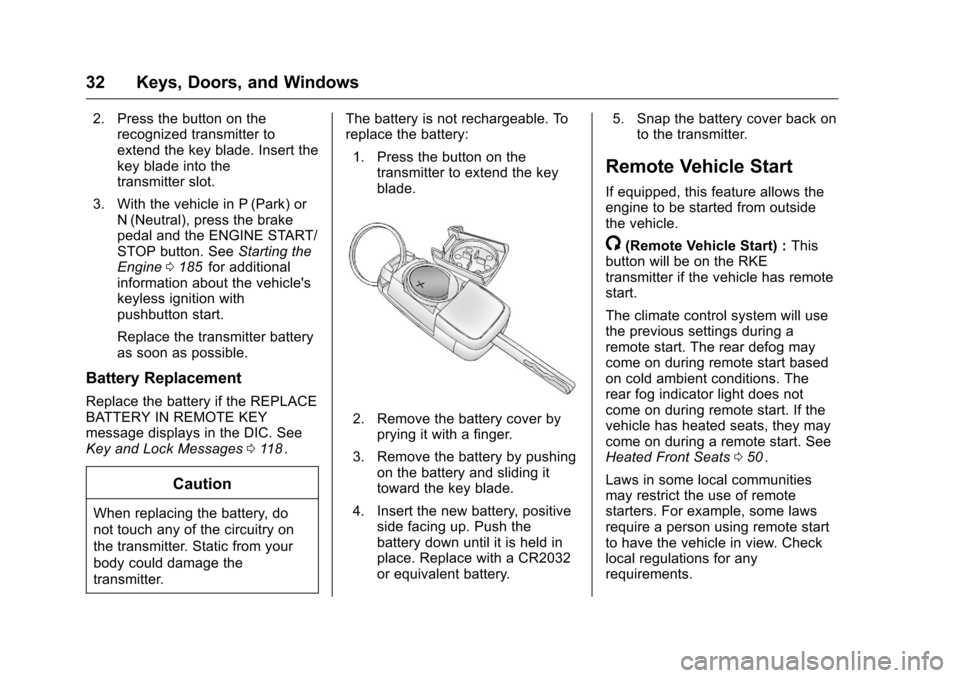
1. Press the button on the transmitter to extend the key
blade.
2. Remove the battery cover byprying it with a finger.
3. Remove the battery by pushing on the battery and sliding it
toward the key blade.
4. Insert the new battery, positive side facing up. Push the
battery down until it is held in
place. Replace with a CR2032
or equivalent battery. 5. Snap the battery cover back on
to the transmitter.
Remote Vehicle Start
If equipped, this feature allows the
engine to be started from outside
the vehicle.
/(Remote Vehicle Start) : This
button will be on the RKE
transmitter if the vehicle has remote
start.
The climate control system will use
the previous settings during a
remote start. The rear defog may
come on during remote start based
on cold ambient conditions. The
rear fog indicator light does not
come on during remote start. If the
vehicle has heated seats, they may
come on during a remote start. See
Heated Front Seats 050
ii.
Laws in some local communities
may restrict the use of remote
starters. For example, some laws
require a person using remote start
to have the vehicle in view. Check
local regulations for any
requirements.
Page 39 of 357
Chevrolet Cruze Limited Owner Manual (GMNA-Localizing-U.S./Canada-
9282844) - 2016 - crc - 9/3/15
38 Keys, Doors, and Windows
Emergency Trunk Release
HandleCaution
Do not use the emergency trunk
release handle as a tie-down or
anchor point when securing items
in the trunk as it could damage
the handle.
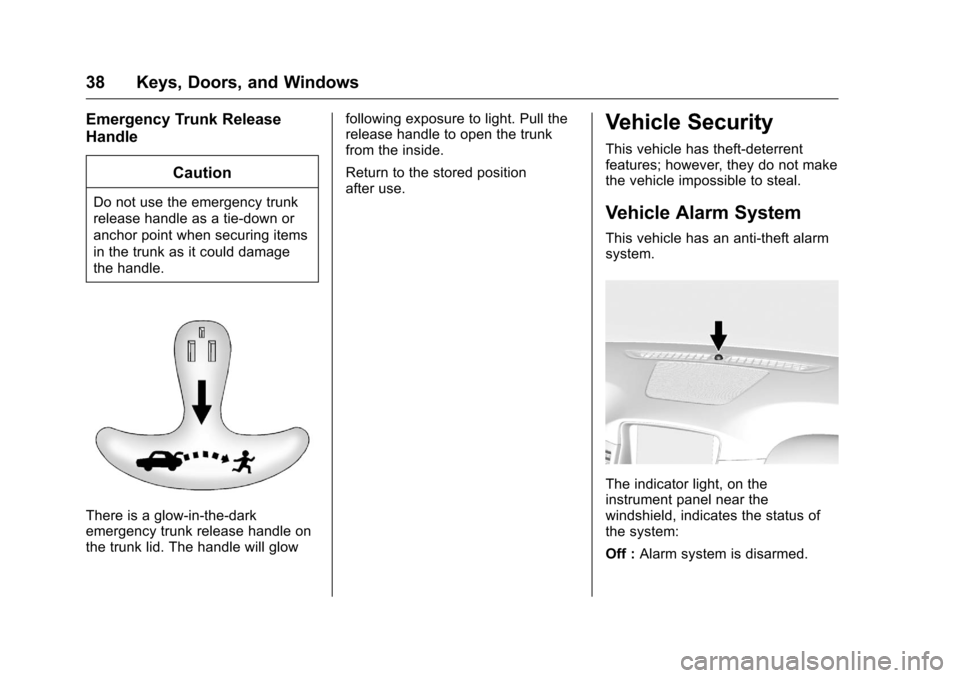
There is a glow-in-the-dark
emergency trunk release handle on
the trunk lid. The handle will glow following exposure to light. Pull the
release handle to open the trunk
from the inside.
Return to the stored position
after use.
Vehicle Security
This vehicle has theft-deterrent
features; however, they do not make
the vehicle impossible to steal.
Vehicle Alarm System
This vehicle has an anti-theft alarm
system.
The indicator light, on the
instrument panel near the
windshield, indicates the status of
the system:
Off :
Alarm system is disarmed.