2016 CHEVROLET CORVETTE wheel
[x] Cancel search: wheelPage 280 of 351

Chevrolet Corvette Owner Manual (GMNA-Localizing-U.S./Canada/Mexico-
9085364) - 2016 - crc - 9/15/15
Vehicle Care 279
5. Tire Sealant Canister
6. Sealant/Air Hose (Clear)
7. Air Only Hose (Black)
8. Power Plug
9. Canister Release Button(Under Sealant/Air Hose)
When using the tire sealant and
compressor kit during cold
temperatures, warm the kit in a
heated environment for five minutes.
This will help to inflate the tire
faster.
If a tire goes flat, avoid further tire
and wheel damage by driving slowly
to a level place. Turn on the hazard
warning flashers. See Hazard
Warning Flashers 0143.
See If a Tire Goes Flat 0275 for
other important safety warnings.
Do not remove any objects that
have penetrated the tire.
1. Remove the tire sealant and compressor kit from its storage
location. See Storing the Tire
Sealant and Compressor
Kit 0283.
2. Unwrap the sealant/air hose (6) and the power plug (8). 3. Place the kit on the ground.
Make sure the tire valve stem
is positioned close to the
ground so the hose will
reach it.
4. Remove the valve stem cap from the flat tire by turning it
counterclockwise.
5. Attach the sealant/air hose (6) onto the tire valve stem. Turn it
clockwise until it is tight.
6. Plug the power plug (8) into the accessory power outlet in the
vehicle. Unplug all items from
other accessory power outlets.
See Power Outlets 094.
If the vehicle has an accessory
power outlet, do not use the
cigarette lighter.
If the vehicle only has a
cigarette lighter, use the
cigarette lighter.
Do not pinch the power plug
cord in the door or window.
7. Start the vehicle. The vehicle must be running while using
the air compressor. 8. Press and turn the selector
switch (1) counterclockwise to
the Sealant + Air position.
9. Press the on/off button (2) to turn the tire sealant and
compressor kit on.
The compressor will inject
sealant and air into the tire.
The pressure gauge (3) will
initially show a high pressure
while the compressor pushes
the sealant into the tire. Once
the sealant is completely
dispersed into the tire, the
pressure will quickly drop and
start to rise again as the tire
inflates with air only.
10. Inflate the tire to the recommended inflation
pressure using the pressure
gauge (3). The recommended
inflation pressure can be found
on the Tire and Loading
Information label. See Tire
Pressure 0262.
The pressure gauge (3) may
read higher than the actual tire
pressure while the compressor
Page 282 of 351
Chevrolet Corvette Owner Manual (GMNA-Localizing-U.S./Canada/Mexico-
9085364) - 2016 - crc - 9/15/15
Vehicle Care 281
If the tire pressure has not
dropped more than 68 kPa
(10 psi) from the recommended
inflation pressure, inflate the
tire to the recommended
inflation pressure.
20. Wipe off any sealant from the wheel, tire, and vehicle.
21. Dispose of the used sealant canister (5) and sealant/air
hose (6) assembly at a local
dealer or in accordance with
local state codes and practices.
22. Replace with a new canister assembly available from your
dealer.
23. After temporarily sealing the tire using the tire sealant and
compressor kit, take the
vehicle to an authorized dealer
within 161 km (100 mi) of
driving to have the tire repaired
or replaced.Using the Tire Sealant and
Compressor Kit without
Sealant to Inflate a Tire (Not
Punctured)
To use the air compressor to inflate
a tire with air only and not sealant:
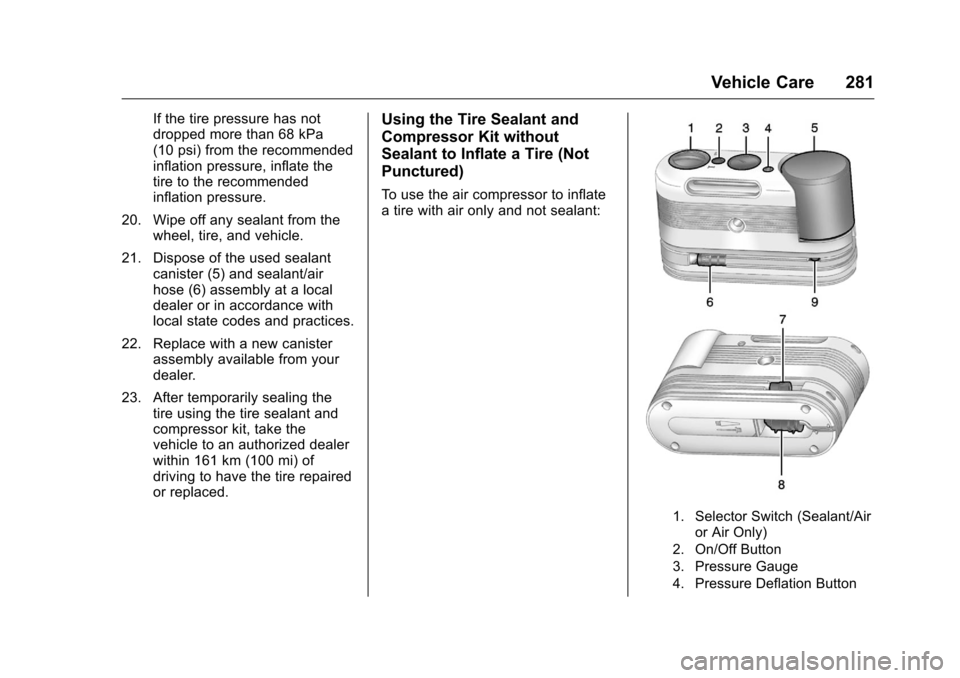
1. Selector Switch (Sealant/Air
or Air Only)
2. On/Off Button
3. Pressure Gauge
4. Pressure Deflation Button
Page 283 of 351
Chevrolet Corvette Owner Manual (GMNA-Localizing-U.S./Canada/Mexico-
9085364) - 2016 - crc - 9/15/15
282 Vehicle Care
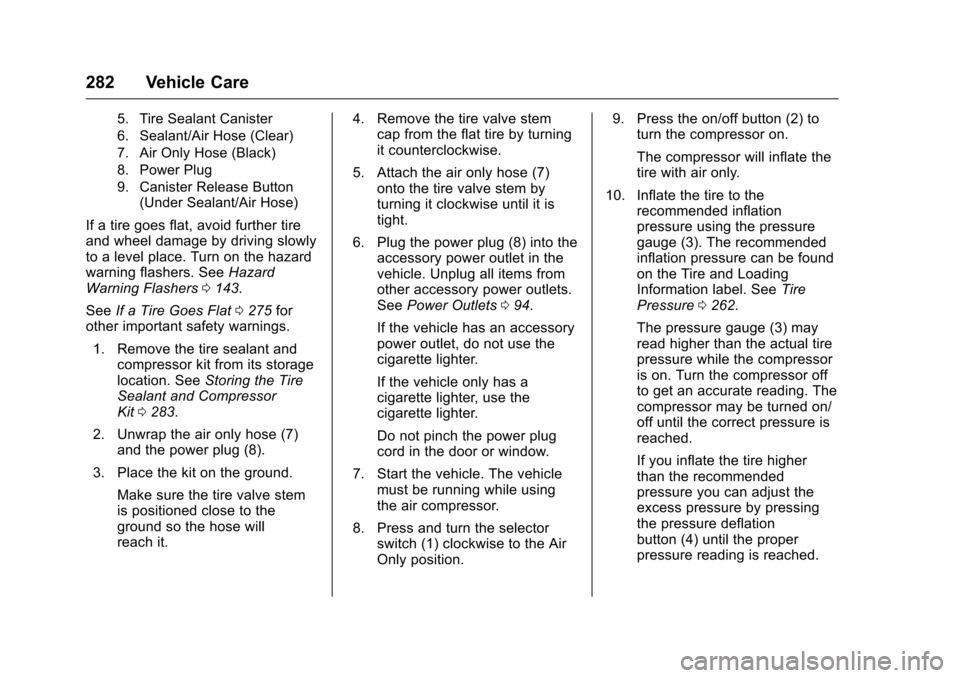
5. Tire Sealant Canister
6. Sealant/Air Hose (Clear)
7. Air Only Hose (Black)
8. Power Plug
9. Canister Release Button(Under Sealant/Air Hose)
If a tire goes flat, avoid further tire
and wheel damage by driving slowly
to a level place. Turn on the hazard
warning flashers. See Hazard
Warning Flashers 0143.
See If a Tire Goes Flat 0275 for
other important safety warnings.
1. Remove the tire sealant and compressor kit from its storage
location. See Storing the Tire
Sealant and Compressor
Kit 0283.
2. Unwrap the air only hose (7) and the power plug (8).
3. Place the kit on the ground. Make sure the tire valve stem
is positioned close to the
ground so the hose will
reach it. 4. Remove the tire valve stem
cap from the flat tire by turning
it counterclockwise.
5. Attach the air only hose (7) onto the tire valve stem by
turning it clockwise until it is
tight.
6. Plug the power plug (8) into the accessory power outlet in the
vehicle. Unplug all items from
other accessory power outlets.
See Power Outlets 094.
If the vehicle has an accessory
power outlet, do not use the
cigarette lighter.
If the vehicle only has a
cigarette lighter, use the
cigarette lighter.
Do not pinch the power plug
cord in the door or window.
7. Start the vehicle. The vehicle must be running while using
the air compressor.
8. Press and turn the selector switch (1) clockwise to the Air
Only position. 9. Press the on/off button (2) to
turn the compressor on.
The compressor will inflate the
tire with air only.
10. Inflate the tire to the recommended inflation
pressure using the pressure
gauge (3). The recommended
inflation pressure can be found
on the Tire and Loading
Information label. See Tire
Pressure 0262.
The pressure gauge (3) may
read higher than the actual tire
pressure while the compressor
is on. Turn the compressor off
to get an accurate reading. The
compressor may be turned on/
off until the correct pressure is
reached.
If you inflate the tire higher
than the recommended
pressure you can adjust the
excess pressure by pressing
the pressure deflation
button (4) until the proper
pressure reading is reached.
Page 284 of 351
Chevrolet Corvette Owner Manual (GMNA-Localizing-U.S./Canada/Mexico-
9085364) - 2016 - crc - 9/15/15
Vehicle Care 283
This option is only functional
when using the air only
hose (7).
11. Press the on/off button (2) to turn the tire sealant and
compressor kit off.
Be careful while handling the
tire sealant and compressor kit
as it could be warm after
usage.
12. Unplug the power plug (8) from the accessory power outlet in
the vehicle.
13. Disconnect the air only hose (7) from the tire valve stem, by
turning it counterclockwise, and
replace the tire valve stem cap.
14. Replace the air only hose (7) and the power plug (8) and
cord back in its original
location.
15. Place the equipment in the original storage location in the
vehicle.
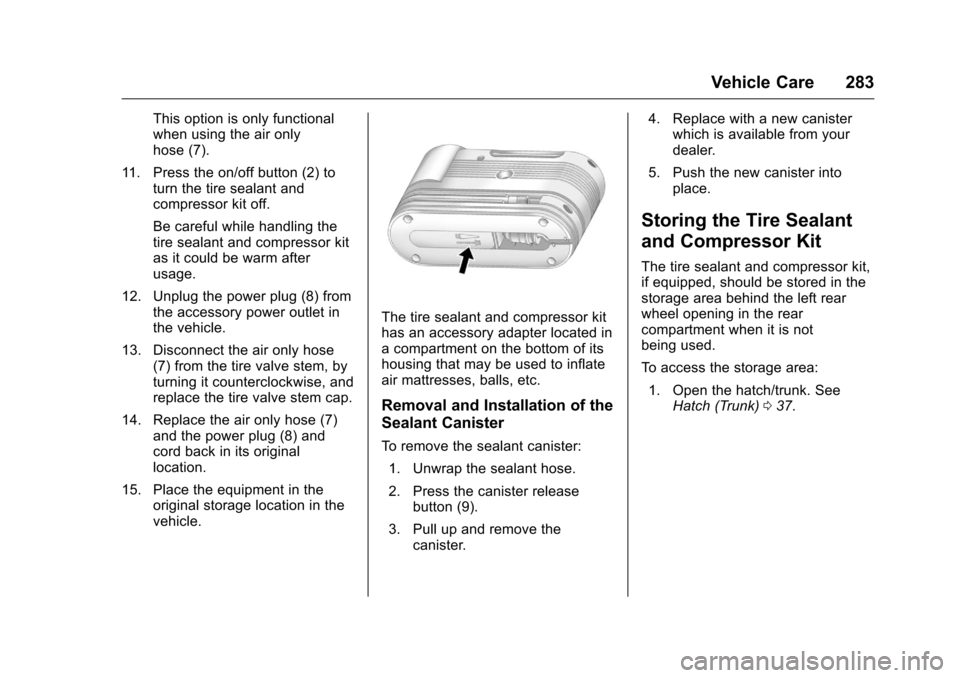
The tire sealant and compressor kit
has an accessory adapter located in
a compartment on the bottom of its
housing that may be used to inflate
air mattresses, balls, etc.
Removal and Installation of the
Sealant Canister
To remove the sealant canister:
1. Unwrap the sealant hose.
2. Press the canister release button (9).
3. Pull up and remove the canister. 4. Replace with a new canister
which is available from your
dealer.
5. Push the new canister into place.
Storing the Tire Sealant
and Compressor Kit
The tire sealant and compressor kit,
if equipped, should be stored in the
storage area behind the left rear
wheel opening in the rear
compartment when it is not
being used.
To access the storage area:
1. Open the hatch/trunk. See Hatch (Trunk) 037.
Page 288 of 351
Chevrolet Corvette Owner Manual (GMNA-Localizing-U.S./Canada/Mexico-
9085364) - 2016 - crc - 9/15/15
Vehicle Care 287
Jumper Cable Removal
Reverse the sequence exactly when
removing the jumper cables.
After starting the disabled vehicle
and removing the jumper cables,
allow it to idle for several minutes.
The power windows may need to be
initialized. See“Window Indexing”
under Power Windows 044.Towing the Vehicle
Caution
Incorrectly towing a disabled
vehicle may cause damage. The
damage would not be covered by
the vehicle warranty. Do not lash
or hook to any suspension
components —including the
control arms, stabilizer bars, and
links —during towing and
recovery of a disabled vehicle,
or when securing the vehicle to a
flatbed car carrier. For towing and
recovery of a disabled vehicle,
use the proper hooks in the
correct locations on the front and
rear sub-frames. Use the proper
nylon strap harnesses around the
tires to secure them to the flatbed
car carrier.
Have the vehicle towed on a flatbed
car carrier. A wheel lift tow truck
could damage the vehicle. Consult your dealer or a
professional towing service if the
disabled vehicle must be towed.
To tow the vehicle behind another
vehicle for recreational purposes,
such as behind a motor home, see
“Recreational Vehicle Towing”
following.
Recreational Vehicle
Towing
Caution
Dolly towing or dinghy towing the
vehicle may cause damage
because of reduced ground
clearance. Always put the vehicle
on a flatbed truck or trailer.
The vehicle was neither designed
nor intended to be towed with any of
its wheels on the ground. If the
vehicle must be towed, see Towing
the Vehicle 0287.
Page 292 of 351
Chevrolet Corvette Owner Manual (GMNA-Localizing-U.S./Canada/Mexico-
9085364) - 2016 - crc - 9/15/15
Vehicle Care 291
require more frequent application.
Black marks from rubber material on
painted surfaces can be removed by
rubbing with a clean cloth. See
Recommended Fluids and
Lubricants0307.
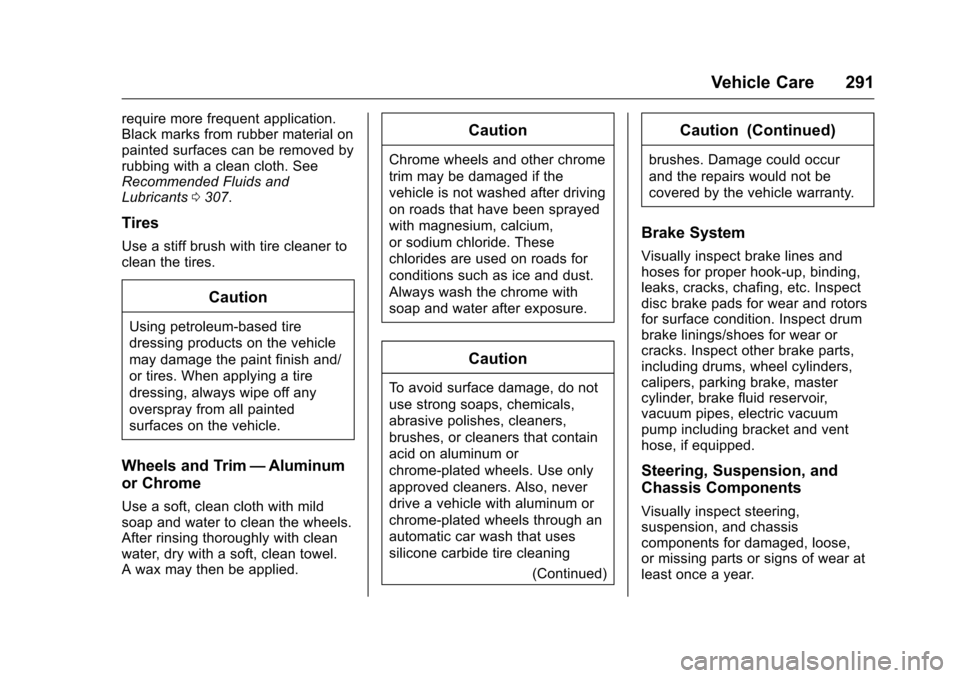
Tires
Use a stiff brush with tire cleaner to
clean the tires.
Caution
Using petroleum-based tire
dressing products on the vehicle
may damage the paint finish and/
or tires. When applying a tire
dressing, always wipe off any
overspray from all painted
surfaces on the vehicle.
Wheels and Trim —Aluminum
or Chrome
Use a soft, clean cloth with mild
soap and water to clean the wheels.
After rinsing thoroughly with clean
water, dry with a soft, clean towel.
A wax may then be applied.
Caution
Chrome wheels and other chrome
trim may be damaged if the
vehicle is not washed after driving
on roads that have been sprayed
with magnesium, calcium,
or sodium chloride. These
chlorides are used on roads for
conditions such as ice and dust.
Always wash the chrome with
soap and water after exposure.
Caution
To avoid surface damage, do not
use strong soaps, chemicals,
abrasive polishes, cleaners,
brushes, or cleaners that contain
acid on aluminum or
chrome-plated wheels. Use only
approved cleaners. Also, never
drive a vehicle with aluminum or
chrome-plated wheels through an
automatic car wash that uses
silicone carbide tire cleaning
(Continued)
Caution (Continued)
brushes. Damage could occur
and the repairs would not be
covered by the vehicle warranty.
Brake System
Visually inspect brake lines and
hoses for proper hook-up, binding,
leaks, cracks, chafing, etc. Inspect
disc brake pads for wear and rotors
for surface condition. Inspect drum
brake linings/shoes for wear or
cracks. Inspect other brake parts,
including drums, wheel cylinders,
calipers, parking brake, master
cylinder, brake fluid reservoir,
vacuum pipes, electric vacuum
pump including bracket and vent
hose, if equipped.
Steering, Suspension, and
Chassis Components
Visually inspect steering,
suspension, and chassis
components for damaged, loose,
or missing parts or signs of wear at
least once a year.
Page 306 of 351
Chevrolet Corvette Owner Manual (GMNA-Localizing-U.S./Canada/Mexico-
9085364) - 2016 - crc - 9/15/15
Service and Maintenance 305
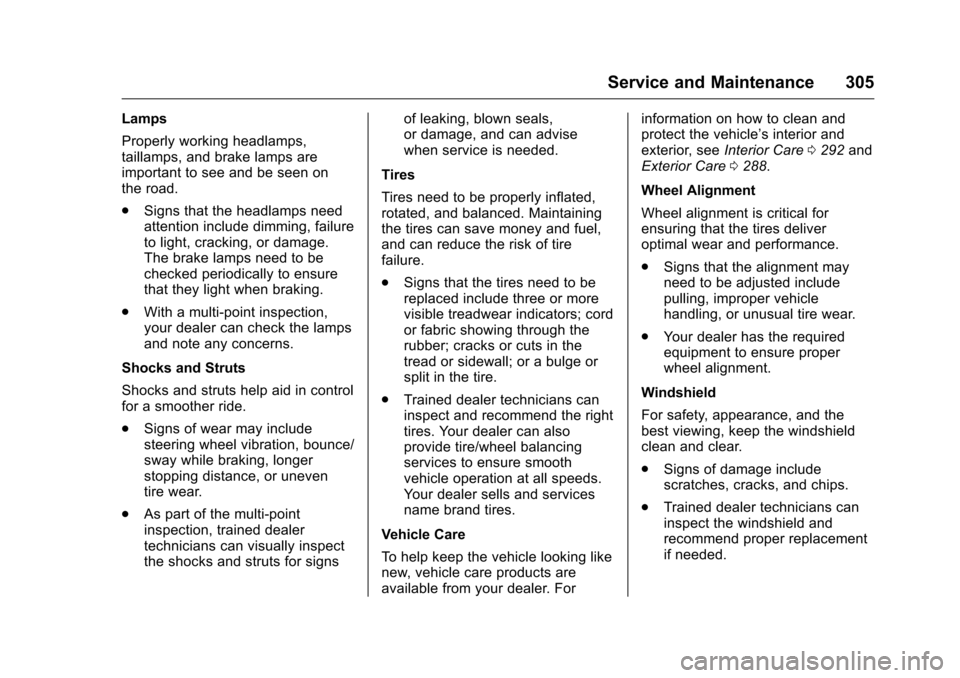
Lamps
Properly working headlamps,
taillamps, and brake lamps are
important to see and be seen on
the road.
.Signs that the headlamps need
attention include dimming, failure
to light, cracking, or damage.
The brake lamps need to be
checked periodically to ensure
that they light when braking.
. With a multi-point inspection,
your dealer can check the lamps
and note any concerns.
Shocks and Struts
Shocks and struts help aid in control
for a smoother ride.
. Signs of wear may include
steering wheel vibration, bounce/
sway while braking, longer
stopping distance, or uneven
tire wear.
. As part of the multi-point
inspection, trained dealer
technicians can visually inspect
the shocks and struts for signs of leaking, blown seals,
or damage, and can advise
when service is needed.
Tires
Tires need to be properly inflated,
rotated, and balanced. Maintaining
the tires can save money and fuel,
and can reduce the risk of tire
failure.
. Signs that the tires need to be
replaced include three or more
visible treadwear indicators; cord
or fabric showing through the
rubber; cracks or cuts in the
tread or sidewall; or a bulge or
split in the tire.
. Trained dealer technicians can
inspect and recommend the right
tires. Your dealer can also
provide tire/wheel balancing
services to ensure smooth
vehicle operation at all speeds.
Your dealer sells and services
name brand tires.
Vehicle Care
To help keep the vehicle looking like
new, vehicle care products are
available from your dealer. For information on how to clean and
protect the vehicle’s interior and
exterior, see
Interior Care 0292 and
Exterior Care 0288.
Wheel Alignment
Wheel alignment is critical for
ensuring that the tires deliver
optimal wear and performance.
. Signs that the alignment may
need to be adjusted include
pulling, improper vehicle
handling, or unusual tire wear.
. Your dealer has the required
equipment to ensure proper
wheel alignment.
Windshield
For safety, appearance, and the
best viewing, keep the windshield
clean and clear.
. Signs of damage include
scratches, cracks, and chips.
. Trained dealer technicians can
inspect the windshield and
recommend proper replacement
if needed.
Page 313 of 351
Chevrolet Corvette Owner Manual (GMNA-Localizing-U.S./Canada/Mexico-
9085364) - 2016 - crc - 9/15/15
312 Technical Data
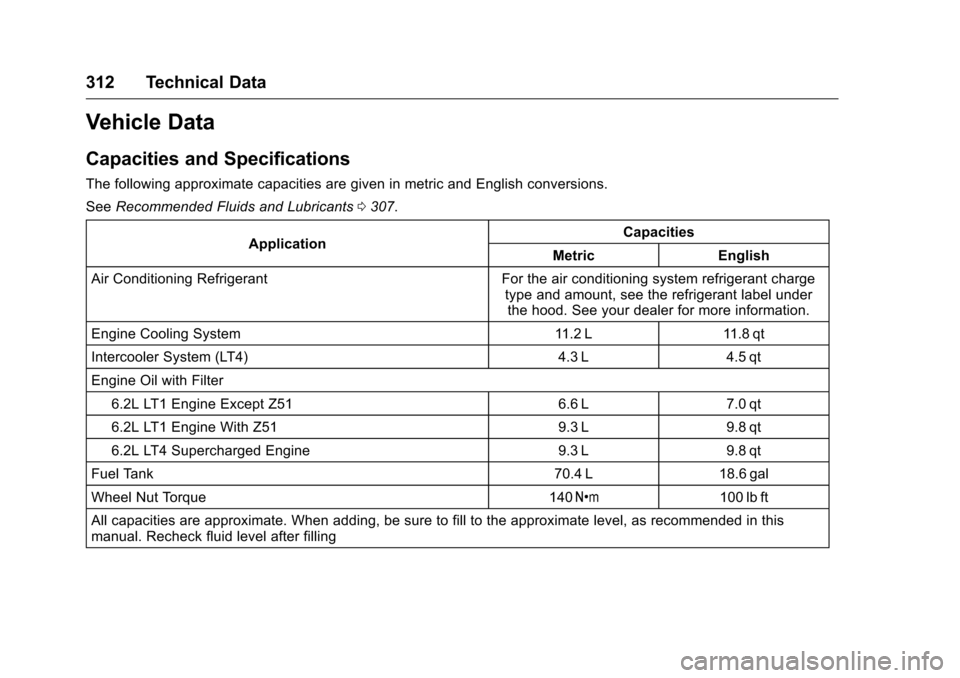
Vehicle Data
Capacities and Specifications
The following approximate capacities are given in metric and English conversions.
SeeRecommended Fluids and Lubricants 0307.
Application Capacities
Metric English
Air Conditioning Refrigerant For the air conditioning system refrigerant charge type and amount, see the refrigerant label underthe hood. See your dealer for more information.
Engine Cooling System 11.2 L 11.8 qt
Intercooler System (LT4) 4.3 L 4.5 qt
Engine Oil with Filter 6.2L LT1 Engine Except Z51 6.6 L 7.0 qt
6.2L LT1 Engine With Z51 9.3 L 9.8 qt
6.2L LT4 Supercharged Engine 9.3 L 9.8 qt
Fuel Tank 70.4 L 18.6 gal
Wheel Nut Torque 140 Y100 lb ft
All capacities are approximate. When adding, be sure to fill to the approximate level, as recommended in this
manual. Recheck fluid level after filling