2016 CHEVROLET CORVETTE tow
[x] Cancel search: towPage 211 of 351
Chevrolet Corvette Owner Manual (GMNA-Localizing-U.S./Canada/Mexico-
9085364) - 2016 - crc - 9/15/15
210 Driving and Operating
{Warning
Attempting to refuel without using
the funnel adapter may cause fuel
spillage and damage the capless
fuel system. This could cause a
fire and you or others could be
badly burned and the vehicle
could be damaged.
3. Remove and clean the funnel adapter and return it to the
storage location.
Filling a Portable Fuel
Container
{Warning
Filling a portable fuel container
while it is in the vehicle can cause
fuel vapors that can ignite either
by static electricity or other
means. You or others could be
badly burned and the vehicle
could be damaged. Always:
(Continued)
Warning (Continued)
.Use approved fuel
containers.
. Remove the container from
the vehicle, trunk, or pickup
bed before filling.
. Place the container on the
ground.
. Place the nozzle inside the
fill opening of the container
before dispensing fuel, and
keep it in contact with the fill
opening until filling is
complete.
. Fill the container no more
than 95% full to allow for
expansion.
. Do not smoke, light
matches, or use lighters
while pumping fuel.
. Avoid using cell phones or
other electronic devices.
Trailer Towing
General Towing
Information
The vehicle is neither designed nor
intended to tow a trailer.
Page 214 of 351
Chevrolet Corvette Owner Manual (GMNA-Localizing-U.S./Canada/Mexico-
9085364) - 2016 - crc - 9/15/15
Vehicle Care 213
If a Tire Goes Flat . . . . . . . . . . . . 275
Tire Sealant andCompressor Kit . . . . . . . . . . . . . 276
Storing the Tire Sealant and Compressor Kit . . . . . . . . . . . . . 283
Jump Starting
Jump Starting - North
America . . . . . . . . . . . . . . . . . . . . . 284
Towing the Vehicle
Towing the Vehicle . . . . . . . . . . . 287
Recreational VehicleTowing . . . . . . . . . . . . . . . . . . . . . . 287
Appearance Care
Exterior Care . . . . . . . . . . . . . . . . . 288
Interior Care . . . . . . . . . . . . . . . . . . 292
Floor Mats . . . . . . . . . . . . . . . . . . . . 295
General Information
For service and parts needs, visit
your dealer. You will receive
genuine GM parts and GM-trained
and supported service people.
Genuine GM parts have one of
these marks:
California Proposition
65 Warning
WARNING: Most motor vehicles,
including this one, contain and/or
emit chemicals known to the State
of California to cause cancer and
birth defects or other reproductive harm. Engine exhaust, many parts
and systems, many fluids, and
some component wear by-products
contain and/or emit these
chemicals.
See
Battery - North America 0241
and Jump Starting - North
America 0284.
California Perchlorate
Materials Requirements
Certain types of automotive
applications, such as airbag
initiators, safety belt pretensioners,
and lithium batteries contained in
Remote Keyless Entry transmitters,
may contain perchlorate materials.
Special handling may be necessary.
For additional information, see
www.dtsc.ca.gov/hazardouswaste/
perchlorate.
Accessories and
Modifications
Adding non-dealer accessories or
making modifications to the vehicle
can affect vehicle performance and
safety, including such things as
Page 225 of 351
Chevrolet Corvette Owner Manual (GMNA-Localizing-U.S./Canada/Mexico-
9085364) - 2016 - crc - 9/15/15
224 Vehicle Care
{Warning
The engine oil dipstick handle
may be hot; it could burn you.
Use a towel or glove to touch the
dipstick handle.
2. Pull the dipstick and wipe it with a clean paper towel or
cloth, then push it back in all
the way. Remove it again,
keeping the tip down, and
check the level.
When to Add Engine Oil
(Except Stingray with
Z51 and Z06)
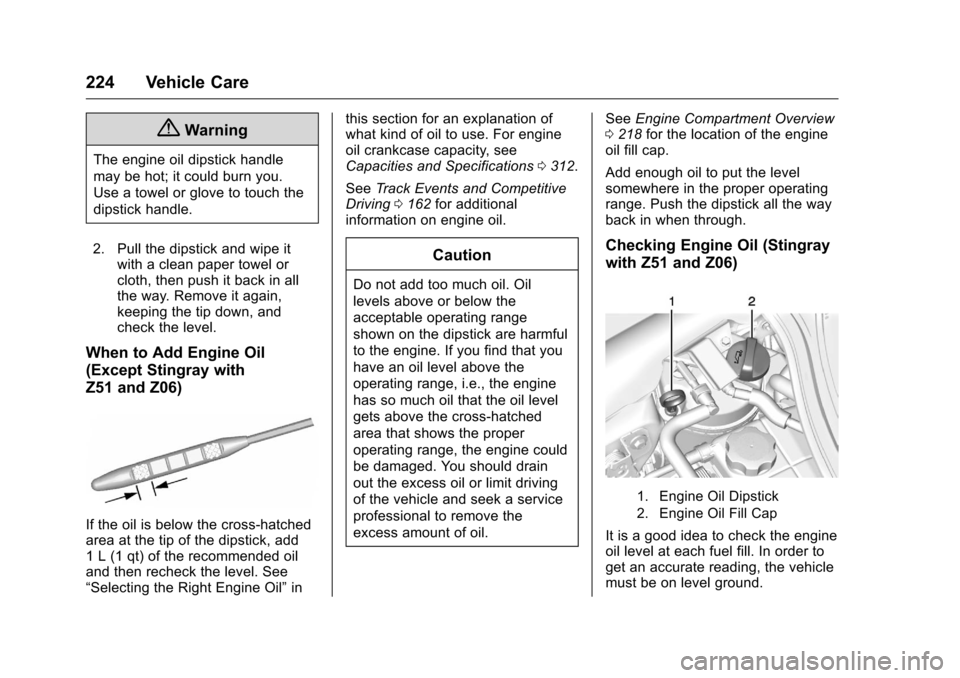
If the oil is below the cross-hatched
area at the tip of the dipstick, add
1 L (1 qt) of the recommended oil
and then recheck the level. See
“Selecting the Right Engine Oil” inthis section for an explanation of
what kind of oil to use. For engine
oil crankcase capacity, see
Capacities and Specifications
0312.
See Track Events and Competitive
Driving 0162 for additional
information on engine oil.
Caution
Do not add too much oil. Oil
levels above or below the
acceptable operating range
shown on the dipstick are harmful
to the engine. If you find that you
have an oil level above the
operating range, i.e., the engine
has so much oil that the oil level
gets above the cross-hatched
area that shows the proper
operating range, the engine could
be damaged. You should drain
out the excess oil or limit driving
of the vehicle and seek a service
professional to remove the
excess amount of oil. See
Engine Compartment Overview
0 218 for the location of the engine
oil fill cap.
Add enough oil to put the level
somewhere in the proper operating
range. Push the dipstick all the way
back in when through.
Checking Engine Oil (Stingray
with Z51 and Z06)
1. Engine Oil Dipstick
2. Engine Oil Fill Cap
It is a good idea to check the engine
oil level at each fuel fill. In order to
get an accurate reading, the vehicle
must be on level ground.
Page 226 of 351
Chevrolet Corvette Owner Manual (GMNA-Localizing-U.S./Canada/Mexico-
9085364) - 2016 - crc - 9/16/15
Vehicle Care 225
The engine oil dipstick handle is a
loop. The dipstick is located on the
dry sump engine oil tank. See
Engine Compartment Overview
0218 for the location of the dry
sump engine oil tank.
These vehicles have a
racetrack-ready dry sump engine
lubrication system. This high
performance system operates
differently than a standard engine
lubrication system and requires a
special procedure when checking
the engine oil level. Follow this
procedure closely.
The engine oil level must be
checked when the engine is warm.
Cold oil level in the dry sump tank
may not indicate the actual amount
of oil in the system. With this
system, engine oil is contained in an
external tank, separate from the
engine. Under normal operating
conditions, the oil pan under the
engine does not store any oil. If the
vehicle has been parked for an
extended period without the engine
being started, some oil will seep
back into the oil pan, reducing the
amount of oil held in the dry sump tank and there could be no engine
oil at all showing on the dipstick.
This is normal since the dipstick is
designed to read the engine oil level
only after the engine has run long
enough to reach normal operating
temperature. Do not add engine oil
based on cold engine dipstick
readings. The engine oil level on the
dipstick will also be inaccurate if
checked while the engine is running.
1. To obtain an accurate engine oil level reading, warm up the
engine to at least 80 °C
(175 °F). Cold oil will not give a
correct oil level reading.
2. Once the engine is warm, turn off the engine. Checking the oil
while the engine is running will
result in an incorrect oil level
reading.
3. Check the oil level between five and 10 minutes after the
engine is shut down.{Warning
The engine oil dipstick handle
may be hot; it could burn you.
Use a towel or glove to touch the
dipstick handle.
4. Remove the dipstick from the external engine oil tank and
wipe it with a clean lint-free
paper towel or a cloth.
Re-insert the dipstick into the
external oil tank, pushing it all
the way in until it stops.
5. Remove the dipstick from the oil tank and read the level on
the cross-hatched area.
Page 237 of 351
Chevrolet Corvette Owner Manual (GMNA-Localizing-U.S./Canada/Mexico-
9085364) - 2016 - crc - 9/15/15
236 Vehicle Care
If ambient temperatures are
anticipated below−28 °C (−18 °F),
make sure a proper mixture ratio of
50% DEX-COOL coolant and 50%
clean, drinkable water is used.
Checking Coolant
The vehicle must be on a level
surface when checking the coolant
level.
Check to see if coolant is visible in
the coolant surge tank. If the coolant
inside the coolant surge tank is
boiling, do not do anything else until
it cools down. If coolant is visible
but the coolant level is not at or
above the cold fill line, add a
mixture of 40% DEX-COOL coolant
and 60% clean, drinkable water at
the coolant recovery tank, but be
sure the cooling system is cool
before this is done. See Engine
Overheating 0237.
The engine coolant surge tank is
toward the rear of the engine
compartment on the passenger side
of the vehicle. See Engine
Compartment Overview 0218.
When the engine is cold, the coolant
level should be at the cold fill line on
the coolant surge tank.
When the engine is hot, the level
could be higher than the cold fill
line. If the coolant is below the cold
fill line when the engine is hot, there
could be a leak in the cooling
system.
If the coolant is low, add the coolant
or take the vehicle to your dealer for
service.
How to Add Coolant to the
Coolant Surge Tank
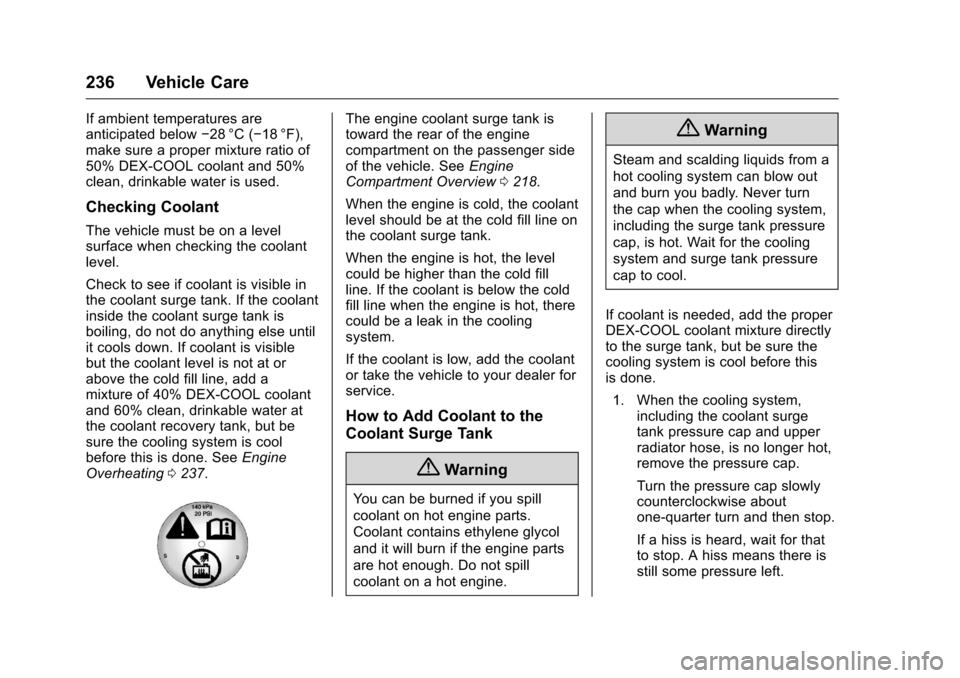
{Warning
You can be burned if you spill
coolant on hot engine parts.
Coolant contains ethylene glycol
and it will burn if the engine parts
are hot enough. Do not spill
coolant on a hot engine.
{Warning
Steam and scalding liquids from a
hot cooling system can blow out
and burn you badly. Never turn
the cap when the cooling system,
including the surge tank pressure
cap, is hot. Wait for the cooling
system and surge tank pressure
cap to cool.
If coolant is needed, add the proper
DEX-COOL coolant mixture directly
to the surge tank, but be sure the
cooling system is cool before this
is done. 1. When the cooling system, including the coolant surge
tank pressure cap and upper
radiator hose, is no longer hot,
remove the pressure cap.
Turn the pressure cap slowly
counterclockwise about
one-quarter turn and then stop.
If a hiss is heard, wait for that
to stop. A hiss means there is
still some pressure left.
Page 245 of 351
Chevrolet Corvette Owner Manual (GMNA-Localizing-U.S./Canada/Mexico-
9085364) - 2016 - crc - 9/15/15
244 Vehicle Care
normal effort. If the shift lever
moves out of P (Park), contact
your dealer for service.
Park Brake and P (Park)
Mechanism Check
{Warning
When you are doing this check,
the vehicle could begin to move.
You or others could be injured
and property could be damaged.
Make sure there is room in front
of the vehicle in case it begins to
roll. Be ready to apply the regular
brake at once should the vehicle
begin to move.
Park on a fairly steep hill, with the
vehicle facing downhill. Keeping
your foot on the regular brake, set
the parking brake.
. To check the parking brake's
holding ability: With the engine
running and the transmission in
N (Neutral), slowly remove foot pressure from the regular brake
pedal. Do this until the vehicle is
held by the parking brake only.
. To check the P (Park)
mechanism's holding ability:
With the engine running, shift to
P (Park). Then release the
parking brake followed by the
regular brake.
Contact your dealer if service is
required.
Wiper Blade Replacement
Windshield wiper blades should be
inspected for wear and cracking.
Replacement blades come in
different types and are removed in
different ways. For proper type and
length, see Maintenance
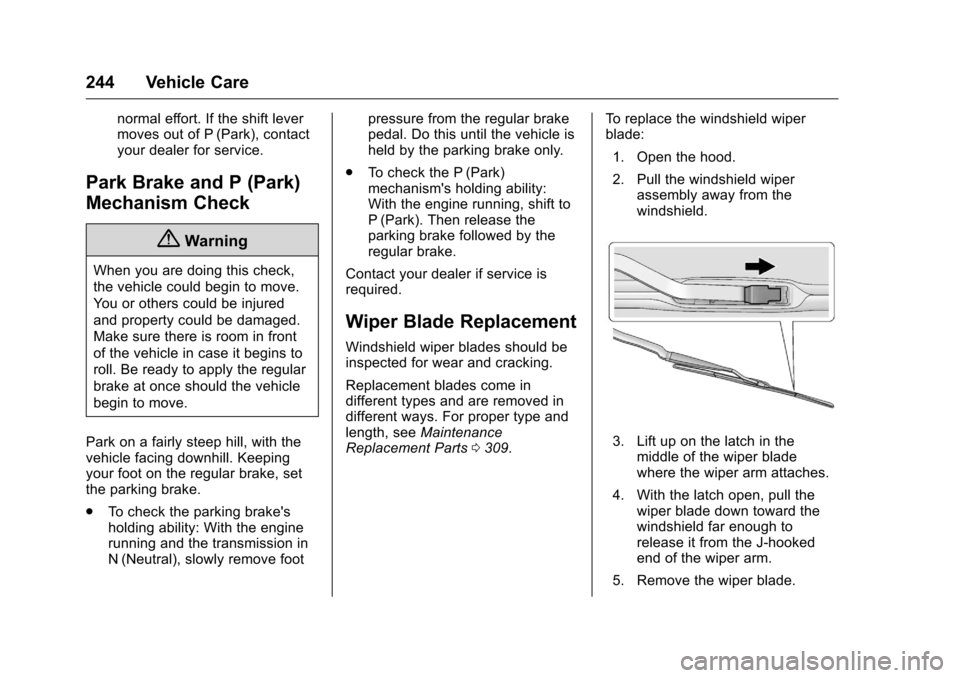
Replacement Parts 0309. To replace the windshield wiper
blade:
1. Open the hood.
2. Pull the windshield wiper assembly away from the
windshield.
3. Lift up on the latch in themiddle of the wiper blade
where the wiper arm attaches.
4. With the latch open, pull the wiper blade down toward the
windshield far enough to
release it from the J-hooked
end of the wiper arm.
5. Remove the wiper blade.
Page 247 of 351
Chevrolet Corvette Owner Manual (GMNA-Localizing-U.S./Canada/Mexico-
9085364) - 2016 - crc - 9/15/15
246 Vehicle Care
LED Lighting
This vehicle has several LED lamps.
For replacement of any LED lighting
assembly, contact your dealer.
License Plate Lamp
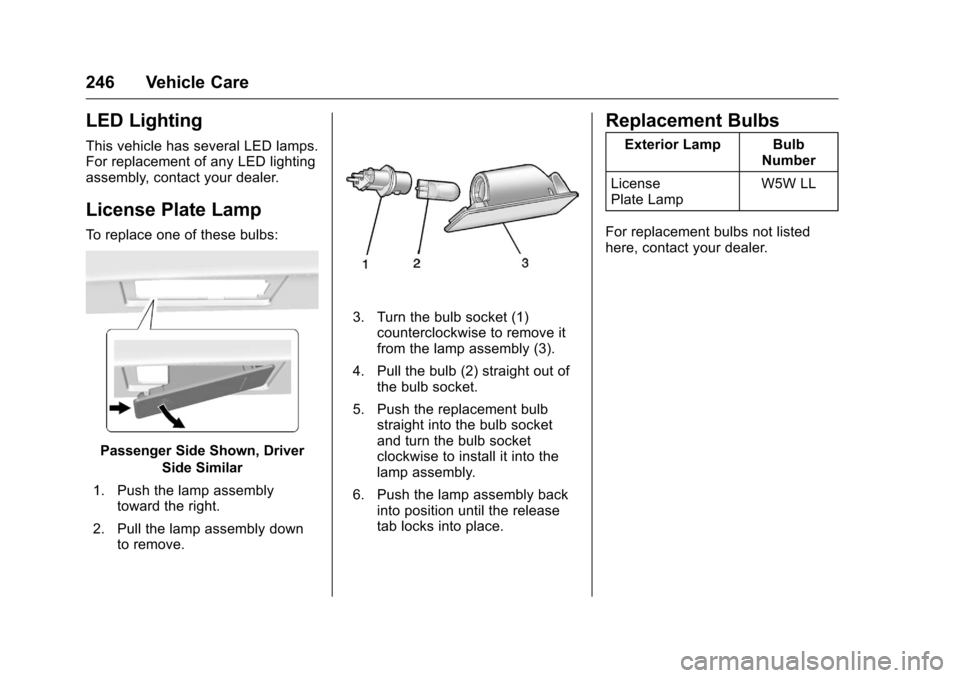
To replace one of these bulbs:
Passenger Side Shown, DriverSide Similar
1. Push the lamp assembly toward the right.
2. Pull the lamp assembly down to remove.
3. Turn the bulb socket (1)counterclockwise to remove it
from the lamp assembly (3).
4. Pull the bulb (2) straight out of the bulb socket.
5. Push the replacement bulb straight into the bulb socket
and turn the bulb socket
clockwise to install it into the
lamp assembly.
6. Push the lamp assembly back into position until the release
tab locks into place.
Replacement Bulbs
Exterior Lamp Bulb Number
License
Plate Lamp W5W LL
For replacement bulbs not listed
here, contact your dealer.
Page 270 of 351
Chevrolet Corvette Owner Manual (GMNA-Localizing-U.S./Canada/Mexico-
9085364) - 2016 - crc - 9/15/15
Vehicle Care 269
Check that all wheel nuts are
properly tightened. See“Wheel
Nut Torque” underCapacities
and Specifications 0312.
{Warning
Rust or dirt on a wheel, or on the
parts to which it is fastened, can
make wheel nuts become loose
after time. The wheel could come
off and cause an accident. When
changing a wheel, remove any
rust or dirt from places where the
wheel attaches to the vehicle. In
an emergency, a cloth or a paper
towel can be used; however, use
a scraper or wire brush later to
remove all rust or dirt.
Lightly coat the center of the
wheel hub with wheel bearing
grease after a wheel change or
tire rotation to prevent corrosion
or rust build-up. Do not get
grease on the flat wheel
mounting surface or on the
wheel nuts or bolts.
When It Is Time for New
Tires
Factors such as maintenance,
temperatures, driving speeds,
vehicle loading, and road conditions
affect the wear rate of the tires.
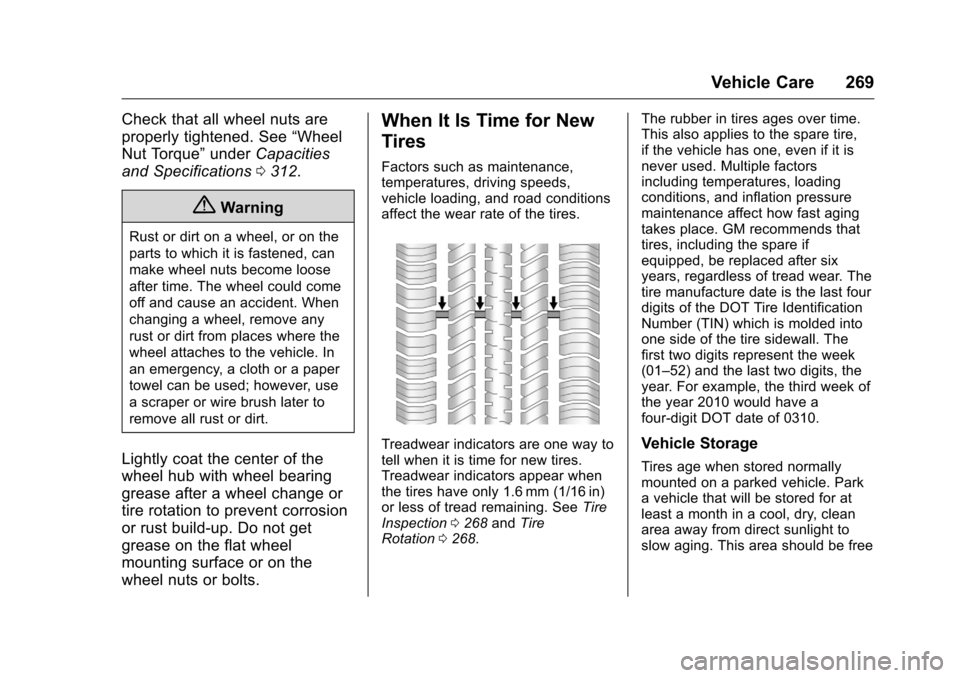
Treadwear indicators are one way to
tell when it is time for new tires.
Treadwear indicators appear when
the tires have only 1.6 mm (1/16 in)
or less of tread remaining. See Tire
Inspection 0268 andTire
Rotation 0268. The rubber in tires ages over time.
This also applies to the spare tire,
if the vehicle has one, even if it is
never used. Multiple factors
including temperatures, loading
conditions, and inflation pressure
maintenance affect how fast aging
takes place. GM recommends that
tires, including the spare if
equipped, be replaced after six
years, regardless of tread wear. The
tire manufacture date is the last four
digits of the DOT Tire Identification
Number (TIN) which is molded into
one side of the tire sidewall. The
first two digits represent the week
(01–52) and the last two digits, the
year. For example, the third week of
the year 2010 would have a
four-digit DOT date of 0310.Vehicle Storage
Tires age when stored normally
mounted on a parked vehicle. Park
a vehicle that will be stored for at
least a month in a cool, dry, clean
area away from direct sunlight to
slow aging. This area should be free