2016 CHEVROLET CORVETTE sensor
[x] Cancel search: sensorPage 105 of 351
Chevrolet Corvette Owner Manual (GMNA-Localizing-U.S./Canada/Mexico-
9085364) - 2016 - crc - 9/15/15
104 Instruments and Controls
Safety Belt Reminders
Driver Safety Belt Reminder
Light
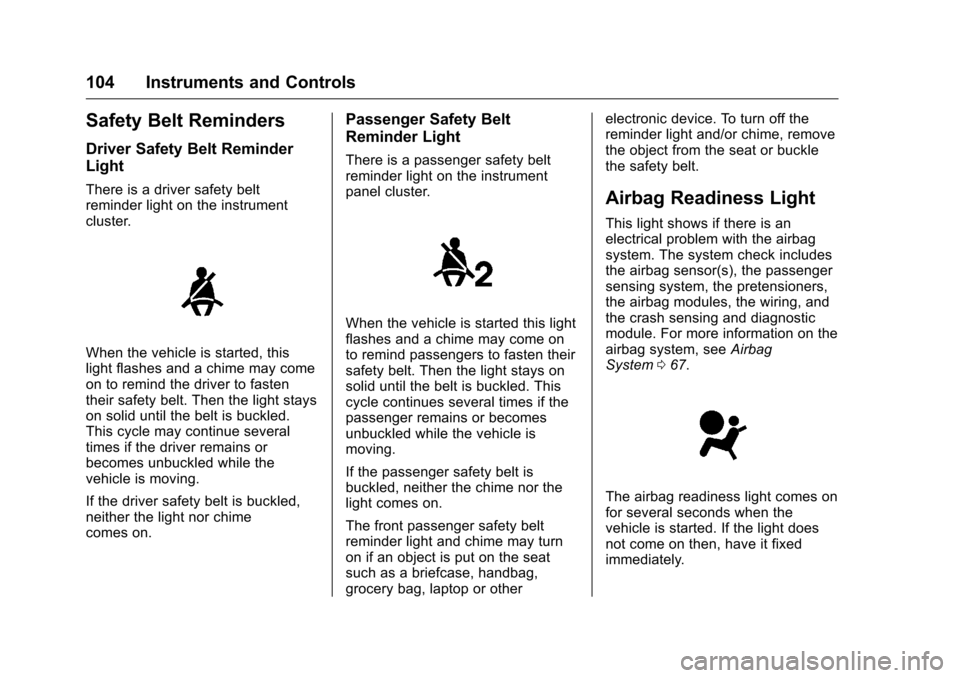
There is a driver safety belt
reminder light on the instrument
cluster.
When the vehicle is started, this
light flashes and a chime may come
on to remind the driver to fasten
their safety belt. Then the light stays
on solid until the belt is buckled.
This cycle may continue several
times if the driver remains or
becomes unbuckled while the
vehicle is moving.
If the driver safety belt is buckled,
neither the light nor chime
comes on.
Passenger Safety Belt
Reminder Light
There is a passenger safety belt
reminder light on the instrument
panel cluster.
When the vehicle is started this light
flashes and a chime may come on
to remind passengers to fasten their
safety belt. Then the light stays on
solid until the belt is buckled. This
cycle continues several times if the
passenger remains or becomes
unbuckled while the vehicle is
moving.
If the passenger safety belt is
buckled, neither the chime nor the
light comes on.
The front passenger safety belt
reminder light and chime may turn
on if an object is put on the seat
such as a briefcase, handbag,
grocery bag, laptop or otherelectronic device. To turn off the
reminder light and/or chime, remove
the object from the seat or buckle
the safety belt.
Airbag Readiness Light
This light shows if there is an
electrical problem with the airbag
system. The system check includes
the airbag sensor(s), the passenger
sensing system, the pretensioners,
the airbag modules, the wiring, and
the crash sensing and diagnostic
module. For more information on the
airbag system, see
Airbag
System 067.
The airbag readiness light comes on
for several seconds when the
vehicle is started. If the light does
not come on then, have it fixed
immediately.
Page 135 of 351
Chevrolet Corvette Owner Manual (GMNA-Localizing-U.S./Canada/Mexico-
9085364) - 2016 - crc - 9/15/15
134 Instruments and Controls
Remote Lock, Unlock, Start
Select and the following may
display:
.Remote Unlock Light Feedback
. Remote Lock Feedback
. Remote Door Unlock
. Remote Start Auto Cool Seats
. Remote Start Auto Heat Seats
. Passive Door Unlock
. Passive Door Lock
. Remote Left in Vehicle Alert
Remote Unlock Light Feedback
When on, the exterior lamps will
flash when unlocking the vehicle
with the RKE transmitter.
Select Off or Flash Lights.
Remote Lock Feedback
This allows selection of what type of
feedback is given when locking the
vehicle with the RKE transmitter.
Select Off, Lights and Horn, Lights
Only, or Horn Only. Remote Door Unlock
This allows selection of which doors
will unlock when pressing
Kon the
RKE transmitter.
Select All Doors or Driver Door.
Remote Start Auto Cool Seats
If equipped and turned on, this
feature will turn the ventilated seats
on when using remote start on
warm days.
Select Off or On.
Remote Start Auto Heat Seats
If equipped and turned on, this
feature will turn the heated seats on
when using remote start on
cold days.
Select Off or On.
Passive Door Unlock
This allows the selection of what
doors will unlock when using the
door handle sensor on the driver
door to unlock the vehicle.
Select All Doors or Driver Door. Passive Door Lock
This feature can be turned on, off,
or select feedback. See
Remote
Keyless Entry (RKE) System
Operation 026.
Select Off, On with Horn
Chirp, or On.
Remote Left in Vehicle Alert
This feature sounds an alert when
the RKE transmitter is left in the
vehicle.
Select Off or On.
Bluetooth
Select and the following may
display:
. Pair New Device
. Device Management
. Ringtones
. Voice Mail Numbers
Pair New Device
Select to pair a new device. See
“Pairing” in“Infotainment Controls”
under “Bluetooth” in the infotainment
manual.
Page 143 of 351
Chevrolet Corvette Owner Manual (GMNA-Localizing-U.S./Canada/Mexico-
9085364) - 2016 - crc - 9/15/15
142 Lighting
To turn off the DRL, turn the exterior
lamp control to the off position or
shift into P (Park). The DRL will stay
off until the control is toggled again
or the vehicle is shifted out of
P (Park).
This procedure applies only to
vehicles first sold in the United
States.
Automatic Headlamp
System
When the exterior lamp control is
set to AUTO and it is dark enough
outside, the headlamps and parking
lamps come on automatically.
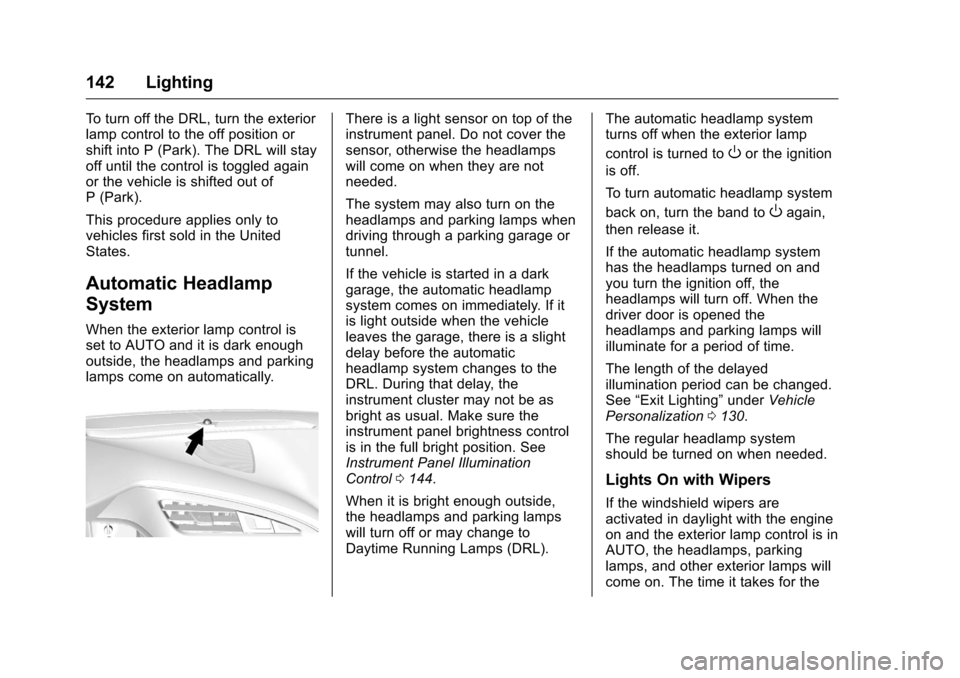
There is a light sensor on top of the
instrument panel. Do not cover the
sensor, otherwise the headlamps
will come on when they are not
needed.
The system may also turn on the
headlamps and parking lamps when
driving through a parking garage or
tunnel.
If the vehicle is started in a dark
garage, the automatic headlamp
system comes on immediately. If it
is light outside when the vehicle
leaves the garage, there is a slight
delay before the automatic
headlamp system changes to the
DRL. During that delay, the
instrument cluster may not be as
bright as usual. Make sure the
instrument panel brightness control
is in the full bright position. See
Instrument Panel Illumination
Control0144.
When it is bright enough outside,
the headlamps and parking lamps
will turn off or may change to
Daytime Running Lamps (DRL). The automatic headlamp system
turns off when the exterior lamp
control is turned to
Oor the ignition
is off.
To turn automatic headlamp system
back on, turn the band to
Oagain,
then release it.
If the automatic headlamp system
has the headlamps turned on and
you turn the ignition off, the
headlamps will turn off. When the
driver door is opened the
headlamps and parking lamps will
illuminate for a period of time.
The length of the delayed
illumination period can be changed.
See “Exit Lighting” underVehicle
Personalization 0130.
The regular headlamp system
should be turned on when needed.
Lights On with Wipers
If the windshield wipers are
activated in daylight with the engine
on and the exterior lamp control is in
AUTO, the headlamps, parking
lamps, and other exterior lamps will
come on. The time it takes for the
Page 156 of 351
Chevrolet Corvette Owner Manual (GMNA-Localizing-U.S./Canada/Mexico-
9085364) - 2016 - crc - 9/15/15
Climate Controls 155
If equipped with heated outside
rearview mirrors, they turn on with
the rear window defogger and help
to clear fog or frost from the surface
of the mirror. SeeHeated
Mirrors 042.
If equipped with a power convertible
top, the rear window defogger and
heated mirrors are automatically
disabled when the power convertible
top is moving or down.
Caution
Using a razor blade or sharp
object on the inside rear window
can damage the antenna or
defogger. Repairs would not be
covered by the vehicle warranty.
Do not stick anything to the rear
window.
z/{(Driver and Passenger
Heated and Ventilated Seats, If
Equipped) : Press to heat or
ventilate the seat. See Heated and
Ventilated Front Seats 059. Remote Start Climate Control
Operation (If Equipped) :
If remote
start is used to start the vehicle, the
climate control system will come on.
The system uses the driver ’s
previous settings to heat or cool the
inside of the vehicle. The rear
window defogger or heated outside
rearview mirrors, if equipped, may
come on based on cold ambient
conditions. The rear defog indicator
light may not come on during a
remote start. The heated or
ventilated seats may turn on if it is
cold or hot outside. See Remote
Vehicle Start 031 and Heated and
Ventilated Front Seats 059,
if equipped.
Sensors
The interior cabin air temperature
and solar sensor on top of the
instrument panel near the
windshield monitors the solar heat
and measures the initial interior
cabin temperature. The climate control system uses the
sensor information to adjust the
temperature, fan speed,
recirculation, and air delivery mode
for best comfort.
The humidity and windshield
temperature sensor is on the
windshield glass inside surface near
the rearview mirror. The automatic
climate control system uses this
sensor to receive information to
determine the need for defogging.
If any of these sensors are blocked
or covered, the automatic climate
control system may not work
properly.
There is also a sensor behind the
front bumper. This sensor reads the
outside air temperature and helps to
maintain the temperature inside the
vehicle. Any cover on the front of
the vehicle could give a false
reading in the temperature.
Page 203 of 351
Chevrolet Corvette Owner Manual (GMNA-Localizing-U.S./Canada/Mexico-
9085364) - 2016 - crc - 9/15/15
202 Driving and Operating
Limited-Slip Differential
(Z51 and Z06 Only)
If equipped, the Electronic
Limited-Slip Differential (ELSD) is
automatically activated. ELSD
actively monitors vehicle sensors
and driver inputs to determine the
amount of change for the
conditions. With ELSD, the
vehicle has:
.Enhanced high-speed control.
. Improved traction through
corners, allowing more
acceleration.
. More precise steering.
. Increased vehicle agility.
. Integration with StabiliTrak.
For vehicles with ELSD, driven
under severe conditions, the rear
axle fluid should be changed. See
Competitive Driving Mode 0198
and Maintenance Schedule 0298.
Cruise Control
With cruise control, a speed of
about 40 km/h (25 mph) or more
can be maintained without keeping
your foot on the accelerator. Cruise
control does not work at speeds
below about 40 km/h (25 mph).
{Warning
Cruise control can be dangerous
where you cannot drive safely at
a steady speed. Do not use
cruise control on winding roads or
in heavy traffic.
Cruise control can be dangerous
on slippery roads. On such roads,
fast changes in tire traction can
cause excessive wheel slip, and
you could lose control. Do not use
cruise control on slippery roads.
If equipped with a manual
transmission, the cruise control will
remain active when the gears are
shifted. The cruise is disengaged if
the clutch is pressed for several
seconds. If the Traction Control System (TCS)
begins to limit wheel spin while you
are using cruise control, the cruise
control automatically disengages.
See
Traction Control/Electronic
Stability Control 0192. When road
conditions allow for using safely
again, cruise control can be turned
back on.
If the brakes are applied, cruise
control disengages.
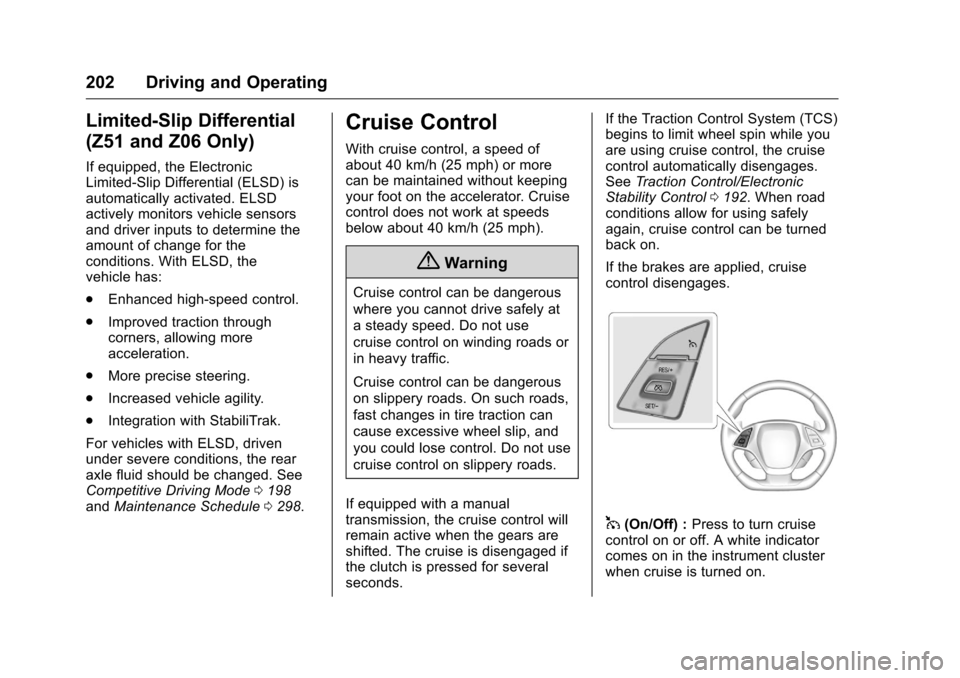
1(On/Off) : Press to turn cruise
control on or off. A white indicator
comes on in the instrument cluster
when cruise is turned on.
Page 232 of 351
Chevrolet Corvette Owner Manual (GMNA-Localizing-U.S./Canada/Mexico-
9085364) - 2016 - crc - 9/15/15
Vehicle Care 231
dust and dirt. Inspect the engine air
cleaner/filter for damage, and
replace if damaged. Do not clean
the engine air cleaner/filter or
components with water or
compressed air.
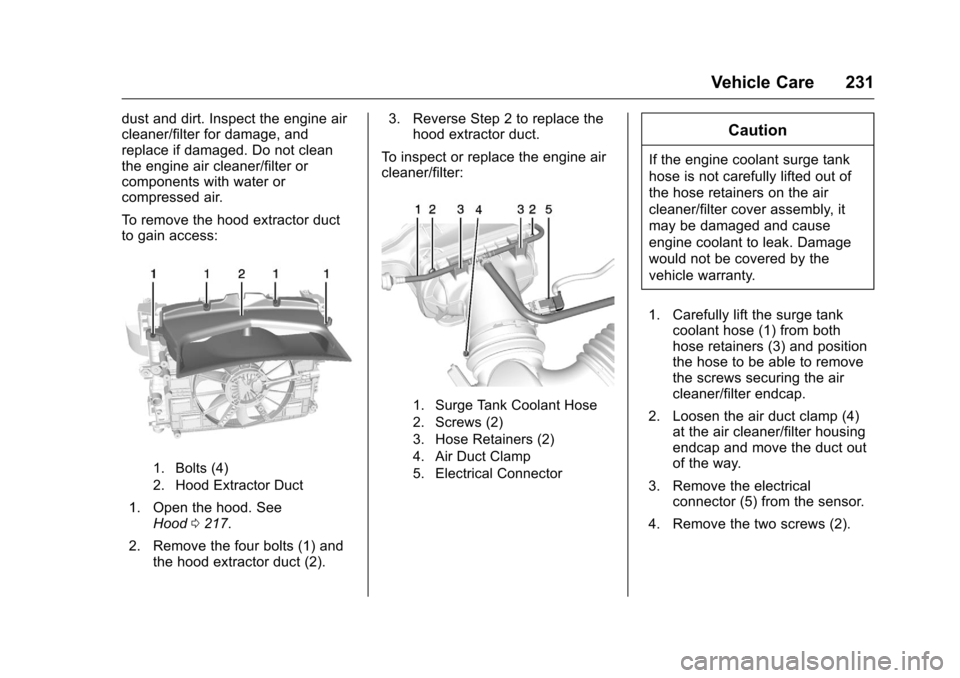
To remove the hood extractor duct
to gain access:
1. Bolts (4)
2. Hood Extractor Duct
1. Open the hood. SeeHood 0217.
2. Remove the four bolts (1) and the hood extractor duct (2). 3. Reverse Step 2 to replace the
hood extractor duct.
To inspect or replace the engine air
cleaner/filter:
1. Surge Tank Coolant Hose
2. Screws (2)
3. Hose Retainers (2)
4. Air Duct Clamp
5. Electrical Connector
Caution
If the engine coolant surge tank
hose is not carefully lifted out of
the hose retainers on the air
cleaner/filter cover assembly, it
may be damaged and cause
engine coolant to leak. Damage
would not be covered by the
vehicle warranty.
1. Carefully lift the surge tank coolant hose (1) from both
hose retainers (3) and position
the hose to be able to remove
the screws securing the air
cleaner/filter endcap.
2. Loosen the air duct clamp (4) at the air cleaner/filter housing
endcap and move the duct out
of the way.
3. Remove the electrical connector (5) from the sensor.
4. Remove the two screws (2).
Page 257 of 351
Chevrolet Corvette Owner Manual (GMNA-Localizing-U.S./Canada/Mexico-
9085364) - 2016 - crc - 9/15/15
256 Vehicle Care
Warning (Continued)
drive over 80 km/h (50 mph) when
the low tire warning light is
displayed. Drive cautiously and
check the tire pressures as soon
as possible.
Run-flat tires can be driven on with
no air pressure. There is no need to
stop on the side of the road to
change the tire. Continue driving;
however, do not drive too far or too
fast. Driving on the tire may not be
possible if there is permanent
damage. To prevent permanent
damage, the tire can be driven with
no air pressure for up to 80 km
(50 mi) at speeds slower than
80 km/h (50 mph). As soon as
possible, contact the nearest
authorized GM or run-flat servicing
facility for inspection and repair or
replacement.
When driving on a deflated run-flat
tire, avoid potholes and other road
hazards that could damage the tire
and/or wheel beyond repair. When a
tire has been damaged, or if driven any distance while deflated, check
with an authorized run-flat tire
service center to determine whether
the tire can be repaired or should be
replaced. To maintain the run-flat
feature, all replacement tires must
be run-flat tires.
To locate the nearest GM or run-flat
servicing facility, call Customer
Assistance.
The valve stems on run-flat tires
have sensors that are part of the
TPMS. See
Tire Pressure Monitor
System 0265. These sensors
contain batteries that are designed
to last for 10 years under normal
driving conditions. See your dealer
for wheel or sensor replacement.
Caution
Using liquid sealants can damage
the tire valves and tire pressure
monitor sensors in the run-flat
tires. This damage is not covered
by the vehicle warranty. Do not
use liquid sealants in run-flat
tires.
Low-Profile Tires
Low-Profile Performance Tire
The original equipment tires on
this vehicle are classified as
low-profile performance tires.
These tires are designed for
very responsive driving on wet
or dry pavement, however, may
produce more road noise and
tend to wear faster.
Caution
Low-profile tires are more
susceptible to damage from road
hazards or curb impact than
standard profile tires. Tire and/or
wheel assembly damage can
occur when coming into contact
with road hazards like potholes,
or sharp edged objects, or when
sliding into a curb. The warranty
does not cover this type of
damage. Keep tires set to the
correct inflation pressure and (Continued)
Page 265 of 351
Chevrolet Corvette Owner Manual (GMNA-Localizing-U.S./Canada/Mexico-
9085364) - 2016 - crc - 9/15/15
264 Vehicle Care
Remove the valve cap from the
tire valve stem. Press the tire
gauge firmly onto the valve to
get the pressure measurement.
If the cold tire inflation pressure
matches the recommended
pressure on the Tire and
Loading Information label, no
further adjustment is necessary.
If the inflation pressure is low,
add air until the recommended
pressure is reached. If the
inflation pressure in high, press
on the metal stem in the center
of the tire valve to release air.
Re-check the tire pressure with
the tire gauge.
Put the valve caps back on the
valve stems to keep out dirt and
moisture and prevent leaks. Use
only valve caps designed for the
vehicle by GM. TPMS sensors
could be damaged and would
not be covered by the vehicle
warranty.Tire Pressure for
High-Speed Operation
{Warning
Driving at high speeds, 160 km/h
(100 mph) or higher, puts
additional strain on tires.
Sustained high-speed driving
causes excessive heat buildup
and can cause sudden tire failure.
This could cause a crash, and
you or others could be killed.
Some high-speed rated tires
require inflation pressure
adjustment for high-speed
operation. When speed limits and
road conditions allow the vehicle
to be driven at high speeds, make
sure the tires are rated for
high-speed operation, are in
excellent condition, and are set to
the correct cold tire inflation
pressure for the vehicle load.
The tires require inflation pressure
adjustment when driving the vehicle
at speeds of 160 km/h (100 mph) or higher, where it is legal. Set the cold
inflation pressure to the maximum
inflation pressure shown on the tire
sidewall, or 265 kPa (38 psi),
whichever is lower. See the
example following. Return the tires
to the recommended cold tire
inflation pressure when high-speed
driving has ended. See
Vehicle
Load Limits 0171.
Example:
The maximum load and inflation
pressure molded on the tire
sidewall, in small letters, near the
rim flange. It will read something like
this: Maximum load
690 kg (1521 lbs) 300 kPa (44 psi)
Max. Press.
For this example, set the inflation
pressure for high-speed driving at
265 kPa (38 psi).
Racing or other competitive driving
may affect the warranty coverage of
the vehicle. See the warranty
booklet for more information.