2016 CHEVROLET CORVETTE manual transmission
[x] Cancel search: manual transmissionPage 37 of 351
Chevrolet Corvette Owner Manual (GMNA-Localizing-U.S./Canada/Mexico-
9085364) - 2016 - crc - 9/15/15
36 Keys, Doors, and Windows
speed becomes faster than 13 km/h
(8 mph) for manual transmissions,
both doors will lock.
Use the power door unlock switch to
unlock the door when the vehicle is
not in P (Park). When the door is
closed again, the doors will lock
either when your foot is removed
from the brake or the vehicle speed
becomes faster than
13 km/h (8 mph).
Automatic Door Unlock
The vehicle is programmed so that
when the shift lever is moved into
P (Park) for automatic transmission
vehicles or when the ignition is
turned off or is in Retained
Accessory Power (RAP) for manual
transmission vehicles, both doors
will unlock.
With the vehicle stopped and the
engine running, door unlocking can
be programmed through the Driver
Information Center (DIC). This
allows the driver to choose various
unlock settings. For programming
information, seeVehicle
Personalization 0130.
Lockout Protection
If the vehicle is in ACC/
ACCESSORY or ON/RUN/START
and the power door lock switch is
pressed with the driver door open,
all the doors will lock and only the
driver door will unlock.
If the vehicle is off and locking is
requested while a door is open,
when all doors are closed the
vehicle will check for RKE
transmitters inside. If an RKE
transmitter is detected and the
number of RKE transmitters inside
has not reduced, the driver door will
unlock and the horn will chirp three
times.
Lockout Protection can be manually
overridden with the driver door open
by pressing and holding
Qon the
power door lock switch. Unlocked Door Anti-Lockout
If Unlocked Door Anti-Lockout is
turned on and the vehicle is off, the
driver door is open, and locking is
requested, all the doors will lock and
only the driver door will unlock. The
Unlocked Door Anti-Lockout feature
can be turned on or off using the
vehicle personalization menus. See
Vehicle Personalization
0130.
Page 38 of 351
Chevrolet Corvette Owner Manual (GMNA-Localizing-U.S./Canada/Mexico-
9085364) - 2016 - crc - 9/15/15
Keys, Doors, and Windows 37
Doors
Hatch (Trunk)
{Warning
Exhaust gases can enter the
vehicle if it is driven with the
liftgate, hatch/trunk open, or with
any objects that pass through the
seal between the body and the
hatch/trunk or liftgate. Engine
exhaust contains carbon
monoxide (CO) which cannot be
seen or smelled. It can cause
unconsciousness and even death.
If the vehicle must be driven with
the liftgate or hatch/trunk open:. Close all of the windows.
. Fully open the air outlets on
or under the instrument
panel.
. Adjust the climate control
system to a setting that
brings in only outside air
and set the fan speed to the
(Continued)
Warning (Continued)
highest setting. See
“Climate Control Systems”
in the Index.
. If the vehicle is equipped
with a power liftgate, disable
the power liftgate function.
For more information about
carbon monoxide, see Engine
Exhaust 0181.
Hatch/Trunk Release
For automatic transmissions, the
vehicle must be in P (Park).
For manual transmissions, the
vehicle must be off or stationary
with the parking brake set. See
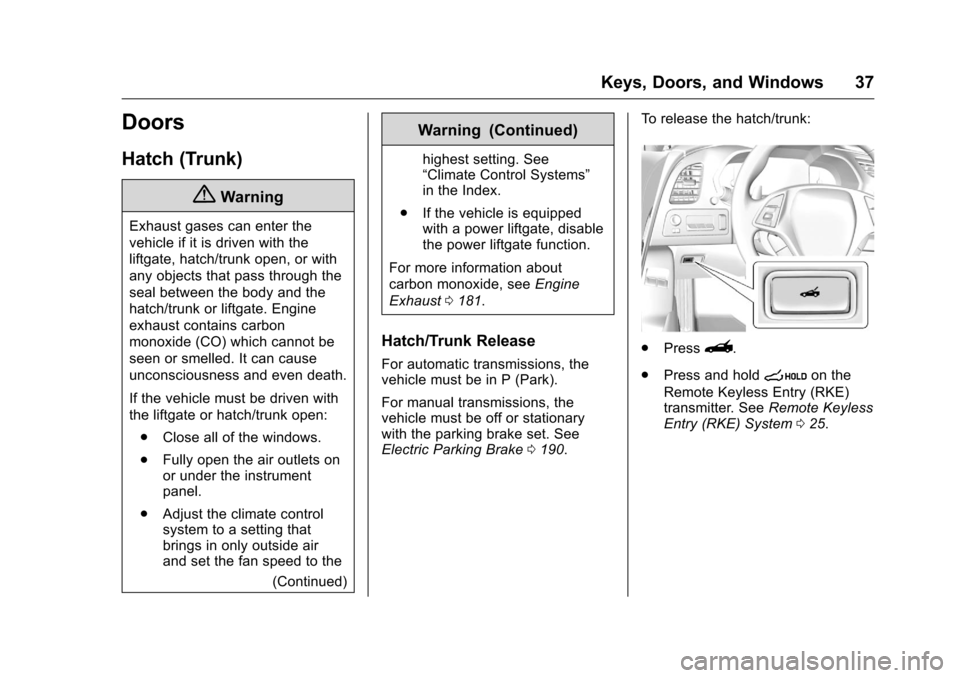
Electric Parking Brake 0190. To release the hatch/trunk:
.
Press}.
. Press and hold
son the
Remote Keyless Entry (RKE)
transmitter. See Remote Keyless
Entry (RKE) System 025.
Page 47 of 351
Chevrolet Corvette Owner Manual (GMNA-Localizing-U.S./Canada/Mexico-
9085364) - 2016 - crc - 9/15/15
46 Keys, Doors, and Windows
Roof
Roof Panel
If equipped with a removable roof
panel, use the following procedures
to remove or install it.
Caution
If a roof panel is dropped or
rested on its edges, the roof
panel, paint, and/or
weatherstripping may be
damaged. Always place the roof
panel in the stowage receivers
after removing it from the vehicle.
Removing the Roof Panel
{Warning
Do not remove a roof panel while
the vehicle is moving. The panel
could fall into the vehicle and
strike an occupant and cause you
to lose control. It could also fly off(Continued)
Warning (Continued)
and strike another vehicle.
Remove the roof panel only when
the vehicle is parked.
It may be necessary to have help
removing the roof panel.
To remove: 1. Shift an automatic transmission into P (Park) or a manual
transmission into 1 (First) or
R (Reverse).
2. Turn the ignition off and set the parking brake.
3. Lower both sun visors.
4. Open the rear hatch/trunk and remove any items that may
interfere with proper storage of
the roof panel.
5. Lower the windows. There are two release handles
on the front and one release
handle on the rear of the roof
panel.
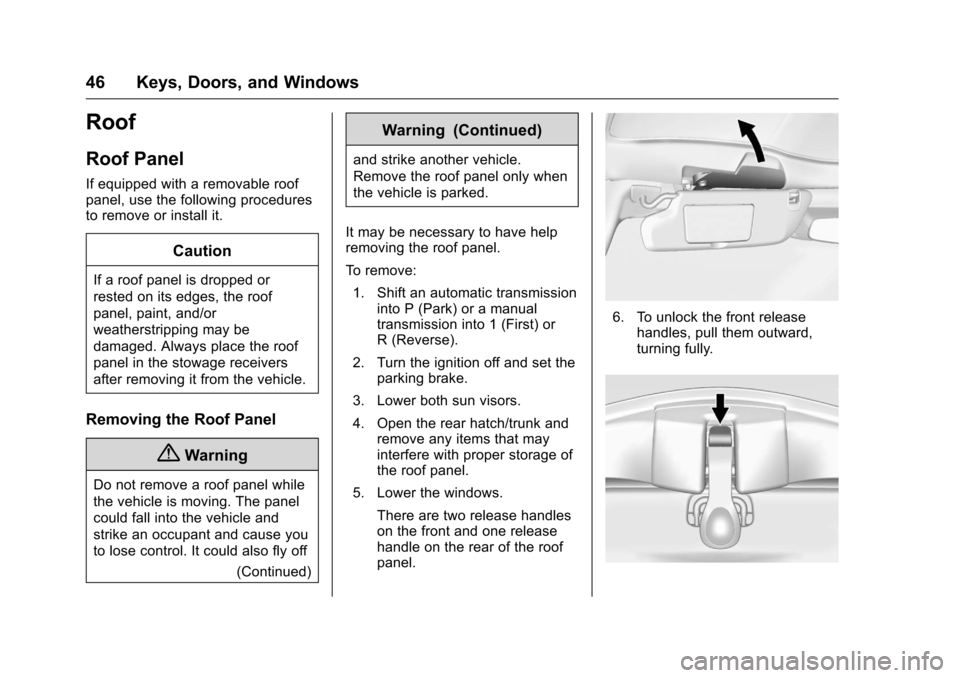
6. To unlock the front releasehandles, pull them outward,
turning fully.
Page 49 of 351
Chevrolet Corvette Owner Manual (GMNA-Localizing-U.S./Canada/Mexico-
9085364) - 2016 - crc - 9/15/15
48 Keys, Doors, and Windows
Installing the Roof Panel
{Warning
An improperly attached roof panel
may fall into or fly off the vehicle.
You or others could be injured.
After installing the roof panel,
always check that it is firmly
attached by pushing up on the
underside of the panel. Check
now and then to be sure the roof
panel is firmly in place.
Caution
Installing the roof with the release
handles in the closed position
could cause damage to the
interior trim. Always move
handles to the open position
when installing the roof.
It is easier if two people install the
roof panel. 1. Shift an automatic transmission
into P (Park). Shift a manual
transmission into 1 (First) or
R (Reverse).
2. Turn the ignition off and set the parking brake.
3. To remove the roof panel, pull up on the rear edge and
remove it from the
storage area.
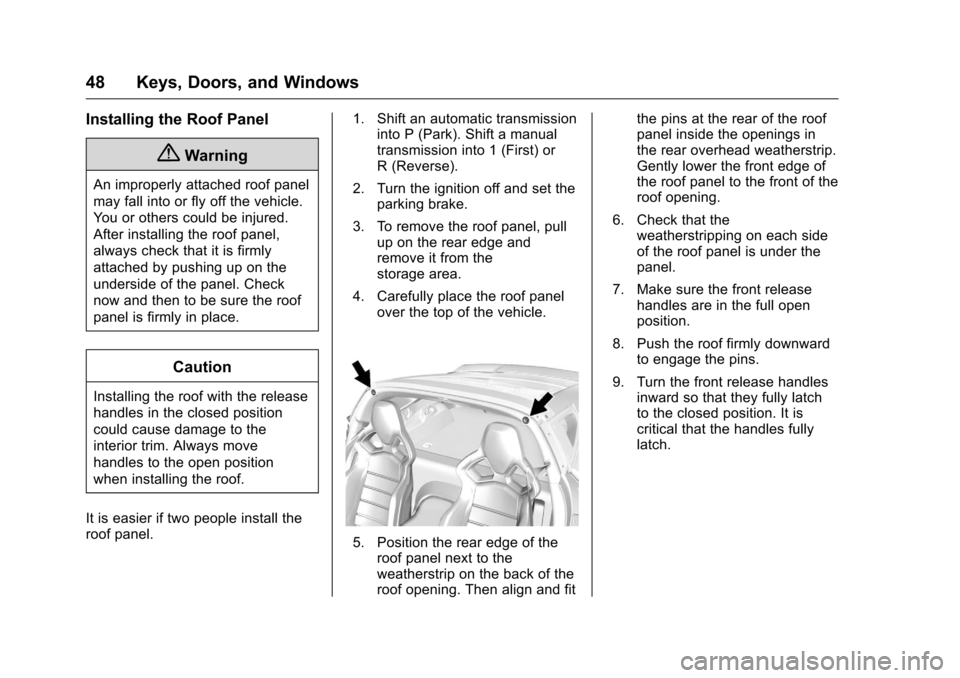
4. Carefully place the roof panel over the top of the vehicle.
5. Position the rear edge of theroof panel next to the
weatherstrip on the back of the
roof opening. Then align and fit the pins at the rear of the roof
panel inside the openings in
the rear overhead weatherstrip.
Gently lower the front edge of
the roof panel to the front of the
roof opening.
6. Check that the weatherstripping on each side
of the roof panel is under the
panel.
7. Make sure the front release handles are in the full open
position.
8. Push the roof firmly downward to engage the pins.
9. Turn the front release handles inward so that they fully latch
to the closed position. It is
critical that the handles fully
latch.
Page 92 of 351

Chevrolet Corvette Owner Manual (GMNA-Localizing-U.S./Canada/Mexico-
9085364) - 2016 - crc - 9/15/15
Instruments and Controls 91
Instruments and
Controls
Controls
Steering Wheel Adjustment . . . . 92
Steering Wheel Controls . . . . . . . 92
Horn . . . . . . . . . . . . . . . . . . . . . . . . . . . 92
Windshield Wiper/Washer . . . . . . 92
Compass . . . . . . . . . . . . . . . . . . . . . . 93
Clock . . . . . . . . . . . . . . . . . . . . . . . . . . 94
Power Outlets . . . . . . . . . . . . . . . . . 94
Warning Lights, Gauges, and
Indicators
Warning Lights, Gauges, andIndicators . . . . . . . . . . . . . . . . . . . . 95
Instrument Cluster . . . . . . . . . . . . . 96
Speedometer . . . . . . . . . . . . . . . . . 101
Odometer . . . . . . . . . . . . . . . . . . . . . 101
Trip Odometer . . . . . . . . . . . . . . . . 101
Tachometer . . . . . . . . . . . . . . . . . . . 101
Fuel Gauge . . . . . . . . . . . . . . . . . . . 101
Boost Gauge . . . . . . . . . . . . . . . . . 102
Engine Coolant Temperature Gauge . . . . . . . . . . . . . . . . . . . . . . 103
Safety Belt Reminders . . . . . . . . 104
Airbag Readiness Light . . . . . . . 104
Passenger Airbag Status Indicator . . . . . . . . . . . . . . . . . . . . 105 Charging System Light . . . . . . . 106
Malfunction Indicator Lamp
(Check Engine Light) . . . . . . . . 106
Brake System Warning Light . . . . . . . . . . . . . . . . . . . . . . . . 108
Electric Parking Brake Light . . . . . . . . . . . . . . . . . . . . . . . . 108
Service Electric Parking Brake Light . . . . . . . . . . . . . . . . . . . . . . . . 109
Antilock Brake System (ABS) Warning Light . . . . . . . . . . . . . . . 109
Gear Shifting Light (Canada and Mexico Only) . . . . . . . . . . . 109
Traction Off Light . . . . . . . . . . . . . 110
Traction Control System (TCS)/ Electronic Stability Control
Light . . . . . . . . . . . . . . . . . . . . . . . . 110
Electronic Stability Control (ESC) Off Light . . . . . . . . . . . . . . 110
Engine Coolant Temperature Warning Light . . . . . . . . . . . . . . . 111
Tire Pressure Light . . . . . . . . . . . 111
Engine Oil Pressure Light . . . . . 111
Low Fuel Warning Light . . . . . . . 112
Security Light . . . . . . . . . . . . . . . . . 112
High-Beam On Light . . . . . . . . . . 112
Lamps On Reminder . . . . . . . . . . 113
Cruise Control Light . . . . . . . . . . 113
Door Ajar Light . . . . . . . . . . . . . . . 113
Information Displays
Driver Information Center (DIC) . . . . . . . . . . . . . . . . 113
Head-Up Display (HUD) . . . . . . 115
Vehicle Messages
Vehicle Messages . . . . . . . . . . . . 120
Battery Voltage and Charging Messages . . . . . . . . . . . . . . . . . . . 120
Brake System Messages . . . . . 120
Compass Messages . . . . . . . . . . 121
Convertible Top Messages . . . 121
Cruise Control Messages . . . . . 122
Door Ajar Messages . . . . . . . . . . 122
Engine Cooling System Messages . . . . . . . . . . . . . . . . . . . 123
Engine Oil Messages . . . . . . . . . 123
Engine Power Messages . . . . . 124
Fuel System Messages . . . . . . . 124
Key and Lock Messages . . . . . 124
Lamp Messages . . . . . . . . . . . . . . 125
Ride Control System Messages . . . . . . . . . . . . . . . . . . . 125
Airbag System Messages . . . . 127
Security Messages . . . . . . . . . . . 127
Service Vehicle Messages . . . . 127
Starting the Vehicle Messages . . . . . . . . . . . . . . . . . . . 128
Tire Messages . . . . . . . . . . . . . . . . 128
Transmission Messages . . . . . . 129
Page 101 of 351
Chevrolet Corvette Owner Manual (GMNA-Localizing-U.S./Canada/Mexico-
9085364) - 2016 - crc - 9/15/15
100 Instruments and Controls
Oil Temperature :Shows the
current oil temperature in either
degrees Celsius (°C) or degrees
Fahrenheit (°F).
Oil Pressure : Shows the current oil
pressure in either kilopascal (kPa) or
in pounds per square inch (psi).
Battery Voltage : Shows the
current battery voltage.
Transmission Fluid
Temperature : Shows the
temperature of the transmission fluid
in either degrees Celsius (°C) or
degrees Fahrenheit (°F).
Tire Temperature : Shows tire
temperature status as either Cold,
Warm, or Hot. Warm is typical for
normal driving while Hot is typical
for aggressive driving. Unknown
may be displayed if tire temperature
information is unavailable.
eLSD and Wheel Slip : Displays
when the Electronic Limited-Slip
Differential (eLSD) is active and
intervening with the vehicle’s normal
operation. The display also displays
slip percentage in a range of low, medium, and high. See
Limited-Slip
Differential (Except Z51 and Z06)
0 201 orLimited-Slip Differential
(Z51 and Z06 Only) 0202.
Audio
While the audio app is open, use
w
orxto change the radio station or
seek to the next or previous track,
depending on the current audio
source. Press SEL to enter the
Audio menu. In the Audio menu
browse for music, select from the
favorites, or change the audio
source.
Phone
Press SEL to enter the Phone
menu. In the Phone menu, if there is
no active phone call, view recent
calls, or scroll through contacts.
If there is an active call, mute or
unmute the phone or switch to
handset or hands-free operation.
Navigation
If equipped, press SEL to enter the
Navigation menu. Displays a map or
turn by turn directions. If there is no
active route, press
pto resume the last route and turn the voice
prompts on/off. If there is an active
route, press SEL to cancel route
guidance or turn the voice prompts
on/off.
Settings
Press SEL to enter the Settings
menu. Use
worxto scroll
through items in the Settings menu.
Units : Press
pwhile Units is
displayed to enter the Units menu.
Choose US or Metric units by
pressing SEL while the desired item
is highlighted.
Display Theme : Press
pto enter
the Display Theme menu. Select
from Link to Drive Mode, Track,
Sport, or Tour for the cluster theme.
Speed Warning : The Speed
Warning display allows the driver to
set a speed that they do not want to
exceed. To set the Speed Warning,
press
pwhen Speed Warning is
displayed. Enable the speed
warning and then use
worxto
adjust the value. Press SEL to set
the speed. Once the speed is set,
Page 102 of 351
Chevrolet Corvette Owner Manual (GMNA-Localizing-U.S./Canada/Mexico-
9085364) - 2016 - crc - 9/15/15
Instruments and Controls 101
this feature can be turned off by
pressing SEL while viewing this
page. If the selected speed limit is
exceeded, a pop-up warning is
displayed with a chime.
Pocket Gauges :Press
pwhile
Pocket Gauges is displayed to enter
the menu and select gauges that
can be displayed for the Sport
theme on the left or right of the
display area. Choose from Oil
Pressure Gauge, Oil Temperature
Gauge, Battery Voltage,
Transmission Fluid Temperature
Gauge, Horsepower, or a blank
gauge.
Software Info : Press
pwhile
Software Info is highlighted to
display open source software
information.
Speedometer
The speedometer shows the
vehicle's speed in either kilometers
per hour (km/h) or miles per
hour (mph).
Odometer
The odometer shows how far the
vehicle has been driven, in either
kilometers or miles.
Trip Odometer
The trip odometer shows how far
the vehicle has been driven since
the trip odometer was last reset.
The trip odometer is accessed and
reset through the Driver Information
Center (DIC). See Driver
Information Center (DIC) 0113.
Tachometer
The tachometer displays the engine
speed in revolutions per
minute (rpm).
Caution
If the engine is operated with the
rpm’s in the warning area at the
high end of the tachometer, the
vehicle could be damaged, and
the damage would not be covered
(Continued)
Caution (Continued)
by the vehicle warranty. Do not
operate the engine with the rpm’s
in the warning area.
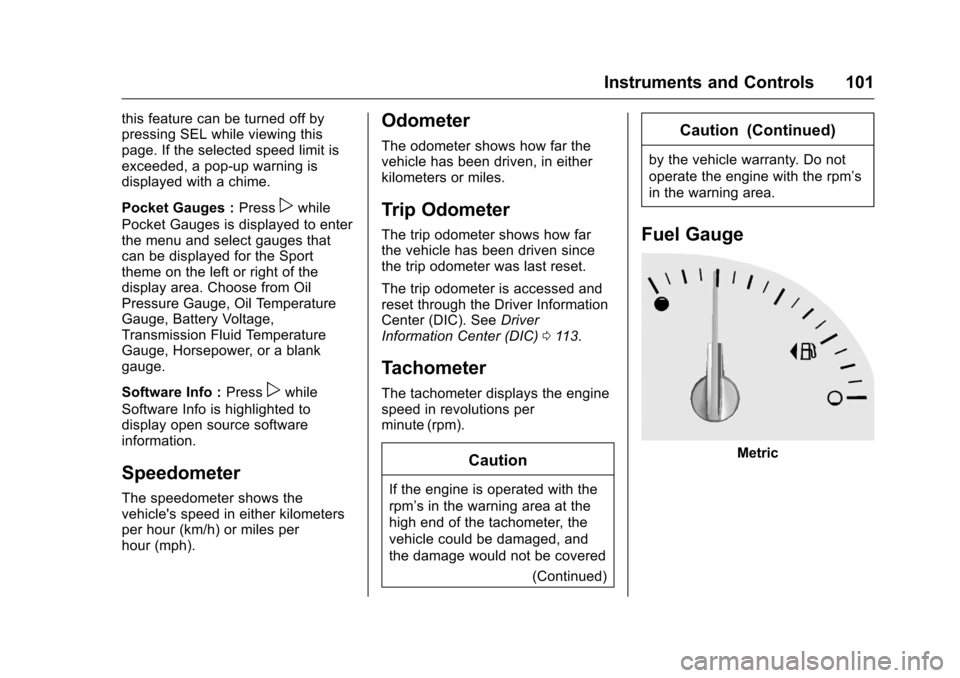
Fuel Gauge
Metric
Page 107 of 351

Chevrolet Corvette Owner Manual (GMNA-Localizing-U.S./Canada/Mexico-
9085364) - 2016 - crc - 9/15/15
106 Instruments and Controls
Charging System Light
The charging system light comes on
briefly when the ignition is turned
on, but the engine is not running, as
a check to show the light is working.
It should go out when the engine is
started.
If the light stays on or comes on
while driving, there may be a
problem with the electrical charging
system. Have it checked by your
dealer. Driving while this light is on
could drain the battery.
When this light comes on, the Driver
Information Center (DIC) also
displays a message. SeeBattery
Voltage and Charging
Messages 0120.
If a short distance must be driven
with the light on, be sure to turn off
all accessories, such as the radio
and air conditioner.
Malfunction Indicator
Lamp (Check Engine
Light)
This light is part of the vehicle’s
emission control on-board
diagnostic system. If this light is on
while the engine is running, a
malfunction has been detected and
the vehicle may require service. The
light should come on to show that it
is working when the ignition is in
Service Only Mode. See Ignition
Positions 0175.
Malfunctions are often indicated by
the system before any problem is
noticeable. Being aware of the light
and seeking service promptly when
it comes on may prevent damage.
Caution
If the vehicle is driven continually
with this light on, the emission
control system may not work as
well, the fuel economy may be
lower, and the vehicle may not
run smoothly. This could lead to
costly repairs that might not be
covered by the vehicle warranty.
Caution
Modifications to the engine,
transmission, exhaust, intake,
or fuel system, or the use of
replacement tires that do not
meet the original tire
specifications, can cause this light
to come on. This could lead to
costly repairs not covered by the
vehicle warranty. This could also
affect the vehicle’s ability to pass
an Emissions Inspection/
Maintenance test. See
Accessories and
Modifications 0213.