2016 CHEVROLET COLORADO Z71 brake light
[x] Cancel search: brake lightPage 256 of 396
Chevrolet Colorado Owner Manual (GMNA-Localizing-U.S/Canada/Mexico-
9159327) - 2016 - crc - 8/28/15
Driving and Operating 255
manufacturer or by the trailer
manufacturer. Always leave just
enough slack so the combination
can turn. Never allow safety chains
to drag on the ground.
Trailer Brakes
A loaded trailer that weighs more
than 900 kg (2,000 lb) needs to have
its own brake system that is
adequate for the weight of the
trailer. Be sure to read and follow
the instructions for the trailer brakes
so they are installed, adjusted, and
maintained properly.
Trailer Wiring Harness
For vehicles not equipped with
heavy-duty trailering, a harness is
secured underneath the left side of
the vehicle, next to the spare tire.
The harness requires the installation
of a trailer connector, which is
available through your dealer. The
seven-wire harness contains the
following trailer circuits:
.Yellow: Left stop/turn signal
. Green: Right stop/turn signal
. Brown: Taillamps/parking lamps .
Black: Ground
. Gray: Back-up lamps
. Orange: Battery feed
. Blue: Trailer brake
To help charge a remote
(non-vehicle) battery, press the Tow/
Haul Mode button at the end of the
shift lever. If the trailer is too light for
Tow/Haul Mode, turn on the
headlamps to help charge the
battery.
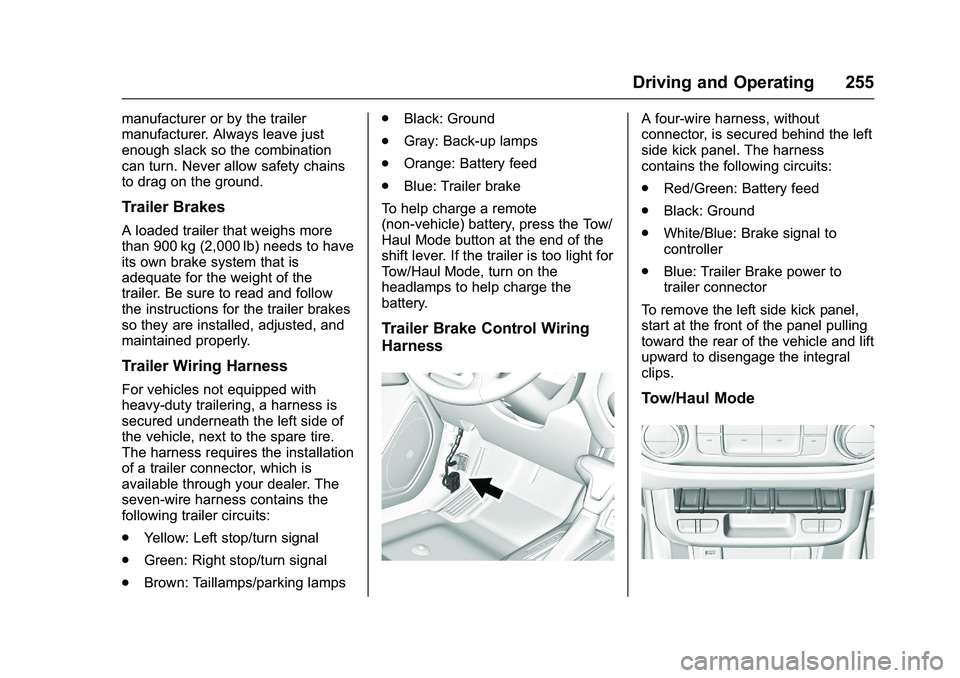
Trailer Brake Control Wiring
Harness
A four-wire harness, without
connector, is secured behind the left
side kick panel. The harness
contains the following circuits:
. Red/Green: Battery feed
. Black: Ground
. White/Blue: Brake signal to
controller
. Blue: Trailer Brake power to
trailer connector
To remove the left side kick panel,
start at the front of the panel pulling
toward the rear of the vehicle and lift
upward to disengage the integral
clips.
Tow/Haul Mode
Page 257 of 396
Chevrolet Colorado Owner Manual (GMNA-Localizing-U.S/Canada/Mexico-
9159327) - 2016 - crc - 8/28/15
256 Driving and Operating
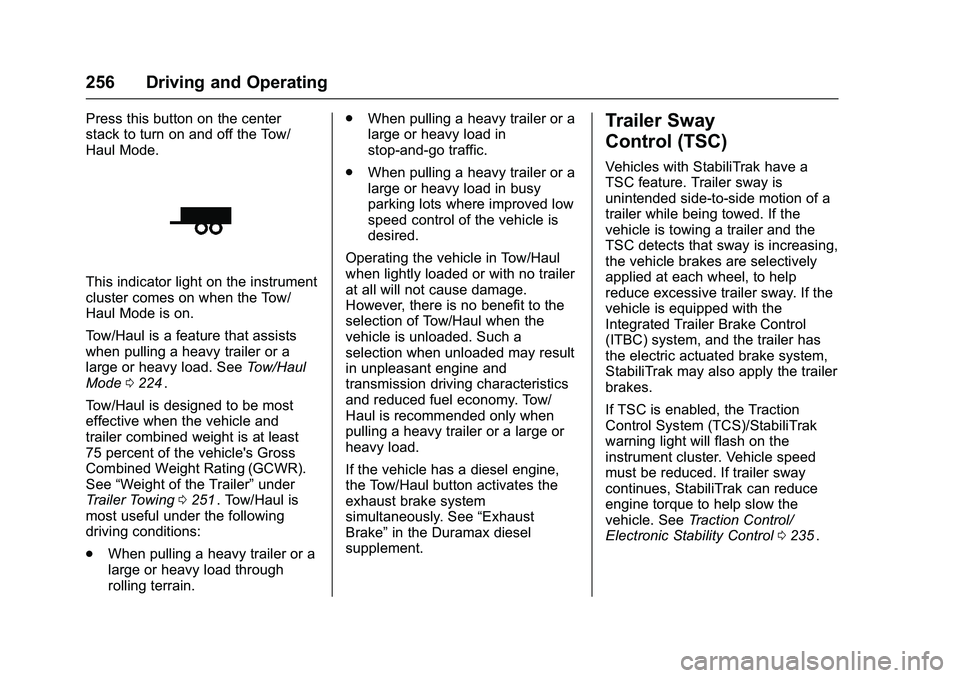
Press this button on the center
stack to turn on and off the Tow/
Haul Mode.
This indicator light on the instrument
cluster comes on when the Tow/
Haul Mode is on.
Tow/Haul is a feature that assists
when pulling a heavy trailer or a
large or heavy load. SeeTow/Haul
Mode 0224
ii.
Tow/Haul is designed to be most
effective when the vehicle and
trailer combined weight is at least
75 percent of the vehicle's Gross
Combined Weight Rating (GCWR).
See “Weight of the Trailer” under
Trailer Towing 0251
ii. Tow/Haul is
most useful under the following
driving conditions:
. When pulling a heavy trailer or a
large or heavy load through
rolling terrain. .
When pulling a heavy trailer or a
large or heavy load in
stop-and-go traffic.
. When pulling a heavy trailer or a
large or heavy load in busy
parking lots where improved low
speed control of the vehicle is
desired.
Operating the vehicle in Tow/Haul
when lightly loaded or with no trailer
at all will not cause damage.
However, there is no benefit to the
selection of Tow/Haul when the
vehicle is unloaded. Such a
selection when unloaded may result
in unpleasant engine and
transmission driving characteristics
and reduced fuel economy. Tow/
Haul is recommended only when
pulling a heavy trailer or a large or
heavy load.
If the vehicle has a diesel engine,
the Tow/Haul button activates the
exhaust brake system
simultaneously. See “Exhaust
Brake” in the Duramax diesel
supplement.
Trailer Sway
Control (TSC)
Vehicles with StabiliTrak have a
TSC feature. Trailer sway is
unintended side-to-side motion of a
trailer while being towed. If the
vehicle is towing a trailer and the
TSC detects that sway is increasing,
the vehicle brakes are selectively
applied at each wheel, to help
reduce excessive trailer sway. If the
vehicle is equipped with the
Integrated Trailer Brake Control
(ITBC) system, and the trailer has
the electric actuated brake system,
StabiliTrak may also apply the trailer
brakes.
If TSC is enabled, the Traction
Control System (TCS)/StabiliTrak
warning light will flash on the
instrument cluster. Vehicle speed
must be reduced. If trailer sway
continues, StabiliTrak can reduce
engine torque to help slow the
vehicle. See Traction Control/
Electronic Stability Control 0235
ii.
Page 278 of 396
Chevrolet Colorado Owner Manual (GMNA-Localizing-U.S/Canada/Mexico-
9159327) - 2016 - crc - 8/28/15
Vehicle Care 277
Caution (Continued)
.Do not mix water with
ready-to-use washer fluid.
Water can cause the
solution to freeze and
damage the washer fluid
tank and other parts of the
washer system.
. When using concentrated
washer fluid, follow the
manufacturer instructions for
adding water.
. Fill the washer fluid tank
only three-quarters full when
it is very cold. This allows
for fluid expansion if
freezing occurs, which could
damage the tank if it is
completely full.
Brakes
Disc brake pads have built-in wear
indicators that make a high-pitched
warning sound when the brake pads
are worn and new pads are needed.
The sound can come and go or be heard all the time the vehicle is
moving, except when applying the
brake pedal firmly.
{Warning
The brake wear warning sound
means that soon the brakes will
not work well. That could lead to
a crash. When the brake wear
warning sound is heard, have the
vehicle serviced.
Caution
Continuing to drive with worn-out
brake pads could result in costly
brake repair.
Some driving conditions or climates
can cause a brake squeal when the
brakes are first applied or lightly
applied. This does not mean
something is wrong with the brakes.
Properly torqued wheel nuts are
necessary to help prevent brake
pulsation. When tires are rotated,
inspect brake pads for wear and evenly tighten wheel nuts in the
proper sequence to torque
specifications in
Capacities and
Specifications 0358
ii.
Brake linings should always be
replaced as complete axle sets.
Brake Pedal Travel
See your dealer if the brake pedal
does not return to normal height,
or if there is a rapid increase in
pedal travel. This could be a sign
that brake service may be required.
Replacing Brake System Parts
Always replace brake system parts
with new, approved replacement
parts. If this is not done, the brakes
may not work properly. The braking
performance expected can change
in many other ways if the wrong
replacement brake parts are
installed or parts are improperly
installed.
Page 279 of 396
Chevrolet Colorado Owner Manual (GMNA-Localizing-U.S/Canada/Mexico-
9159327) - 2016 - crc - 8/28/15
278 Vehicle Care
Brake Fluid
The brake/clutch master cylinder
reservoir is filled with GM approved
DOT 3 brake fluid as indicated on
the reservoir cap. SeeEngine
Compartment Overview 0262
iifor
the location of the reservoir.
Checking Brake Fluid
With the vehicle in P (Park) on a
level surface, the brake fluid level
should be between the minimum
and maximum marks on the brake
fluid reservoir.
There are only two reasons why the
brake fluid level in the reservoir may
go down:
. Normal brake lining wear. When
new linings are installed, the
fluid level goes back up. .
A fluid leak in the brake/clutch
hydraulic system. Have the
brake/clutch hydraulic system
fixed. With a leak, the brakes will
not work well.
Always clean the brake fluid
reservoir cap and the area around
the cap before removing it.
Do not top off the brake/clutch fluid.
Adding fluid does not correct a leak.
If fluid is added when the linings are
worn, there will be too much fluid
when new brake linings are
installed. Add or remove fluid, as
necessary, only when work is done
on the brake/clutch hydraulic
system.
{Warning
If too much brake fluid is added, it
can spill on the engine and burn,
if the engine is hot enough. You
or others could be burned, and
the vehicle could be damaged.
Add brake fluid only when work is
done on the brake/clutch
hydraulic system. When the brake/clutch fluid falls to a
low level, the brake warning light
comes on. See
Brake System
Warning Light 0117
ii.
Brake fluid absorbs water over time
which degrades the effectiveness of
the brake fluid. Replace brake fluid
at the specified intervals to prevent
increased stopping distance. See
Maintenance Schedule 0344
ii.
What to Add
Use only GM approved DOT 3
brake fluid from a clean, sealed
container. See Recommended
Fluids and Lubricants 0353
ii.
{Warning
The wrong or contaminated brake
fluid could result in damage to the
brake system. This could result in
the loss of braking leading to a
possible injury. Always use the
proper GM approved brake fluid.
Page 307 of 396

Chevrolet Colorado Owner Manual (GMNA-Localizing-U.S/Canada/Mexico-
9159327) - 2016 - crc - 8/28/15
306 Vehicle Care
.The TPMS sensor matching
process was not done or not
completed successfully after
rotating the tires. The
malfunction light and the DIC
message should go off after
successfully completing the
sensor matching process. See
“TPMS Sensor Matching
Process” later in this section.
. One or more TPMS sensors are
missing or damaged. The
malfunction light and the DIC
message should go off when the
TPMS sensors are installed and
the sensor matching process is
performed successfully. See
your dealer for service.
. Replacement tires or wheels do
not match the original equipment
tires or wheels. Tires and wheels
other than those recommended
could prevent the TPMS from
functioning properly. See Buying
New Tires 0310
ii. .
Operating electronic devices or
being near facilities using radio
wave frequencies similar to the
TPMS could cause the TPMS
sensors to malfunction.
If the TPMS is not functioning
properly, it cannot detect or signal a
low tire condition. See your dealer
for service if the TPMS malfunction
light and DIC message come on
and stay on.
TPMS Sensor Matching
Process
Each TPMS sensor has a unique
identification code. The identification
code needs to be matched to a new
tire/wheel position after rotating the
vehicle’s tires or replacing one or
more of the TPMS sensors. Also,
the TPMS sensor matching process
should be performed after replacing
a spare tire with a road tire
containing the TPMS sensor. The
malfunction light and the DIC
message should go off at the next
ignition cycle. The sensors are
matched to the tire/wheel positions,
using a TPMS relearn tool, in the
following order: driver side front tire, passenger side front tire, passenger
side rear tire, and driver side rear.
See your dealer for service or to
purchase a relearn tool. A TPMS
relearn tool can also be purchased.
See Tire Pressure Monitor Sensor
Activation Tool at
www.gmtoolsandequipment.com or
call 1-800-GM TOOLS
(1-800-468-6657).
There are two minutes to match the
first tire/wheel position, and
five minutes overall to match all four
tire/wheel positions. If it takes
longer, the matching process stops
and must be restarted.
The TPMS sensor matching
process is:
1. Set the parking brake.
2. Turn the ignition to ON/RUN with the engine off.
3. If the vehicle has an uplevel DIC, make sure the Tire
Pressure info page option is
turned on. The info pages on
the DIC can be turned on and
off through the Settings menu.
Page 329 of 396
Chevrolet Colorado Owner Manual (GMNA-Localizing-U.S/Canada/Mexico-
9159327) - 2016 - crc - 8/28/15
328 Vehicle Care
The jump start positive terminal (3)
and negative terminal (4) are on the
battery of the vehicle providing the
jump start.
The positive jump start connection
for the discharged battery is under a
trim cover. Open the cover to
expose the terminal.1. Check the other vehicle. It must have a 12-volt battery
with a negative ground system.
Caution
If the other vehicle does not have
a 12-volt system with a negative
ground, both vehicles can be
damaged. Only use a vehicle that
has a 12-volt system with a
negative ground for jump starting.
2. Position the two vehicles so that they are not touching.
3. Set the parking brake firmly and put the shift lever in
P (Park) with an automatic
transmission, or N (Neutral)
with a manual transmission.
Caution
If any accessories are left on or
plugged in during the jump
starting procedure, they could be
damaged. The repairs would not
be covered by the vehicle
warranty. Whenever possible, turn
off or unplug all accessories on
either vehicle when jump starting.
4. Turn the ignition to LOCK/OFF. Turn off all lights and
accessories in both vehicles,
except the hazard warning
flashers if needed.
{Warning
An electric fan can start up even
when the engine is not running
and can injure you. Keep hands,
clothing, and tools away from any
underhood electric fan.
{Warning
Using a match near a battery can
cause battery gas to explode.
People have been hurt doing this,
and some have been blinded.
Use a flashlight if you need more
light.
Battery fluid contains acid that
can burn you. Do not get it on
you. If you accidentally get it in
your eyes or on your skin, flush
the place with water and get
medical help immediately.
{Warning
Fans or other moving engine
parts can injure you badly. Keep
your hands away from moving
parts once the engine is running.
5. Connect one end of the red positive (+) cable to the
positive (+) terminal on the
discharged battery.
Page 335 of 396
Chevrolet Colorado Owner Manual (GMNA-Localizing-U.S/Canada/Mexico-
9159327) - 2016 - crc - 8/28/15
334 Vehicle Care
To dolly tow a four-wheel-drive
vehicle from the rear:1. Drive the rear wheels onto the dolly.
2. Set the parking brake. See Parking Brake 0233
ii.
3. Put the transmission in P (Park).
4. Secure the vehicle to the dolly following the manufacturer's
instructions.
5. Use a clamping device designed for towing to ensure
that the front wheels are locked
into the straight position.
6. Shift the transfer case to N (Neutral). See “Shifting into
N (Neutral)” underFour-Wheel
Drive 0226
iifor the proper
procedure.
7. Turn the ignition to LOCK/OFF.
Appearance Care
Exterior Care
Locks
Locks are lubricated at the factory.
Use a de-icing agent only when
absolutely necessary, and have the
locks greased after using. See
Recommended Fluids and
Lubricants 0353
ii.
Washing the Vehicle
To preserve the vehicle's finish,
wash it often and out of direct
sunlight.
Caution
Do not use petroleum-based,
acidic, or abrasive cleaning
agents as they can damage the
vehicle's paint, metal, or plastic
parts. If damage occurs, it would
not be covered by the vehicle
warranty. Approved cleaning
products can be obtained from
(Continued)
Caution (Continued)
your dealer. Follow all
manufacturer directions regarding
correct product usage, necessary
safety precautions, and
appropriate disposal of any
vehicle care product.
Caution
Avoid using high-pressure
washes closer than 30 cm (12 in)
to the surface of the vehicle. Use
of power washers exceeding
8,274 kPa (1,200 psi) can result
in damage or removal of paint
and decals.
This symbol
eis on any
underhood compartment electrical
center that should not be power
washed. This could cause damage
that would not be covered by the
vehicle warranty.
Page 352 of 396
Chevrolet Colorado Owner Manual (GMNA-Localizing-U.S/Canada/Mexico-
9159327) - 2016 - crc - 8/28/15
Service and Maintenance 351
.To avoid break-down or failure to
start the vehicle, maintain a
battery with full cranking power.
. Trained dealer technicians have
the diagnostic equipment to test
the battery and ensure that the
connections and cables are
corrosion-free.
Belts
. Belts may need replacing if they
squeak or show signs of
cracking or splitting.
. Trained dealer technicians have
access to tools and equipment
to inspect the belts and
recommend adjustment or
replacement when necessary.
Brakes
Brakes stop the vehicle and are
crucial to safe driving.
. Signs of brake wear may include
chirping, grinding, or squealing
noises, or difficulty stopping. .
Trained dealer technicians have
access to tools and equipment
to inspect the brakes and
recommend quality parts
engineered for the vehicle.
Fluids
Proper fluid levels and approved
fluids protect the vehicle’s systems
and components. See
Recommended Fluids and
Lubricants 0353
iifor GM approved
fluids.
. Engine oil and windshield
washer fluid levels should be
checked at every fuel fill.
. Instrument cluster lights may
come on to indicate that fluids
may be low and need to be
filled.
Hoses
Hoses transport fluids and should
be regularly inspected to ensure
that there are no cracks or leaks.
With a multi-point inspection, your
dealer can inspect the hoses and
advise if replacement is needed. Lamps
Properly working headlamps,
taillamps, and brake lamps are
important to see and be seen on
the road.
.
Signs that the headlamps need
attention include dimming, failure
to light, cracking, or damage.
The brake lamps need to be
checked periodically to ensure
that they light when braking.
. With a multi-point inspection,
your dealer can check the lamps
and note any concerns.
Shocks and Struts
Shocks and struts help aid in control
for a smoother ride.
. Signs of wear may include
steering wheel vibration, bounce/
sway while braking, longer
stopping distance, or uneven
tire wear.
. As part of the multi-point
inspection, trained dealer
technicians can visually inspect
the shocks and struts for signs