2016 CHEVROLET COLORADO Z71 light
[x] Cancel search: lightPage 231 of 396
Chevrolet Colorado Owner Manual (GMNA-Localizing-U.S/Canada/Mexico-
9159327) - 2016 - crc - 8/28/15
230 Driving and Operating
Automatic Transfer Case
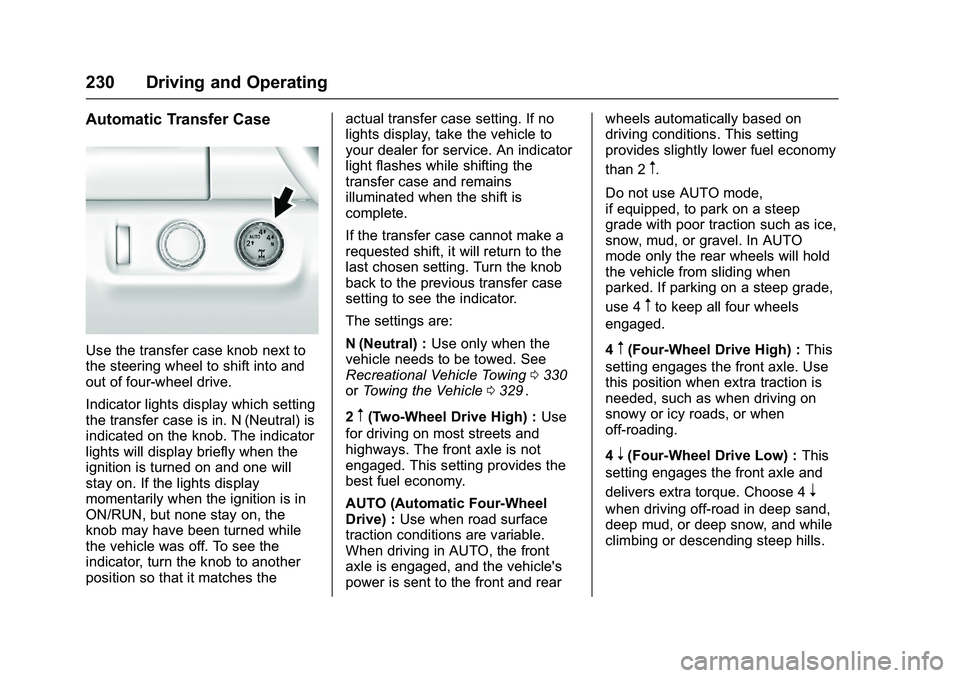
Use the transfer case knob next to
the steering wheel to shift into and
out of four-wheel drive.
Indicator lights display which setting
the transfer case is in. N (Neutral) is
indicated on the knob. The indicator
lights will display briefly when the
ignition is turned on and one will
stay on. If the lights display
momentarily when the ignition is in
ON/RUN, but none stay on, the
knob may have been turned while
the vehicle was off. To see the
indicator, turn the knob to another
position so that it matches theactual transfer case setting. If no
lights display, take the vehicle to
your dealer for service. An indicator
light flashes while shifting the
transfer case and remains
illuminated when the shift is
complete.
If the transfer case cannot make a
requested shift, it will return to the
last chosen setting. Turn the knob
back to the previous transfer case
setting to see the indicator.
The settings are:
N (Neutral) :
Use only when the
vehicle needs to be towed. See
Recreational Vehicle Towing 0330
iior Towing the Vehicle 0329ii.
2
m(Two-Wheel Drive High) : Use
for driving on most streets and
highways. The front axle is not
engaged. This setting provides the
best fuel economy.
AUTO (Automatic Four-Wheel
Drive) : Use when road surface
traction conditions are variable.
When driving in AUTO, the front
axle is engaged, and the vehicle's
power is sent to the front and rear wheels automatically based on
driving conditions. This setting
provides slightly lower fuel economy
than 2
m.
Do not use AUTO mode,
if equipped, to park on a steep
grade with poor traction such as ice,
snow, mud, or gravel. In AUTO
mode only the rear wheels will hold
the vehicle from sliding when
parked. If parking on a steep grade,
use 4
mto keep all four wheels
engaged.
4
m(Four-Wheel Drive High) : This
setting engages the front axle. Use
this position when extra traction is
needed, such as when driving on
snowy or icy roads, or when
off-roading.
4
n(Four-Wheel Drive Low) : This
setting engages the front axle and
delivers extra torque. Choose 4
n
when driving off-road in deep sand,
deep mud, or deep snow, and while
climbing or descending steep hills.
Page 232 of 396
Chevrolet Colorado Owner Manual (GMNA-Localizing-U.S/Canada/Mexico-
9159327) - 2016 - crc - 8/28/15
Driving and Operating 231
Shifting into 4nwill turn Traction
Control and StabiliTrak off. See
Traction Control/Electronic Stability
Control 0235
ii.
Shifting Into 4
mor AUTO
Turn the knob to the 4
mor AUTO
position at any speed, except from 4
n. The indicator light will flash while
shifting and will remain on when the
shift is completed.
Shifting Into 2
m
Turn the knob to 2mat any speed,
except when shifting from 4
n. The
indicator light will flash while shifting
and will remain on when the shift is
completed.
Shifting Into 4
n
When 4nis engaged, keep vehicle
speed below 72 km/h (45 mph).
To shift into 4
n:
1. The ignition must be in ON/ RUN and the vehicle must be
stopped or moving less than
5 km/h (3 mph) with the transmission in N (Neutral). It is
best for the vehicle to be
moving 1.6 to 3.2 km/h
(1 to 2 mph).
2. Turn the knob to 4
n. Wait for
the 4
nindicator light to stop
flashing before shifting the
transmission into gear.
Caution
Shifting the transmission into gear
before the requested mode
indicator light has stopped
flashing could damage the
transfer case.
If the transmission is in gear and/or
moving more than 5 km/h (3 mph),
the 4
nindicator light will flash for
30 seconds and not complete the
shift. After 30 seconds the transfer
case will shift to 4
m. Turn the knob
to 4
mto display the indicator. With
the vehicle moving less than 5 km/h
(3 mph), and the transmission in
N (Neutral), attempt the shift again. Shifting Out of 4
n
To shift:
1. The vehicle must be stopped or moving less than 5 km/h
(3 mph) with the transmission
in N (Neutral) and the ignition in
ON/RUN. It is best for the
vehicle to be moving
1.6 to 3.2 km/h (1 to 2 mph).
2. Turn the knob to 4
m, AUTO,
or 2
m. Wait for the 4m, AUTO,
or 2
mindicator light to stop
flashing before shifting the
transmission into gear.
Caution
Shifting the transmission into gear
before the requested mode
indicator light has stopped
flashing could damage the
transfer case.
Page 233 of 396

Chevrolet Colorado Owner Manual (GMNA-Localizing-U.S/Canada/Mexico-
9159327) - 2016 - crc - 8/28/15
232 Driving and Operating
If the transmission is in gear and/or
moving more than 5 km/h (3 mph),
the 4
m, AUTO, or 2mindicator light
will flash for 30 seconds but will not
complete the shift. With the vehicle
moving less than 5 km/h (3 mph),
and the transmission in N (Neutral),
attempt the shift again.
Shifting Into N (Neutral)
To shift:
1. Park the vehicle on a level surface.
2. Set the parking brake and press and hold the brake
pedal. See Parking Brake
0 233
ii.
3. Start the vehicle or turn the ignition to ON/RUN.
4. Shift the transmission to N (Neutral).
5. Shift the transfer case to 2
m. 6. Turn the transfer case knob
clockwise to N (Neutral) until it
stops and hold it there until the
N (Neutral) light starts blinking.
This will take at least
10 seconds. Then slowly
release the dial to the 4
n
position. The N (Neutral) light
will come on when the transfer
case shift to N (Neutral) is
complete.
7. With the engine running, verify that the transfer case is in
N (Neutral) by shifting the
transmission to R (Reverse),
then shift the transmission to
D (Drive). There should be no
movement of the vehicle while
shifting the transmission.
8. Turn the engine off, and the ignition to ACC/ACCESSORY.
9. Place the transmission shift lever in P (Park). See
Recreational Vehicle Towing
0330
ii.
10. Turn the ignition to LOCK/OFF. Shifting Out of N (Neutral)
To shift:
1. Set the parking brake and apply the brake pedal.
2. Turn the ignition to ON/RUN with the engine off.
3. Shift the transmission to N (Neutral).
4. Turn the transfer case knob to the desired setting.
After the transfer case has
shifted out of N (Neutral), the
N (Neutral) light will go out.
5. Release the parking brake.
6. Start the engine and shift the transmission to the
desired gear.
Page 234 of 396
Chevrolet Colorado Owner Manual (GMNA-Localizing-U.S/Canada/Mexico-
9159327) - 2016 - crc - 8/28/15
Driving and Operating 233
Brakes
Antilock Brake
System (ABS)
This vehicle has ABS, an advanced
electronic braking system that helps
prevent a braking skid.
When the vehicle begins to drive
away, ABS checks itself.
A momentary motor or clicking noise
might be heard while this test is
going on, and it might even be
noticed that the brake pedal moves
a little. This is normal.
If there is a problem with ABS, this
warning light stays on. SeeAntilock
Brake System (ABS) Warning Light
0 118
ii. If driving safely on a wet road and it
becomes necessary to slam on the
brakes and continue braking to
avoid a sudden obstacle, a
computer senses the wheels are
slowing down. If one of the wheels
is about to stop rolling, the computer
will separately work the brakes at
each wheel.
ABS can change the brake pressure
to each wheel, as required, faster
than any driver could. This can help
you steer around the obstacle while
braking hard.
As the brakes are applied, the
computer keeps receiving updates
on wheel speed and controls
braking pressure accordingly.
Remember: ABS does not change
the time needed to get a foot up to
the brake pedal or always decrease
stopping distance. If you get too
close to the vehicle in front of you,
there will not be enough time to
apply the brakes if that vehicle
suddenly slows or stops. Always
leave enough room up ahead to
stop, even with ABS.
Using ABS
Do not pump the brakes. Just hold
the brake pedal down firmly and let
ABS work. You may hear the ABS
pump or motor operating and feel
the brake pedal pulsate. This is
normal.
Braking in Emergencies
ABS allows you to steer and brake
at the same time. In many
emergencies, steering can help
more than even the very best
braking.
Parking Brake
Page 235 of 396

Chevrolet Colorado Owner Manual (GMNA-Localizing-U.S/Canada/Mexico-
9159327) - 2016 - crc - 8/28/15
234 Driving and Operating
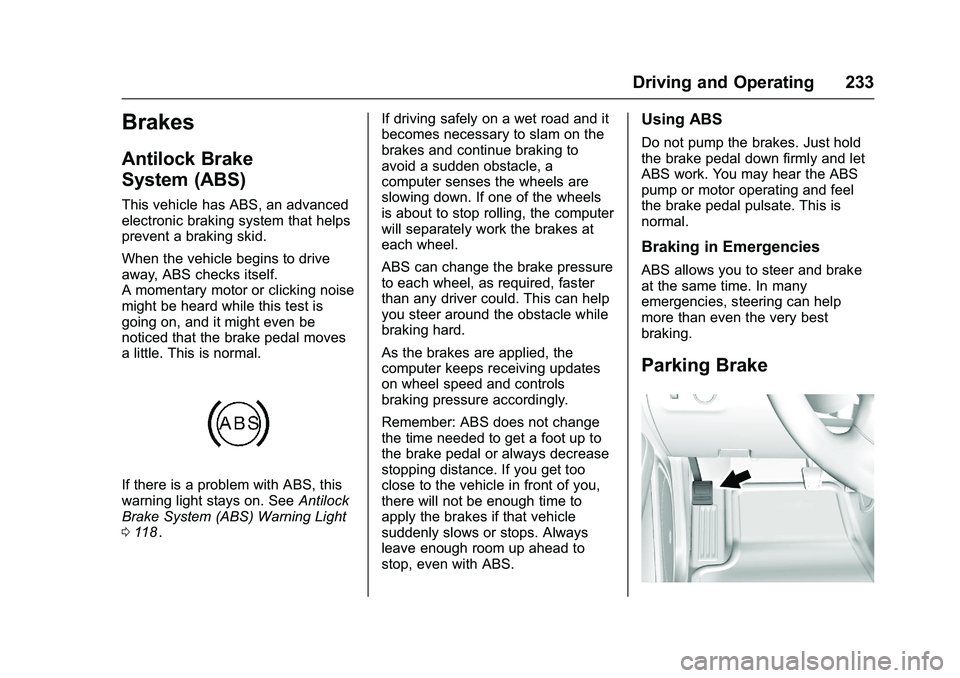
Set the parking brake by holding the
regular brake pedal down, then
pushing down the parking brake
pedal.
If the ignition is on, the brake
system warning light will come on.
SeeBrake System Warning Light
0 117
ii.
Caution
Driving with the parking brake on
can overheat the brake system
and cause premature wear or
damage to brake system parts.
Make sure that the parking brake
is fully released and the brake
warning light is off before driving.
To release the parking brake, hold
the regular brake pedal down, then
push down momentarily on the
parking brake pedal until you feel
the pedal release. Slowly pull your
foot up off the parking brake pedal.
If the parking brake is not released
when you begin to drive, the brake system warning light will flash and a
chime will sound warning you that
the parking brake is still on.
If you are towing a trailer and are
parking on a hill, see
Driving
Characteristics and Towing Tips
0 249
ii.
Brake Assist
The Brake Assist feature is
designed to assist the driver in
stopping or decreasing vehicle
speed in emergency driving
conditions. This feature uses the
stability system hydraulic brake
control module to supplement the
power brake system under
conditions where the driver has
quickly and forcefully applied the
brake pedal in an attempt to quickly
stop or slow down the vehicle. The
stability system hydraulic brake
control module increases brake
pressure at each corner of the
vehicle until the ABS activates. Minor brake pedal pulsation or
pedal movement during this time is
normal and the driver should
continue to apply the brake pedal as
the driving situation dictates. The
Brake Assist feature will
automatically disengage when the
brake pedal is released or brake
pedal pressure is quickly
decreased.
Hill Start Assist (HSA)
This vehicle has an HSA feature,
which may be useful when the
vehicle is stopped on a grade
sufficient enough to activate HSA.
This feature is designed to prevent
the vehicle from rolling, either
forward or rearward, during vehicle
drive off. After the driver completely
stops and holds the vehicle in a
complete standstill on a grade, HSA
will be automatically activated.
Page 237 of 396
Chevrolet Colorado Owner Manual (GMNA-Localizing-U.S/Canada/Mexico-
9159327) - 2016 - crc - 8/28/15
236 Driving and Operating
instrument cluster. Both traction
control and StabiliTrak are
automatically disabled in this
condition.
The indicator light for both systems
is in the instrument cluster. This
light will:
.Flash when TCS is limiting
wheel spin.
. Flash when StabiliTrak is
activated.
. Turn on and stay on when either
system is not working.
If either system fails to turn on or to
activate, a message displays in the
Driver Information Center (DIC), and
dcomes on and stays on to
indicate that the system is inactive
and is not assisting the driver in maintaining control. The vehicle is
safe to drive, but driving should be
adjusted accordingly.
If
dcomes on and stays on:
1. Stop the vehicle.
2. Turn the engine off and wait 15 seconds.
3. Start the engine.
Drive the vehicle. If
dcomes on
and stays on, the vehicle may need
more time to diagnose the problem.
If the condition persists, see your
dealer.
Turning the Systems Off
and On
The button for TCS and StabiliTrak
is on the center stack.
Caution
Do not repeatedly brake or
accelerate heavily when TCS is
off. The vehicle driveline could be
damaged.
To turn off only TCS, press and
release the
gbutton. The Traction
Off light
idisplays in the
instrument cluster. To turn TCS on
again, press and release the
g
button. The Traction Off lighti
displayed in the instrument cluster
will turn off.
If TCS is limiting wheel spin when
the
gbutton is pressed, the system
will not turn off until the wheels stop
spinning.
To turn off both TCS and StabiliTrak,
press and hold the
gbutton until
the Traction Off light
iand
StabiliTrak Off light
gcome on and
stay on in the instrument cluster. To
turn TCS and StabiliTrak on again,
press and release the
gbutton. The
Page 238 of 396
Chevrolet Colorado Owner Manual (GMNA-Localizing-U.S/Canada/Mexico-
9159327) - 2016 - crc - 8/28/15
Driving and Operating 237
Traction Off lightiand StabiliTrak
Off light
gin the instrument cluster
turn off.
StabiliTrak will automatically turn on
if the vehicle exceeds 56 km/h
(35 mph). Traction control will
remain off until the driver presses
the
gbutton or the ignition is cycled
Off then On.
Adding accessories can affect the
vehicle performance. See
Accessories and Modifications
0 259
ii.
Hill Descent
Control (HDC)
If equipped, HDC can be used when
driving downhill. It sets and
maintains vehicle speed while
descending a very steep incline in a
forward or reverse gear.
The HDC switch is on the center
stack, below the climate controls.
Press
5to enable or disable HDC.
Vehicle speed must be below
60 km/h (37 mph).
The HDC light displays on the
instrument cluster when enabled.
HDC can maintain vehicle speeds
between 4 and 30 km/h (3 and
19 mph) on an incline greater than
or equal to a 10% grade. A blinking
HDC light indicates that the system
is actively applying the brakes to
maintain vehicle speed.
When HDC is set, that is the initial
set speed. It can be increased or
decreased by applying the
accelerator or brake pedal. Smaller
HDC speed control adjustments are
accomplished using the cruise up or
down buttons. Each tap of the
+RES will increase the set speed by
0.8 km/h (0.5 mph), while each tap
of the SET– will decrease the set
speed by 0.8 km/h (0.5 mph). This
adjusted speed becomes the new
set speed. HDC will remain enabled between
30 and 60 km/h (19 and 37 mph),
however vehicle speed cannot be
set or maintained in this range.
It will automatically disable if the
vehicle speed is above 80 km/h
(50 mph) or above 60 km/h
(37 mph) for at least 30 seconds.5
must be pressed again to
re-enable HDC.
When enabled, if the vehicle is at a
speed above 30 km/h (19 mph) and
less than 60 km/h (37 mph), a DIC
message will display instructing the
driver to reduce speed for HDC
operation.
Cruise control will not function while
HDC is enabled and vehicle speed
is below 40 km/h (25 mph).
Page 241 of 396

Chevrolet Colorado Owner Manual (GMNA-Localizing-U.S/Canada/Mexico-
9159327) - 2016 - crc - 8/28/15
240 Driving and Operating
Using Cruise Control on Hills
How well the cruise control will work
on hills depends on the vehicle
speed, load, and the steepness of
the hills. When going up steep hills,
you might have to step on the
accelerator pedal to maintain your
speed. When going downhill, you
might have to brake or shift to a
lower gear to keep your speed
down. If the brake pedal is applied,
cruise control will disengage.
Ending Cruise Control
There are four ways to end cruise
control:
.Step lightly on the brake pedal.
. Press
*.
. Press the clutch pedal for
several seconds or shift the
transmission to N (Neutral).
. To turn off cruise control,
press
5.
Erasing Speed Memory
The cruise control set speed is
erased from memory if
5is pressed
or if the ignition is turned off.
Driver Assistance
Systems
Rear Vision
Camera (RVC)
{Warning
The camera(s) do not display
children, pedestrians, bicyclists,
crossing traffic, animals, or any
other object outside of the
cameras’ field of view, below the
bumper, or under the vehicle.
Shown distances may be different
from actual distances. Do not
drive or park the vehicle using
only these camera(s). Always
check behind and around the
vehicle before driving. Failure to
use proper care may result in
injury, death, or vehicle damage.
If equipped, the RVC system is
designed to help the driver when
backing up by displaying a view of
the area behind the vehicle. When
the key is in ON/RUN and the driver shifts the vehicle into R (Reverse),
the video image automatically
appears on the infotainment screen.
The infotainment screen goes to the
previous screen after approximately
four seconds once the vehicle is
shifted out of R (Reverse).
To see the previous screen sooner,
do one of the following:
.
Press a hard key on the
infotainment system.
. Shift into P (Park).
The RVC will not work properly if
the tailgate is down. If the tailgate is
down, do not use this system.
Guidelines
The RVC system may have a
guideline overlay that can help the
driver align the vehicle when
backing into a parking spot.
To turn the guidelines on or off:
1. Shift into P (Park).
2. Press SETTINGS on the home screen of the infotainment
system.
3. Select Rear Camera.