2016 CHEVROLET COLORADO door lock
[x] Cancel search: door lockPage 42 of 396
Chevrolet Colorado Owner Manual (GMNA-Localizing-U.S/Canada/Mexico-
9159327) - 2016 - crc - 8/28/15
Keys, Doors, and Windows 41
If conditions prevent the window
from closing and the window
continues to auto-reverse, it is
possible to close the window by
activating the express override.
Hold the window switch in the
partially or fully pulled position.
Release of the switch from the
partially pulled up position will cause
the window to stop. Release of the
switch from the fully pulled position
will activate the express-up and
related obstacle detection features.
{Warning
If express override is activated,
the window will not reverse
automatically. You or others could
be injured and the window could
be damaged. Before you use
express override, make sure that
all people and obstructions are
clear of the window path.
Rear Window Lockout (Crew
Cab Only)
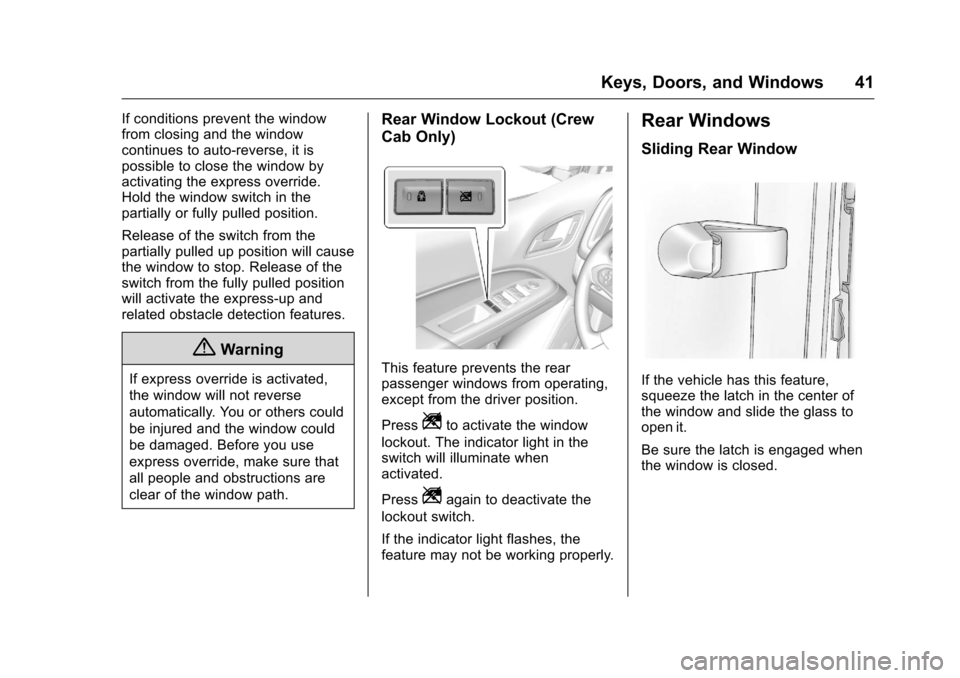
This feature prevents the rear
passenger windows from operating,
except from the driver position.
Press
Zto activate the window
lockout. The indicator light in the
switch will illuminate when
activated.
Press
Zagain to deactivate the
lockout switch.
If the indicator light flashes, the
feature may not be working properly.
Rear Windows
Sliding Rear Window
If the vehicle has this feature,
squeeze the latch in the center of
the window and slide the glass to
open it.
Be sure the latch is engaged when
the window is closed.
Page 43 of 396
Chevrolet Colorado Owner Manual (GMNA-Localizing-U.S/Canada/Mexico-
9159327) - 2016 - crc - 8/28/15
42 Keys, Doors, and Windows
Sun Visors
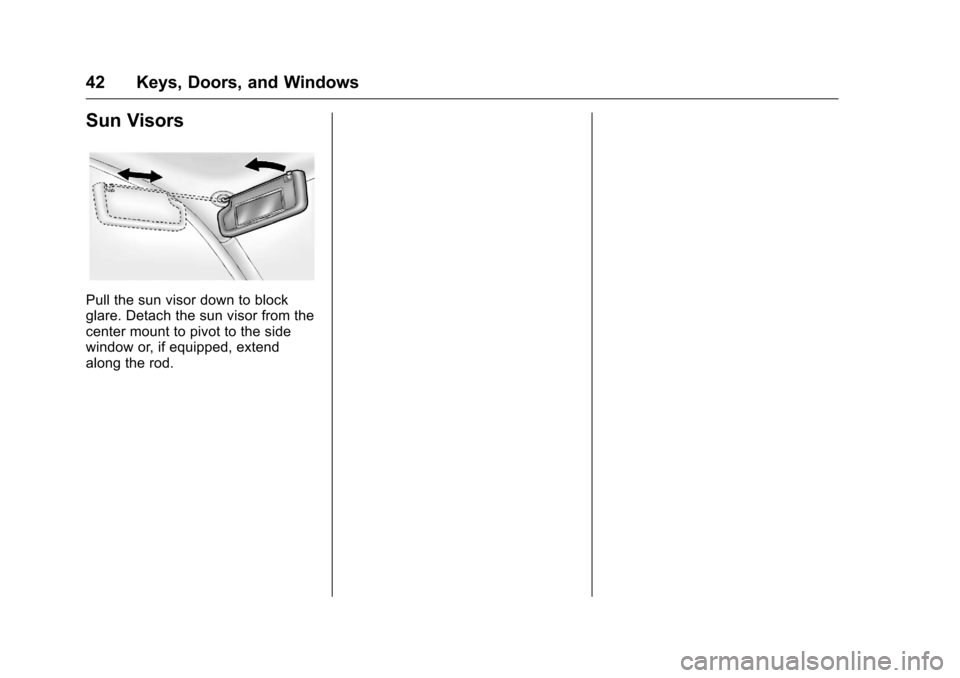
Pull the sun visor down to block
glare. Detach the sun visor from the
center mount to pivot to the side
window or, if equipped, extend
along the rod.
Page 55 of 396
Chevrolet Colorado Owner Manual (GMNA-Localizing-U.S/Canada/Mexico-
9159327) - 2016 - crc - 8/28/15
54 Seats and Restraints
To unlatch the belt, push the button
on the buckle. The belt should
return to its stowed position.
Always stow the safety belt slowly.
If the safety belt webbing returns
quickly to the stowed position, the
retractor may lock and cannot be
pulled out. If this happens, pull the
safety belt straight out firmly to
unlock the webbing, and then
release it. If the webbing is still
locked in the retractor, see your
dealer.Before a door is closed, be sure the
safety belt is out of the way. If a
door is slammed against a safety
belt, damage can occur to both the
safety belt and the vehicle.
Shoulder Belt Height Adjuster
The vehicle has a shoulder belt
height adjuster for the driver and
front outboard passenger.
Adjust the height so the shoulder
portion of the belt is on the shoulder
and not falling off of it. The belt
should be close to, but not
contacting, the neck. Improper
shoulder belt height adjustment
could reduce the effectiveness of
the safety belt in a crash. See
How
to Wear Safety Belts Properly 051
ii.
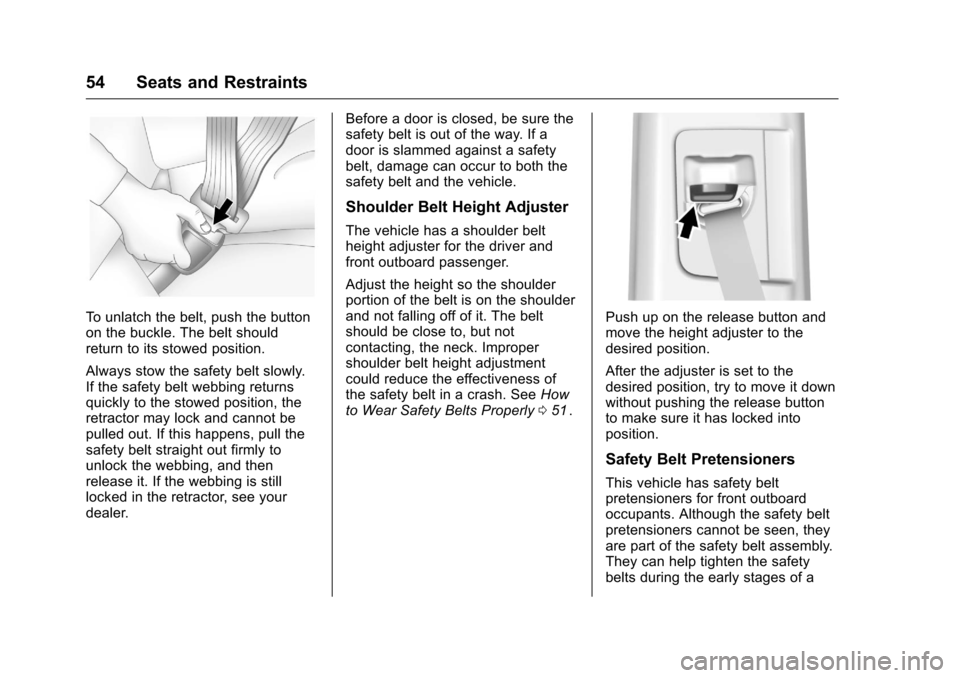
Push up on the release button and
move the height adjuster to the
desired position.
After the adjuster is set to the
desired position, try to move it down
without pushing the release button
to make sure it has locked into
position.
Safety Belt Pretensioners
This vehicle has safety belt
pretensioners for front outboard
occupants. Although the safety belt
pretensioners cannot be seen, they
are part of the safety belt assembly.
They can help tighten the safety
belts during the early stages of a
Page 60 of 396
Chevrolet Colorado Owner Manual (GMNA-Localizing-U.S/Canada/Mexico-
9159327) - 2016 - crc - 8/28/15
Seats and Restraints 59
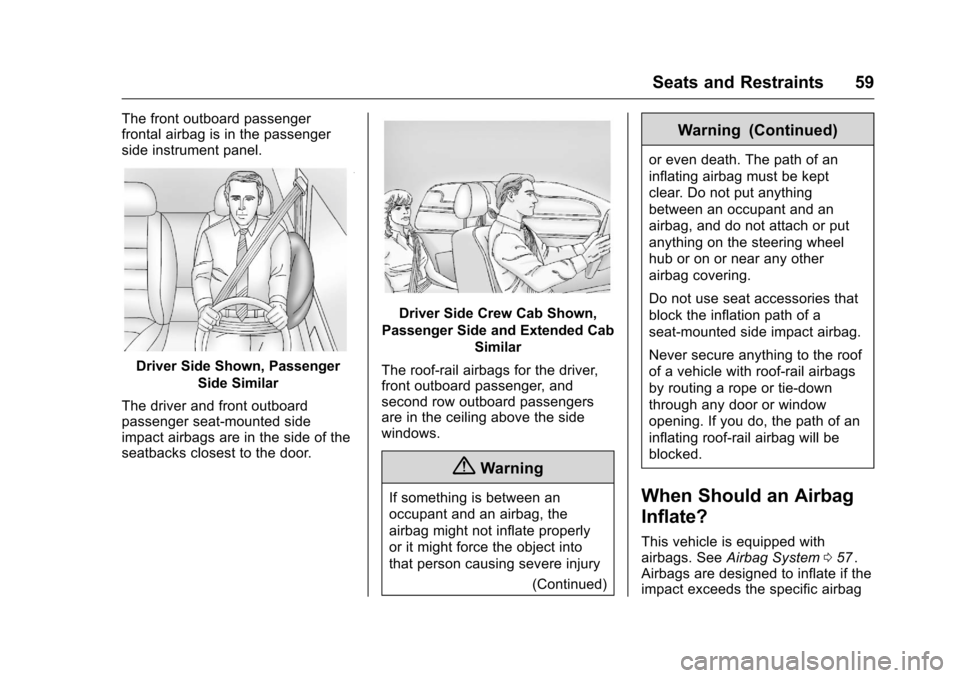
The front outboard passenger
frontal airbag is in the passenger
side instrument panel.
Driver Side Shown, PassengerSide Similar
The driver and front outboard
passenger seat-mounted side
impact airbags are in the side of the
seatbacks closest to the door.
Driver Side Crew Cab Shown,
Passenger Side and Extended Cab Similar
The roof-rail airbags for the driver,
front outboard passenger, and
second row outboard passengers
are in the ceiling above the side
windows.
{Warning
If something is between an
occupant and an airbag, the
airbag might not inflate properly
or it might force the object into
that person causing severe injury (Continued)
Warning (Continued)
or even death. The path of an
inflating airbag must be kept
clear. Do not put anything
between an occupant and an
airbag, and do not attach or put
anything on the steering wheel
hub or on or near any other
airbag covering.
Do not use seat accessories that
block the inflation path of a
seat-mounted side impact airbag.
Never secure anything to the roof
of a vehicle with roof-rail airbags
by routing a rope or tie‐down
through any door or window
opening. If you do, the path of an
inflating roof-rail airbag will be
blocked.
When Should an Airbag
Inflate?
This vehicle is equipped with
airbags. SeeAirbag System 057ii.
Airbags are designed to inflate if the
impact exceeds the specific airbag
Page 62 of 396
Chevrolet Colorado Owner Manual (GMNA-Localizing-U.S/Canada/Mexico-
9159327) - 2016 - crc - 8/28/15
Seats and Restraints 61
How Does an Airbag
Restrain?
In moderate to severe frontal or
near frontal collisions, even belted
occupants can contact the steering
wheel or the instrument panel. In
moderate to severe side collisions,
even belted occupants can contact
the inside of the vehicle.
Airbags supplement the protection
provided by safety belts by
distributing the force of the impact
more evenly over the
occupant's body.
Rollover capable roof-rail airbags
are designed to help contain the
head and chest of occupants in the
outboard seating positions in the
first and second rows. The rollover
capable roof-rail airbags are
designed to help reduce the risk of
full or partial ejection in rollover
events, although no system can
prevent all such ejections.But airbags would not help in many
types of collisions, primarily
because the occupant's motion is
not toward those airbags. See
When
Should an Airbag Inflate? 059ii.
Airbags should never be regarded
as anything more than a supplement
to safety belts.
What Will You See after
an Airbag Inflates?
After the frontal airbags and
seat-mounted side impact airbags
inflate, they quickly deflate, so
quickly that some people may not
even realize an airbag inflated.
Roof-rail airbags may still be at least
partially inflated for some time after
they inflate. Some components of
the airbag module may be hot for
several minutes. For location of the
airbags, see Where Are the
Airbags? 058
ii.
The parts of the airbag that come
into contact with you may be warm,
but not too hot to touch. There may
be some smoke and dust coming
from the vents in the deflated
airbags. Airbag inflation does not prevent the driver from seeing out of
the windshield or being able to steer
the vehicle, nor does it prevent
people from leaving the vehicle.
{Warning
When an airbag inflates, there
may be dust in the air. This dust
could cause breathing problems
for people with a history of
asthma or other breathing trouble.
To avoid this, everyone in the
vehicle should get out as soon as
it is safe to do so. If you have
breathing problems but cannot
get out of the vehicle after an
airbag inflates, then get fresh air
by opening a window or a door.
If you experience breathing
problems following an airbag
deployment, you should seek
medical attention.
The vehicle has a feature that may
automatically unlock the doors, turn
on the interior lamps and hazard
warning flashers, and shut off the
fuel system after the airbags inflate.
Page 63 of 396
Chevrolet Colorado Owner Manual (GMNA-Localizing-U.S/Canada/Mexico-
9159327) - 2016 - crc - 8/28/15
62 Seats and Restraints
The feature may also activate,
without airbag inflation, after an
event that exceeds a predetermined
threshold. You can lock the doors,
and turn off the interior lamps, and
turn off the hazard warning flashers
by using the controls for those
features.
{Warning
A crash severe enough to inflate
the airbags may have also
damaged important functions in
the vehicle, such as the fuel
system, brake and steering
systems, etc. Even if the vehicle
appears to be drivable after a
moderate crash, there may be
concealed damage that could
make it difficult to safely operate
the vehicle.
Use caution if you should attempt
to restart the engine after a crash
has occurred.
In many crashes severe enough to
inflate the airbag, windshields are
broken by vehicle deformation. Additional windshield breakage may
also occur from the front outboard
passenger airbag.
.
Airbags are designed to inflate
only once. After an airbag
inflates, you will need some new
parts for the airbag system.
If you do not get them, the
airbag system will not be there
to help protect you in another
crash. A new system will include
airbag modules and possibly
other parts. The service manual
for the vehicle covers the need
to replace other parts.
. The vehicle has a crash sensing
and diagnostic module which
records information after a
crash. See Vehicle Data
Recording and Privacy 0372
iiand Event Data Recorders
0 373ii.
. Let only qualified technicians
work on the airbag systems.
Improper service can mean that
an airbag system will not work
properly. See your dealer for
service.
Passenger Sensing
System
The vehicle has a passenger
sensing system for the front
outboard passenger position. The
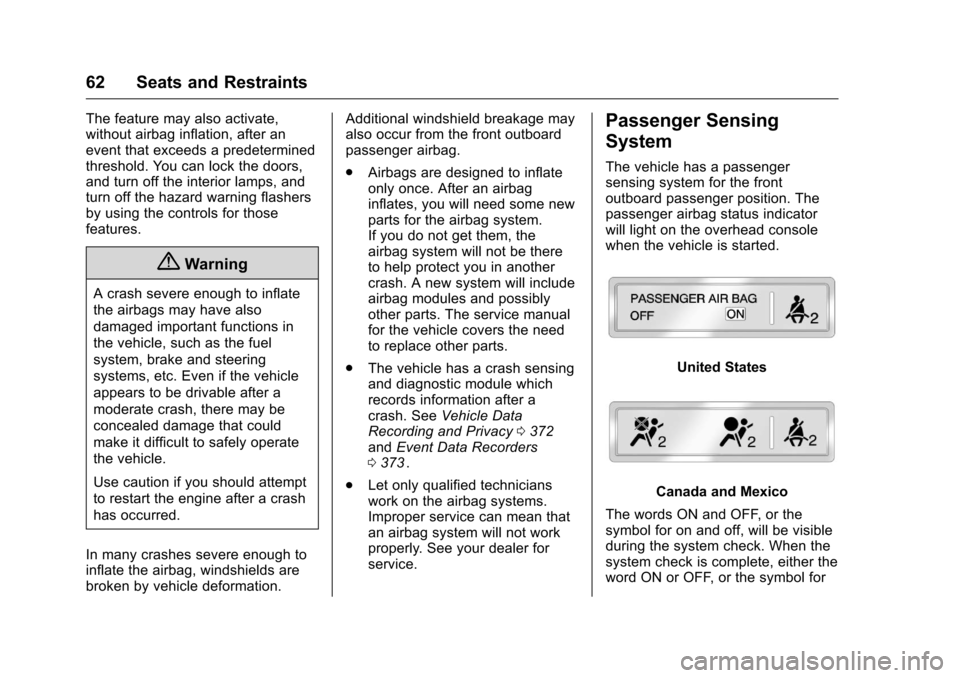
passenger airbag status indicator
will light on the overhead console
when the vehicle is started.
United States
Canada and Mexico
The words ON and OFF, or the
symbol for on and off, will be visible
during the system check. When the
system check is complete, either the
word ON or OFF, or the symbol for
Page 102 of 396
Chevrolet Colorado Owner Manual (GMNA-Localizing-U.S/Canada/Mexico-
9159327) - 2016 - crc - 8/28/15
Instruments and Controls 101
Instruments and
Controls
Controls
Steering Wheel Adjustment . . . 102
Steering Wheel Controls . . . . . . 103
Horn . . . . . . . . . . . . . . . . . . . . . . . . . . 103
Windshield Wiper/Washer . . . . 103
Compass . . . . . . . . . . . . . . . . . . . . . 104
Clock . . . . . . . . . . . . . . . . . . . . . . . . . 104
Power Outlets . . . . . . . . . . . . . . . . 105
Warning Lights, Gauges, and
Indicators
Warning Lights, Gauges, andIndicators . . . . . . . . . . . . . . . . . . . 106
Instrument Cluster (Base Level) . . . . . . . . . . . . . . . . . . . . . . . 107
Instrument Cluster (Uplevel) . . . . . . . . . . . . . . . . . . . . 109
Speedometer . . . . . . . . . . . . . . . . . 111
Odometer . . . . . . . . . . . . . . . . . . . . . 111
Trip Odometer . . . . . . . . . . . . . . . . 111
Tachometer . . . . . . . . . . . . . . . . . . . 111
Fuel Gauge . . . . . . . . . . . . . . . . . . . 111
Engine Coolant Temperature
Gauge . . . . . . . . . . . . . . . . . . . . . . 112
Safety Belt Reminders . . . . . . . . 113
Airbag Readiness Light . . . . . . . 114 Passenger Airbag Status
Indicator . . . . . . . . . . . . . . . . . . . . . 114
Charging System Light . . . . . . . 115
Malfunction Indicator Lamp (Check Engine Light) . . . . . . . . 115
Brake System Warning Light . . . . . . . . . . . . . . . . . . . . . . . . 117
Antilock Brake System (ABS) Warning Light . . . . . . . . . . . . . . . 118
Up-Shift Light (Manual Transmission) . . . . . . . . . . . . . . . 118
Tow/Haul Mode Light . . . . . . . . . 118
Hill Descent Control Light . . . . . 118
Lane Departure Warning (LDW) Light . . . . . . . . . . . . . . . . . 119
Vehicle Ahead Indicator . . . . . . . 119
Traction Off Light . . . . . . . . . . . . . 119
StabiliTrak®OFF Light . . . . . . . . 119
Traction Control System (TCS)/ StabiliTrak
®Light . . . . . . . . . . . 120
Tire Pressure Light . . . . . . . . . . . 120
Engine Oil Pressure Light . . . . 121
Low Fuel Warning Light (Base Level) . . . . . . . . . . . . . . . . . . . . . . . 121
Low Fuel Warning Light (Uplevel) . . . . . . . . . . . . . . . . . . . . 121
Security Light . . . . . . . . . . . . . . . . . 122
High-Beam On Light . . . . . . . . . . 122
Front Fog Lamp Light . . . . . . . . . 122
Lamps On Reminder . . . . . . . . . 122
Cruise Control Light . . . . . . . . . . 122 Door Ajar Light (Uplevel
Cluster) . . . . . . . . . . . . . . . . . . . . . 123
Information Displays
Driver Information Center (DIC)(Base Level) . . . . . . . . . . . . . . . . 123
Driver Information Center (DIC) (Uplevel) . . . . . . . . . . . . . . . . . . . . 126
Vehicle Messages
Vehicle Messages . . . . . . . . . . . . 129
Battery Voltage and ChargingMessages . . . . . . . . . . . . . . . . . . . 129
Brake System Messages . . . . . 130
Compass Messages . . . . . . . . . . 130
Door Ajar Messages . . . . . . . . . . 130
Engine Cooling System Messages . . . . . . . . . . . . . . . . . . . 131
Engine Oil Messages . . . . . . . . . 131
Engine Power Messages . . . . . 132
Fuel System Messages . . . . . . . 132
Key and Lock Messages . . . . . 132
Lamp Messages . . . . . . . . . . . . . . 132
Object Detection System Messages . . . . . . . . . . . . . . . . . . . 133
Ride Control System Messages . . . . . . . . . . . . . . . . . . . 133
Airbag System Messages . . . . 134
Safety Belt Messages . . . . . . . . 134
Security Messages . . . . . . . . . . . 134
Page 105 of 396
Chevrolet Colorado Owner Manual (GMNA-Localizing-U.S/Canada/Mexico-
9159327) - 2016 - crc - 8/28/15
104 Instruments and Controls
If the windshield wiper lever is then
moved to off before the driver door
is opened or within 10 minutes, the
wipers will restart and move to the
base of the windshield.
If the ignition is turned to LOCK/
OFF while the wipers are performing
wipes due to windshield washing,
the wipers continue to run until they
reach the base of the windshield.
Compass
The vehicle may have a compass
display on the Driver Information
Center (DIC). The compass receives
its heading and other information
from the Global Positioning
System (GPS) antenna,
StabiliTrak
®, and vehicle speed
information.
The compass system is designed to
operate for a certain number of
miles or degrees of turn before
needing a signal from the GPS
satellites. When the compass
display shows CAL, drive the
vehicle for a short distance in an
open area where it can receive a
GPS signal. The compass system will automatically determine when a
GPS signal is restored and provide
a heading again. See
Compass
Messages 0130
iifor the messages
that may be displayed for the
compass.
Clock
Setting the Time and Date with
Faceplate Controls
To set the time or date:
1. Select SETTINGS from the Home Page, then select Time
and Date.
2. Select the desired function.
3. Turn the MENU knob to increase or decrease the value.
4. Press the MENU knob to go to the next value. After the last
value is selected, the system
will update and return to the
Settings menu. Press
oBACK
to go to the last menu and
save the changes.
Auto Set requires an active
connection to OnStar. If auto timing is set, the time
displayed on the clock may not
update immediately when driving
into a new time zone.
To set the clock display:
1. Select SETTINGS from the Home Page, then select Time
and Date.
2. Select Clock Display.
3. Turn the MENU knob to Off or On.
4. Press the MENU knob to select.
Press
oBACK to go to the last
menu and save the changes.
Setting the Time and Date with
Touchscreen Controls
To set the time:
1. Touch SETTINGS on the Home Page, then touch Time
and Date.