2016 BUICK VERANO lock
[x] Cancel search: lockPage 2 of 20

2
Power Door Lock Buttons
Power Mirrors Control
Turn Signal Lever/ Driver Information Center Controls
Driver Information Center
Tilt/Telescopic Steering Wheel Lever
Instrument Panel Illumination Control
Cruise Control/Forward Collision AlertF Buttons
Windshield Wipers Lever
Hood Release Lever
Exterior Lamp Control
Instrument Panel
Audio Steering Wheel Controls
Engine Start/Stop ButtonF
Symbols
Check Engine
Oil Pressure
Airbag Readiness
Traction Control Off
StabiliTrak/Traction Control Warning
Security
Charging System
Safety Belt Reminder
Brake System Warning
BRAKE Parking Brake Set
Lights On
Page 3 of 20

3
Refer to your Owner Manual to learn about the information being relayed by the lights, gauges and indicators of the instrument cluster.
See In Brief in your Owner Manual.
Traction Control and StabiliTrak/Lane Departure WarningF Buttons
Electric Parking BrakeDriver’s Heated Seat ButtonFClimate ControlsPassenger’s Heated Seat ButtonF
Hazard Warning Flashers ButtonTrunk Release ButtonInfotainment System
F Optional equipment
Antilock Brake System Warning
Low Tire Pressure
StabiliTrak/Traction Control Off
Fog Lamps
Cruise Control
Page 4 of 20
4
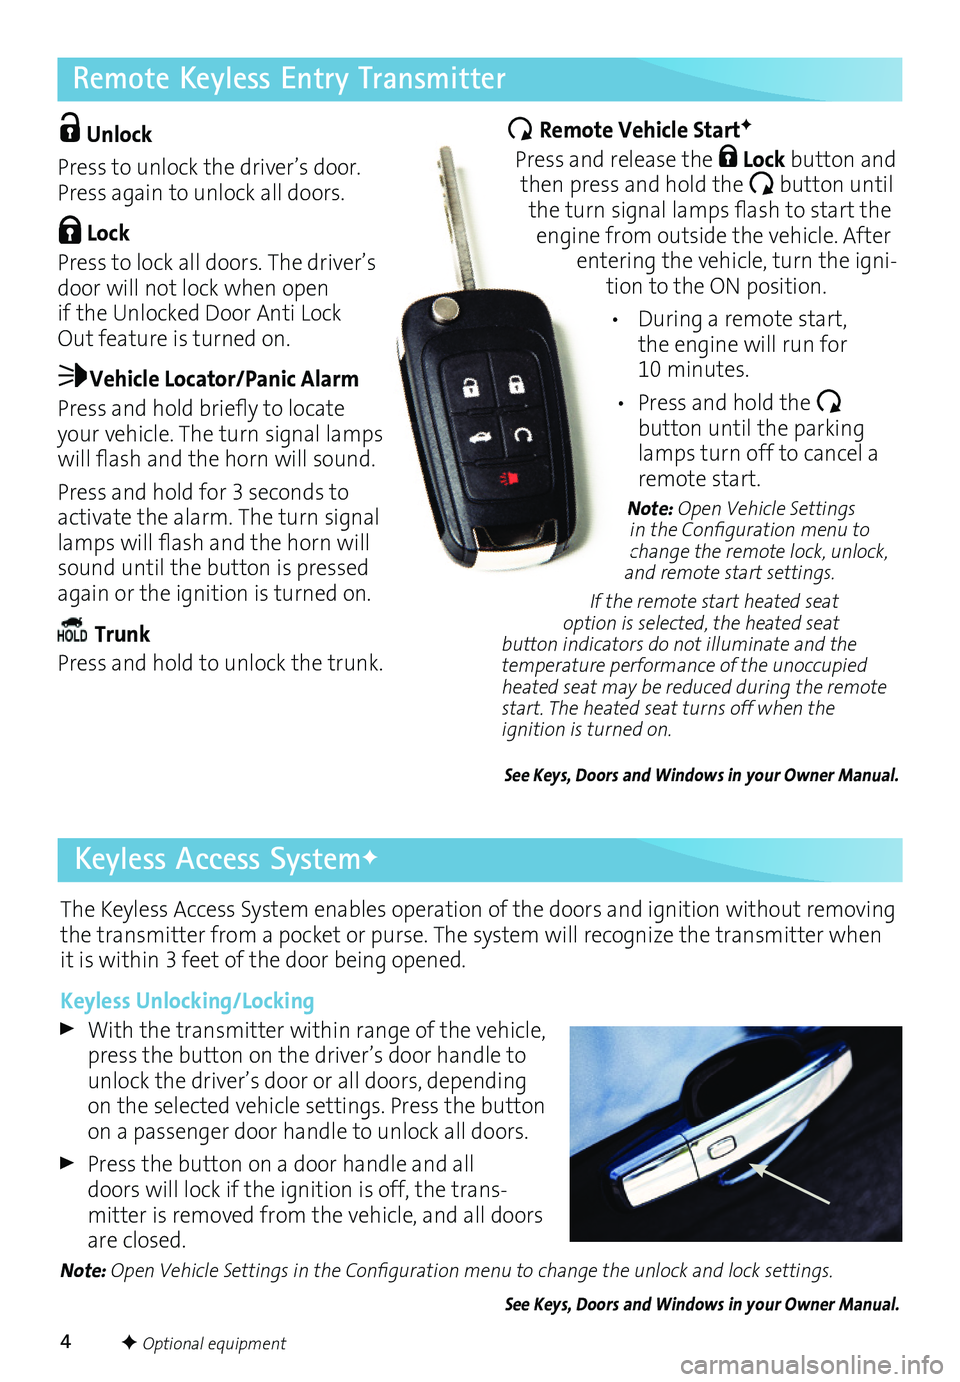
Remote Keyless Entry Transmitter
The Keyless Access System enables operation of the doors and ignition without removing the transmitter from a pocket or purse. The system will recognize the transmitter when it is within 3 feet of the door being opened.
Keyless Unlocking/Locking
With the transmitter within range of the vehicle, press the button on the driver’s door handle to unlock the driver’s door or all doors, depending on the selected vehicle
settings. Press the button on a passenger door handle to unlock all doors.
Press the button on a door handle and all doors will lock if the ignition is off, the transmitter is removed from the vehicle, and all doors are closed.
Note: Open Vehicle Settings in the Configuration menu to change the unlock and lock settings.
See Keys, Doors and Windows in your Owner Manual.
Unlock
Press to unlock the driver’s door. Press again to unlock all doors.
Lock
Press to lock all doors. The driver’s door will not lock when open if the Unlocked Door Anti Lock Out feature is turned on.
Vehicle Locator/Panic Alarm
Press and hold briefly to locate your vehicle. The turn signal lamps will flash and the horn will sound.
Press and hold for 3 seconds to activate the alarm. The turn signal lamps will flash and the horn will sound until the button is pressed again or the ignition is turned on.
Trunk
Press and hold to unlock the trunk.
Remote Vehicle StartF
Press and release the Lock button and then press and hold the button until the turn signal lamps flash to start the engine from outside the vehicle. After entering the vehicle, turn the ignition to the ON position.
• During a remote start, the engine will run for 10 minutes.
• Press and hold the
button until the parking lamps turn off to cancel a remote start.
Note: Open Vehicle Settings in the Configuration menu to change the remote lock, unlock, and remote start settings.
If the remote start heated seat option is selected, the heated seat button indicators do not illuminate and the temperature performance of the unoccupied heated seat may be reduced during the remote start. The heated seat turns off when the ignition is turned on.
See Keys, Doors and Windows in your Owner Manual.
F Optional equipment
Keyless Access SystemF
Page 6 of 20
6
Tilt/Telescopic Steering Wheel
With the vehicle parked, push down the lever on the left side of the steering column to adjust the steering wheel. The steering wheel can then be moved up or down and in or out. Pull up the lever to lock the steering wheel in place.
See Instruments and Controls in your Owner Manual.
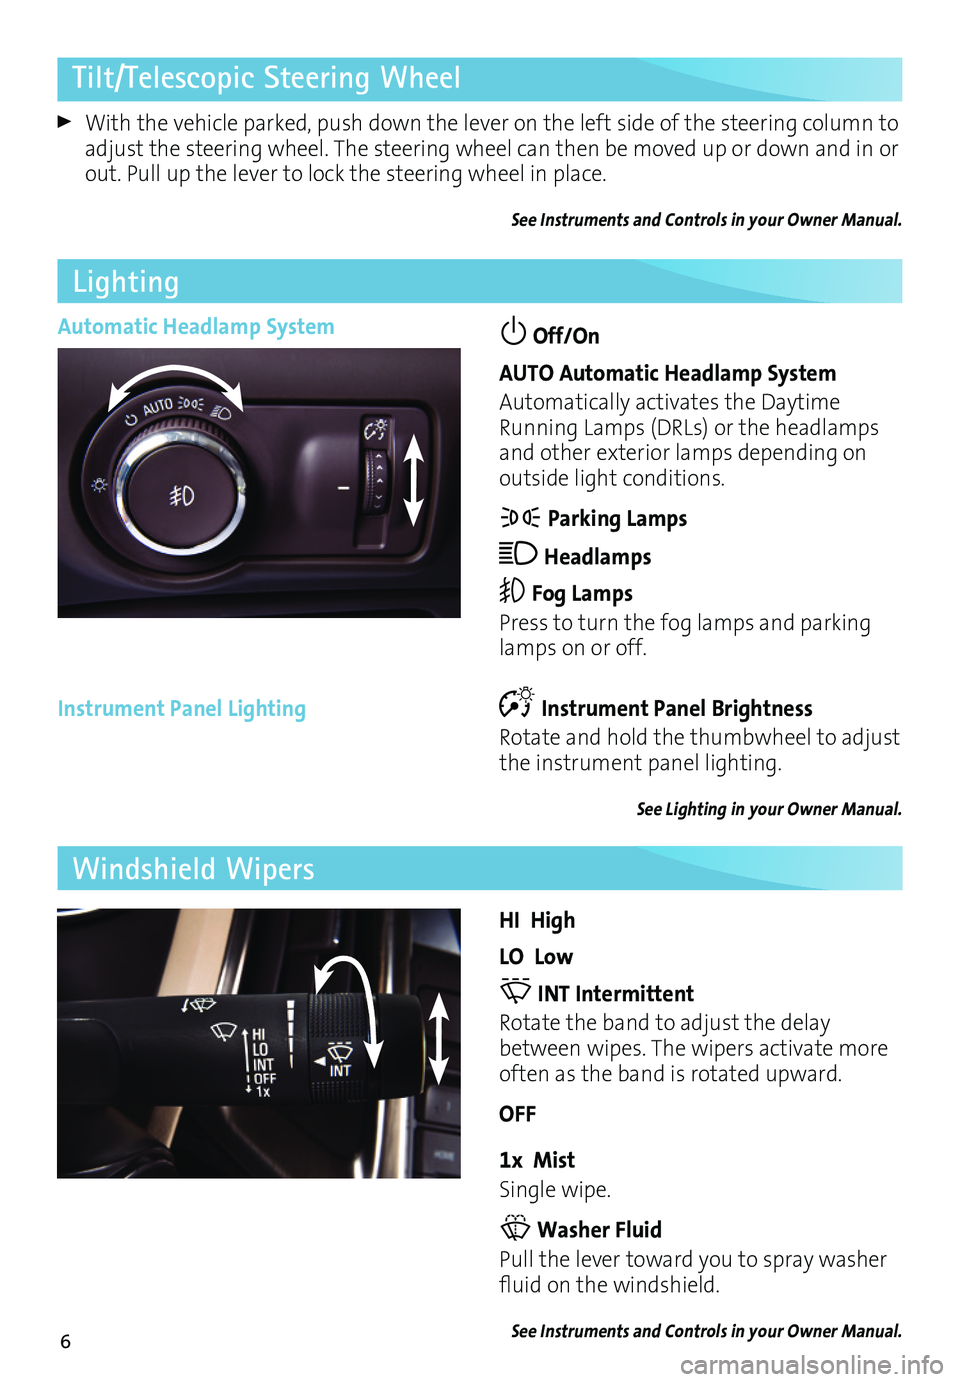
Automatic Headlamp System Off/On
AUTO Automatic Headlamp System
Automatically activates the Daytime Running Lamps (DRLs) or the headlamps and other exterior lamps depending on
outside light conditions.
Parking Lamps
Headlamps
Fog Lamps
Press to turn the fog lamps and parking lamps on or off.
Instrument Panel Lighting
Lighting
Instrument Panel Brightness
Rotate and hold the thumbwheel to adjust the instrument panel lighting.
See Lighting in your Owner Manual.
HI High
LO Low
INT Intermittent
Rotate the band to adjust the delay between wipes. The wipers activate more often as the band is rotated upward.
OFF
1x Mist
Single wipe.
Washer Fluid
Pull the lever toward you to spray washer fluid on the windshield.
See Instruments and Controls in your Owner Manual.
Windshield Wipers
Page 8 of 20

8
Audio System
Radio with CD, Touch Screen and Navigation shown
SRCE: Select the audio source
VOL: Power/ Volume
Next radio station, track or file
1–6: Favorite preset stations
HOME: Main screen
Previous radio station, track or file Play/Pause
Open the Phone menu/Mute the vehicle speakers
INFO: Display available song information
CONFIG: Open the Configuration menu
TUNE/MENU: Turn the knob to highlight menu items or tune radio stations; push the chrome ring to open/select menu items
See Infotainment System in your Owner Manual.
Open the Clock menu
BACK: Move back one level in the menus
FAV: Display pages of favorite radio stations
AS: Autostore list of stations with strongest signal
Eject disc
Refer to your Owner Manual for important safety information about using the infotainment system while driving.
Page 9 of 20
9
Audio System
Setting the Time
1. Turn on the audio system.
2. Press the Clock button.
3. Press the MENU knob chrome ring to highlight the desired time.
4. Turn the MENU knob to change the value; press the chrome ring to confirm the set value. Press the BACK button to return to the Time Settings menu.
Note: Open the Time and Date Settings in the Configuration menu to make other time and date adjustments.
Storing Favorite Stations
Radio stations from all bands (AM, FM or XMF) can be stored, in any order, on up to six pages of favorites.
1. Tune in the desired radio station.
2. Press the FAV button to display the page where the station is to be stored.
3. Press and hold one of the six numeric pushbuttons for more than two seconds.
4. Repeat the steps for each pushbutton on each page.
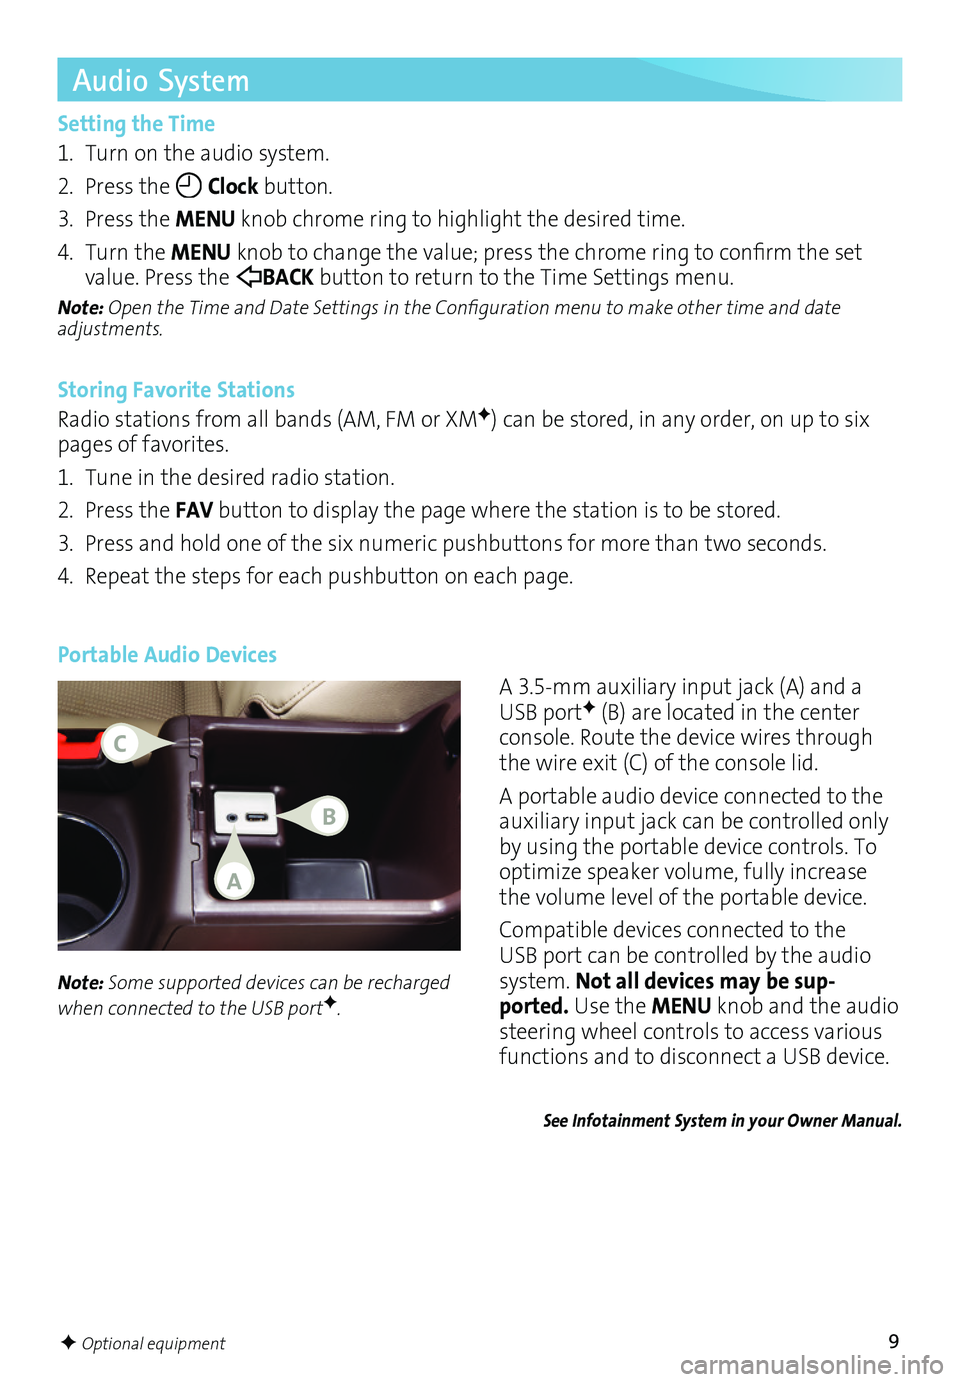
Portable Audio Devices
A 3.5mm auxiliary input jack (A) and a USB portF (B) are located in the center console. Route the device wires through the wire exit (C) of the console lid.
A portable audio device connected to the auxiliary input jack can be controlled only by using the portable device controls. To optimize speaker volume, fully increase the volume level of the portable device.
Compatible devices connected to the USB port can be controlled by the audio system. Not all devices may be sup-ported. Use the MENU knob and the audio
steering wheel controls to access various
functions and to disconnect a USB device.
Note: Some supported devices can be recharged when connected to the USB portF.
See Infotainment System in your Owner Manual.
F Optional equipment
A
C
B
Page 15 of 20
15
Vehicle Personalization
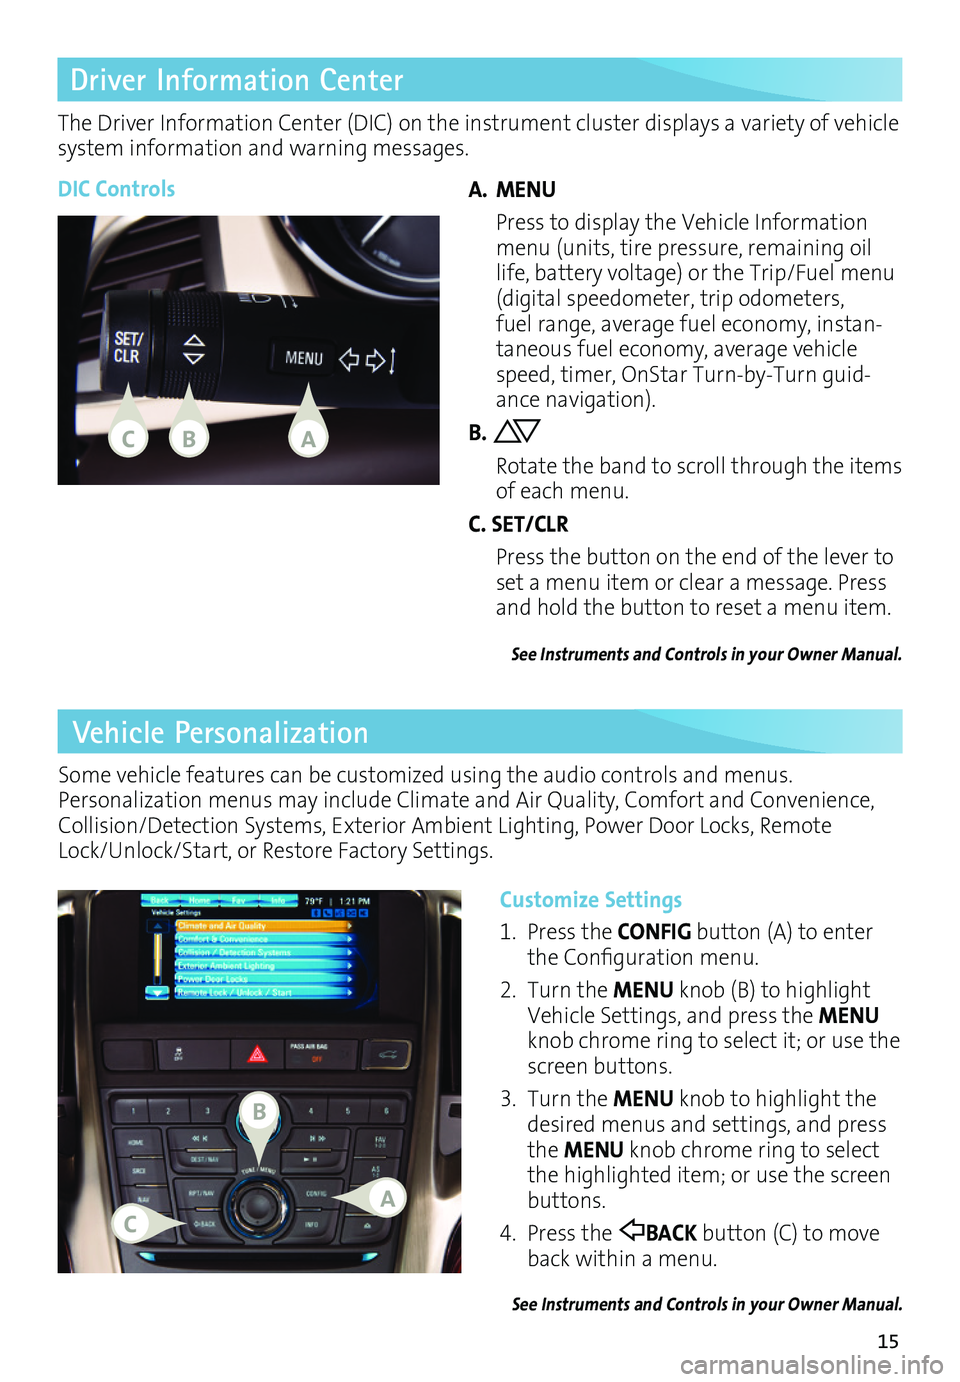
Customize Settings
1. Press the CONFIG button (A) to enter the Configuration menu.
2. Turn the MENU knob (B) to highlight Vehicle Settings, and press the MENU knob chrome ring to select it; or use the screen buttons.
3. Turn the MENU knob to highlight the desired menus and settings, and press the MENU knob chrome ring to select the highlighted item; or use the screen buttons.
4. Press the BACK button (C) to move back within a menu.
See Instruments and Controls in your Owner Manual.
Some vehicle features can be customized using the audio controls and menus. Personalization menus may include Climate and Air Quality, Comfort and Convenience, Collision/Detection Systems, Exterior Ambient Lighting, Power Door Locks, Remote Lock/Unlock/Start, or Restore Factory Settings.
Driver Information Center
The Driver Information Center (DIC) on the instrument cluster displays a variety of vehicle system information and warning messages.
DIC ControlsA. MENU
Press to display the Vehicle Information menu (units, tire pressure, remaining oil life, battery voltage) or the Trip/Fuel menu (digital speedometer, trip odometers, fuel range, average fuel economy, instantaneous fuel economy, average vehicle speed, timer, OnStar TurnbyTurn guidance navigation).
B.
Rotate the band to scroll through the items of each menu.
C. SET/CLR
Press the button on the end of the lever to set a menu item or clear a message. Press and hold the button to reset a menu item.
See Instruments and Controls in your Owner Manual.
CAB
B
CA
Page 19 of 20
19
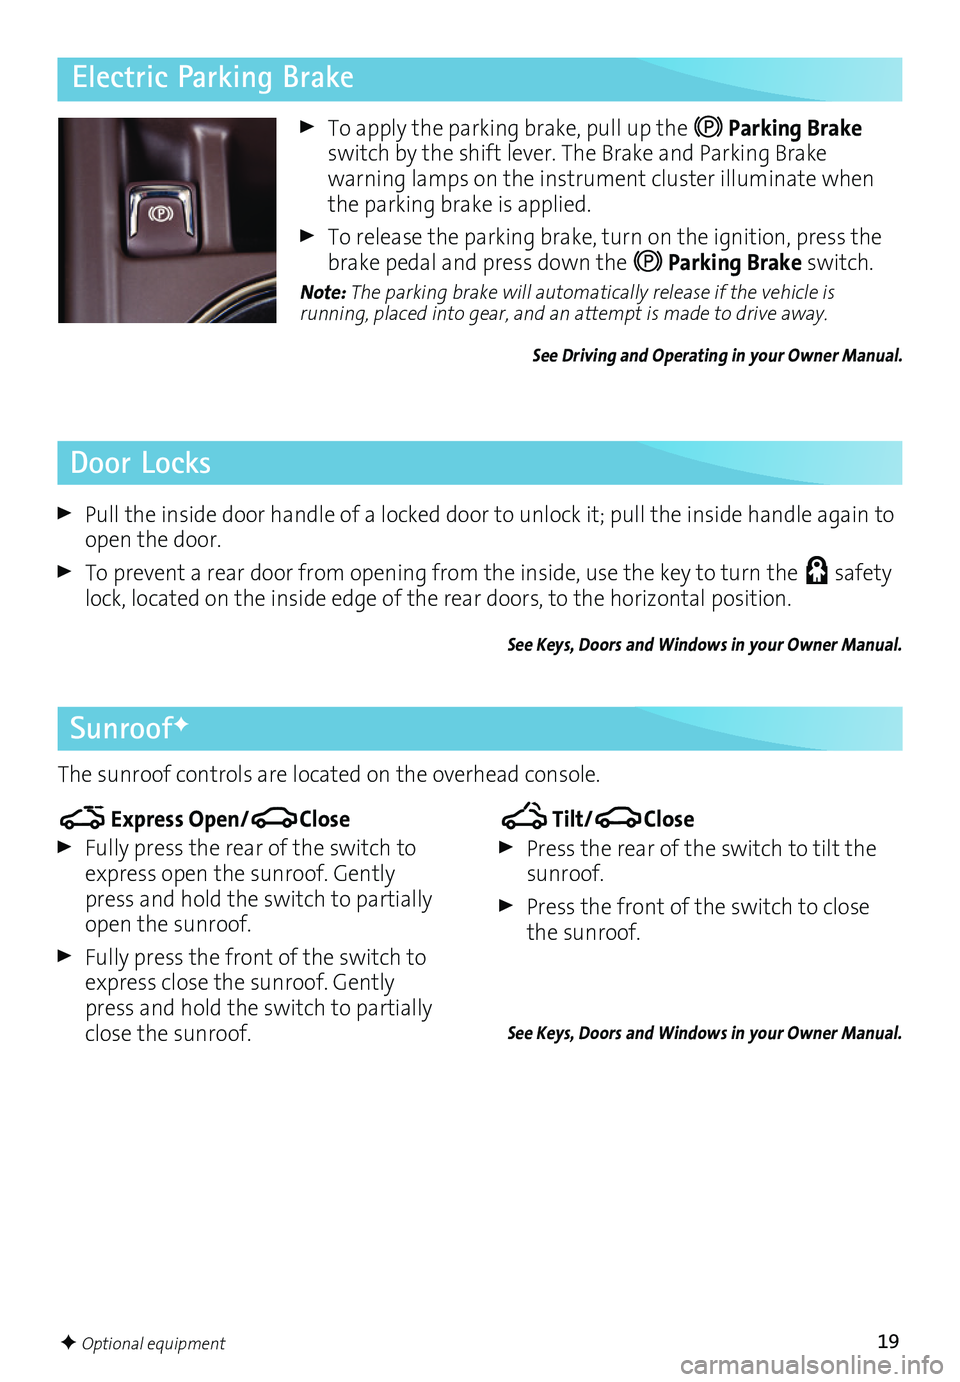
To apply the parking brake, pull up the Parking Brake switch by the shift lever. The Brake and Parking Brake
warning lamps on the instrument cluster illuminate when the parking brake is applied.
To release the parking brake, turn on the ignition, press the brake pedal and press down the Parking Brake switch.
Note: The parking brake will automatically release if the vehicle is
running, placed into gear, and an attempt is made to drive away.
See Driving and Operating in your Owner Manual.
Door Locks
Pull the inside door handle of a locked door to unlock it; pull the inside handle again to open the door.
To prevent a rear door from opening from the inside, use the key to turn the safety lock, located on the inside edge of the rear doors, to the horizontal position.
See Keys, Doors and Windows in your Owner Manual.
SunroofF
The sunroof controls are located on the overhead console.
Tilt/Close
Press the rear of the switch to tilt the sunroof.
Press the front of the switch to close the sunroof.
See Keys, Doors and Windows in your Owner Manual.
Express Open/Close
Fully press the rear of the switch to express open the sunroof. Gently press and hold the switch to partially open the sunroof.
Fully press the front of the switch to express close the sunroof. Gently press and hold the switch to partially close the sunroof.
Electric Parking Brake
F Optional equipment