2016 BUICK LACROSSE tow
[x] Cancel search: towPage 88 of 367
Buick LaCrosse Owner Manual (GMNA-Localizing-U.S./Canada/Mexico-
9159288) - 2016 - CRC - 10/5/15
Seats and Restraints 87
{Warning
To reduce the risk of serious or
fatal injuries during a crash, do
not attach more than one child
restraint to a single anchor.
Attaching more than one child
restraint to a single anchor could
cause the anchor or attachment
to come loose or even break
during a crash. A child or others
could be injured.
{Warning
Children can be seriously injured
or strangled if a shoulder belt is
wrapped around their neck. The
shoulder belt can tighten but
cannot be loosened if it is locked.
The shoulder belt locks when it is
pulled all the way out of the
retractor. It unlocks when the
shoulder belt is allowed to go all
the way back into the retractor,
but it cannot do this if it is(Continued)
Warning (Continued)
wrapped around a child’s neck.
If the shoulder belt is locked and
tightened around a child’s neck,
the only way to loosen the belt is
to cut it.
Buckle any unused safety belts
behind the child restraint so
children cannot reach them. Pull
the shoulder belt all the way out
of the retractor to set the lock,
and tighten the belt behind the
child restraint after the child
restraint has been installed.
Caution
Do not let the LATCH
attachments rub against the
vehicle’s safety belts. This may
damage these parts. If necessary,
move buckled safety belts to
avoid rubbing the LATCH
attachments.
(Continued)
Caution (Continued)
Do not fold the rear seatback
when the seat is occupied. Do not
fold the empty rear seat with a
safety belt buckled. This could
damage the safety belt or the
seat. Unbuckle and return the
safety belt to its stowed position,
before folding the seat.
If you need to secure more than one
child restraint in the rear seat, see
Where to Put the Restraint 083.
You cannot secure three child
restraints using the LATCH anchors
in the rear seat at the same time,
but you can install two of them.
If you want to do this, install one
LATCH child restraint in the right
rear seating position, and install the
other one either in the left rear
seating position or in the center
seating position. If you need to
install child restraints in both the
center and left rear seating
positions, the one in the center
Page 94 of 367
Buick LaCrosse Owner Manual (GMNA-Localizing-U.S./Canada/Mexico-
9159288) - 2016 - CRC - 10/5/15
Seats and Restraints 93
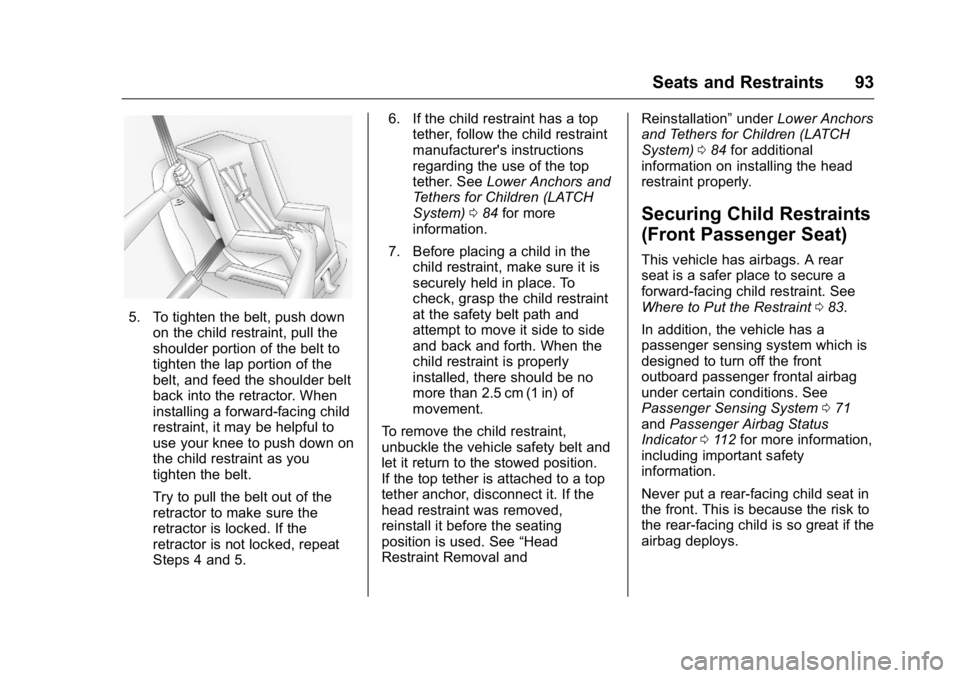
5. To tighten the belt, push downon the child restraint, pull the
shoulder portion of the belt to
tighten the lap portion of the
belt, and feed the shoulder belt
back into the retractor. When
installing a forward-facing child
restraint, it may be helpful to
use your knee to push down on
the child restraint as you
tighten the belt.
Try to pull the belt out of the
retractor to make sure the
retractor is locked. If the
retractor is not locked, repeat
Steps 4 and 5. 6. If the child restraint has a top
tether, follow the child restraint
manufacturer's instructions
regarding the use of the top
tether. See Lower Anchors and
Tethers for Children (LATCH
System) 084 for more
information.
7. Before placing a child in the child restraint, make sure it is
securely held in place. To
check, grasp the child restraint
at the safety belt path and
attempt to move it side to side
and back and forth. When the
child restraint is properly
installed, there should be no
more than 2.5 cm (1 in) of
movement.
To remove the child restraint,
unbuckle the vehicle safety belt and
let it return to the stowed position.
If the top tether is attached to a top
tether anchor, disconnect it. If the
head restraint was removed,
reinstall it before the seating
position is used. See “Head
Restraint Removal and Reinstallation”
underLower Anchors
and Tethers for Children (LATCH
System) 084 for additional
information on installing the head
restraint properly.
Securing Child Restraints
(Front Passenger Seat)
This vehicle has airbags. A rear
seat is a safer place to secure a
forward-facing child restraint. See
Where to Put the Restraint 083.
In addition, the vehicle has a
passenger sensing system which is
designed to turn off the front
outboard passenger frontal airbag
under certain conditions. See
Passenger Sensing System 071
and Passenger Airbag Status
Indicator 0112 for more information,
including important safety
information.
Never put a rear-facing child seat in
the front. This is because the risk to
the rear-facing child is so great if the
airbag deploys.
Page 97 of 367
Buick LaCrosse Owner Manual (GMNA-Localizing-U.S./Canada/Mexico-
9159288) - 2016 - CRC - 10/5/15
96 Seats and Restraints
7. Before placing a child in thechild restraint, make sure it is
securely held in place. To
check, grasp the child restraint
at the safety belt path and
attempt to move it side to side
and back and forth. When the
child restraint is properly
installed, there should be no
more than 2.5 cm (1 in) of
movement.
If the airbag is off, the off indicator in
the passenger airbag status
indicator will come on and stay on
when the vehicle is started.
If a child restraint has been installed
and the on indicator is lit, see “If the
On Indicator Is Lit for a Child
Restraint” underPassenger Sensing
System 071.
To remove the child restraint,
unbuckle the vehicle safety belt and
let it return to the stowed position.
Page 103 of 367
Buick LaCrosse Owner Manual (GMNA-Localizing-U.S./Canada/Mexico-
9159288) - 2016 - CRC - 10/5/15
102 Instruments and Controls
Horn
Pressaon the steering wheel pad
to sound the horn.
Windshield Wiper/Washer
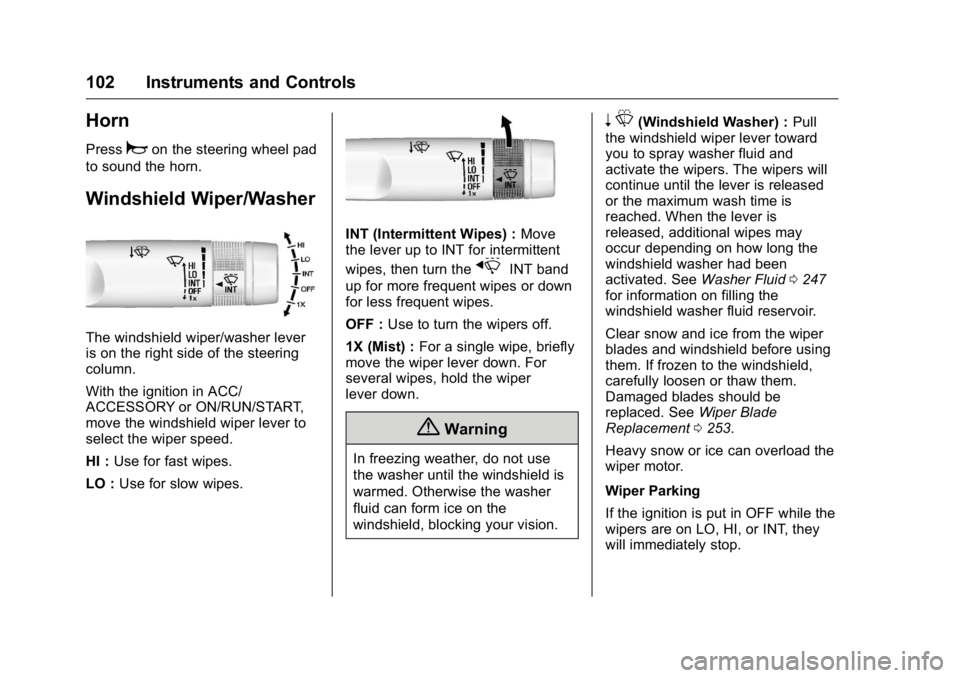
The windshield wiper/washer lever
is on the right side of the steering
column.
With the ignition in ACC/
ACCESSORY or ON/RUN/START,
move the windshield wiper lever to
select the wiper speed.
HI : Use for fast wipes.
LO : Use for slow wipes.
INT (Intermittent Wipes) : Move
the lever up to INT for intermittent
wipes, then turn the
xINT band
up for more frequent wipes or down
for less frequent wipes.
OFF : Use to turn the wipers off.
1X (Mist) : For a single wipe, briefly
move the wiper lever down. For
several wipes, hold the wiper
lever down.
{Warning
In freezing weather, do not use
the washer until the windshield is
warmed. Otherwise the washer
fluid can form ice on the
windshield, blocking your vision.
n L(Windshield Washer) : Pull
the windshield wiper lever toward
you to spray washer fluid and
activate the wipers. The wipers will
continue until the lever is released
or the maximum wash time is
reached. When the lever is
released, additional wipes may
occur depending on how long the
windshield washer had been
activated. See Washer Fluid0247
for information on filling the
windshield washer fluid reservoir.
Clear snow and ice from the wiper
blades and windshield before using
them. If frozen to the windshield,
carefully loosen or thaw them.
Damaged blades should be
replaced. See Wiper Blade
Replacement 0253.
Heavy snow or ice can overload the
wiper motor.
Wiper Parking
If the ignition is put in OFF while the
wipers are on LO, HI, or INT, they
will immediately stop.
Page 112 of 367
Buick LaCrosse Owner Manual (GMNA-Localizing-U.S./Canada/Mexico-
9159288) - 2016 - CRC - 10/5/15
Instruments and Controls 111
Engine Coolant
Temperature Gauge
Metric
English
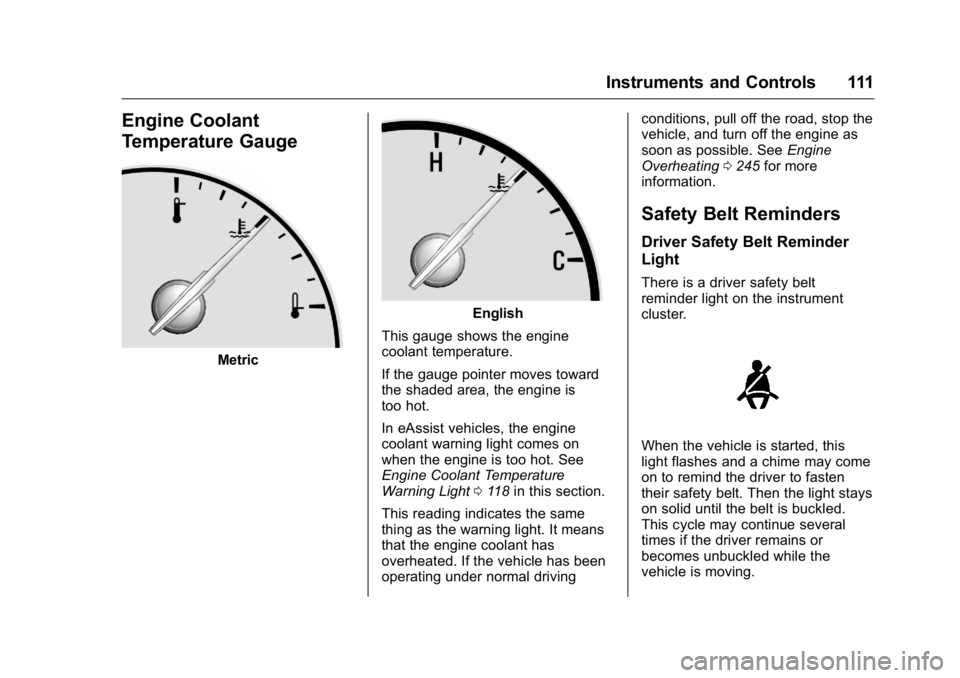
This gauge shows the engine
coolant temperature.
If the gauge pointer moves toward
the shaded area, the engine is
too hot.
In eAssist vehicles, the engine
coolant warning light comes on
when the engine is too hot. See
Engine Coolant Temperature
Warning Light 0118 in this section.
This reading indicates the same
thing as the warning light. It means
that the engine coolant has
overheated. If the vehicle has been
operating under normal driving conditions, pull off the road, stop the
vehicle, and turn off the engine as
soon as possible. See
Engine
Overheating 0245 for more
information.
Safety Belt Reminders
Driver Safety Belt Reminder
Light
There is a driver safety belt
reminder light on the instrument
cluster.
When the vehicle is started, this
light flashes and a chime may come
on to remind the driver to fasten
their safety belt. Then the light stays
on solid until the belt is buckled.
This cycle may continue several
times if the driver remains or
becomes unbuckled while the
vehicle is moving.
Page 115 of 367

Buick LaCrosse Owner Manual (GMNA-Localizing-U.S./Canada/Mexico-
9159288) - 2016 - CRC - 10/5/15
114 Instruments and Controls
Malfunction Indicator
Lamp (Check Engine
Light)
This light is part of the vehicle’s
emission control on-board
diagnostic system. If this light is on
while the engine is running, a
malfunction has been detected and
the vehicle may require service. The
light should come on to show that it
is working when the ignition is in
ON/RUN with the engine not
running for Key Access or in Service
Only Mode for Keyless Access. See
Ignition Positions (Keyless Access)
0175 orIgnition Positions (Key
Access) 0176.
Malfunctions are often indicated by
the system before any problem is
noticeable. Being aware of the light
and seeking service promptly when
it comes on may prevent damage.
Caution
If the vehicle is driven continually
with this light on, the emission
control system may not work as
well, the fuel economy may be
lower, and the vehicle may not
run smoothly. This could lead to
costly repairs that might not be
covered by the vehicle warranty.
Caution
Modifications to the engine,
transmission, exhaust, intake,
or fuel system, or the use of
replacement tires that do not
meet the original tire
specifications, can cause this light
to come on. This could lead to
costly repairs not covered by the
vehicle warranty. This could also
affect the vehicle’s ability to pass
an Emissions Inspection/
Maintenance test. See
Accessories and
Modifications 0228. If the light is flashing :
A
malfunction has been detected that
could damage the emission control
system and increase vehicle
emissions. Diagnosis and service
may be required.
To help prevent damage, reduce
vehicle speed and avoid hard
accelerations and uphill grades.
If towing a trailer, reduce the
amount of cargo being hauled as
soon as possible.
If the light continues to flash, find a
safe place to park. Turn the vehicle
off and wait at least 10 seconds
before restarting the engine. If the
light is still flashing, follow the
previous guidelines and see your
dealer for service as soon as
possible.
If the light is on steady : A
malfunction has been detected.
Diagnosis and service may be
required.
Check the following:
. A loose or missing fuel cap may
cause the light to come on. See
Filling the Tank 0217. A few
Page 117 of 367
Buick LaCrosse Owner Manual (GMNA-Localizing-U.S./Canada/Mexico-
9159288) - 2016 - CRC - 10/5/15
116 Instruments and Controls
This light should come on briefly
when the engine is started. If it does
not come on then, have it fixed so it
will be ready to warn you if there is
a problem.
If the light comes on and stays on,
there is a brake problem.
{Warning
The brake system might not be
working properly if the brake
system warning light is on.
Driving with the brake system
warning light on can lead to a
crash. If the light is still on after
the vehicle has been pulled off
the road and carefully stopped,
have the vehicle towed for
service.
Electric Parking Brake
Light
MetricEnglish
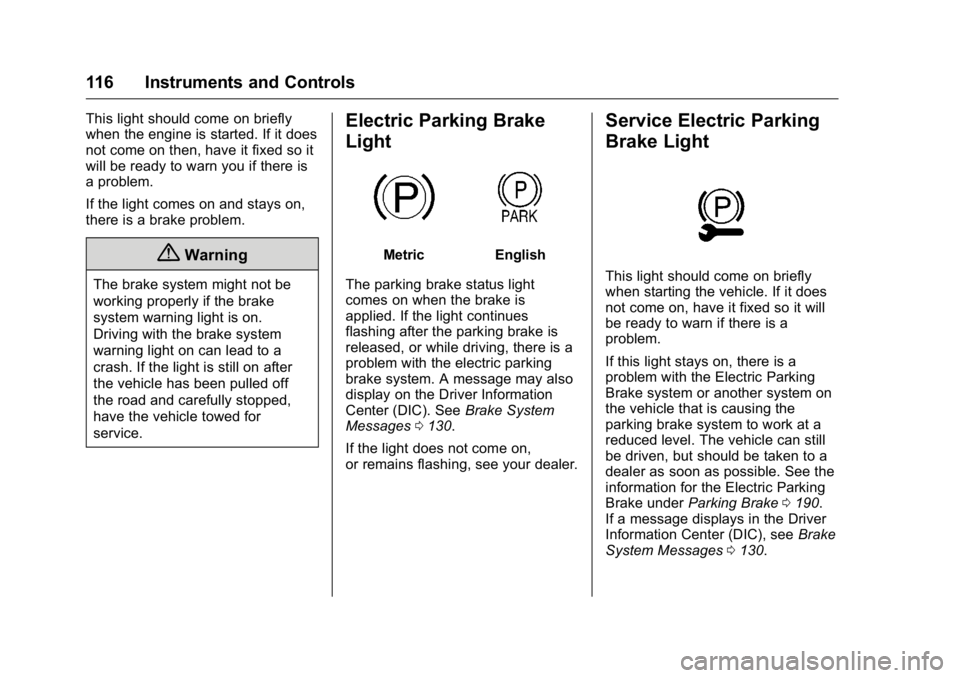
The parking brake status light
comes on when the brake is
applied. If the light continues
flashing after the parking brake is
released, or while driving, there is a
problem with the electric parking
brake system. A message may also
display on the Driver Information
Center (DIC). See Brake System
Messages 0130.
If the light does not come on,
or remains flashing, see your dealer.
Service Electric Parking
Brake Light
This light should come on briefly
when starting the vehicle. If it does
not come on, have it fixed so it will
be ready to warn if there is a
problem.
If this light stays on, there is a
problem with the Electric Parking
Brake system or another system on
the vehicle that is causing the
parking brake system to work at a
reduced level. The vehicle can still
be driven, but should be taken to a
dealer as soon as possible. See the
information for the Electric Parking
Brake under Parking Brake 0190.
If a message displays in the Driver
Information Center (DIC), see Brake
System Messages 0130.
Page 127 of 367
Buick LaCrosse Owner Manual (GMNA-Localizing-U.S./Canada/Mexico-
9159288) - 2016 - CRC - 10/5/15
126 Instruments and Controls
Following Distance Indicator/Gap
Setting :The current follow time to
the vehicle ahead is displayed as a
time value on this page when
Adaptive Cruise Control (ACC) is
not engaged. When ACC has been
engaged, the Follow Distance
Indicator page switches to the Gap
Setting page. This page shows the
current gap setting. See Forward
Collision Alert (FCA) System 0208
and Adaptive Cruise Control 0197.
Driver Efficiency Gauge (eAssist
Only) : Assists in driving efficiently
and will vary based on driver input.
To maximize efficiency, keep the
leaf in the solid green zone in the
center of the gauge. The gauge
moves down when braking and up
when accelerating. When either is
done aggressively, the vehicle is
being driven less efficiently and the
gauge will move further from the
center.
Drive Cycle Summary (eAssist
Only) : Displays the distance
traveled and the fuel economy for
that trip. Top Consumers :
Displays the top
four vehicle energy consumers,
along with their total fuel
consumption.
Economy Trend : Displays history
of the Average Fuel Economy from
the last 50 km (30 miles). Each bar
represents about 5 km (3 miles) of
driving. The fuel economy will range
from 0 –15 L/100 km (0 –50 mpg).
During driving the bars will shift to
always reflect the most recent
distance on the right side. This
display cannot be reset.
ECO Index : The bar graph on the
left hand side provides feedback on
the efficiency of current driving
behavior. The graph shows
a percentage value that is based on
current fuel consumption compared
to what is expected from the vehicle
with good and bad driving habits.
Each box represents 10%, with all
boxes filled being 100%. More
economical driving will result in
being in the ECO box.
Instantaneous Fuel Economy is also
shown on right hand side. This
display cannot be reset.Head-Up Display (HUD)
{Warning
If the HUD image is too bright or
too high in your field of view, it
may take you more time to see
things you need to see when it is
dark outside. Be sure to keep the
HUD image dim and placed low in
your field of view.
If equipped with HUD, some
information concerning the
operation of the vehicle is projected
onto the windshield. The information
is projected through the HUD lens
on the driver side of the instrument
panel and focused out toward the
front of the vehicle.
Caution
If you try to use the HUD image
as a parking aid, you may
misjudge the distance and
damage your vehicle. Do not use
the HUD image as a parking aid.