2016 BMW X1 head unit
[x] Cancel search: head unitPage 94 of 242

2."Time/Date"3."Auto time set"
Date
Setting the date
1."Settings"2."Time/Date"3."Date:"4.Turn the controller until the desired day is
displayed.5.Press the controller.6.Make the necessary settings for the month
and year.
The date is stored.
Setting the date format
1."Settings"2."Time/Date"3."Format:"4.Select the desired format.
The date format is stored.
Language
Setting the language
To set the language on the Control Display:
1."Settings"2."Language/Units"3."Language:"4.Select the desired language.
Settings are stored for the profile currently
used.
Setting the voice dialog
Voice dialog for the voice activation system,
refer to page 27.
Units of measurement
Setting the units of measurement
To set the units for fuel consumption, route/
distance and temperature:1."Settings"2."Language/Units"3.Select the desired menu item.4.Select the desired unit.
Settings are stored for the profile currently
used.
Brightness
Setting the brightness To set the brightness of the Control Display:
1."Settings"2."Control display"3."Brightness"4.Turn the controller until the desired bright‐
ness is set.5.Press the controller.
Settings are stored for the profile currently
used.
Depending on the light conditions, the bright‐
ness settings may not be clearly visible.
Head-up Display
Overview
Seite 94ControlsDisplays94
Online Edition for Part no. 01 40 2 964 303 - VI/15
Page 214 of 242

InformationWARNING
The vehicle jack is optimized for lifting
the vehicle and for the jacking points on the
vehicle only. There is risk of injuries. Do not lift
any other vehicle or cargo using the vehicle
jack.◀
Removing the emergency wheel The emergency wheel and the tools are lo‐
cated in the trunk under the cargo floor panel.1.Unscrew the wing nut.2.Remove the cover.3.Remove tool holder.4.Remove emergency wheel.
Prepare wheel change
1.Follow the Safety instructions, refer to
page 214.2.With the wheel chock from the onboard ve‐
hicle tool kit, also secure the vehicle
against rolling away at the front wheel of
the opposite side. For this, place the wheel
chock behind the front wheel diagonally
across.3.Loosen the wheel lug bolts a half turn.
Jacking up the vehicle
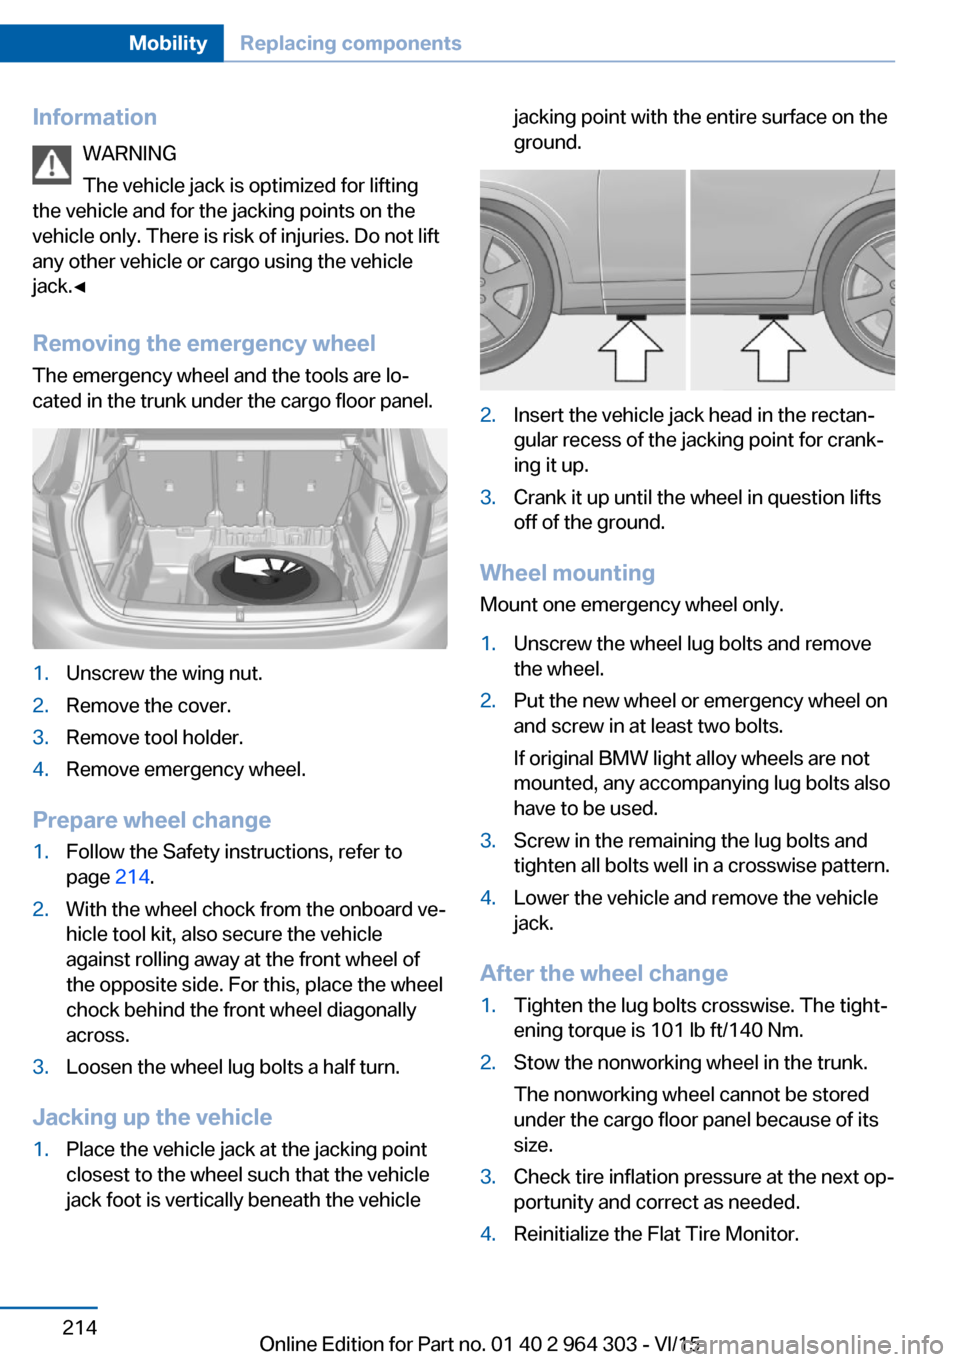
1.Place the vehicle jack at the jacking point
closest to the wheel such that the vehicle
jack foot is vertically beneath the vehiclejacking point with the entire surface on the
ground.2.Insert the vehicle jack head in the rectan‐
gular recess of the jacking point for crank‐
ing it up.3.Crank it up until the wheel in question lifts
off of the ground.
Wheel mounting
Mount one emergency wheel only.
1.Unscrew the wheel lug bolts and remove
the wheel.2.Put the new wheel or emergency wheel on
and screw in at least two bolts.
If original BMW light alloy wheels are not
mounted, any accompanying lug bolts also
have to be used.3.Screw in the remaining the lug bolts and
tighten all bolts well in a crosswise pattern.4.Lower the vehicle and remove the vehicle
jack.
After the wheel change
1.Tighten the lug bolts crosswise. The tight‐
ening torque is 101 lb ft/140 Nm.2.Stow the nonworking wheel in the trunk.
The nonworking wheel cannot be stored
under the cargo floor panel because of its
size.3.Check tire inflation pressure at the next op‐
portunity and correct as needed.4.Reinitialize the Flat Tire Monitor.Seite 214MobilityReplacing components214
Online Edition for Part no. 01 40 2 964 303 - VI/15
Page 237 of 242

Manual air distribu‐tion 145, 148
Manual air flow 145, 148
Manual brake, see Parking brake 72
Manual mode, Steptronic transmission 78
Manual operation, door lock 39
Manual operation, exterior mirrors 61
Manual operation, fuel filler flap 182
Manual operation, Park Dis‐ tance Control PDC 136
Manual operation, rearview camera 138
Marking, run-flat tires 192
Master key, see Remote con‐ trol 34
Maximum cooling 147
Maximum speed, display 88
Maximum speed, winter tires 191
Measurement, units of 94
Medical kit 218
Memory, seat, mirror 59
Menu in instrument clus‐ ter 90
Menus, operating, iDrive 18
Menus, refer to iDrive operat‐ ing concept 20
Messages, see Check Con‐ trol 82
Microfilter 146, 148
Minimum tread, tires 190
Mirror 60
Mirror memory 59
Mobile communication devi‐ ces in the vehicle 169
Mobility System 192
Modifications, technical, see Own Safety 7
Moisture in headlight 207
Monitor, see Control Dis‐ play 18 Mounting of child restraint
systems 65
Multifunction steering wheel, buttons 14
Multimedia 6
N
Navigation 6
Neck restraints, front, see Head restraints 58
Neck restraints, rear, see Head restraints 59
Neutral cleaner, see wheel cleaner 224
New wheels and tires 190
Nylon rope for tow-starting/ towing 220
O OBD Onboard Diagnosis 205
OBD, see OBD Onboard Di‐ agnosis 205
Obstacle marking, rearview camera 139
Octane rating, see Recom‐ mended fuel grade 184
Odometer 86
Office 6
Offroad trips 168
Oil 199
Oil, adding 200
Oil additives 201
Oil change 201
Oil change interval, service requirements 87
Oil filler neck 200
Oil types, alternative 201
Oil types, suitable 201
Old batteries, disposal 216
On-board computer 90
On-board computer, refer to On-board computer 90
Onboard monitor, see Control Display 18 Onboard vehicle tool kit 206
Opening/closing via door lock 39
Opening and closing 34
Opening and closing, without remote control 39
Opening and closing, with re‐ mote control 37
Opening the tailgate with no- touch activation 44
Operating concept, iDrive 18
Optional equipment, standard equipment 7
Outside air, refer to Auto‐ matic recirculated-air con‐
trol 147
Own Safety 7
P Paint, vehicle 223
Panoramic glass sunroof 49
Parallel parking assistant 140
Park Distance Control PDC 135
Parked-car ventilation 149
Parked vehicle, condensa‐ tion 171
Parking aid, see PDC 135
Parking assistant 140
Parking brake 72
Parking lights 97
Parts and accessories 7
Passenger side mirror, tilting downward 61
Pathway lines, rearview cam‐ era 139
PDC Park Distance Con‐ trol 135
Pedestrian warning with city braking function 114
Performance Control 122
Personal Profile 35
Personal Profile, exporting profiles 36 Seite 237Everything from A to ZReference237
Online Edition for Part no. 01 40 2 964 303 - VI/15