2016 BMW 750I XDRIVE SEDAN warning lights
[x] Cancel search: warning lightsPage 93 of 314
Transporting children safelyVehicle features and optionsThis chapter describes all standard, country-
specific and optional features offered with the
series. It also describes features that are not
necessarily available in your car, e. g., due tothe selected options or country versions. This
also applies to safety-related functions and
systems. The respectively applicable country
provisions must be observed when using the
respective features and systems.
The right place for children
Information
WARNING
Unattended children or animals can
move the vehicle and endanger themselves
and traffic, e.g. with the following actions:▷Pressing the Start/Stop button.▷Releasing the parking brake.▷Opening and closing of doors or windows.▷Shifting the selector lever into neutral.▷Using vehicle equipment.
There is risk of accidents or injuries. Do not
leave children or animals unattended in the ve‐
hicle. Carry remote control along when exiting
and lock the vehicle.◀
Children should always be in the rear WARNING
Persons shorter than 5 ft, 150 cm cannot
correctly fasten the safety belt without suitable
additional restraint systems. The protective ef‐
fect of the safety belts can be limited or lost
when safety belts are fastened incorrectly. An
incorrectly fastened safety belt can cause ad‐
ditional injuries, e.g. in the event of an accident
or during braking and evasive maneuvers.
There is risk of injuries or danger to life. Secure
persons shorter than 5 ft, 150 cm using suita‐
ble restraint systems.◀
Accident research shows that the safest place
for children is in the back seat.
Only transport children younger than 13 years
of age or shorter than 5 ft, 150 cm in the rear in
child restraint systems provided in accordance
with the age, weight and size of the child.
Children 13 years of age or older must wear a
safety belt as soon as a suitable child restraint
system can no longer be used due to their age,
weight and size.
Children on the front passenger seat
Before using a child restraint system on the
front passenger seat, ensure that the front,
knee, and side airbags on the front passenger
side are deactivated. Automatic deactivation of
front-seat passenger airbags, refer to
page 138.
Information WARNING
Active front-seat passenger airbags can
injure a child in a child restraint system when
the airbags are activated. There is risk of inju‐
ries. Make sure that the front-seat passenger
airbags are deactivated and that the PASSEN‐
GER AIRBAG OFF indicator lamp lights up.◀Seite 93Transporting children safelyControls93
Online Edition for Part no. 0140 2 964 330 - VI/15
Page 94 of 314
Installing child restraint
systems
Information
Pay attention to the specifications of the child
restraint system manufacturer when selecting,
installing, and using child restraint systems.
WARNING
The stability of the child restraint system
is limited or compromised with incorrect seat
adjustment or improper installation of the child
seat. There is risk of injuries or danger to life.
Make sure that the child restraint system fits
securely against the backrest. If possible, ad‐
just the backrest tilt for all affected backrests
and correctly adjust the seats. Make sure that
seats and backrests are securely engaged. If
possible, adjust the height of the head re‐
straints or remove them.◀
On the front passenger seat
Deactivating airbags WARNING
Active front-seat passenger airbags can
injure a child in a child restraint system when
the airbags are activated. There is risk of inju‐
ries. Make sure that the front-seat passenger
airbags are deactivated and that the PASSEN‐
GER AIRBAG OFF indicator lamp lights up.◀
After installing a child restraint system in the
front passenger seat, make sure that the front,
knee and side airbags on the front passenger
side are deactivated.
Deactivate the front-seat passenger airbags
automatically, refer to page 138.
Seat position and height Before installing a child restraint system, move
the front passenger seat as far back as possi‐
ble and bring it up to medium height to obtain
the best possible position for the belt and tooffer optimal protection in the event of an acci‐
dent.
If the upper anchorage of the safety belt is lo‐
cated in front of the belt guide of the child seat,
move the passenger seat carefully forward un‐
til the best possible belt guide position is
reached.
Backrest width Adjustable backrest width: before installing a
child restraint system in the front passenger
seat, open the backrest width completely. Do
not change the backrest width again and do
not call up a memory position.
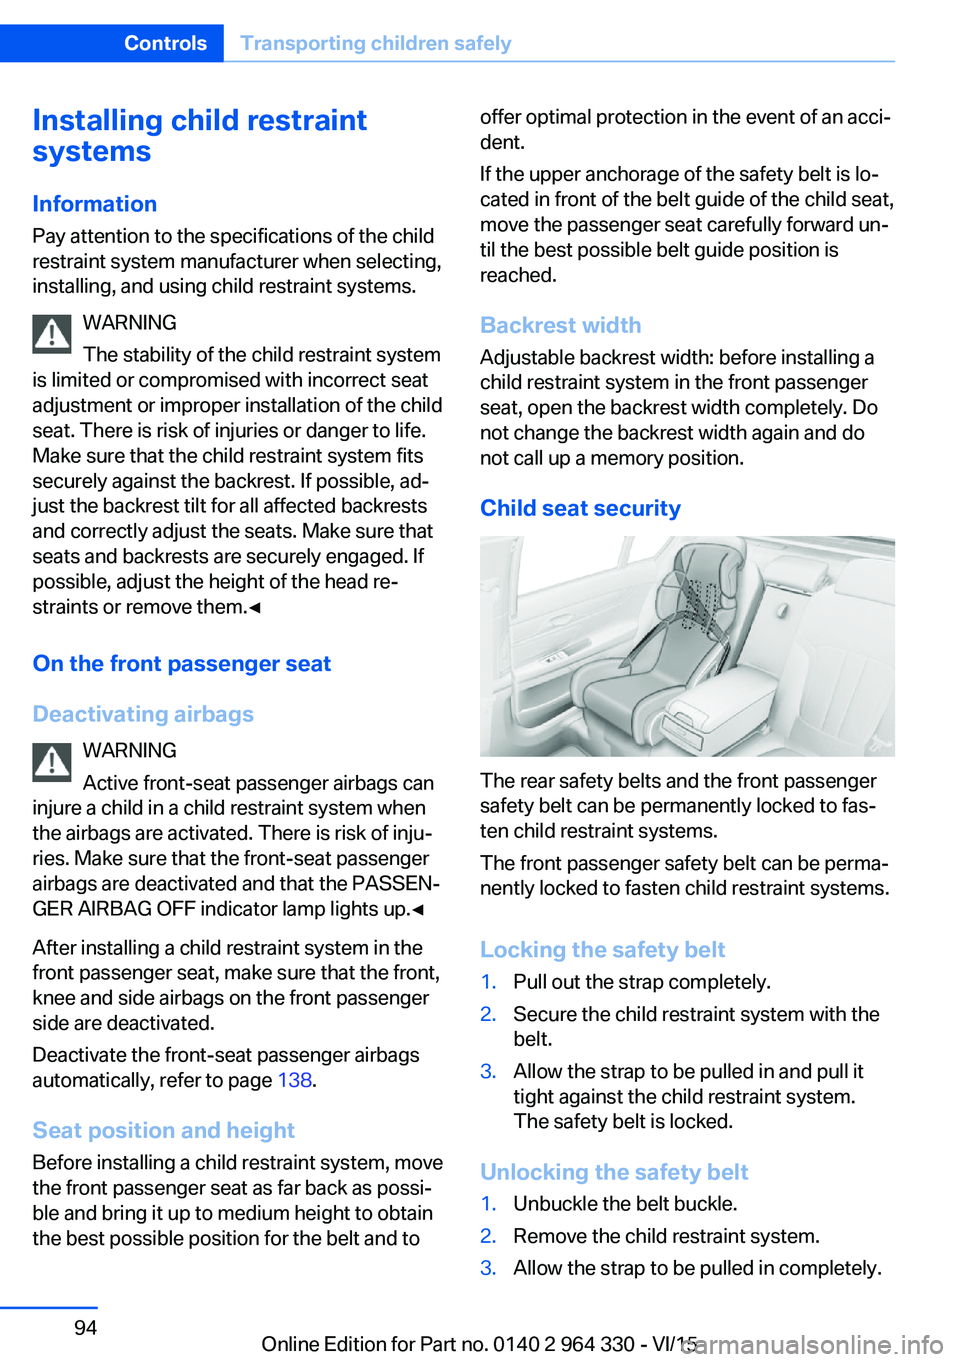
Child seat security
The rear safety belts and the front passenger
safety belt can be permanently locked to fas‐
ten child restraint systems.
The front passenger safety belt can be perma‐
nently locked to fasten child restraint systems.
Locking the safety belt
1.Pull out the strap completely.2.Secure the child restraint system with the
belt.3.Allow the strap to be pulled in and pull it
tight against the child restraint system.
The safety belt is locked.
Unlocking the safety belt
1.Unbuckle the belt buckle.2.Remove the child restraint system.3.Allow the strap to be pulled in completely.Seite 94ControlsTransporting children safely94
Online Edition for Part no. 0140 2 964 330 - VI/15
Page 97 of 314
DrivingVehicle features and options
This chapter describes all standard, country-
specific and optional features offered with the
series. It also describes features that are not
necessarily available in your car, e. g., due to
the selected options or country versions. This
also applies to safety-related functions and
systems. The respectively applicable country
provisions must be observed when using the
respective features and systems.
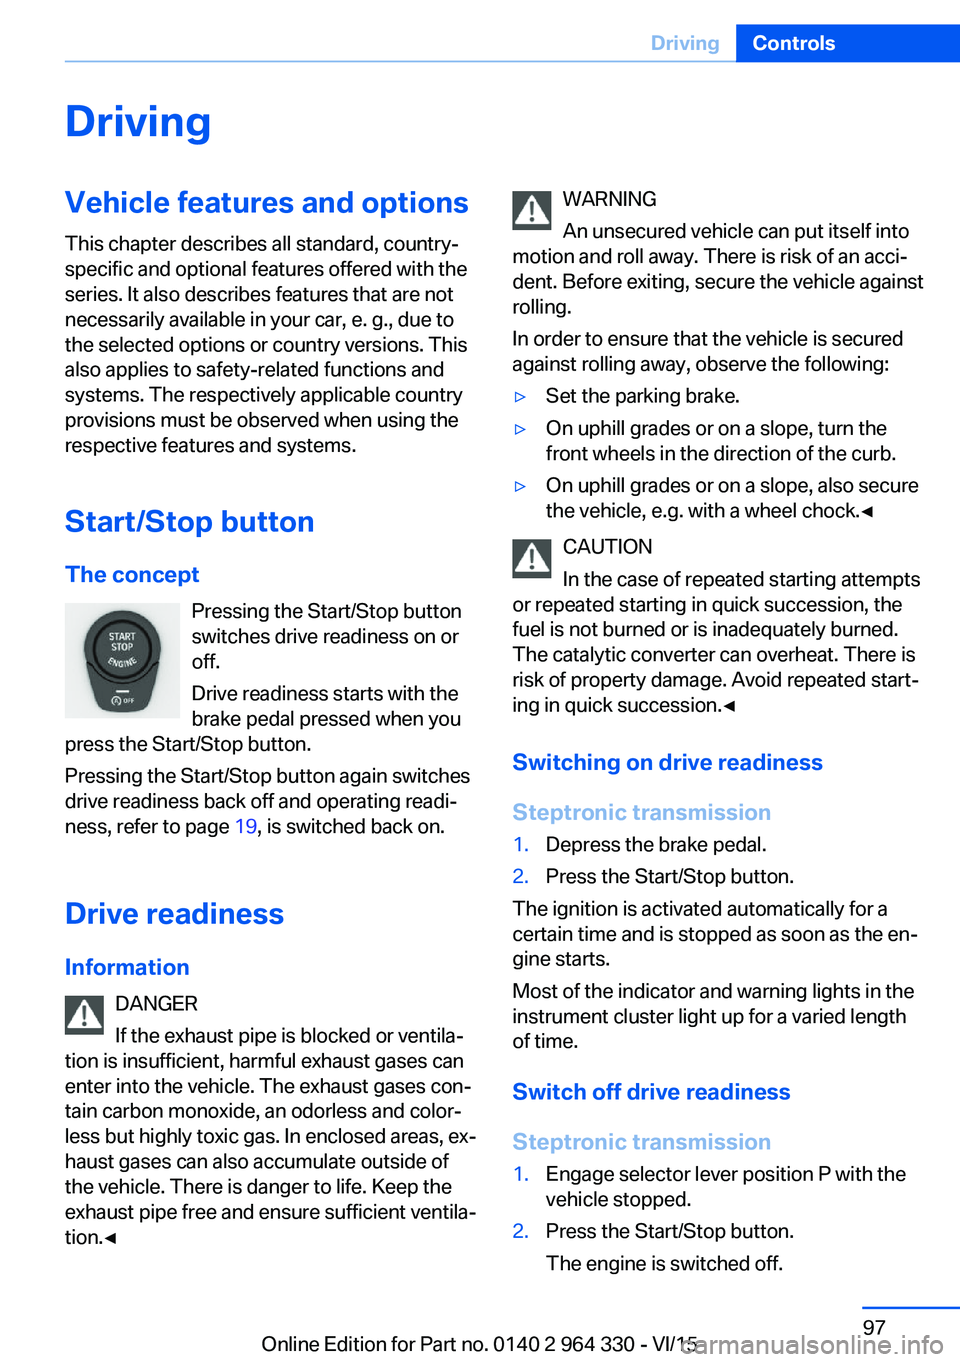
Start/Stop button The concept Pressing the Start/Stop button
switches drive readiness on or
off.
Drive readiness starts with the
brake pedal pressed when you
press the Start/Stop button.
Pressing the Start/Stop button again switches
drive readiness back off and operating readi‐
ness, refer to page 19, is switched back on.
Drive readiness
Information DANGER
If the exhaust pipe is blocked or ventila‐
tion is insufficient, harmful exhaust gases can
enter into the vehicle. The exhaust gases con‐
tain carbon monoxide, an odorless and color‐
less but highly toxic gas. In enclosed areas, ex‐
haust gases can also accumulate outside of
the vehicle. There is danger to life. Keep the
exhaust pipe free and ensure sufficient ventila‐
tion.◀WARNING
An unsecured vehicle can put itself into
motion and roll away. There is risk of an acci‐
dent. Before exiting, secure the vehicle against
rolling.
In order to ensure that the vehicle is secured
against rolling away, observe the following:▷Set the parking brake.▷On uphill grades or on a slope, turn the
front wheels in the direction of the curb.▷On uphill grades or on a slope, also secure
the vehicle, e.g. with a wheel chock.◀
CAUTION
In the case of repeated starting attempts
or repeated starting in quick succession, the
fuel is not burned or is inadequately burned.
The catalytic converter can overheat. There is
risk of property damage. Avoid repeated start‐
ing in quick succession.◀
Switching on drive readiness
Steptronic transmission
1.Depress the brake pedal.2.Press the Start/Stop button.
The ignition is activated automatically for a
certain time and is stopped as soon as the en‐
gine starts.
Most of the indicator and warning lights in the
instrument cluster light up for a varied length
of time.
Switch off drive readiness
Steptronic transmission
1.Engage selector lever position P with the
vehicle stopped.2.Press the Start/Stop button.
The engine is switched off.Seite 97DrivingControls97
Online Edition for Part no. 0140 2 964 330 - VI/15
Page 100 of 314

Automatic deactivation
In certain situations, Auto Start/Stop function
is deactivated automatically for safety reasons
as if the driver were absent.
Malfunction
The Auto Start/Stop function no longer
switches off the engine automatically. A Check
Control message is displayed. It is possible to
continue driving. Have the system checked.
Parking brake The concept
The parking brake is used to prevent the vehi‐
cle from rolling when it is parked.
Information WARNING
An unsecured vehicle can put itself into
motion and roll away. There is risk of an acci‐
dent. Before exiting, secure the vehicle against
rolling.
In order to ensure that the vehicle is secured
against rolling away, observe the following:▷Set the parking brake.▷On uphill grades or on a slope, turn the
front wheels in the direction of the curb.▷On uphill grades or on a slope, also secure
the vehicle, e.g. with a wheel chock.◀
WARNING
Unattended children or animals can
move the vehicle and endanger themselves
and traffic, e.g. with the following actions:
▷Pressing the Start/Stop button.▷Releasing the parking brake.▷Opening and closing of doors or windows.▷Shifting the selector lever into neutral.▷Using vehicle equipment.There is risk of accidents or injuries. Do not
leave children or animals unattended in the ve‐
hicle. Carry remote control along when exiting
and lock the vehicle.◀
Overview
Parking brake
Setting Pull the switch.
LED on the switch lights up.
The indicator lamp in the instrument
cluster lights up red. The parking brake
is set.
While driving Use as emergency brake while driving:
Pull the switch and hold it. The vehicle brakes
hard while the switch is being pulled.
The indicator lamp lights up red, a sig‐
nal sounds and the brake lights light
up.
A Check Control message is displayed.
If the vehicle is slowed down to a speed of ap‐
prox. 2 mph/3 km/h the parking brake is set.
Releasing
With drive readiness switched on:
Seite 100ControlsDriving100
Online Edition for Part no. 0140 2 964 330 - VI/15
Page 103 of 314
Turn signal, high beams,
headlight flasher
Turn signal
Turn signal in exterior mirror
When driving and during operation of the turn
signals or hazard warning system, do not fold
in the exterior mirrors, so that the signal lights on the exterior mirror are easy to see.
Using turn signals
Press the lever beyond the resistance point.
The turn signal lever returns into is starting po‐
sition after actuation.
To switch off manually, slightly tap the lever to
the resistance point.
Triple turn signal activation
Slightly tap lever.
The triple turn signal duration can be adjusted.
About iDrive:
1."My Vehicle"2."Vehicle settings"3."Lighting"4."Exterior lighting"5."One-touch turn signal"6.Select desired setting.
The setting is stored for the drive profile cur‐
rently used.
Signaling briefly
Press the lever to the resistance point and hold
it there for as long as you want the turn signal
to flash.
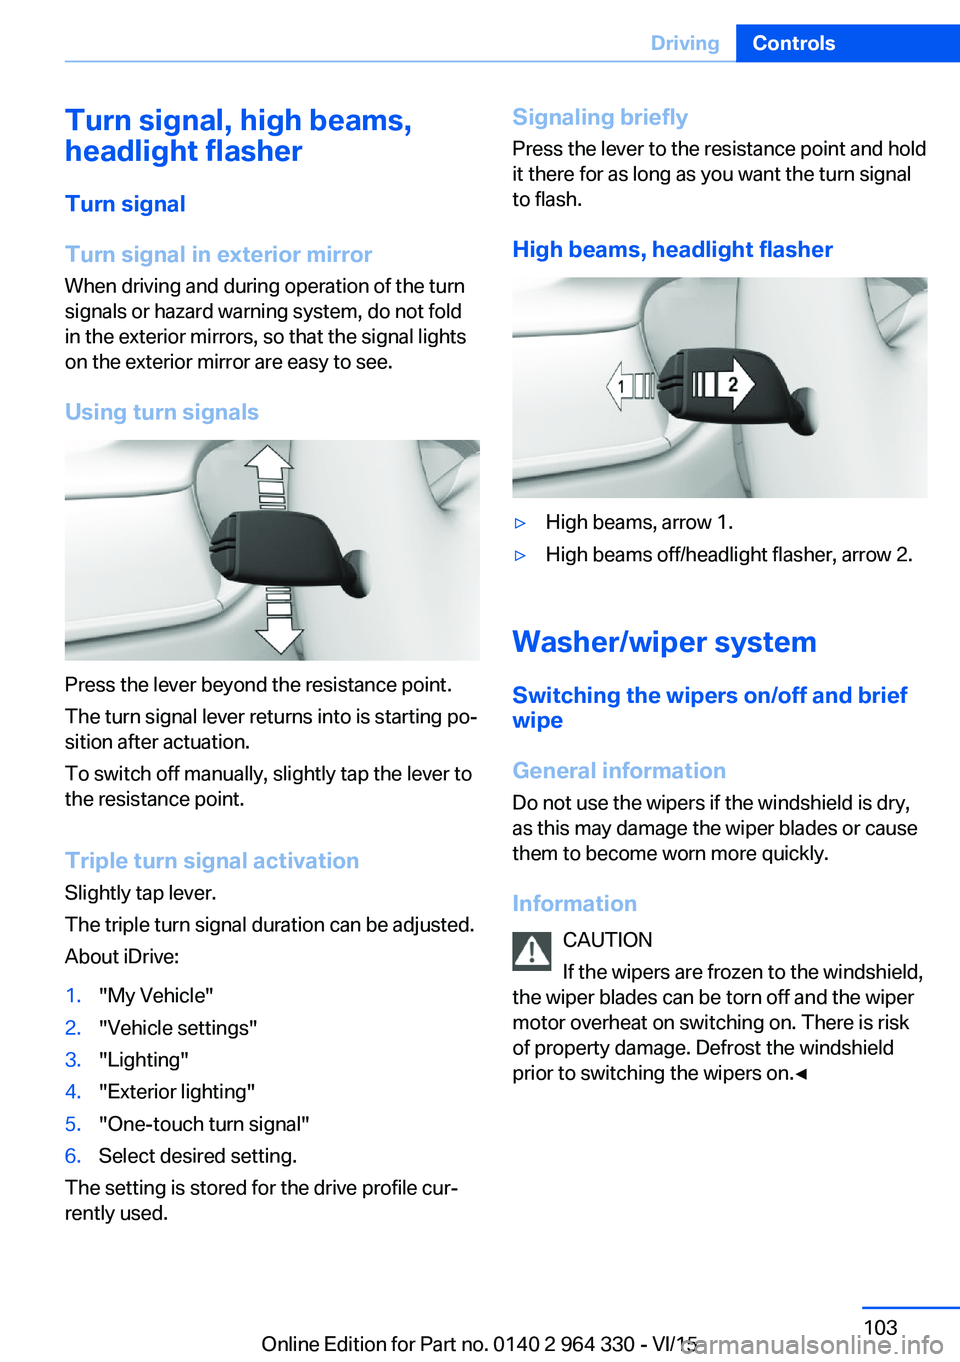
High beams, headlight flasher▷High beams, arrow 1.▷High beams off/headlight flasher, arrow 2.
Washer/wiper system Switching the wipers on/off and brief
wipe
General information
Do not use the wipers if the windshield is dry,
as this may damage the wiper blades or cause them to become worn more quickly.
Information CAUTION
If the wipers are frozen to the windshield,
the wiper blades can be torn off and the wiper
motor overheat on switching on. There is risk of property damage. Defrost the windshield
prior to switching the wipers on.◀
Seite 103DrivingControls103
Online Edition for Part no. 0140 2 964 330 - VI/15
Page 105 of 314
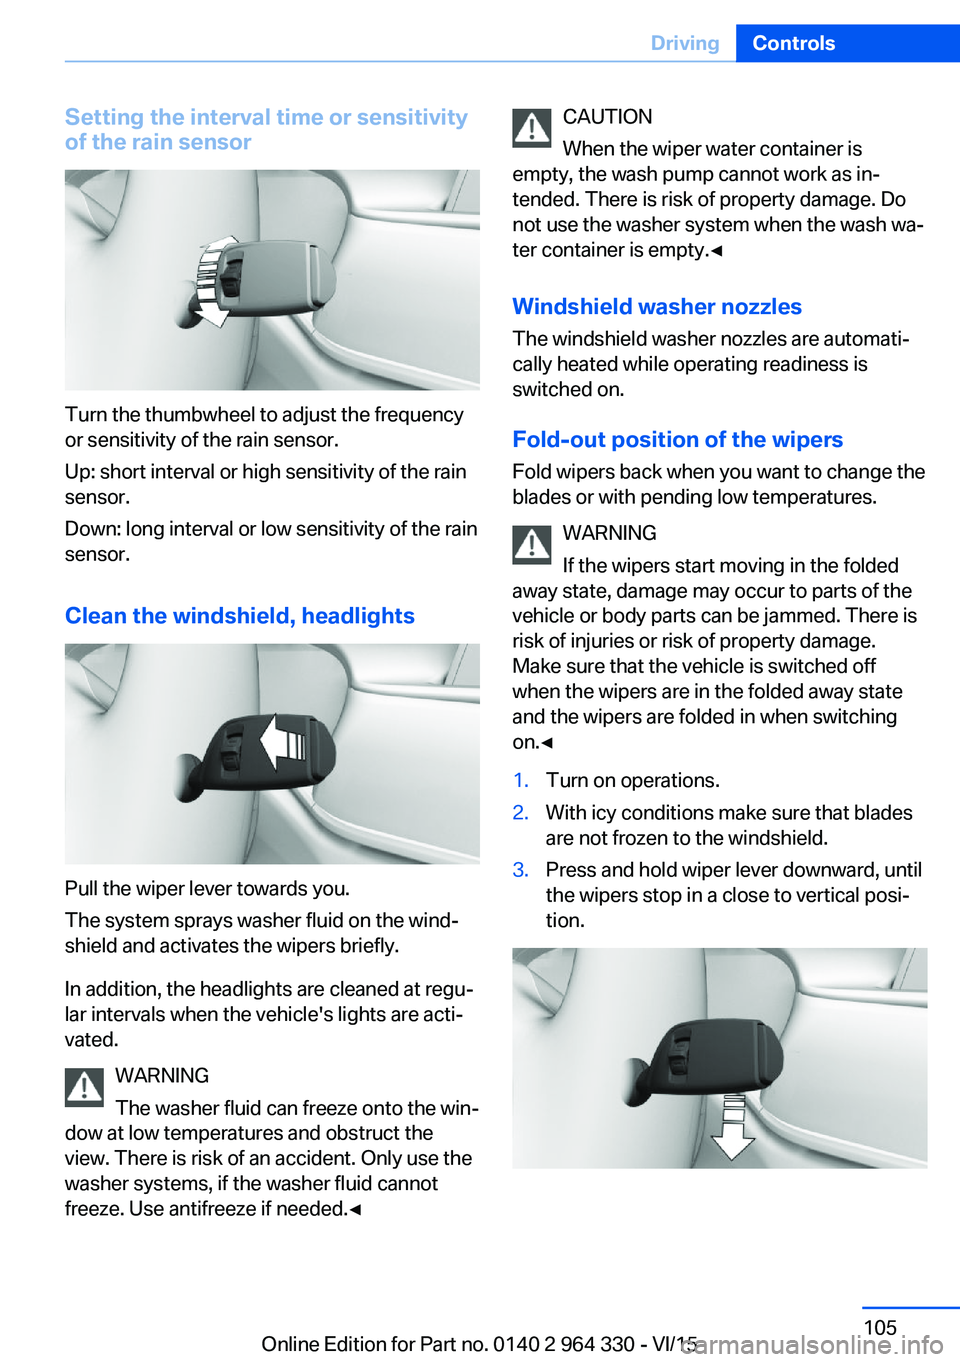
Setting the interval time or sensitivity
of the rain sensor
Turn the thumbwheel to adjust the frequency
or sensitivity of the rain sensor.
Up: short interval or high sensitivity of the rain
sensor.
Down: long interval or low sensitivity of the rain
sensor.
Clean the windshield, headlights
Pull the wiper lever towards you.
The system sprays washer fluid on the wind‐
shield and activates the wipers briefly.
In addition, the headlights are cleaned at regu‐
lar intervals when the vehicle's lights are acti‐
vated.
WARNING
The washer fluid can freeze onto the win‐
dow at low temperatures and obstruct the
view. There is risk of an accident. Only use the
washer systems, if the washer fluid cannot
freeze. Use antifreeze if needed.◀
CAUTION
When the wiper water container is
empty, the wash pump cannot work as in‐
tended. There is risk of property damage. Do
not use the washer system when the wash wa‐
ter container is empty.◀
Windshield washer nozzles
The windshield washer nozzles are automati‐
cally heated while operating readiness is
switched on.
Fold-out position of the wipers Fold wipers back when you want to change the
blades or with pending low temperatures.
WARNING
If the wipers start moving in the folded
away state, damage may occur to parts of the vehicle or body parts can be jammed. There is
risk of injuries or risk of property damage.
Make sure that the vehicle is switched off
when the wipers are in the folded away state
and the wipers are folded in when switching
on.◀1.Turn on operations.2.With icy conditions make sure that blades
are not frozen to the windshield.3.Press and hold wiper lever downward, until
the wipers stop in a close to vertical posi‐
tion.Seite 105DrivingControls105
Online Edition for Part no. 0140 2 964 330 - VI/15
Page 114 of 314
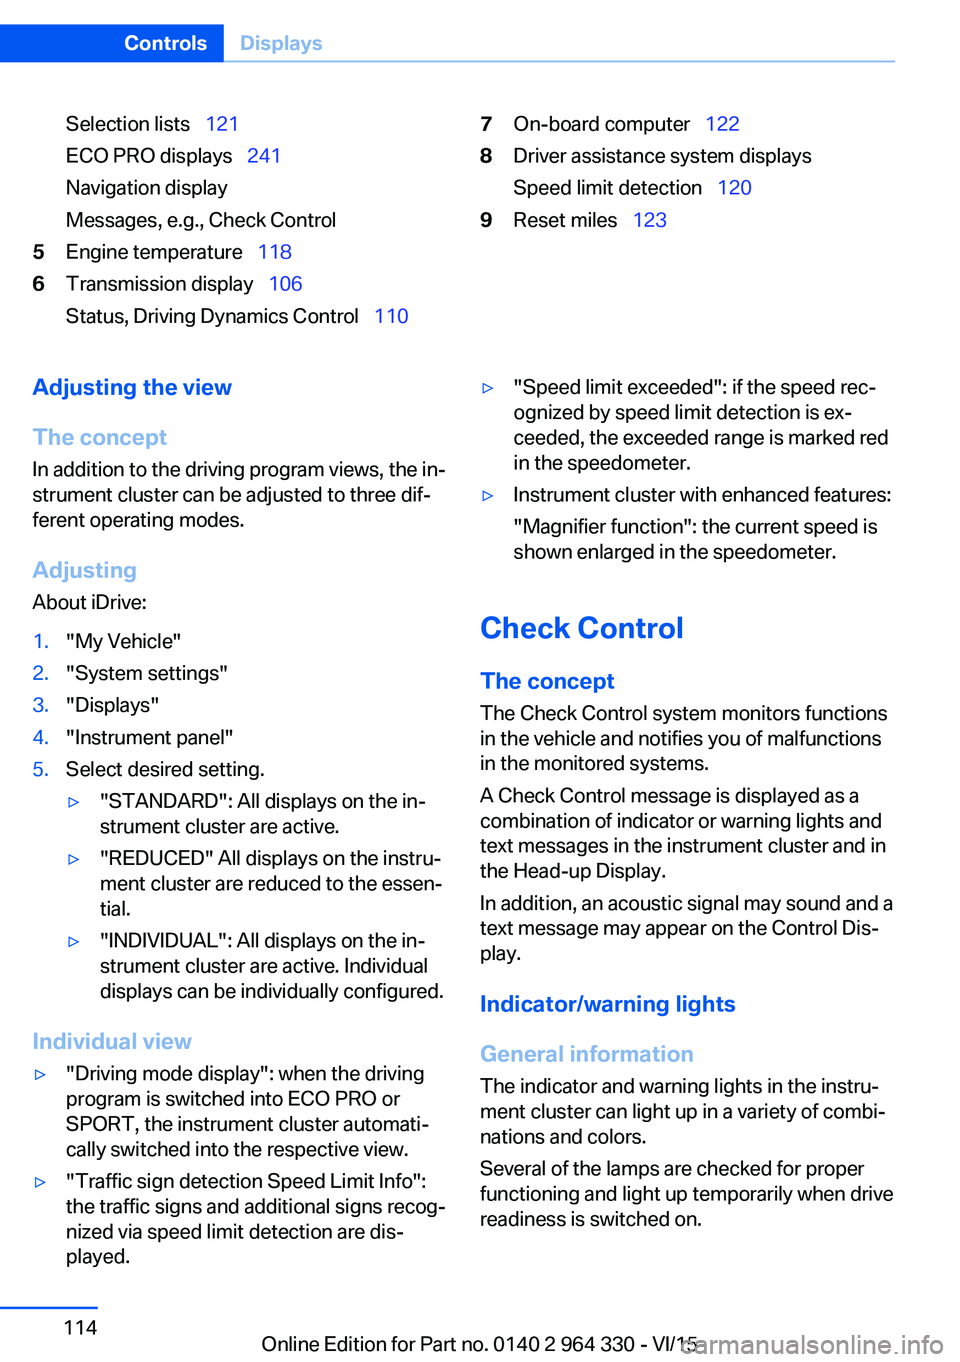
Selection lists 121
ECO PRO displays 241
Navigation display
Messages, e.g., Check Control5Engine temperature 1186Transmission display 106
Status, Driving Dynamics Control 1107On-board computer 1228Driver assistance system displays
Speed limit detection 1209Reset miles 123Adjusting the view
The concept In addition to the driving program views, the in‐
strument cluster can be adjusted to three dif‐
ferent operating modes.
Adjusting
About iDrive:1."My Vehicle"2."System settings"3."Displays"4."Instrument panel"5.Select desired setting.▷"STANDARD": All displays on the in‐
strument cluster are active.▷"REDUCED" All displays on the instru‐
ment cluster are reduced to the essen‐
tial.▷"INDIVIDUAL": All displays on the in‐
strument cluster are active. Individual
displays can be individually configured.
Individual view
▷"Driving mode display": when the driving
program is switched into ECO PRO or
SPORT, the instrument cluster automati‐
cally switched into the respective view.▷"Traffic sign detection Speed Limit Info":
the traffic signs and additional signs recog‐
nized via speed limit detection are dis‐
played.▷"Speed limit exceeded": if the speed rec‐
ognized by speed limit detection is ex‐
ceeded, the exceeded range is marked red
in the speedometer.▷Instrument cluster with enhanced features:
"Magnifier function": the current speed is
shown enlarged in the speedometer.
Check Control
The concept The Check Control system monitors functions
in the vehicle and notifies you of malfunctions
in the monitored systems.
A Check Control message is displayed as a
combination of indicator or warning lights and
text messages in the instrument cluster and in
the Head-up Display.
In addition, an acoustic signal may sound and a text message may appear on the Control Dis‐
play.
Indicator/warning lights
General information
The indicator and warning lights in the instru‐
ment cluster can light up in a variety of combi‐
nations and colors.
Several of the lamps are checked for proper
functioning and light up temporarily when drive
readiness is switched on.
Seite 114ControlsDisplays114
Online Edition for Part no. 0140 2 964 330 - VI/15
Page 116 of 314
▷Interference through systems or devices
with the same radio frequency: After leav‐
ing the area of the interference, the system
automatically becomes active again.▷TPM could not conclude the reset: perform
the reset of the system again.▷A wheel without TPM electronics is
mounted: Have it checked by a dealer’s
service center or another qualified service
center or repair shop as needed.▷Malfunction: Have system checked imme‐
diately by a dealer’s service center or an‐
other qualified service center or repair
shop.
For more information, see Tire Pressure Moni‐
tor, refer to page 264.
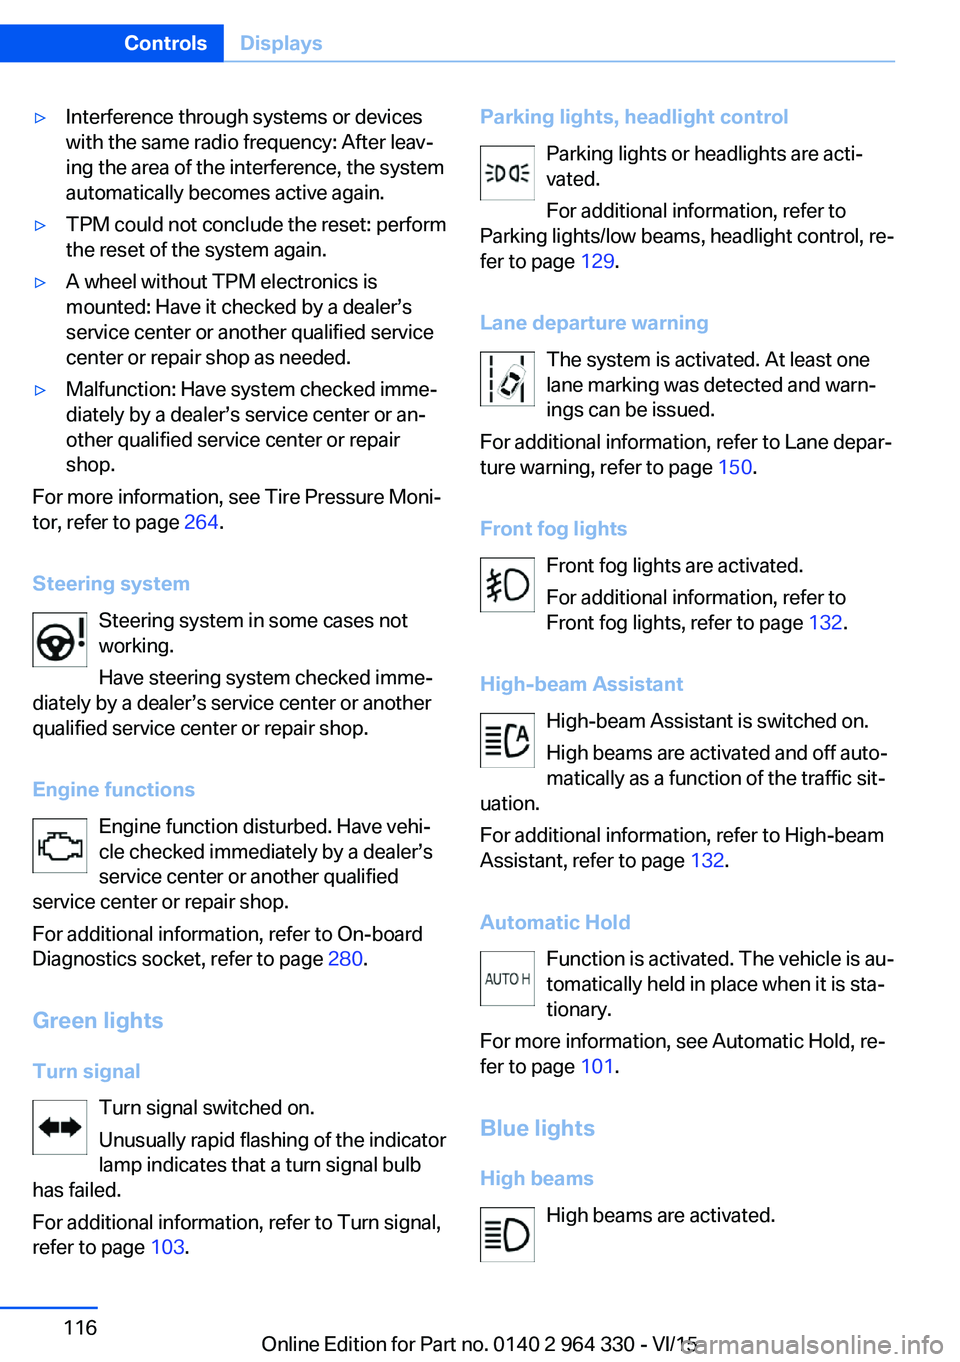
Steering system Steering system in some cases not
working.
Have steering system checked imme‐
diately by a dealer’s service center or another
qualified service center or repair shop.
Engine functions Engine function disturbed. Have vehi‐
cle checked immediately by a dealer’s
service center or another qualified
service center or repair shop.
For additional information, refer to On-board
Diagnostics socket, refer to page 280.
Green lights Turn signal Turn signal switched on.
Unusually rapid flashing of the indicator
lamp indicates that a turn signal bulb
has failed.
For additional information, refer to Turn signal,
refer to page 103.
Parking lights, headlight control
Parking lights or headlights are acti‐
vated.
For additional information, refer to
Parking lights/low beams, headlight control, re‐
fer to page 129.
Lane departure warning The system is activated. At least one
lane marking was detected and warn‐
ings can be issued.
For additional information, refer to Lane depar‐
ture warning, refer to page 150.
Front fog lights Front fog lights are activated.
For additional information, refer to
Front fog lights, refer to page 132.
High-beam Assistant High-beam Assistant is switched on.
High beams are activated and off auto‐
matically as a function of the traffic sit‐
uation.
For additional information, refer to High-beam
Assistant, refer to page 132.
Automatic Hold Function is activated. The vehicle is au‐
tomatically held in place when it is sta‐
tionary.
For more information, see Automatic Hold, re‐
fer to page 101.
Blue lights
High beams High beams are activated.Seite 116ControlsDisplays116
Online Edition for Part no. 0140 2 964 330 - VI/15