2016 BMW 740I SEDAN ECU
[x] Cancel search: ECUPage 260 of 314
Rotating wheels between axlesDifferent wear patterns can occur on the frontand rear axles depending on individual driving
conditions. The tires can be rotated between
the axles to achieve even wear. A dealer’s
service center or another qualified service cen‐
ter or repair shop will be glad to answer addi‐
tional questions at any time. After rotating,
check the tire pressure and correct if needed.
Rotating the tires is not permissible on vehi‐
cles with different tire sizes or rim sizes on the
front and rear axles.
Storage
Store wheels and tires in a cool, dry place with
as little exposure to light as possible.
Always protect tires against all contact with oil,
grease and fuels.
Do not exceed the maximum tire inflation pres‐
sure indicated on the side wall of the tire.
Run-flat tires
Label
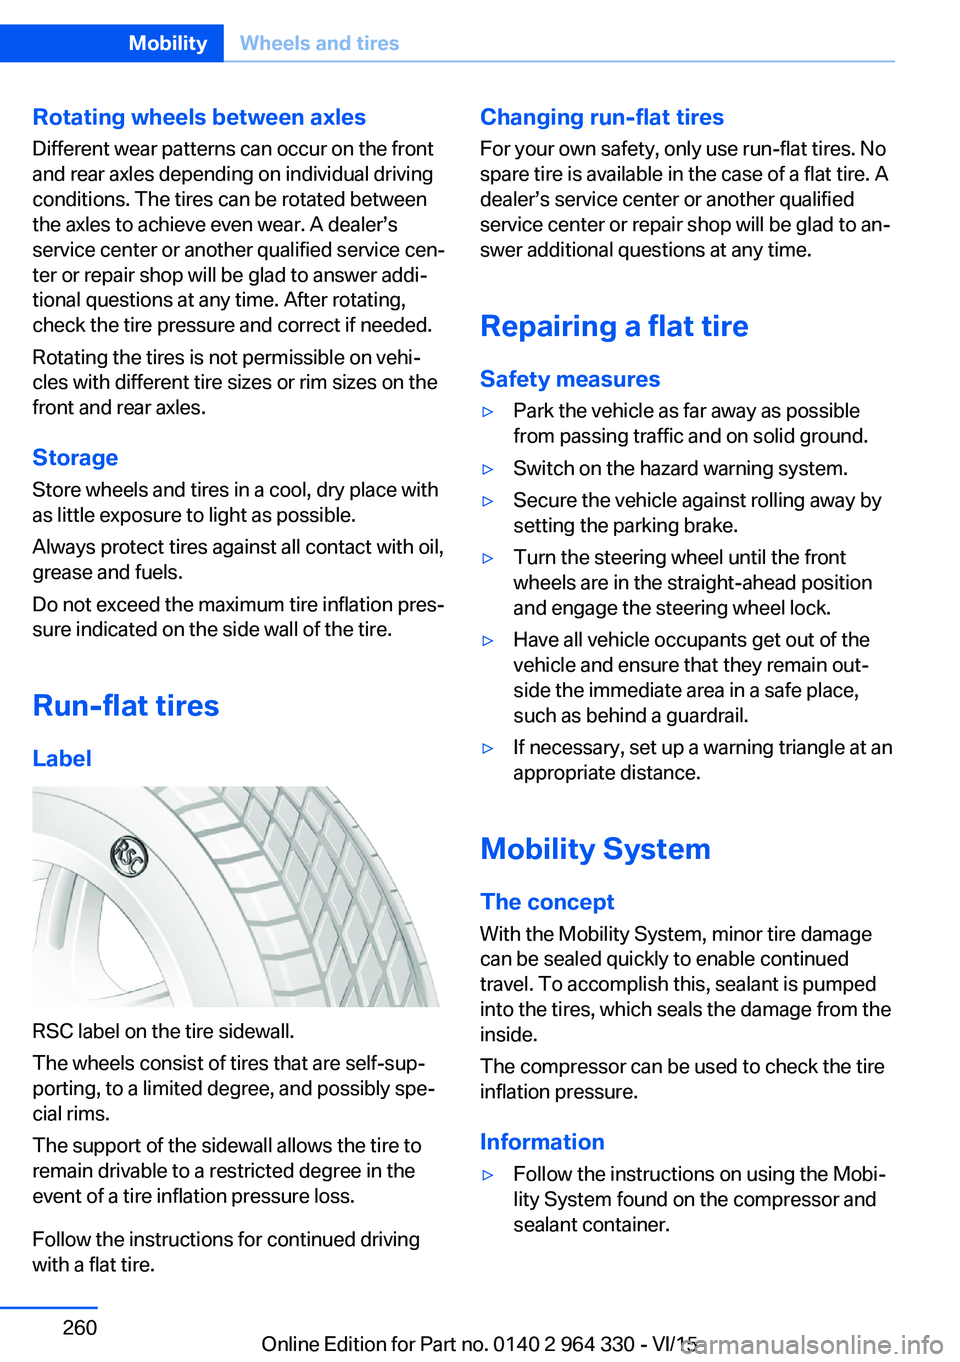
RSC label on the tire sidewall.
The wheels consist of tires that are self-sup‐
porting, to a limited degree, and possibly spe‐
cial rims.
The support of the sidewall allows the tire to
remain drivable to a restricted degree in the
event of a tire inflation pressure loss.
Follow the instructions for continued driving
with a flat tire.
Changing run-flat tires
For your own safety, only use run-flat tires. No
spare tire is available in the case of a flat tire. A
dealer’s service center or another qualified
service center or repair shop will be glad to an‐
swer additional questions at any time.
Repairing a flat tire Safety measures▷Park the vehicle as far away as possible
from passing traffic and on solid ground.▷Switch on the hazard warning system.▷Secure the vehicle against rolling away by
setting the parking brake.▷Turn the steering wheel until the front
wheels are in the straight-ahead position
and engage the steering wheel lock.▷Have all vehicle occupants get out of the
vehicle and ensure that they remain out‐
side the immediate area in a safe place,
such as behind a guardrail.▷If necessary, set up a warning triangle at an
appropriate distance.
Mobility System
The concept
With the Mobility System, minor tire damage
can be sealed quickly to enable continued
travel. To accomplish this, sealant is pumped
into the tires, which seals the damage from the
inside.
The compressor can be used to check the tire
inflation pressure.
Information
▷Follow the instructions on using the Mobi‐
lity System found on the compressor and
sealant container.Seite 260MobilityWheels and tires260
Online Edition for Part no. 0140 2 964 330 - VI/15
Page 272 of 314
Hood
Information WARNING
Improperly executed work in the engine
compartment can damage components and
lead to a safety risk. There is risk of accidents
or risk of property damage.◀
WARNING
The engine compartment accommo‐
dates moving components. Certain compo‐
nents can move in the engine compartment
with the vehicle switched off, e.g. the cooler
fan. There is risk of injuries. Do not reach into
the area of moving parts. Keep articles of
clothing and hair away from moving parts.◀
CAUTION
Folded-away wipers can be jammed
when the hood is opened. There is risk of
property damage. Make sure that the wipers
with the wiper blades mounted are folded
down onto the windshield before opening the
hood.◀
WARNING
There are protruding parts, e.g. lock
hook, on the inside of the hood. There is risk of
injuries. If the hood is open, pay attention to
protruding parts and keep these areas clear.◀
WARNING
An incorrectly locked hood can open
while driving and restrict visibility. There is risk
of an accident. Stop immediately and correctly
close the hood.◀
WARNING
Body parts can be jammed on opening
and closing the hood. There is risk of injuries.
Make sure that the area of movement of the
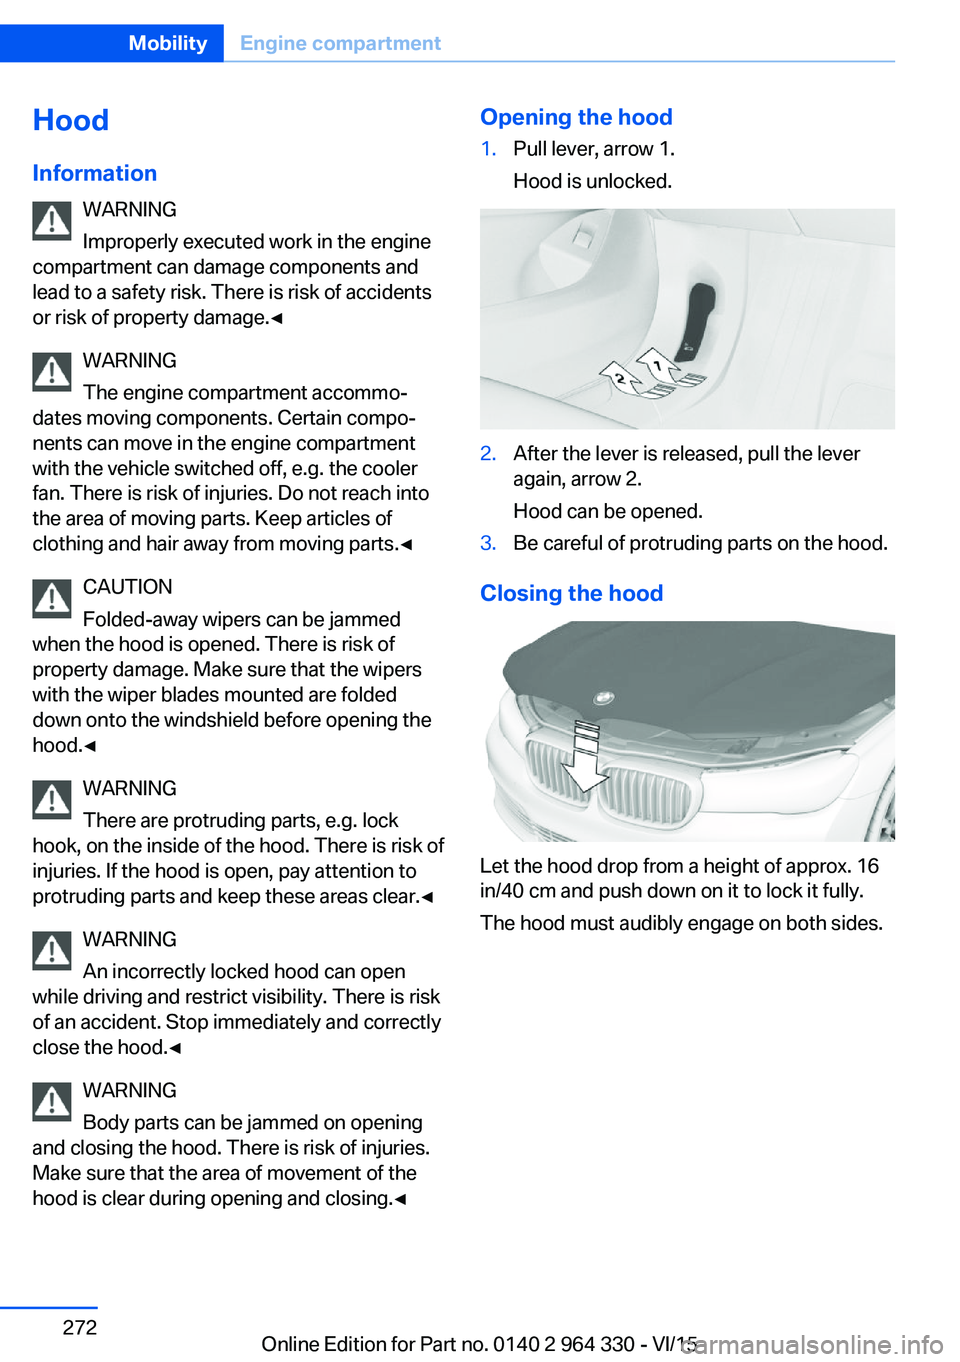
hood is clear during opening and closing.◀Opening the hood1.Pull lever, arrow 1.
Hood is unlocked.2.After the lever is released, pull the lever
again, arrow 2.
Hood can be opened.3.Be careful of protruding parts on the hood.
Closing the hood
Let the hood drop from a height of approx. 16
in/40 cm and push down on it to lock it fully.
The hood must audibly engage on both sides.
Seite 272MobilityEngine compartment272
Online Edition for Part no. 0140 2 964 330 - VI/15
Page 281 of 314
Replacing componentsVehicle features and optionsThis chapter describes all standard, country-
specific and optional features offered with the
series. It also describes features that are not
necessarily available in your car, e. g., due to
the selected options or country versions. This
also applies to safety-related functions and
systems. The respectively applicable country
provisions must be observed when using the
respective features and systems.
Onboard vehicle tool kit
The onboard vehicle tool kit is located in the
left storage compartment of the cargo area.
Wiper blade replacement
Information CAUTION
If the wiper arm falls onto the windshield
without the wiper blades installed, the wind‐
shield can be damaged. There is risk of prop‐
erty damage. Secure the wiper arm when re‐
placing the wiper blades and do not fold down
the wipers without the wiper blades installed.◀
CAUTION
Folded-away wipers can be jammed
when the hood is opened. There is risk of
property damage. Make sure that the wipers
with the wiper blades mounted are folded
down onto the windshield before opening the
hood.◀
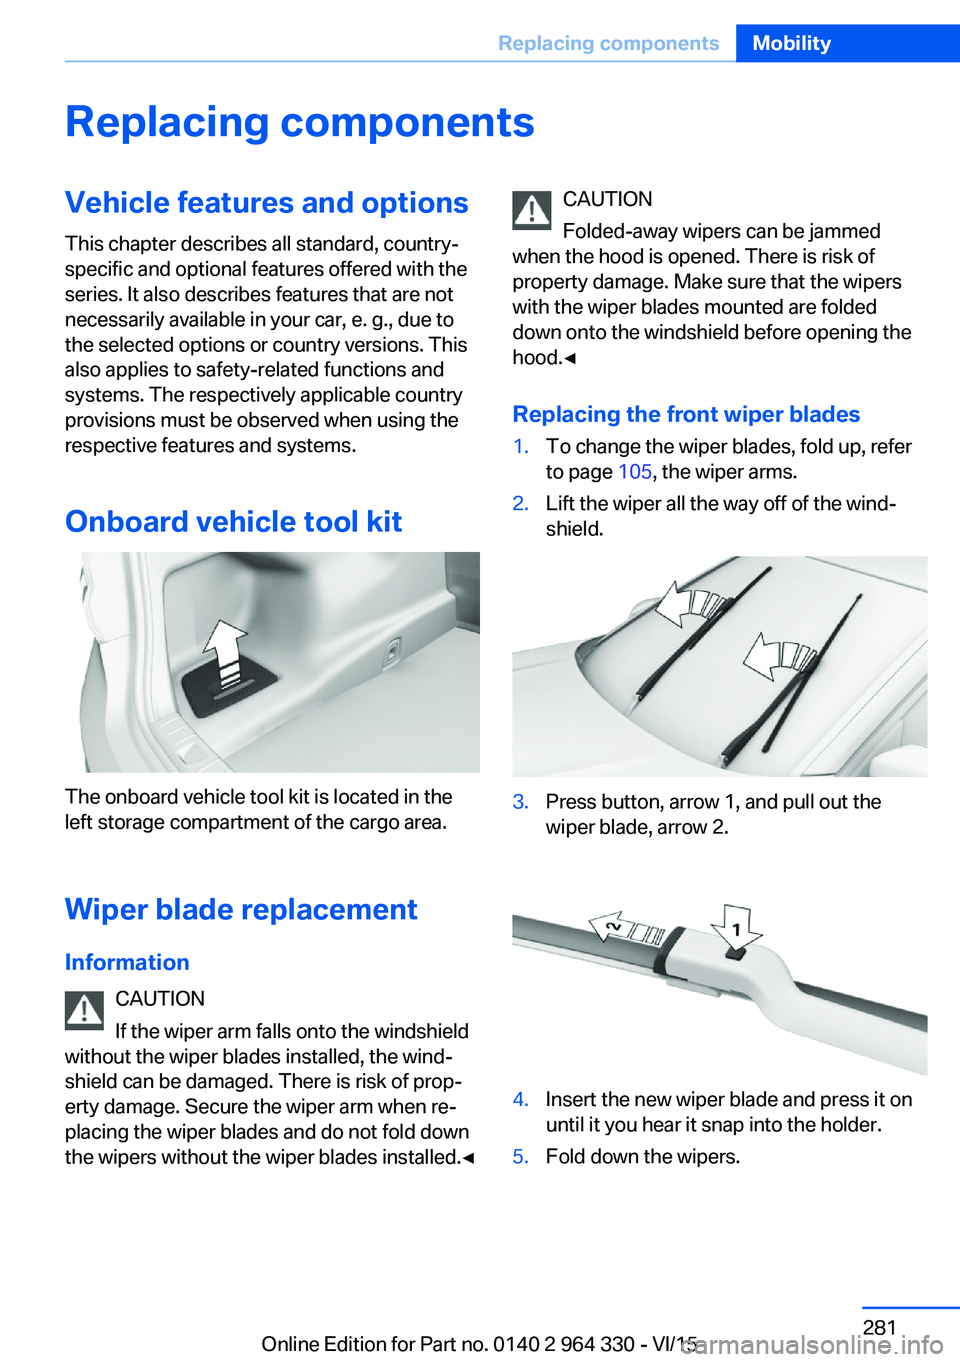
Replacing the front wiper blades1.To change the wiper blades, fold up, refer
to page 105, the wiper arms.2.Lift the wiper all the way off of the wind‐
shield.3.Press button, arrow 1, and pull out the
wiper blade, arrow 2.4.Insert the new wiper blade and press it on
until it you hear it snap into the holder.5.Fold down the wipers.Seite 281Replacing componentsMobility281
Online Edition for Part no. 0140 2 964 330 - VI/15
Page 283 of 314
▷Have all vehicle occupants get out of the
vehicle and ensure that they remain out‐
side the immediate area in a safe place,
such as behind a guardrail.▷If necessary, set up a warning triangle or
portable hazard warning lamp at an appro‐
priate distance.▷Perform wheel change only on a flat, solid
and slip-resistant surface. On soft or slip‐
pery ground, e.g., snow, ice, tiles, etc., the
vehicle or vehicle jack can slip away to the
side.▷Do not place wood blocks or similar items
under the vehicle jack; otherwise, it cannot
reach its carrying capacity because of the
restricted height.▷If the vehicle is raised, do not lie under the
vehicle and do not start the engine; other‐
wise, a fatal hazard exists.
Information
WARNING
The vehicle jack is optimized for lifting
the vehicle and for the jacking points on the
vehicle only. There is risk of injuries. Do not lift
any other vehicle or cargo using the vehicle
jack.◀
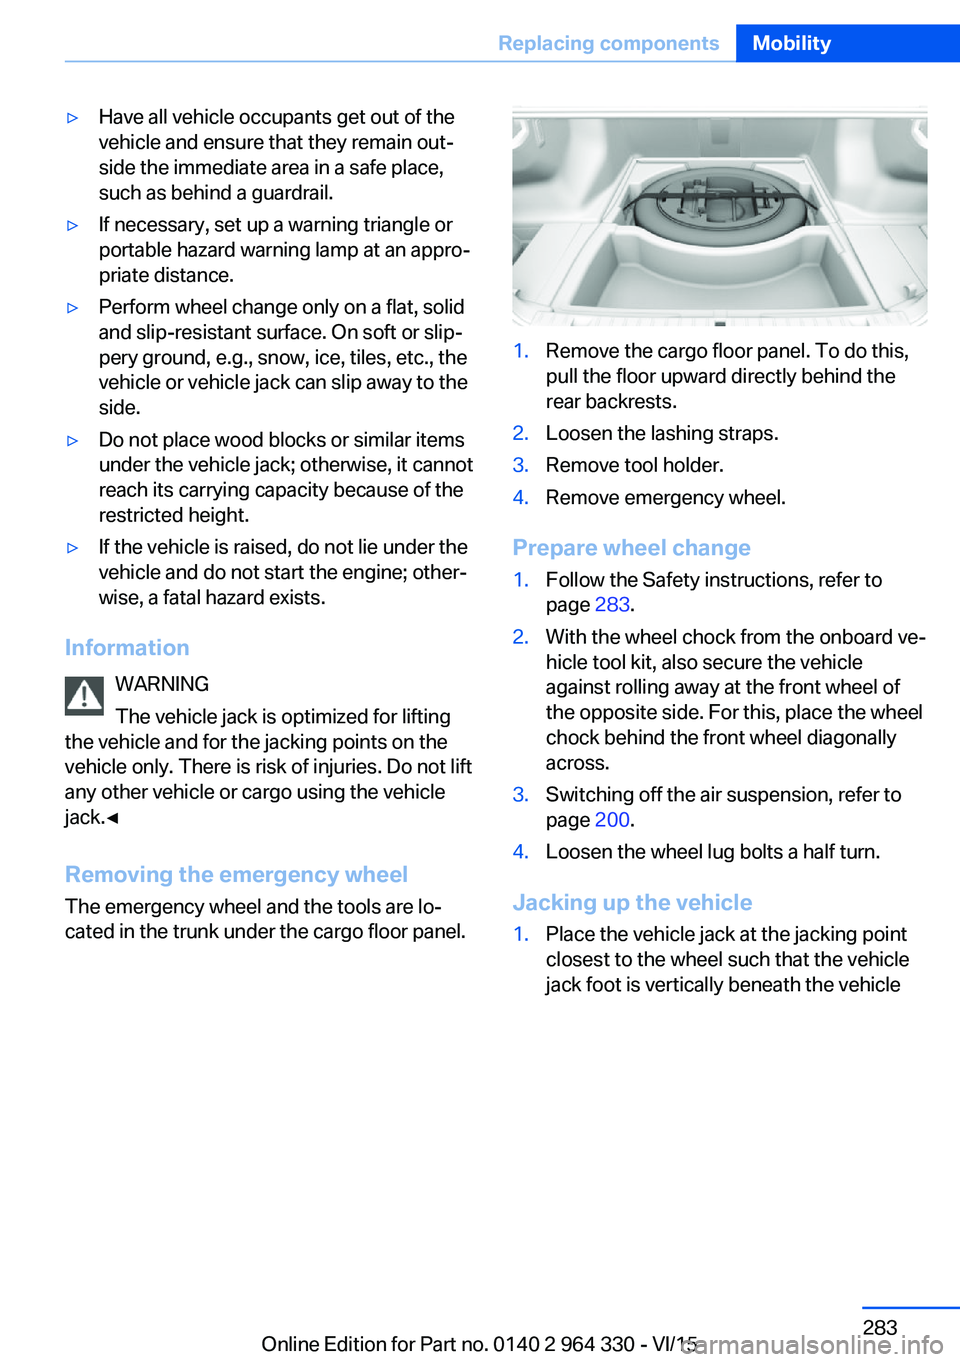
Removing the emergency wheel The emergency wheel and the tools are lo‐
cated in the trunk under the cargo floor panel.
1.Remove the cargo floor panel. To do this,
pull the floor upward directly behind the
rear backrests.2.Loosen the lashing straps.3.Remove tool holder.4.Remove emergency wheel.
Prepare wheel change
1.Follow the Safety instructions, refer to
page 283.2.With the wheel chock from the onboard ve‐
hicle tool kit, also secure the vehicle
against rolling away at the front wheel of
the opposite side. For this, place the wheel
chock behind the front wheel diagonally
across.3.Switching off the air suspension, refer to
page 200.4.Loosen the wheel lug bolts a half turn.
Jacking up the vehicle
1.Place the vehicle jack at the jacking point
closest to the wheel such that the vehicle
jack foot is vertically beneath the vehicleSeite 283Replacing componentsMobility283
Online Edition for Part no. 0140 2 964 330 - VI/15
Page 285 of 314
Check Control messages of these comfort fea‐
tures are no longer displayed.
Charging the battery
General information
Make sure that the battery is always suffi‐
ciently charged to guarantee that the battery
remains usable for its full service life.
The battery may need to be charged in the fol‐
lowing cases:▷When making frequent short-distance
drives.▷If the vehicle is not used for prolonged pe‐
riods, longer than a month.
Information
CAUTION
Battery chargers for the vehicle battery
can work with high voltages and currents,
which means that the 12V on-board network
can be overloaded or damaged. There is risk of
property damage. Only connect battery charg‐
ers for the vehicle battery to the starting aid
terminals in the engine compartment.◀
Starting aid terminals
In the vehicle, only charge the battery via the
starting aid terminals, refer to page 288, in the
engine compartment with the engine off.
Power failure
After a temporary power loss, some equipment
needs to be newly initialized or individual set‐
tings updated, e. g.:
▷Seat, mirror, and steering wheel memory:
store the positions again.▷Time: update.▷Date: update.▷Glass sunroof: initialize the system, refer to
page 75.Disposing of old batteries
Have old batteries disposed of by a
dealer’s service center or another
qualified service center or repair shop
or take them to a collection point.
Maintain the battery in an upright position for
transport and storage. Secure the battery so
that it does not tip over during transport.
Fuses Information WARNING
Incorrect and repaired fuses can overload
electrical lines and components. There is risk
of fire. Never attempt to repair a blown fuse
and do not replace a nonworking fuse with a
substitute of another color or amperage rat‐
ing.◀
In the trunk
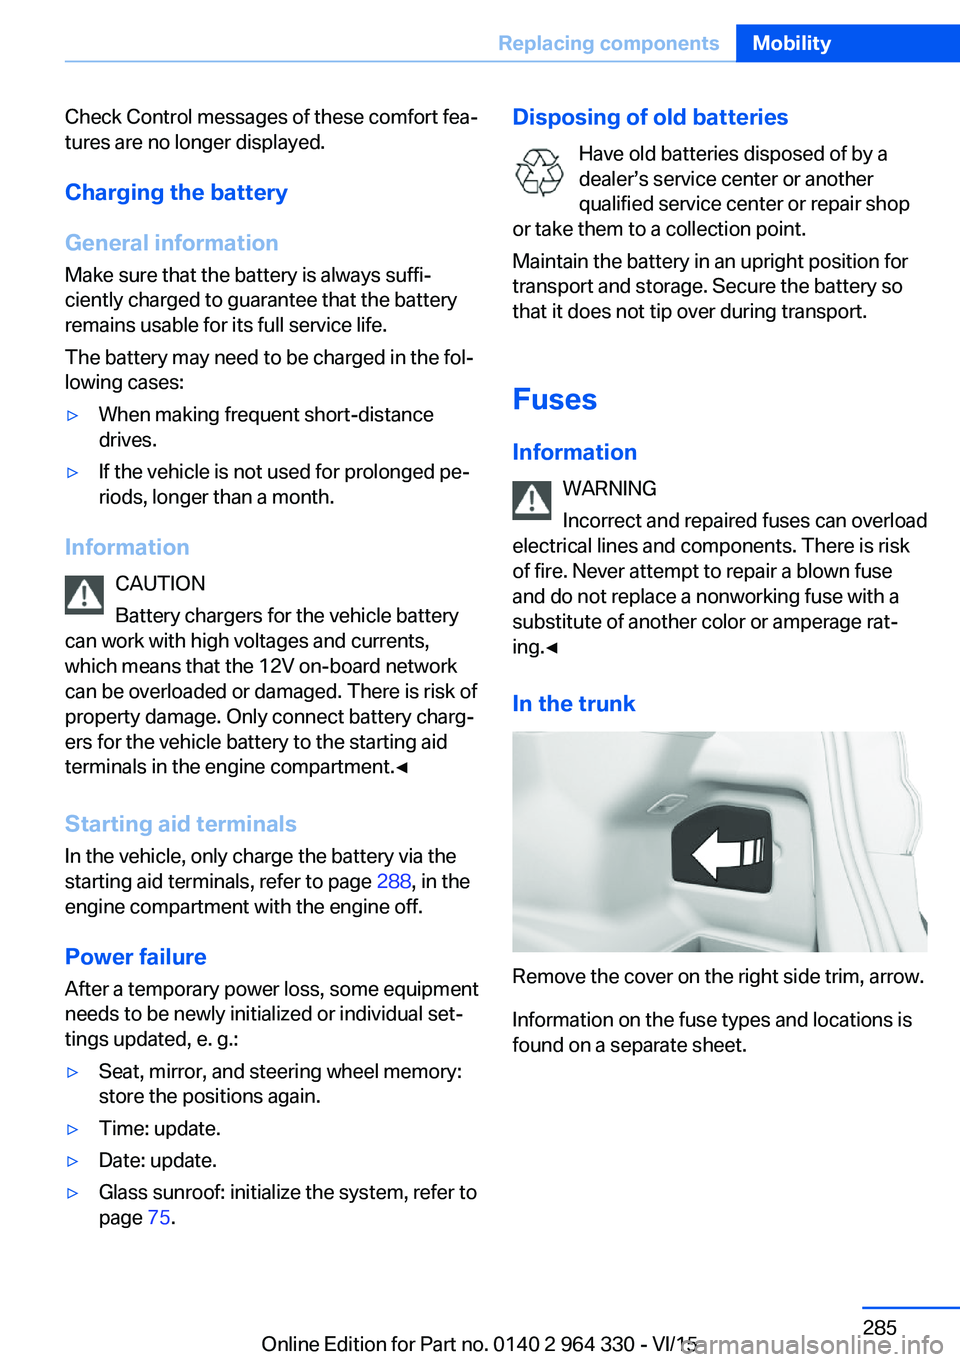
Remove the cover on the right side trim, arrow.
Information on the fuse types and locations is
found on a separate sheet.
Seite 285Replacing componentsMobility285
Online Edition for Part no. 0140 2 964 330 - VI/15
Page 290 of 314
Should it prove impossible to avoid mounting
the tow bar at an offset angle, please observe
the following:▷Maneuvering capability is limited going
around corners.▷The tow bar will generate lateral forces if it
is secured with an offset.
Tow rope
When starting to tow the vehicle, make sure
that the tow rope is taut.
To avoid jerking and the associated stresses
on the vehicle components when towing, al‐
ways use nylon ropes or nylon straps.
Tow fitting
General information
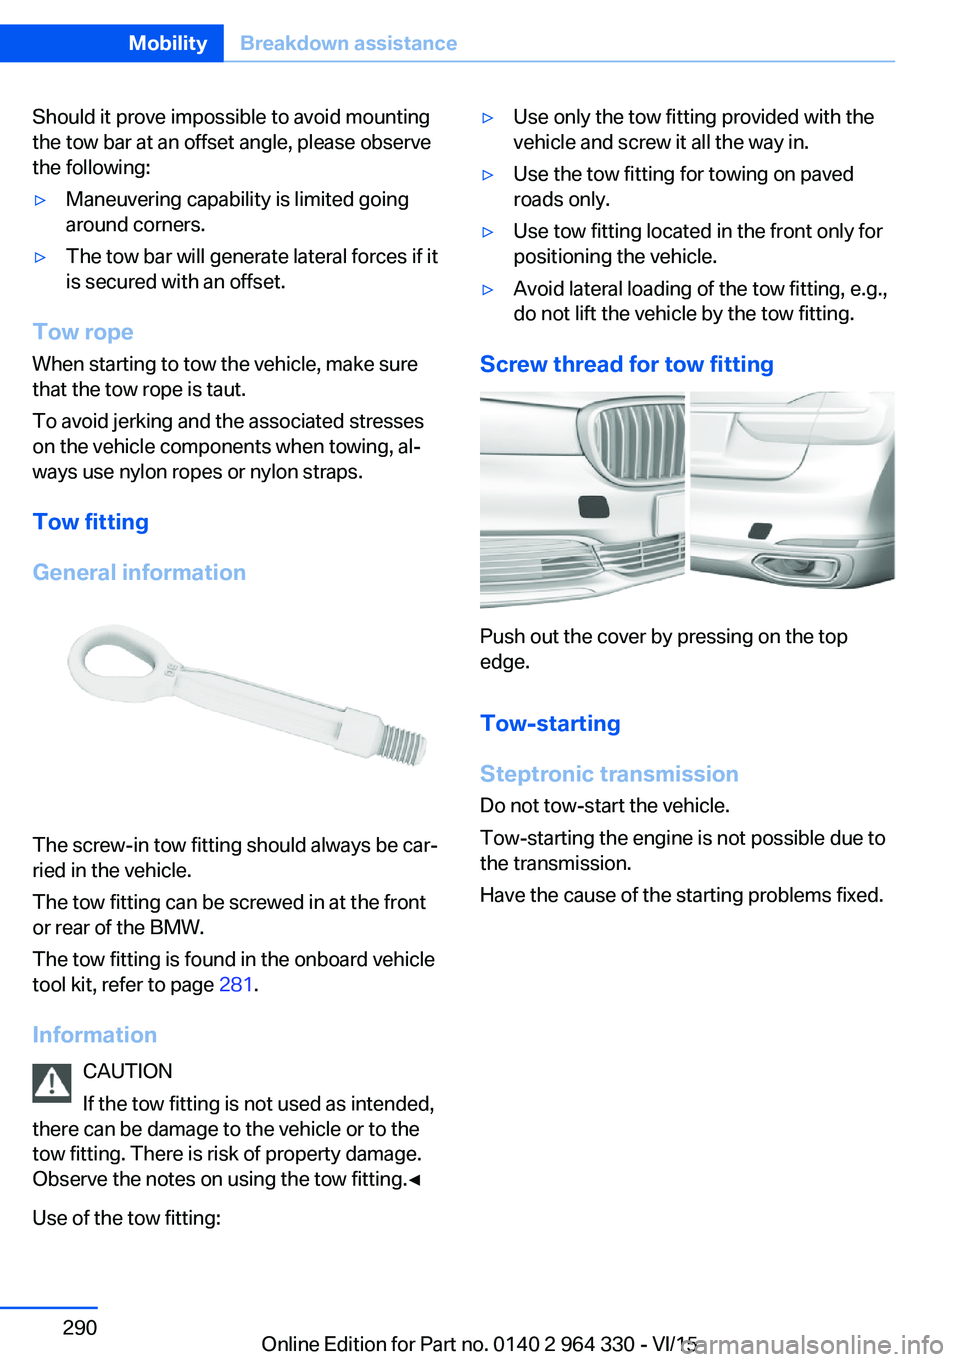
The screw-in tow fitting should always be car‐
ried in the vehicle.
The tow fitting can be screwed in at the front
or rear of the BMW.
The tow fitting is found in the onboard vehicle
tool kit, refer to page 281.
Information CAUTION
If the tow fitting is not used as intended,
there can be damage to the vehicle or to the
tow fitting. There is risk of property damage.
Observe the notes on using the tow fitting.◀
Use of the tow fitting:
▷Use only the tow fitting provided with the
vehicle and screw it all the way in.▷Use the tow fitting for towing on paved
roads only.▷Use tow fitting located in the front only for
positioning the vehicle.▷Avoid lateral loading of the tow fitting, e.g.,
do not lift the vehicle by the tow fitting.
Screw thread for tow fitting
Push out the cover by pressing on the top
edge.
Tow-starting
Steptronic transmission Do not tow-start the vehicle.
Tow-starting the engine is not possible due to
the transmission.
Have the cause of the starting problems fixed.
Seite 290MobilityBreakdown assistance290
Online Edition for Part no. 0140 2 964 330 - VI/15
Page 294 of 314
WARNING
Chemical cleansers can destroy the
safety belt webbing. Missing protective effect
of the safety belts. There is risk of injuries or
danger to life. Use only a mild soapy solution
for cleaning the safety belts.◀
Use only a mild soapy solution, with the safety
belts clipped into their buckles.
Do not allow the switchs to retract the safety
belts until they are dry.
Carpets and floor mats WARNING
Objects in the driver's floor area can limit
the pedal distance or block a depressed pedal.
There is risk of an accident. Stow objects in
the vehicle such that they are secured and
cannot enter into the driver's floor area. Use
floor mats that are suitable for the vehicle and
can be safely attached to the floor. Do not use
loose floor mats and do not layer several floor
mats. Make sure that there is sufficient clear‐
ance for the pedals. Ensure that the floor mats
are securely fastened again after they were re‐
moved, e.g. for cleaning.◀
Floor mats can be removed from the car's inte‐
rior for cleaning.
If the floor carpets are very dirty, clean with a
microfiber cloth and water or a textile cleaner.
To prevent matting of the carpet, rub back and
forth in the direction of travel only.
Sensor/camera lenses
To clean sensors and camera lenses, use a
cloth moistened with a small amount of glass
detergent.Displays/screens/protective glass of
the Head-up Display
CAUTION
Chemical cleansers, moisture or fluids of
any kind can damage the surface of displays
and screens. There is risk of property damage.
Clean with a clean, antistatic microfiber cloth.◀
CAUTION
The surface of displays can be damaged
with improper cleaning. There is risk of prop‐
erty damage. Avoid pressure that is too high
and do not use any scratching materials.◀
Clean with a clean, antistatic microfiber cloth.
Clean the protective glass of the Head-up Dis‐
play, refer to page 126, using a microfiber cloth
and commercially available dish-washing soap.
Long-term
When the vehicle is shut down for longer than
three months, special measures must be
taken. Further information is available from a
dealer’s service center or another qualified
service center or repair shop.Seite 294MobilityCare294
Online Edition for Part no. 0140 2 964 330 - VI/15
Page 303 of 314
BBackrest curvature, see Lum‐ bar support 77
Backrest, seats 76
Backrest, width 77
Band-aids, see First-aid kit 287
Bar for tow-starting/ towing 289
Basic position, rear seats 80
Battery replacement, vehicle battery 284
Battery replacement, vehicle remote control 55
Battery, vehicle 284
Being towed, see tow-start‐ ing/towing 289
Belts, safety belts 80
Beverage holder, cu‐ pholder 228
Blinds, sun protection 72
Bluetooth connection 42
BMW Assist 6
BMW display key 55
BMW Driver’s Guide App 6
BMW gesture control 30
BMW Homepage 6
BMW Internet page 6
BMW maintenance sys‐ tem 279
BMW Touch Command 36
Bonus range, ECO PRO 243
Bottle holder, see Cu‐ pholder 228
Brake assistant 163
Brake assistant, adaptive 163
Brake discs, break-in 234
Brake force display 160
Brake lights, adaptive 160
Brake lights, brake force dis‐ play 160
Brake pads, break-in 234
Braking, hints 235
Breakdown assistance 286
Break-in 234 Brightness of Control Dis‐
play 39
Bulb replacement 282
Bulb replacement, front 282
Bulb replacement, front lamps 282
Bulb replacement, rear 282
Bulb replacement, tail lamps 282
Bulbs and lights 282
Button, Start/Stop 97
Bypassing, see Jump-start‐ ing 287
C
California Proposition 65 Warning 8
Calling up mirror adjust‐ ment 68
Calling up seat adjust‐ ment 68
Calling up steering wheel ad‐ justment 68
Camera-based damping ad‐ justment 201
Camera lenses, care 294
Camera, rearview camera, without Surround View 184
Camera, see Surround View 187
Can holder, see Cu‐ pholder 228
Captain’s chair 89
Car battery 284
Car care products 292
Care, displays 294
Care, vehicle 292
Cargo 237
Cargo area, storage compart‐ ments 229
Cargo, securing 238
Cargo straps, securing cargo 238
Car key, see Remote con‐ trol 54 Carpet, care 294
Cartridge replacement, see Ambient air package 211
Car wash 291
Catalytic converter, see Hot exhaust system 235
CBS Condition Based Serv‐ ice 279
Center armrest 227
Center console 16
Central locking system 63
Central screen, see Control Display 21
Changes, technical, see Own Safety 7
Changing parts 281
Changing wheels 282
Changing wheels/tires 258
Chassis number, see vehicle identification number 10
Check Control 114
Checking the engine oil level electronically 273
Checking the oil level elec‐ tronically 273
Children, seating position 93
Children, transporting safely 93
Child restraint fixing sys‐ tem 93
Child restraint fixing system LATCH 95
Child restraint fixing systems, mounting 94
Child safety locks 96
Child seat, mounting 94
Child seats 93
Chrome parts, care 293
Cigarette lighter 218
Cleaning displays 294
Climate control 203
Climate control on roof‐ liner 209
Clock 118
Closing the trunk lid with no- touch activation 66 Seite 303Everything from A to ZReference303
Online Edition for Part no. 0140 2 964 330 - VI/15