2016 BMW 7 SERIES Start
[x] Cancel search: StartPage 58 of 314

▷Place remote control with the lock button
upward in the bulge of the wireless charg‐
ing station underneath the center armrest.▷Connect the remote control via the micro
USB socket on the left side to a USB port.
Software information
To display information stored in the BMW dis‐
play key about the OpenSource software used,
proceed as follows:
1.Menu "Security information"2. , Tap symbol.3. / Tap the symbol three times.
To end the display:
Tap symbol.
Profile The concept In the profiles, individual settings for several
drivers can be saved and called up again at a
later time.
General information
There are three profiles with which personal
vehicle settings can be stored. Every remote
control has one of these profiles assigned.
If the vehicle is unlocked using a remote con‐
trol, the assigned personal profile will be acti‐
vated. All settings stored in the profile are au‐
tomatically applied.
If several drivers use their own remote control,
the vehicle will adjust the personal settings
during unlocking. These settings are also re‐
stored, if the vehicle has been used in the
meantime by a person with a different remote
control.
Changes to the settings are automatically
saved in the profile currently activated.
If another profile is selected via iDrive, the set‐
tings saved in it will be applied automatically.
The new profile is assigned to the remote con‐
trol currently used.
There is an additional profile available that is
not assigned to any remote control: "Just drive
off (guest)". It can be used to apply settings in
the vehicle without changing the personal pro‐
files.
Active profile
After switching on the Control Display, the
name of the active profile is displayed.
It is possible to jump directly to the Profile
management, refer to page 59, in order to
select your own profile, for example. This allow
you to call up personal vehicle settings if you
did not unlock the vehicle with your own key.1."Change driver profile"2.Select profile, refer to page 59.
As soon as the engine is started or any key is
pressed, the last selected key is displayed on
the Control Display.
To exit the welcome screen via iDrive:
"Start system"
Adjusting The settings for the following systems and
functions are saved in the active profile. The
scope of storable settings is country- and
equipment-dependable.
▷Unlocking and locking.▷Lights.▷Climate control.▷Radio.Seite 58ControlsOpening and closing58
Online Edition for Part no. 0140 2 964 330 - VI/15
Page 64 of 314

Trunk lidInformation To avoid locking it into the vehicle, do not
place the remote control in the cargo area.
Opening
During opening, the trunk lid pivots back and
up. Ensure that adequate clearance is available
before opening.▷Press button on the exterior of the trunk
lid.▷Press and hold button on the re‐ mote control for approx. one sec‐
ond.
As the case may be, the doors are also un‐
locked. Opening with the remote control,
refer to page 61.▷Press button in the storage com‐
partment of the driver's door.
The opening procedure is interrupted:
▷By pressing the button again.▷When starting the engine.▷When the vehicle starts moving.▷By pressing the button on the inside of the
tailgate.
Closing
Without Comfort Access:
▷Press button on the inside of the trunk lid.
The trunk lid closes automatically.
With Comfort Access:
▷Press button, arrow 1, on the inside of the
trunk lid.▷Press button, arrow 2.
The vehicle will be locked after closing the
tailgate. The driver's door must be closed
for this purpose and the remote control
must be outside of the vehicle in the area
of the trunk lid.
An acoustic signal sounds and the tailgate
closes.
The closing operation is interrupted:
▷By pressing the button again.▷When starting the engine.▷The vehicle starts off with jerks.
WARNING
Body parts can be jammed when operat‐
ing the tailgate. There is risk of injuries. Make
sure that the area of movement of the tailgate
is clear during opening and closing.◀
Seite 64ControlsOpening and closing64
Online Edition for Part no. 0140 2 964 330 - VI/15
Page 65 of 314

Manual operationIn the event of an electrical malfunction, man‐
ually operate the unlocked trunk lid slowly and
smoothly.
WARNING
Body parts can be jammed when operat‐
ing the tailgate. There is risk of injuries. Make
sure that the area of movement of the tailgate
is clear during opening and closing.◀
Locking separately The trunk lid can be locked separately with the
switch in the glove compartment. If the glove
compartment is locked, the trunk lid cannot be
opened.▷Trunk lid secured, arrow 1.▷Trunk lid not secured, ar‐
row 2.
Slide the switch into the arrow 1 position. This
secures the trunk lid and disconnects it from
the central locking system.
This is beneficial when the vehicle is parked
using valet service. The remote control can be
handed out without the integrated key.
Emergency unlocking
Pull the handle inside the trunk.
The trunk lid unlocks.
Comfort Access
Information
To avoid locking it into the vehicle, do not
place the remote control in the cargo area.
The concept
The vehicle can be accessed without activat‐
ing the remote control.
All you need to do is to have the remote con‐ trol with you, such as in your pants pocket.
The vehicle automatically detects the remote
control when it is in close proximity or in the
car's interior.
Comfort Access supports the following func‐
tions:▷Unlocking/locking of the vehicle.▷Convenient closing.▷Opening/closing the tailgate individually.▷Open/close trunk lid with no-touch activa‐
tion.▷Start the engine.
Functional requirements
▷There are no external sources of interfer‐
ence nearby.▷To lock the vehicle, the remote control
must be located outside of the vehicle near
the doors.▷The next unlocking and locking cycle is not
possible until after approx. 2 seconds.▷The engine can only be started if the re‐
mote control is in the vehicle.Seite 65Opening and closingControls65
Online Edition for Part no. 0140 2 964 330 - VI/15
Page 68 of 314

3."Doors/Key"4. "Driver's door"
or
"All doors"
5.Select desired setting:▷"Driver's door"
Only the driver's door and the fuel filler
flap are unlocked. Pressing again un‐
locks the entire vehicle.▷"All doors"
The entire vehicle is unlocked.
Trunk lid
Depending on optional features and country
version, this setting is not offered in some
cases.
About iDrive:
1."My Vehicle"2."Vehicle settings"3."Doors/Key"4. "Tailgate"
or
"Tailgate and door(s)"
5.Select desired setting:▷"Tailgate"
The trunk lid is opened.▷"Tailgate and door(s)"
The trunk lid is opened and the doors
are unlocked.
Confirmation signals from the vehicle
About iDrive:
1."My Vehicle"2."Vehicle settings"3."Doors/Key"4.Deactivate or activate the desired confir‐
mation signals.▷"Flash for lock/unlock"▷"Acoustic signal for lock/unlock"
Automatic locking
About iDrive:
1."My Vehicle"2."Vehicle settings"3."Doors/Key"4.Select desired setting:▷"Lock automatically"
The vehicle locks automatically after a
short period of time if no door is
opened.▷"Lock after starting to drive"
The vehicle locks automatically after
you drive off.
Automatic unlocking
About iDrive:
1."My Vehicle"2."Vehicle settings"3."Doors/Key"4."Unlock at end of trip"
After drive readiness is ended by pressing
the Start/Stop button, the locked vehicle is
automatically unlocked.
Retrieving the seat, mirror, and
steering wheel settings
On unlocking of the vehicle, the positions for
the driver's seat, exterior mirror, and steering wheel stored in the profile are automatically re‐
trieved.
WARNING
There is risk of jamming when moving
the seats. There is risk of injuries or risk of
property damage. Make sure that the area of
movement of the seat is clear prior to any ad‐
justment.◀
Seite 68ControlsOpening and closing68
Online Edition for Part no. 0140 2 964 330 - VI/15
Page 70 of 314

▷The indicator lamp flashes after unlocking
until drive readiness is switched on, but no
longer than approx. 5 minutes:
An alarm has been triggered.
Tilt alarm sensor The tilt of the vehicle is monitored.
The alarm system responds in situations such
as attempts to steal a wheel or when the car is
towed.
Interior motion sensor The windows and glass sunroof must be
closed for the system to function properly.
Avoiding unintentional alarms The tilt alarm sensor and interior motion sen‐
sor can be switched off together, such as in
the following situations:
▷In automatic car washes.▷In duplex garages.▷During transport on trains carrying vehi‐
cles, at sea or on a trailer.▷With animals in the vehicle.
Switching off the tilt alarm sensor and
interior motion sensor
Press the remote control button again
within 10 seconds as soon as the vehicle
is locked.
The indicator lamp lights up for approx. 2 sec‐
onds and then continues to flash.
The tilt alarm sensor and interior motion sen‐
sor are turned off until the vehicle is locked
again.
Switching off the alarm
▷Unlock the vehicle using the remote con‐
trol, if needed, through emergency detec‐
tion of the remote control, refer to page 55.▷With Comfort Access: if you are carrying
the remote control on your person, grasp
the driver side or front passenger side door
handle completely.
Power windows
Information WARNING
Unattended children or animals can
move the vehicle and endanger themselves
and traffic, e.g. with the following actions:
▷Pressing the Start/Stop button.▷Releasing the parking brake.▷Opening and closing of doors or windows.▷Shifting the selector lever into neutral.▷Using vehicle equipment.
There is risk of accidents or injuries. Do not
leave children or animals unattended in the ve‐
hicle. Carry remote control along when exiting
and lock the vehicle.◀
Opening
▷Press the button to the resistance
point.
The window opens while the switch is held.▷Press the switch beyond the resist‐
ance point.
The window opens automatically. Pressing
the switch again stops the motion.
See also: Convenient opening, refer to
page 61, via remote control.
Seite 70ControlsOpening and closing70
Online Edition for Part no. 0140 2 964 330 - VI/15
Page 73 of 314

Roller sunblinds in the side windows
Overview
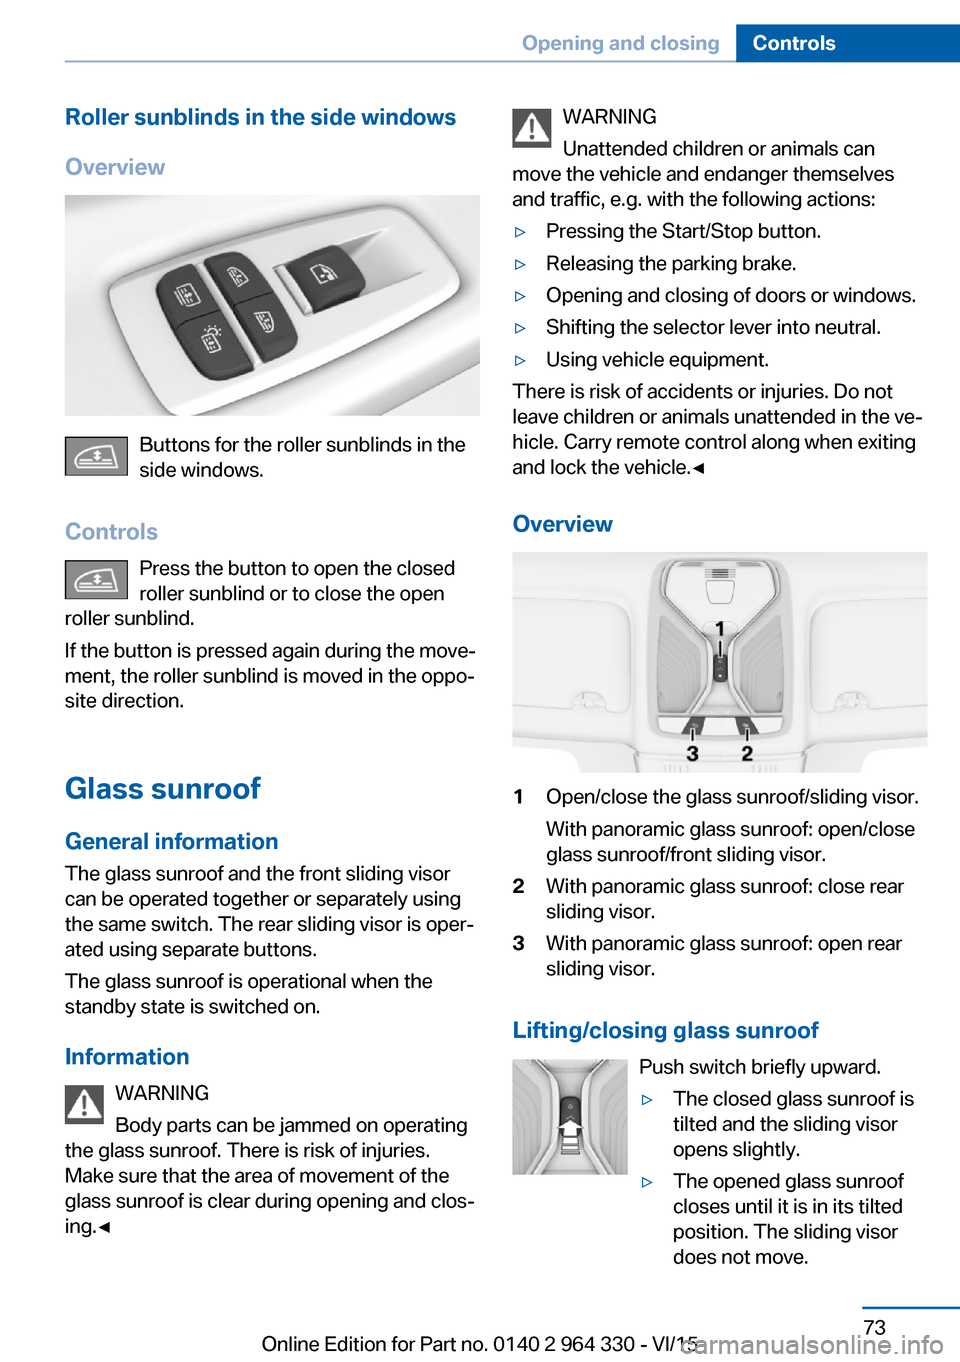
Buttons for the roller sunblinds in the
side windows.
Controls Press the button to open the closed
roller sunblind or to close the open
roller sunblind.
If the button is pressed again during the move‐
ment, the roller sunblind is moved in the oppo‐
site direction.
Glass sunroof General information
The glass sunroof and the front sliding visor
can be operated together or separately using
the same switch. The rear sliding visor is oper‐
ated using separate buttons.
The glass sunroof is operational when the
standby state is switched on.
Information WARNING
Body parts can be jammed on operating
the glass sunroof. There is risk of injuries.
Make sure that the area of movement of the
glass sunroof is clear during opening and clos‐
ing.◀
WARNING
Unattended children or animals can
move the vehicle and endanger themselves
and traffic, e.g. with the following actions:▷Pressing the Start/Stop button.▷Releasing the parking brake.▷Opening and closing of doors or windows.▷Shifting the selector lever into neutral.▷Using vehicle equipment.
There is risk of accidents or injuries. Do not
leave children or animals unattended in the ve‐
hicle. Carry remote control along when exiting
and lock the vehicle.◀
Overview
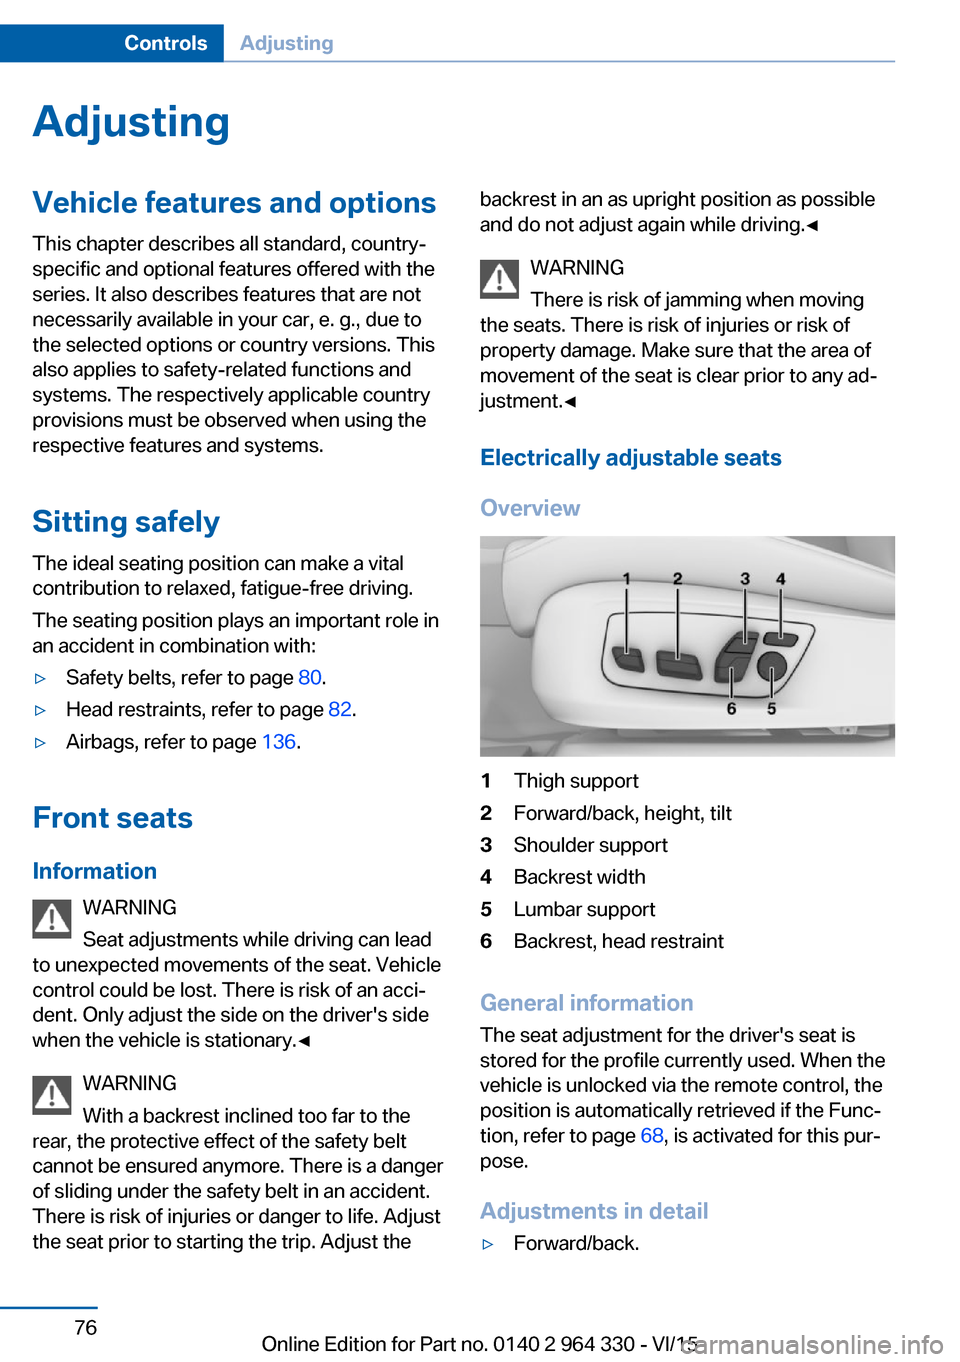
1Open/close the glass sunroof/sliding visor.
With panoramic glass sunroof: open/close
glass sunroof/front sliding visor.2With panoramic glass sunroof: close rear
sliding visor.3With panoramic glass sunroof: open rear
sliding visor.
Lifting/closing glass sunroof
Push switch briefly upward.
▷The closed glass sunroof is
tilted and the sliding visor
opens slightly.▷The opened glass sunroof
closes until it is in its tilted
position. The sliding visor
does not move.Seite 73Opening and closingControls73
Online Edition for Part no. 0140 2 964 330 - VI/15
Page 76 of 314

AdjustingVehicle features and options
This chapter describes all standard, country-
specific and optional features offered with the
series. It also describes features that are not
necessarily available in your car, e. g., due to
the selected options or country versions. This
also applies to safety-related functions and
systems. The respectively applicable country
provisions must be observed when using the
respective features and systems.
Sitting safely The ideal seating position can make a vital
contribution to relaxed, fatigue-free driving.
The seating position plays an important role in
an accident in combination with:▷Safety belts, refer to page 80.▷Head restraints, refer to page 82.▷Airbags, refer to page 136.
Front seats
Information WARNING
Seat adjustments while driving can lead
to unexpected movements of the seat. Vehicle
control could be lost. There is risk of an acci‐
dent. Only adjust the side on the driver's side
when the vehicle is stationary.◀
WARNING
With a backrest inclined too far to the
rear, the protective effect of the safety belt
cannot be ensured anymore. There is a danger
of sliding under the safety belt in an accident.
There is risk of injuries or danger to life. Adjust
the seat prior to starting the trip. Adjust the
backrest in an as upright position as possible
and do not adjust again while driving.◀
WARNING
There is risk of jamming when moving
the seats. There is risk of injuries or risk of
property damage. Make sure that the area of
movement of the seat is clear prior to any ad‐
justment.◀
Electrically adjustable seats
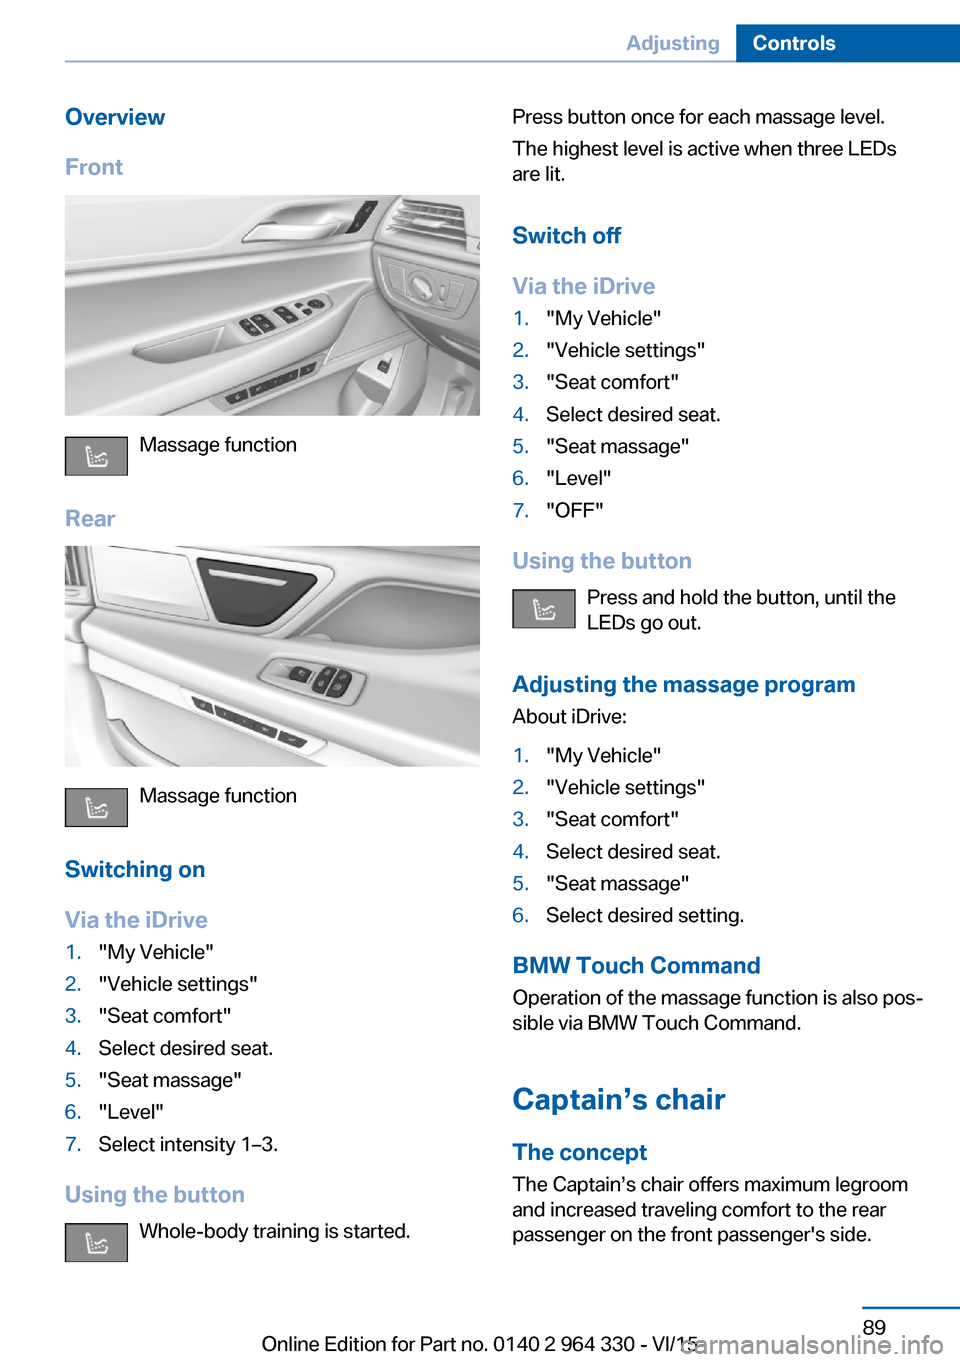
Overview1Thigh support2Forward/back, height, tilt3Shoulder support4Backrest width5Lumbar support6Backrest, head restraint
General information
The seat adjustment for the driver's seat is
stored for the profile currently used. When the
vehicle is unlocked via the remote control, the
position is automatically retrieved if the Func‐
tion, refer to page 68, is activated for this pur‐
pose.
Adjustments in detail
▷Forward/back.Seite 76ControlsAdjusting76
Online Edition for Part no. 0140 2 964 330 - VI/15
Page 89 of 314

Overview
Front
Massage function
Rear
Massage function
Switching on
Via the iDrive
1."My Vehicle"2."Vehicle settings"3."Seat comfort"4.Select desired seat.5."Seat massage"6."Level"7.Select intensity 1–3.
Using the button Whole-body training is started.
Press button once for each massage level.
The highest level is active when three LEDs
are lit.
Switch off
Via the iDrive1."My Vehicle"2."Vehicle settings"3."Seat comfort"4.Select desired seat.5."Seat massage"6."Level"7."OFF"
Using the button Press and hold the button, until the
LEDs go out.
Adjusting the massage program About iDrive:
1."My Vehicle"2."Vehicle settings"3."Seat comfort"4.Select desired seat.5."Seat massage"6.Select desired setting.
BMW Touch Command
Operation of the massage function is also pos‐
sible via BMW Touch Command.
Captain’s chair
The concept The Captain’s chair offers maximum legroom
and increased traveling comfort to the rear
passenger on the front passenger's side.
Seite 89AdjustingControls89
Online Edition for Part no. 0140 2 964 330 - VI/15