2016 BMW 435I XDRIVE CONVERTIBLE Sport
[x] Cancel search: SportPage 9 of 247
ContentsThe fastest way to find information on a partic‐
ular topic or item is by using the index, refer to
page 232.6Notes
At a glance
14Cockpit18iDrive27Voice activation system30Integrated Owner's Manual in the vehicle
Controls
34Opening and closing52Adjusting61Transporting children safely64Driving76Displays91Lights96Safety119Driving stability control systems124Driving comfort145Climate control153Interior equipment163Storage compartments
Driving tips
168Things to remember when driving171Loading173Saving fuelMobility182Refueling184Fuel186Wheels and tires199Engine compartment201Engine oil204Coolant205Maintenance207Replacing components216Breakdown assistance221Care
Reference
228Technical data232Everything from A to Z
Online Edition for Part no. 01 40 2 960 547 - II/15
Page 14 of 247
wood, New Jersey 07675-1227, Telephone
1-800-831-1117.
If NHTSA receives similar complaints, it may
open an investigation, and if it finds that a
safety defect exists in a group of vehicles, it
may order a recall and remedy campaign.
However, NHTSA cannot become involved in
individual problems between you, your dealer,
or BMW of North America, LLC.
To contact NHTSA, you may call the Vehicle
Safety Hotline toll-free at 1-888-327-4236
(TTY: 1-800-424-9153); go to http://
www.safercar.gov; or write to: Administrator,
NHTSA, 400 Seventh Street, SW., Washing‐
ton, DC 20590. You can also obtain other in‐
formation about motor vehicle safety from
http://www.safercar.gov.
For Canadian customers
Canadian customers who wish to report a
safety-related defect to Transport Canada, De‐
fect Investigations and Recalls, may call the
toll-free hotline 1-800-333-0510. You can also
obtain other information about motor vehicle
safety from http://www.tc.gc.ca/roadsafety.Seite 10Notes10
Online Edition for Part no. 01 40 2 960 547 - II/15
Page 43 of 247
Malfunction
Remote control detection by the vehicle can
among others be malfunctioning under the fol‐
lowing circumstances:▷The battery of the remote control is dis‐
charged. Replace the battery, refer to
page 35.▷Interference of the radio connection from
transmission towers or other equipment
with high transmit power.▷Shielding of the remote control due to
metal objects.▷Interference of the radio connection from
mobile phones or other electronic devices
in direct proximity.
Do not transport the remote control together
with metal objects or electronic devices.
In the case of interference, the vehicle can also
be unlocked and locked from the outside with‐
out remote control, refer to page 39.
For US owners only
The transmitter and receiver units comply with
part 15 of the FCC/Federal Communication
Commission regulations. Operation is gov‐
erned by the following:
FCC ID:
▷LX8766S.▷LX8766E.▷LX8CAS.▷LX8CAS2.▷MYTCAS4.
Compliance statement:
This device complies with part 15 of the FCC
Rules. Operation is subject to the following
two conditions:
▷This device may not cause harmful inter‐
ference, and▷this device must accept any interference
received, including interference that may
cause undesired operation.Any unauthorized modifications or changes to
these devices could void the user's authority to
operate this equipment.
Without remote control
From the outside Locking from the outside
Do not lock the vehicle from the outside
with people inside the car, as the vehicle can‐
not be unlocked from inside without special
knowledge.◀
Remove the key before pulling the door
handle
Before pulling the outside door handle, remove
the key to avoid damaging the paintwork and
the key.◀
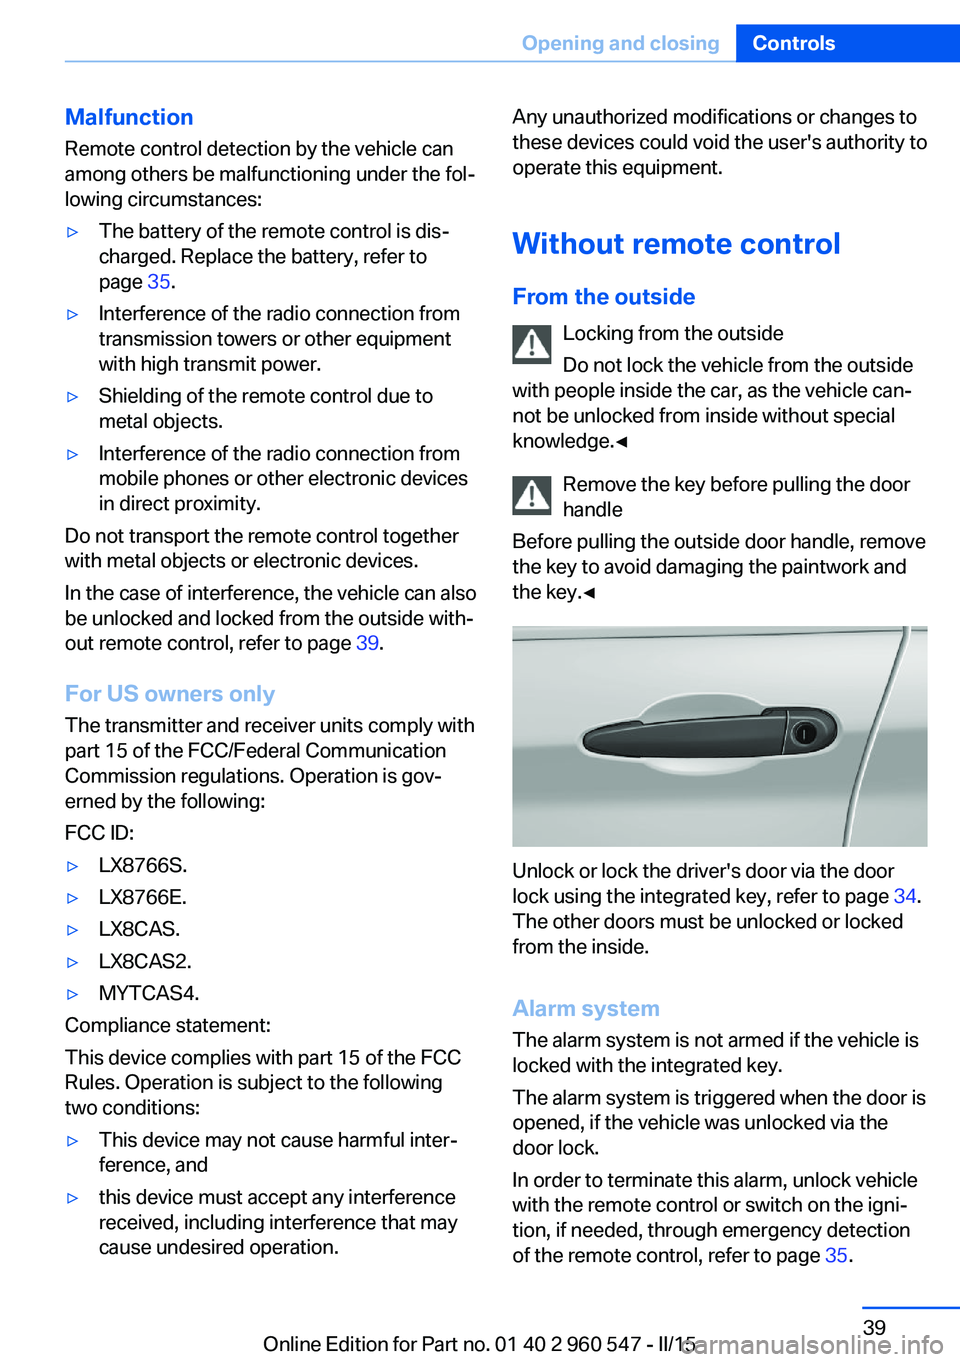
Unlock or lock the driver's door via the door
lock using the integrated key, refer to page 34.
The other doors must be unlocked or locked
from the inside.
Alarm system
The alarm system is not armed if the vehicle is
locked with the integrated key.
The alarm system is triggered when the door is
opened, if the vehicle was unlocked via the door lock.
In order to terminate this alarm, unlock vehicle
with the remote control or switch on the igni‐
tion, if needed, through emergency detection
of the remote control, refer to page 35.
Seite 39Opening and closingControls39
Online Edition for Part no. 01 40 2 960 547 - II/15
Page 46 of 247
Locking
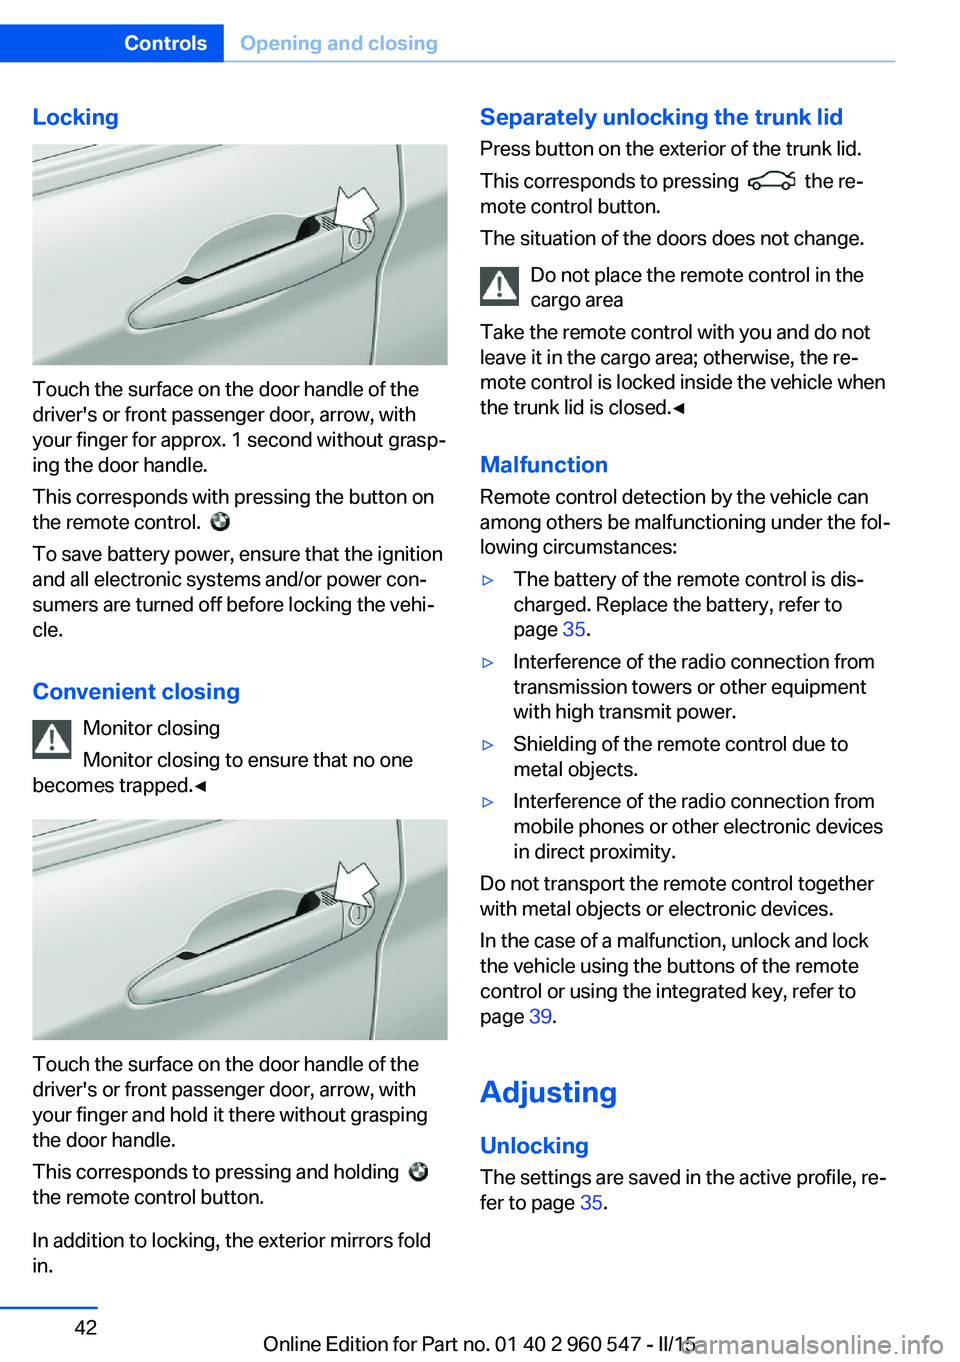
Touch the surface on the door handle of the
driver's or front passenger door, arrow, with
your finger for approx. 1 second without grasp‐
ing the door handle.
This corresponds with pressing the button on
the remote control.
To save battery power, ensure that the ignition
and all electronic systems and/or power con‐
sumers are turned off before locking the vehi‐
cle.
Convenient closing Monitor closing
Monitor closing to ensure that no one
becomes trapped.◀
Touch the surface on the door handle of the
driver's or front passenger door, arrow, with
your finger and hold it there without grasping
the door handle.
This corresponds to pressing and holding
the remote control button.
In addition to locking, the exterior mirrors fold
in.
Separately unlocking the trunk lid
Press button on the exterior of the trunk lid.
This corresponds to pressing
the re‐
mote control button.
The situation of the doors does not change.
Do not place the remote control in the
cargo area
Take the remote control with you and do not
leave it in the cargo area; otherwise, the re‐
mote control is locked inside the vehicle when
the trunk lid is closed.◀
Malfunction
Remote control detection by the vehicle can
among others be malfunctioning under the fol‐
lowing circumstances:
▷The battery of the remote control is dis‐
charged. Replace the battery, refer to
page 35.▷Interference of the radio connection from
transmission towers or other equipment
with high transmit power.▷Shielding of the remote control due to
metal objects.▷Interference of the radio connection from
mobile phones or other electronic devices
in direct proximity.
Do not transport the remote control together
with metal objects or electronic devices.
In the case of a malfunction, unlock and lock
the vehicle using the buttons of the remote
control or using the integrated key, refer to
page 39.
Adjusting
Unlocking The settings are saved in the active profile, re‐
fer to page 35.
Seite 42ControlsOpening and closing42
Online Edition for Part no. 01 40 2 960 547 - II/15
Page 49 of 247

hardtop is open. Falling objects such as leaves
can trigger the alarm unintentionally.
Avoiding unintentional alarms
The tilt alarm sensor and interior motion sen‐
sor can be switched off together, such as in
the following situations:▷In automatic car washes.▷In duplex garages.▷During transport on trains carrying vehi‐
cles, at sea or on a trailer.▷With animals in the vehicle.
Switching off the tilt alarm sensor and
interior motion sensor
Press the remote control button again
within 10 seconds as soon as the vehicle
is locked.
The indicator lamp lights up for approx. 2 sec‐
onds and then continues to flash.
The tilt alarm sensor and interior motion sen‐
sor are turned off, until the vehicle is locked again.
Switching off the alarm
▷Unlock vehicle with the remote control or
switch on the ignition, if needed through
emergency detection of remote control, re‐
fer to page 35.▷With Comfort Access: if you are carrying
the remote control on your person, grasp
the driver side or front passenger side door
handle completely.Power windows
Hint Take the remote control with you
Take the remote control with you when
leaving the vehicle so that children, e.g., can‐
not operate the power windows and injure
themselves.◀
Opening individually
▷ Press the button to the resistance
point.
The window opens while the switch is held.▷ Press the switch beyond the resist‐
ance point.
The window opens automatically. Pressing
the switch again stopse the motion.
See also: Convenient opening, refer to
page 37, via remote control.
Opening together
▷ Press the button to the resistance
point.
All windows open while the switch is being
held.▷ Press the switch beyond the resist‐
ance point.
All windows open automatically.
Pressing again stops the motion.
Seite 45Opening and closingControls45
Online Edition for Part no. 01 40 2 960 547 - II/15
Page 53 of 247
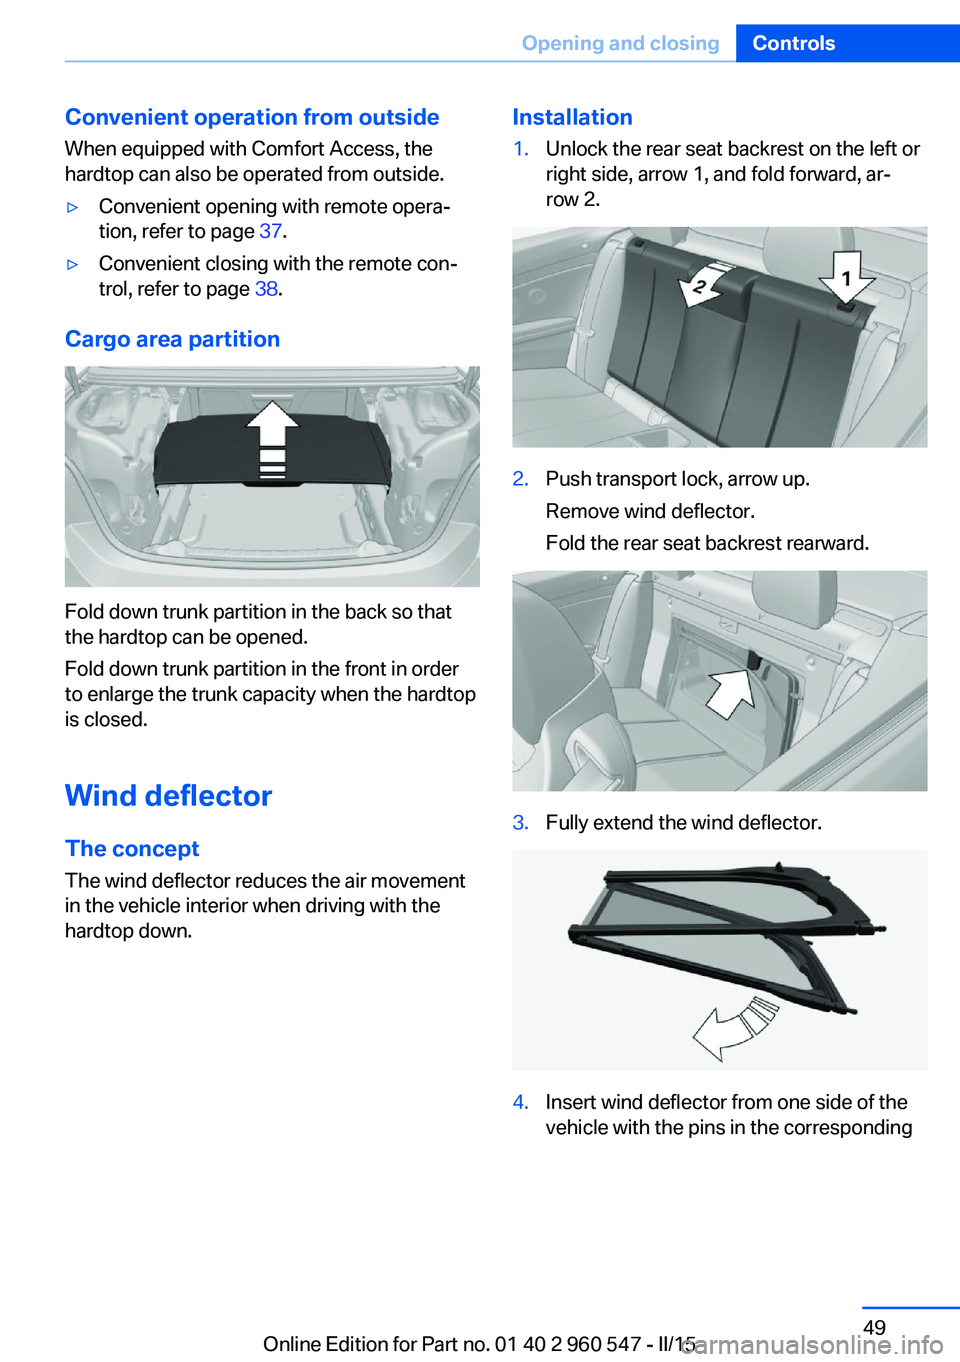
Convenient operation from outside
When equipped with Comfort Access, the
hardtop can also be operated from outside.▷Convenient opening with remote opera‐
tion, refer to page 37.▷Convenient closing with the remote con‐
trol, refer to page 38.
Cargo area partition
Fold down trunk partition in the back so that
the hardtop can be opened.
Fold down trunk partition in the front in order
to enlarge the trunk capacity when the hardtop
is closed.
Wind deflector
The concept The wind deflector reduces the air movement
in the vehicle interior when driving with the
hardtop down.
Installation1.Unlock the rear seat backrest on the left or
right side, arrow 1, and fold forward, ar‐
row 2.2.Push transport lock, arrow up.
Remove wind deflector.
Fold the rear seat backrest rearward.3.Fully extend the wind deflector.4.Insert wind deflector from one side of the
vehicle with the pins in the correspondingSeite 49Opening and closingControls49
Online Edition for Part no. 01 40 2 960 547 - II/15
Page 54 of 247
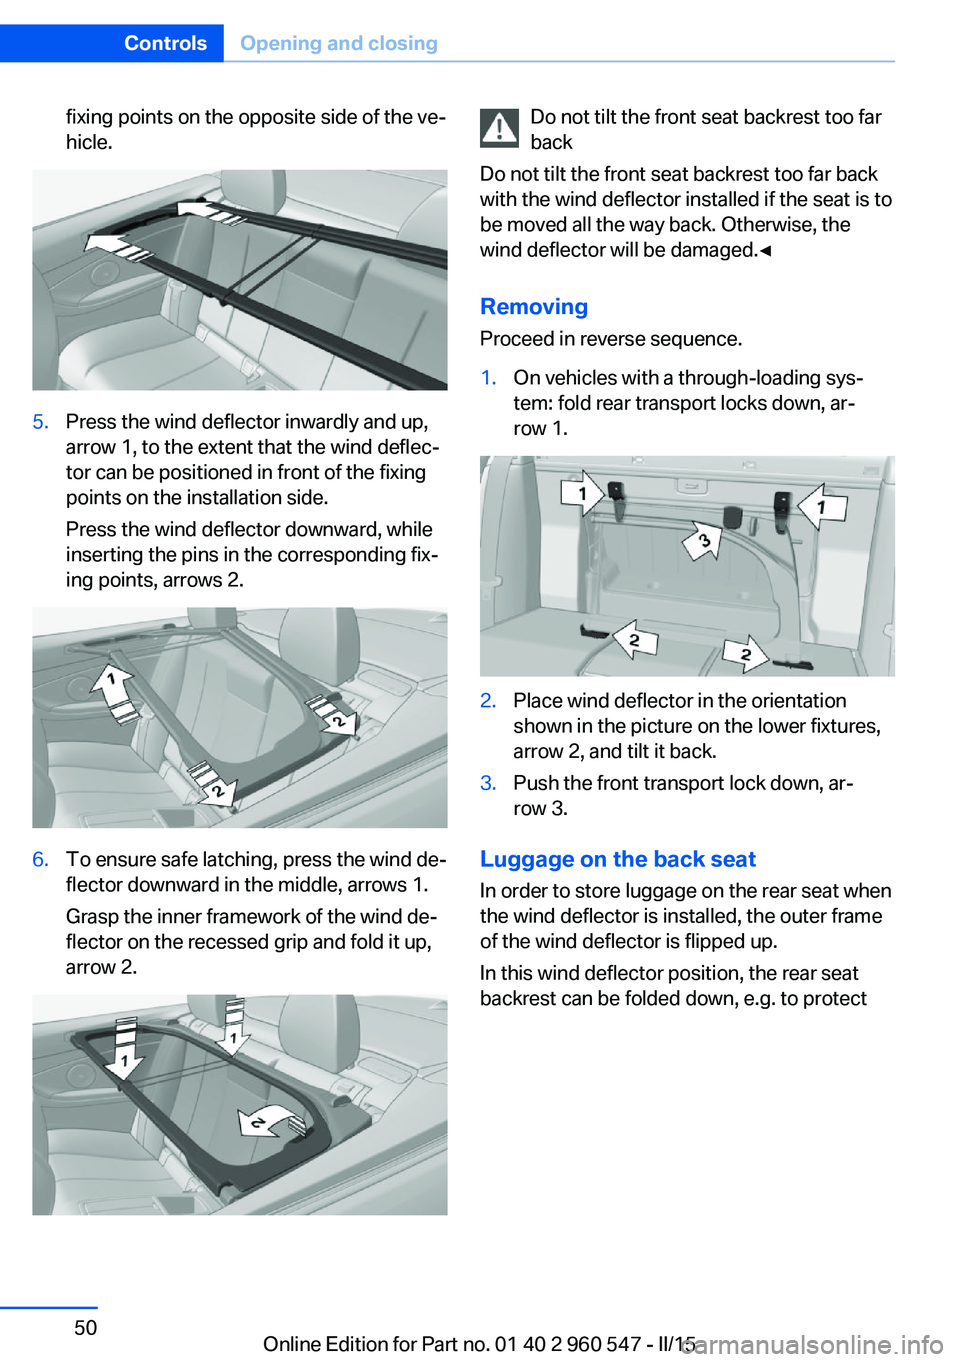
fixing points on the opposite side of the ve‐
hicle.5.Press the wind deflector inwardly and up,
arrow 1, to the extent that the wind deflec‐
tor can be positioned in front of the fixing
points on the installation side.
Press the wind deflector downward, while
inserting the pins in the corresponding fix‐
ing points, arrows 2.6.To ensure safe latching, press the wind de‐
flector downward in the middle, arrows 1.
Grasp the inner framework of the wind de‐
flector on the recessed grip and fold it up,
arrow 2.Do not tilt the front seat backrest too far
back
Do not tilt the front seat backrest too far back
with the wind deflector installed if the seat is to
be moved all the way back. Otherwise, the
wind deflector will be damaged.◀
RemovingProceed in reverse sequence.1.On vehicles with a through-loading sys‐
tem: fold rear transport locks down, ar‐
row 1.2.Place wind deflector in the orientation
shown in the picture on the lower fixtures,
arrow 2, and tilt it back.3.Push the front transport lock down, ar‐
row 3.
Luggage on the back seat
In order to store luggage on the rear seat when
the wind deflector is installed, the outer frame
of the wind deflector is flipped up.
In this wind deflector position, the rear seat
backrest can be folded down, e.g. to protect
Seite 50ControlsOpening and closing50
Online Edition for Part no. 01 40 2 960 547 - II/15
Page 65 of 247
Transporting children safelyVehicle features and optionsThis chapter describes all standard, country-
specific and optional features offered with the
series. It also describes features that are not
necessarily available in your car, e. g., due tothe selected options or country versions. This
also applies to safety-related functions and
systems. The respectively applicable country
provisions must be observed when using the
respective features and systems.
The right place for children
Note
Children in the vehicle
Do not leave children unattended in the
vehicle; otherwise, they could endanger them‐
selves and other persons, e.g., by opening the
doors.◀
Children should always be in the rear Accident research shows that the safest place
for children is in the back seat.
Transporting children in the rear
Only transport children younger than
13 years of age or shorter than 5 ft/150 cm in
the rear in child restraint systems provided in
accordance with the age, weight and size of
the child; otherwise, there is an increased risk
of injury in an accident.
Children 13 years of age or older must wear a
safety belt as soon as a suitable child restraint
system can no longer be used due to their age,
weight and size.◀
Children on the front passenger seat
Should it ever be necessary to use a child re‐
straint system in the front passenger seat,
make sure that the front, knee and side airbags
on the front passenger side are deactivated.
Automatic deactivation of front-seat passen‐
ger airbags, refer to page 98.Note
Deactivating the front-seat passenger
airbags
If a child restraint system is used in the front
passenger seat, deactivate the front-seat pas‐
senger airbags; otherwise, there is an in‐
creased risk of injury to the child when the air‐
bags are activated, even with a child restraint
system.◀
Installing child restraint
systems
Hints Manufacturer's information for child re‐straint systems
To select, mount and use child restraint sys‐
tems, observe the information provided by the
system manufacturer; otherwise, the protec‐
tive effect can be lost.◀
Ensuring the stability of the child seat
When installing child restraint systems,
make sure that the child seat is securely fas‐
tened to the backrest of the seat. Angle and
headrest of the backrest might need to be ad‐
justed or possibly be removed. Make sure that
all backrests are securely locked. Otherwise
the stability of the child seat can be affected,
and there is an increased risk of injury becauseSeite 61Transporting children safelyControls61
Online Edition for Part no. 01 40 2 960 547 - II/15