2016 BMW 428I CONVERTIBLE trunk release
[x] Cancel search: trunk releasePage 52 of 247

damage to trunk lid and bicycle rack may oc‐
cur.◀
Do not operate hardtop on uneven sec‐
tions or road
Do not open or close hardtop on uneven sec‐
tions of road. Otherwise, the vibrations can re‐
sult in damage to the hardtop.◀
Using the trunk
When hardtop is open
Luggage can only be stored under the trunk
partition; note the respective label.
When hardtop is closed
Luggage can be stowed under the trunk parti‐
tion and to the left and right of the lifting mech‐
anism; note the respective label.
Remove articles of luggage from the side
areas
Before opening the hardtop, remove all pieces
of luggage from the side areas. Otherwise, lug‐
gage and hardtop can be damaged.◀
Before opening and closing▷Follow the safety instructions for the hard‐
top.▷Make sure that the trunk partition in the
trunk is folded down.▷Make sure that the cargo does not push
against the trunk partition from below.▷Make sure that the trunk lid is closed.
Opening and closing from the inside
In order to protect the battery, move the hard‐
top only when the engine is running if possible.
Before closing the hardtop, remove any foreign
objects from the windshield frame; otherwise,
closing may be prevented.
▷Press and hold the reel. The win‐
dows are rolled down, and the
hardtop opens as long as the reel is
pressed.▷Pull the reel and hold it. The win‐
dows are lowered, the hardtop
closes and the windows are raised again as
long as the reel is pulled.
Push or pull reel until the hardtop is completely
open or closed and the end of the procedure is
indicated by a corresponding Check Control
message. Always make sure that the hardtop
well storage cover is completely closed. If the
hardtop is completely open or closed, hardtop
and hardtop well storage cover are latched.
Interruption Open and close hardtop completely
Always open or close the hardtop com‐
pletely. Hardtop and hardtop well storage
cover are locked in the final positions. Driving
with the hardtop or hardtop well storage cover
unlocked can result in damage.◀
The hardtop movement is interrupted if the
reel is released. The sequence can be contin‐
ued in the desired direction using the reel.
Seite 48ControlsOpening and closing48
Online Edition for Part no. 01 40 2 960 547 - II/15
Page 145 of 247
HintsPersonal responsibility
Even an active system does not relieve
the driver from personal responsibility while
driving.
Technically the system has its limits, it cannot
independently react to all traffic situations.
Monitor your driving, be on the alert, observe
the vehicle surroundings and other traffic and
react when needed - risk of accident.◀
Changes to the parking space
Changes to the parking space after it was
measured are not taken into account by the system.
Therefore, always be alert and ready to inter‐
vene; otherwise, there is the risk of an acci‐
dent.◀
Transporting cargo
Cargo that extends beyond the perimeter
of the vehicle is not taken into account by the
system during the parking procedure.
Therefore, always be alert and ready to inter‐
vene; otherwise, there is the risk of an acci‐
dent.◀
Curbs
The parking assistant may steer the vehi‐
cle over or onto curb if need be.
Therefore, always be alert and ready to inter‐
vene; otherwise, the wheels, tires, or the vehi‐
cle may become damaged.◀
An engine that has been switched off by the
Auto Start Stop function is restarted automati‐
cally when the parking assistant is activated.
Requirements
For measuring parking spaces▷Maximum speed while driving forward ap‐
prox. 22 mph/35 km/h.▷Maximum distance to row of parked vehi‐
cles: 5 ft/1.5 m.
Suitable parking space
▷Gap between two objects with a minimum
length of approx. 5 ft/1.5 m.▷Min. length of gap between two objects:
your vehicle's length plus approx.
4 ft/1.2 m.▷Minimum depth: approx. 5 ft/1.5 m.
Regarding the parking procedure
▷Doors and trunk lid closed.▷Parking brake released.▷When parking in parking spaces on the
driver's side, the corresponding turn signal
must be set where applicable.
Overview
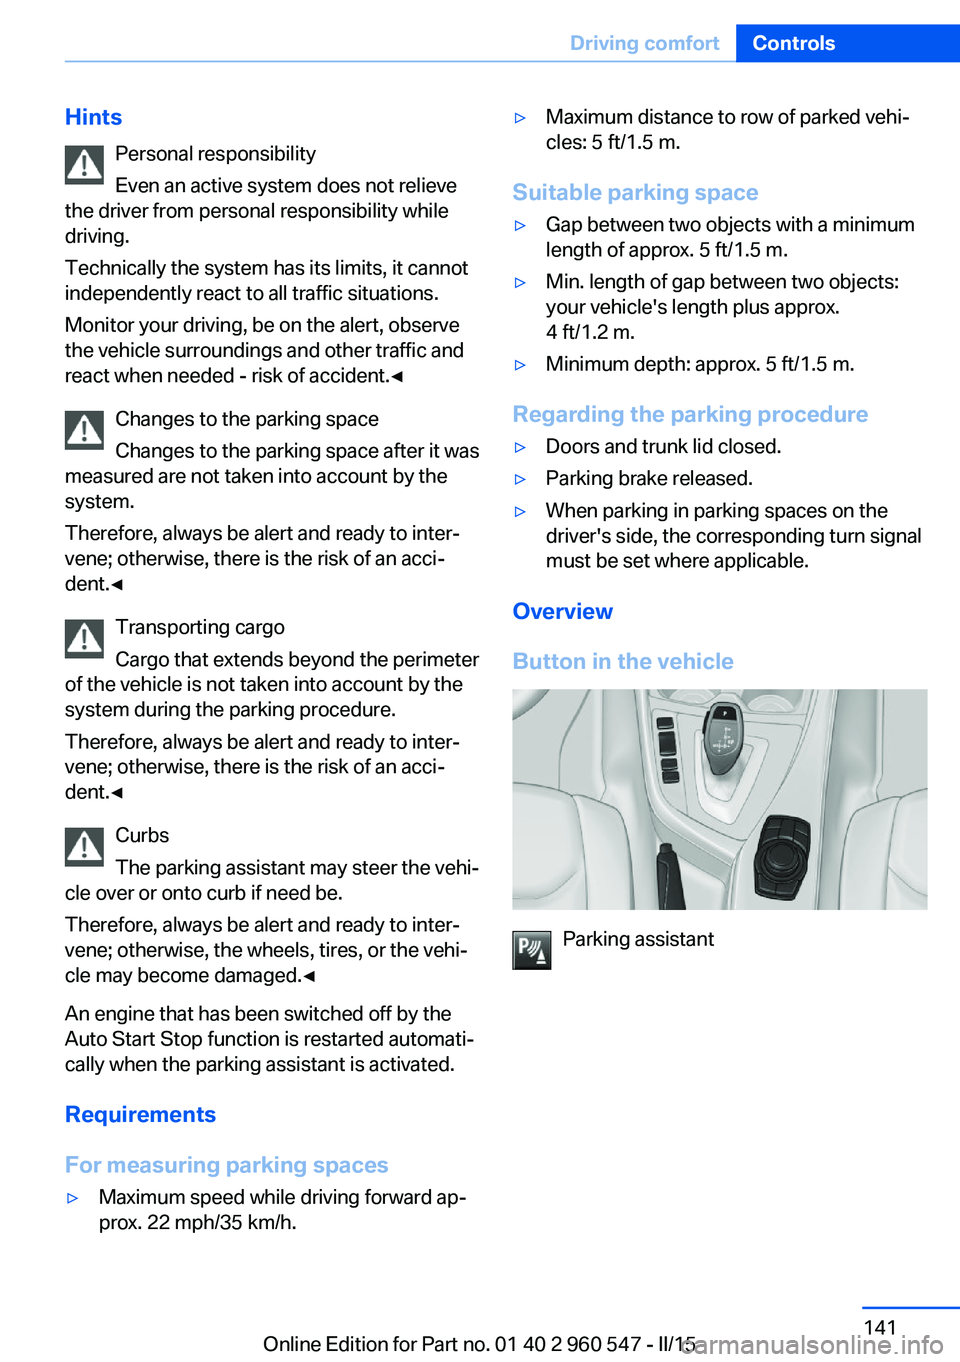
Button in the vehicle
Parking assistant
Seite 141Driving comfortControls141
Online Edition for Part no. 01 40 2 960 547 - II/15
Page 164 of 247
Expanding cargo area volume
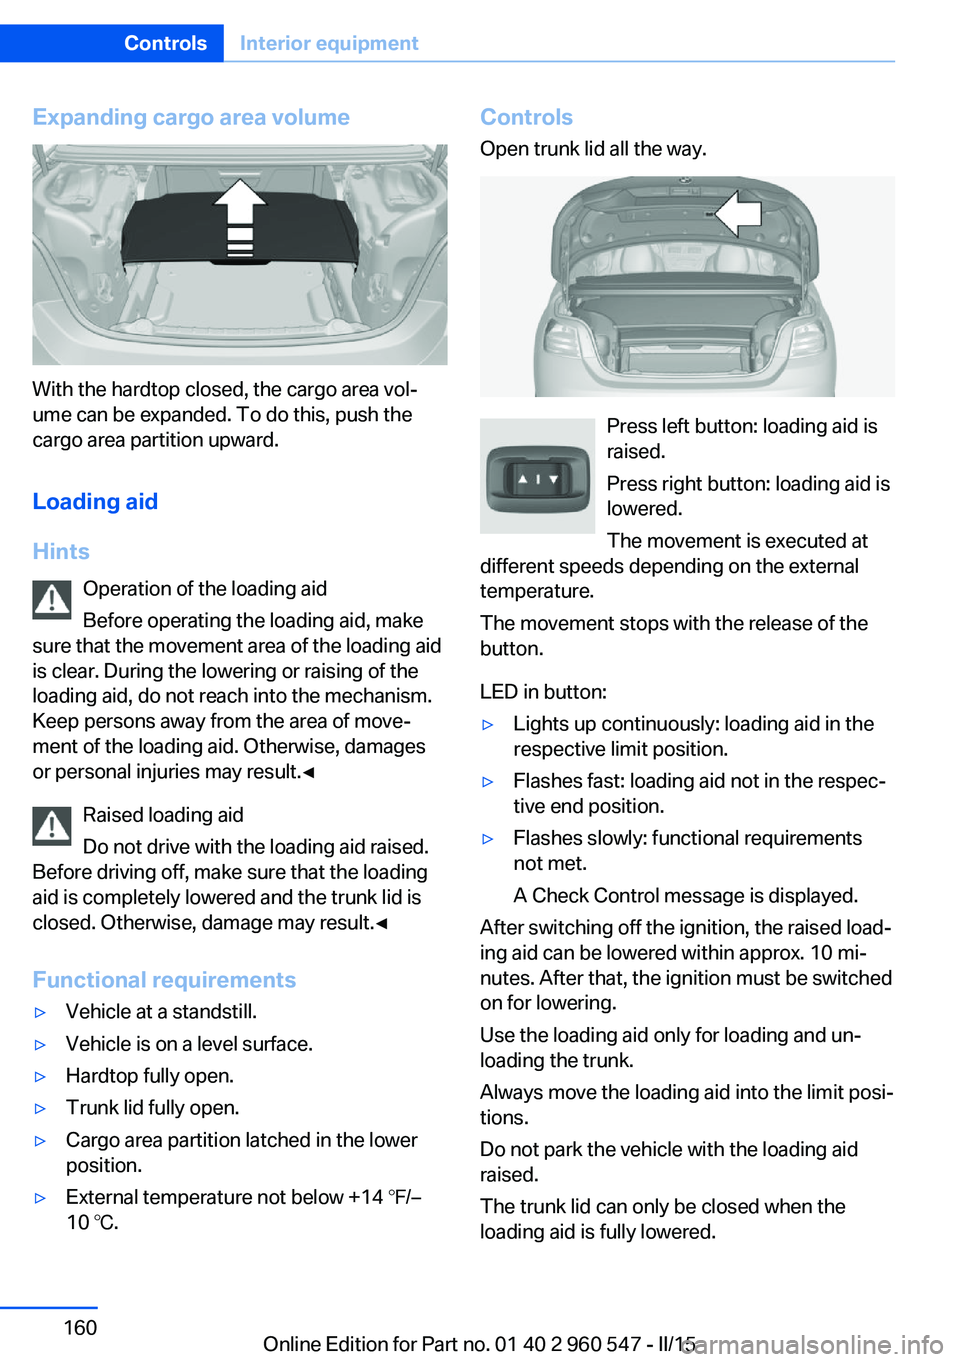
With the hardtop closed, the cargo area vol‐
ume can be expanded. To do this, push the
cargo area partition upward.
Loading aid
Hints Operation of the loading aid
Before operating the loading aid, make
sure that the movement area of the loading aid
is clear. During the lowering or raising of the
loading aid, do not reach into the mechanism.
Keep persons away from the area of move‐
ment of the loading aid. Otherwise, damages
or personal injuries may result.◀
Raised loading aid
Do not drive with the loading aid raised.
Before driving off, make sure that the loading
aid is completely lowered and the trunk lid is
closed. Otherwise, damage may result.◀
Functional requirements
▷Vehicle at a standstill.▷Vehicle is on a level surface.▷Hardtop fully open.▷Trunk lid fully open.▷Cargo area partition latched in the lower
position.▷External temperature not below +14 ℉/–
10 ℃.Controls
Open trunk lid all the way.
Press left button: loading aid is
raised.
Press right button: loading aid is
lowered.
The movement is executed at
different speeds depending on the external
temperature.
The movement stops with the release of the
button.
LED in button:
▷Lights up continuously: loading aid in the
respective limit position.▷Flashes fast: loading aid not in the respec‐
tive end position.▷Flashes slowly: functional requirements
not met.
A Check Control message is displayed.
After switching off the ignition, the raised load‐
ing aid can be lowered within approx. 10 mi‐
nutes. After that, the ignition must be switched
on for lowering.
Use the loading aid only for loading and un‐
loading the trunk.
Always move the loading aid into the limit posi‐
tions.
Do not park the vehicle with the loading aid
raised.
The trunk lid can only be closed when the
loading aid is fully lowered.
Seite 160ControlsInterior equipment160
Online Edition for Part no. 01 40 2 960 547 - II/15
Page 186 of 247
RefuelingVehicle features and options
This chapter describes all standard, country-
specific and optional features offered with the
series. It also describes features that are not
necessarily available in your car, e. g., due to
the selected options or country versions. This
also applies to safety-related functions and
systems. The respectively applicable country
provisions must be observed when using the
respective features and systems.
Hints Observe the fuel recommendation, refer to
page 184, prior to refueling.
Refuel promptly
Refuel no later than at a range of
30 miles/50 km or engine operation might fail
and damage might occur.◀
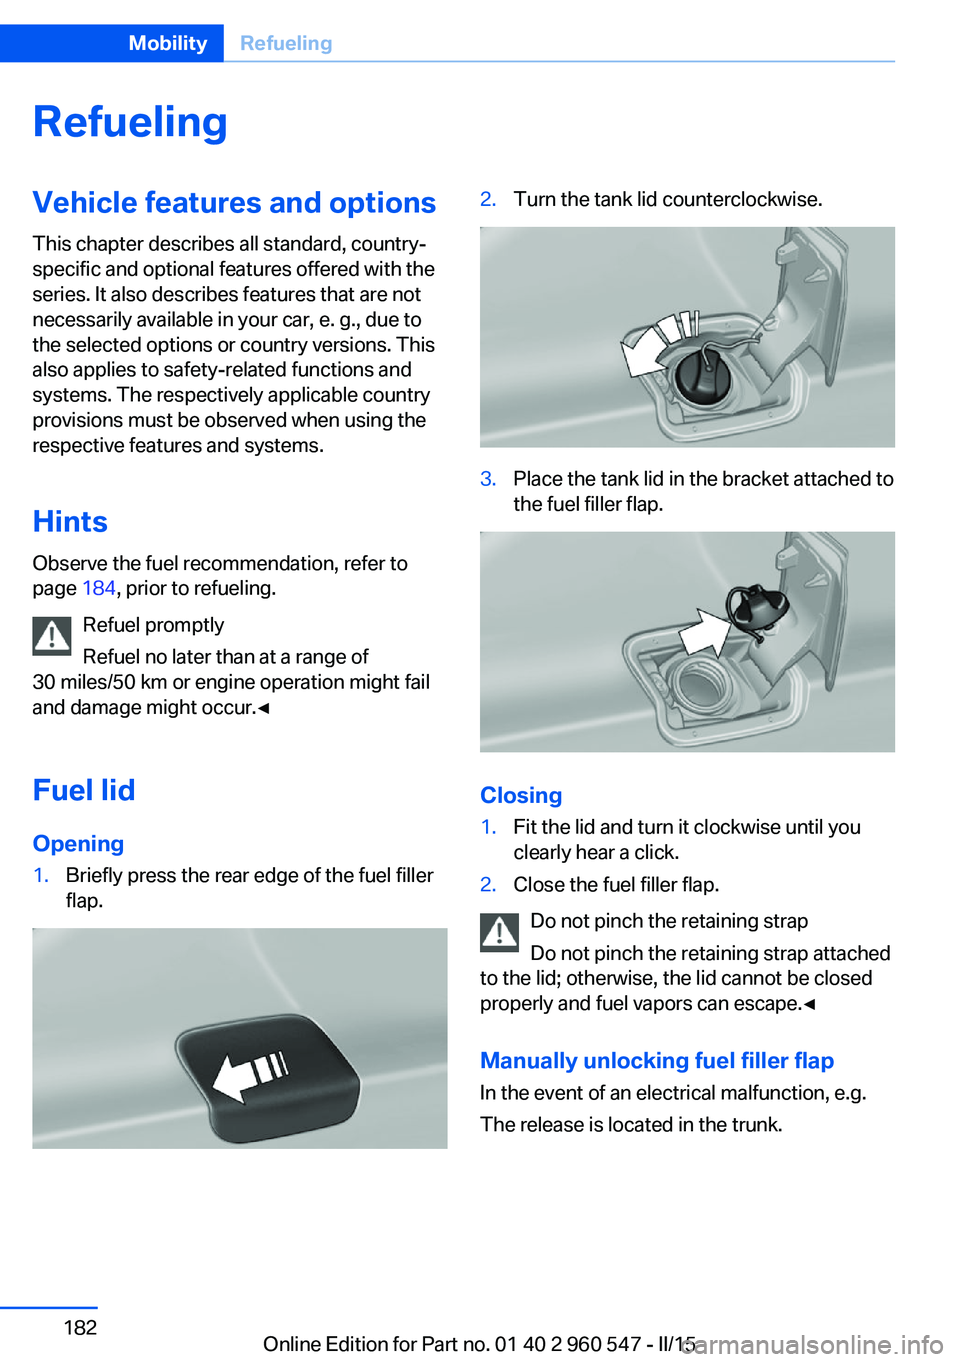
Fuel lid Opening1.Briefly press the rear edge of the fuel filler
flap.2.Turn the tank lid counterclockwise.3.Place the tank lid in the bracket attached to
the fuel filler flap.
Closing
1.Fit the lid and turn it clockwise until you
clearly hear a click.2.Close the fuel filler flap.
Do not pinch the retaining strap
Do not pinch the retaining strap attached
to the lid; otherwise, the lid cannot be closed
properly and fuel vapors can escape.◀
Manually unlocking fuel filler flap In the event of an electrical malfunction, e.g.
The release is located in the trunk.
Seite 182MobilityRefueling182
Online Edition for Part no. 01 40 2 960 547 - II/15
Page 215 of 247
Outer brake lamp: 21-watt bulb, H21WLL.
The tail lights feature LED technology. Contact
your service center in the event of a malfunc‐
tion.
Use caution when replacing the bulb
Use caution and proceed one step at a
time when replacing the bulbs to prevent dam‐
age to the tail lights or the vehicle.◀
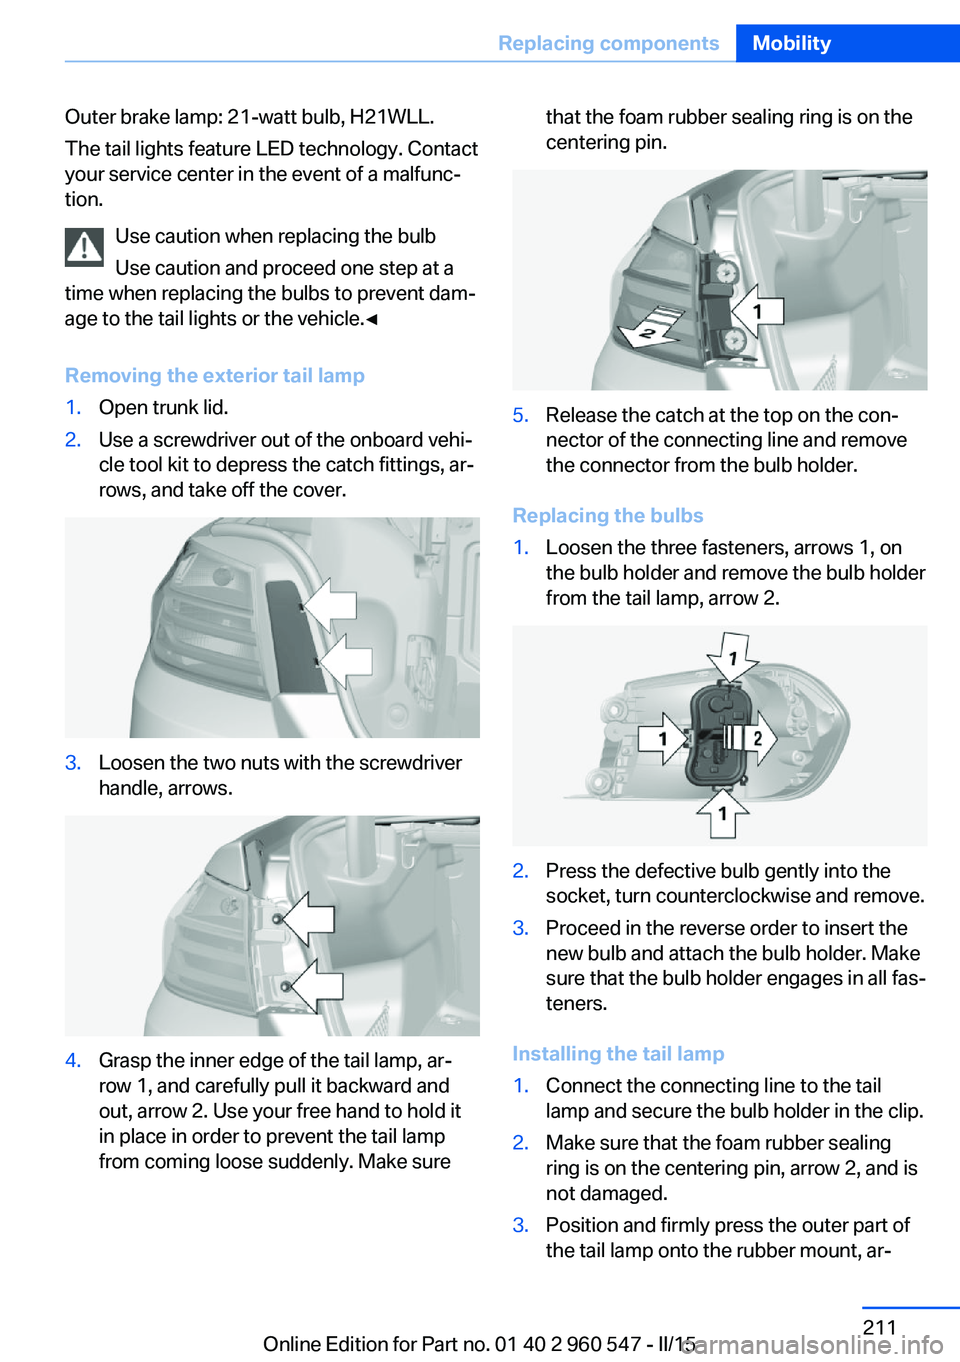
Removing the exterior tail lamp1.Open trunk lid.2.Use a screwdriver out of the onboard vehi‐
cle tool kit to depress the catch fittings, ar‐
rows, and take off the cover.3.Loosen the two nuts with the screwdriver
handle, arrows.4.Grasp the inner edge of the tail lamp, ar‐
row 1, and carefully pull it backward and
out, arrow 2. Use your free hand to hold it
in place in order to prevent the tail lamp
from coming loose suddenly. Make surethat the foam rubber sealing ring is on the
centering pin.5.Release the catch at the top on the con‐
nector of the connecting line and remove
the connector from the bulb holder.
Replacing the bulbs
1.Loosen the three fasteners, arrows 1, on
the bulb holder and remove the bulb holder
from the tail lamp, arrow 2.2.Press the defective bulb gently into the
socket, turn counterclockwise and remove.3.Proceed in the reverse order to insert the
new bulb and attach the bulb holder. Make
sure that the bulb holder engages in all fas‐
teners.
Installing the tail lamp
1.Connect the connecting line to the tail
lamp and secure the bulb holder in the clip.2.Make sure that the foam rubber sealing
ring is on the centering pin, arrow 2, and is
not damaged.3.Position and firmly press the outer part of
the tail lamp onto the rubber mount, ar‐Seite 211Replacing componentsMobility211
Online Edition for Part no. 01 40 2 960 547 - II/15
Page 216 of 247
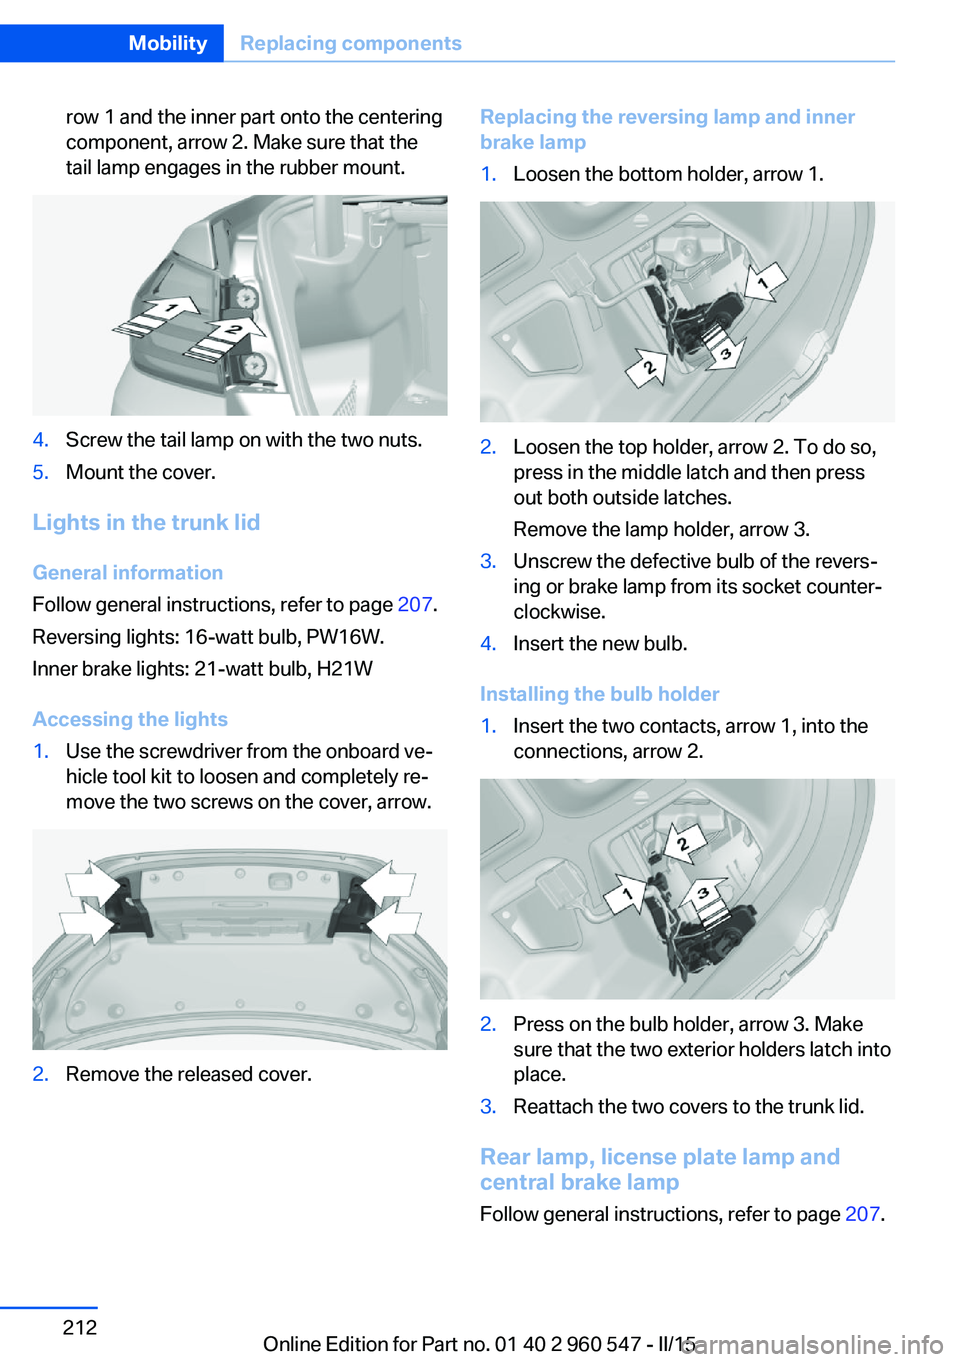
row 1 and the inner part onto the centering
component, arrow 2. Make sure that the
tail lamp engages in the rubber mount.4.Screw the tail lamp on with the two nuts.5.Mount the cover.
Lights in the trunk lid
General information
Follow general instructions, refer to page 207.
Reversing lights: 16-watt bulb, PW16W.
Inner brake lights: 21-watt bulb, H21W
Accessing the lights
1.Use the screwdriver from the onboard ve‐
hicle tool kit to loosen and completely re‐
move the two screws on the cover, arrow.2.Remove the released cover.Replacing the reversing lamp and inner
brake lamp1.Loosen the bottom holder, arrow 1.2.Loosen the top holder, arrow 2. To do so,
press in the middle latch and then press
out both outside latches.
Remove the lamp holder, arrow 3.3.Unscrew the defective bulb of the revers‐
ing or brake lamp from its socket counter‐
clockwise.4.Insert the new bulb.
Installing the bulb holder
1.Insert the two contacts, arrow 1, into the
connections, arrow 2.2.Press on the bulb holder, arrow 3. Make
sure that the two exterior holders latch into
place.3.Reattach the two covers to the trunk lid.
Rear lamp, license plate lamp and
central brake lamp
Follow general instructions, refer to page 207.
Seite 212MobilityReplacing components212
Online Edition for Part no. 01 40 2 960 547 - II/15
Page 238 of 247

Control Display, settings 88
Controller 18, 19
Control systems, driving sta‐ bility 119
Convenient closing with the remote control 38
Convenient opening with the remote control 37
Convertible, hardtop 46
Convertible mode, automatic climate control 146, 149
Convertible program, auto‐ matic climate con‐
trol 146 , 149
Coolant 204
Coolant level 204
Coolant temperature 81
Cooling function 146, 149
Cooling, maximum 149
Cooling system 204
Cornering light 92
Corrosion on brake discs 170
Cosmetic mirror 157
Courtesy lamps during un‐ locking 37
Courtesy lamps with the vehi‐ cle locked 38
Cruise control 130
Cruise control, active with Stop & Go 124
Cruising range 81
Cupholders 165
Current fuel consumption 82
D
Damage, tires 192
Damping control, dy‐ namic 121
Data, technical 228
Date 81
Daytime running lights 92
Defrosting, refer to defrosting the windows 146
Defrosting, refer to Windows, defrosting 150 Defrosting the windows 146
Dehumidifying, air 146, 149
Deleting personal data 25
Deletion of personal data 25
Destination distance 86
Digital clock 81
Digital compass 155
Dimensions 228
Dimmable exterior mirrors 59
Dimmable interior rearview mirror 59
Direction indicator, refer to Turn signals 68
Display, electronic, instru‐ ment cluster 76
Display in windshield 89
Display lighting, refer to In‐ strument lighting 94
Displays, cleaning 224
Disposal, coolant 204
Disposal, vehicle battery 214
Distance control, refer to PDC 132
Distance to destination 86
Divided screen view, split screen 23
Door lock 39
Door lock, refer to Remote control 34
Drive-off assistant 123
Drive-off assistant, refer to DSC 119
Driver assistance, refer to In‐ telligent Safety 106
Driving Assistant, refer to In‐ telligent Safety 106
Driving Dynamics Con‐ trol 121
Driving instructions, break- in 168
Driving mode 121
Driving notes, general 168
Driving stability control sys‐ tems 119
Driving style analysis 178
Driving tips 168 DSC Dynamic Stability Con‐
trol 119
DTC Dynamic Traction Con‐ trol 120
Dynamic Damping Con‐ trol 121
Dynamic Stability Control DSC 119
Dynamic Traction Control DTC 120
E
ECO PRO 174
ECO PRO, bonus range 175
ECO PRO display 174
ECO PRO driving mode 174
ECO PRO driving style analy‐ sis 178
ECO PRO mode 174
ECO PRO Tip - driving in‐ struction 176
EfficientDynamics 176
Electronic displays, instru‐ ment cluster 76
Electronic oil measure‐ ment 201
Electronic Stability Program ESP, refer to DSC 119
Emergency detection, remote control 35
Emergency release, fuel filler flap 182
Emergency Request 216
Emergency start function, en‐ gine start 35
Emergency unlocking, trans‐ mission lock 74
Emergency unlocking, trunk lid 41
Energy Control 82
Energy recovery 82
Engine, automatic Start/Stop function 66
Engine, automatic switch- off 66 Seite 234ReferenceEverything from A to Z234
Online Edition for Part no. 01 40 2 960 547 - II/15