2016 BMW 4 SERIES GRAN COUPE electric
[x] Cancel search: electricPage 223 of 249

When the emergency request is received
at the BMW Response Center, the BMW
Response Center contacts you and takes
further steps to help you.
Even if you are unable to respond, the
BMW Response Center can take further
steps to help you under certain circum‐
stances.
For this, data are transmitted to the BMW
Response Center which serve to deter‐
mine the necessary rescue measures. E. g.
the current position of the vehicle, if it can
be established.▷If the LED is flashing green, but the BMW
Response Center can no longer be heard
via the speaker, you can nevertheless still
be heard at the BMW Response Center.
Initiating an Emergency Request
automatically
Under certain conditions, an Emergency Re‐
quest is automatically initiated immediately af‐
ter a severe accident. Automatic Collision Noti‐
fication is not affected by pressing the SOS
button.
Warning triangle
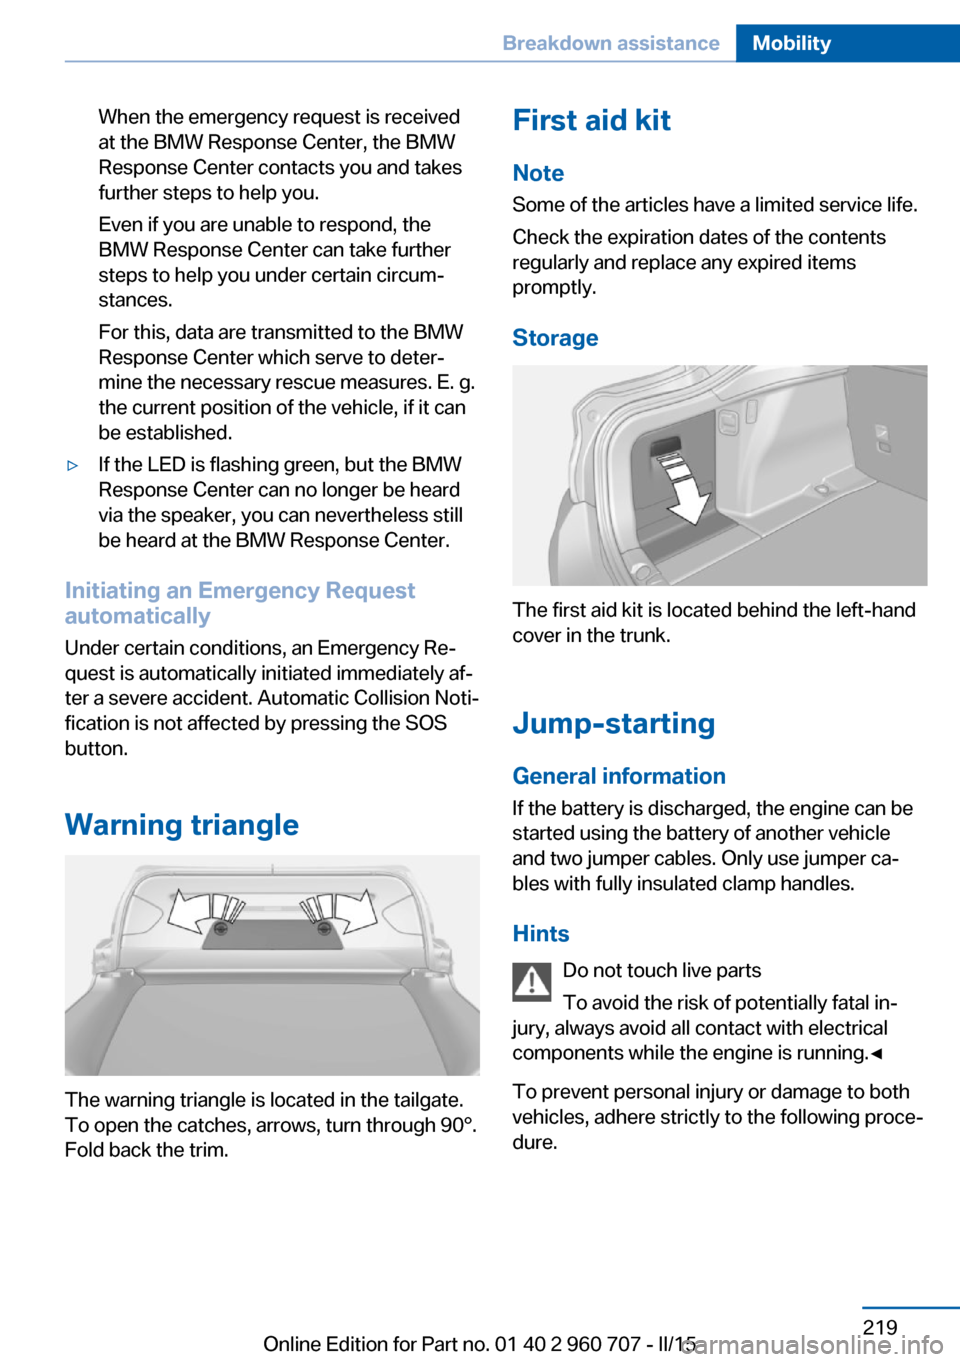
The warning triangle is located in the tailgate.
To open the catches, arrows, turn through 90°.
Fold back the trim.
First aid kit
Note
Some of the articles have a limited service life.
Check the expiration dates of the contents
regularly and replace any expired items
promptly.
Storage
The first aid kit is located behind the left-hand
cover in the trunk.
Jump-starting
General information If the battery is discharged, the engine can be
started using the battery of another vehicle and two jumper cables. Only use jumper ca‐
bles with fully insulated clamp handles.
Hints Do not touch live parts
To avoid the risk of potentially fatal in‐
jury, always avoid all contact with electrical
components while the engine is running.◀
To prevent personal injury or damage to both
vehicles, adhere strictly to the following proce‐
dure.
Seite 219Breakdown assistanceMobility219
Online Edition for Part no. 01 40 2 960 707 - II/15
Page 226 of 249

Steptronic transmission: transporting
your vehicle
Note Your vehicle is not permitted to be towed.
Therefore, contact a service center in the
event of a breakdown.
Do not have the vehicle towed
Have your vehicle transported on a load‐
ing platform only; otherwise, damage may oc‐
cur.◀
Tow truck
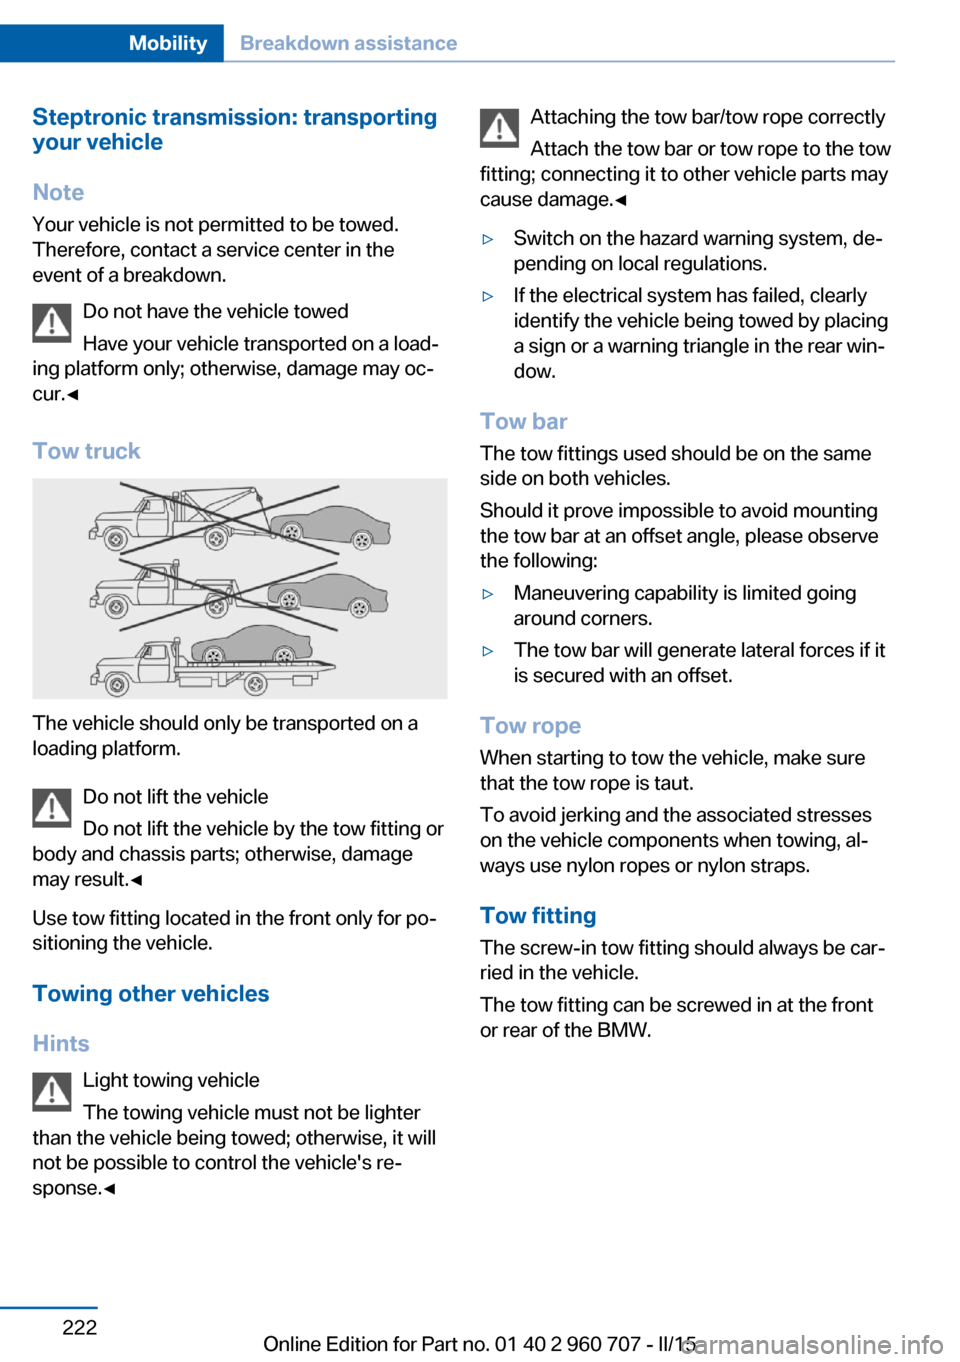
The vehicle should only be transported on a
loading platform.
Do not lift the vehicle
Do not lift the vehicle by the tow fitting or
body and chassis parts; otherwise, damage
may result.◀
Use tow fitting located in the front only for po‐
sitioning the vehicle.
Towing other vehicles
Hints Light towing vehicle
The towing vehicle must not be lighter
than the vehicle being towed; otherwise, it will
not be possible to control the vehicle's re‐
sponse.◀
Attaching the tow bar/tow rope correctly
Attach the tow bar or tow rope to the tow
fitting; connecting it to other vehicle parts may
cause damage.◀▷Switch on the hazard warning system, de‐
pending on local regulations.▷If the electrical system has failed, clearly
identify the vehicle being towed by placing
a sign or a warning triangle in the rear win‐
dow.
Tow bar
The tow fittings used should be on the same
side on both vehicles.
Should it prove impossible to avoid mounting
the tow bar at an offset angle, please observe
the following:
▷Maneuvering capability is limited going
around corners.▷The tow bar will generate lateral forces if it
is secured with an offset.
Tow rope
When starting to tow the vehicle, make sure
that the tow rope is taut.
To avoid jerking and the associated stresses
on the vehicle components when towing, al‐
ways use nylon ropes or nylon straps.
Tow fitting
The screw-in tow fitting should always be car‐
ried in the vehicle.
The tow fitting can be screwed in at the front
or rear of the BMW.
Seite 222MobilityBreakdown assistance222
Online Edition for Part no. 01 40 2 960 707 - II/15
Page 231 of 249

No cleansers that contain alcohol or sol‐
vents
Do not use cleansers that contain alcohol or
solvents, such as lacquer thinners, heavy-duty
grease removers, fuel, or such; this could lead
to surface damage.◀
Safety belts
Dirty belt straps impede the reeling action and
thus have a negative impact on safety.
Chemical cleaning
Do not clean chemically; this can destroy
the webbing.◀
Use only a mild soapy solution, with the safety
belts clipped into their buckles.
Do not allow the reels to retract the safety
belts until they are dry.
Carpets and floor mats No objects in the area around the pedals
Keep floor mats, carpets, and any other
objects out of the pedal area; otherwise, the
function of the pedals could be impeded while
driving and create the risk of an accident.
Do not place additional floor mats over existing
mats or other objects.
Only use floor mats that have been approved
for the vehicle and can be properly attached to
floor.
Ensure that the floor mats are securely fas‐
tened again after they were removed for clean‐
ing, e.g.◀
Floor mats can be removed from the car's inte‐
rior for cleaning.
If the floor carpets are very dirty, clean with a
microfiber cloth and water or a textile cleaner.
To prevent matting of the carpet, rub back and
forth in the direction of travel only.Sensor/camera lenses
To clean sensors and camera lenses, use a
cloth moistened with a small amount of glass
detergent.
Displays/monitors Cleaning displays and screens
Do not use any chemical or household
cleaning agents; otherwise, surfaces can be af‐
fected.◀
Keeping out moisture
Keep all fluids and moisture away from
the unit; otherwise, electrical components can
be damaged.◀
Avoid pressure
Avoid pressing too hard when cleaning
and do not use abrasive materials; otherwise,
damage can result.◀
Clean with a clean, antistatic microfiber cloth.
Long-termWhen the vehicle is shut down for longer than
three months, special measures must be
taken. Additional information is available from
the service center.Seite 227CareMobility227
Online Edition for Part no. 01 40 2 960 707 - II/15
Page 240 of 249

Connecting electrical devi‐ces 157
Continued driving with a flat tire 103 , 106
Control Display 18
Control Display, settings 90
Controller 18, 19
Control systems, driving sta‐ bility 120
Convenient opening with the remote control 37
Coolant 206
Coolant level 206
Coolant temperature 83
Cooling function 147, 150
Cooling, maximum 149
Cooling system 206
Cornering light 94
Corrosion on brake discs 170
Cosmetic mirror 157
Courtesy lamps during un‐ locking 37
Courtesy lamps with the vehi‐ cle locked 38
Cruise control 131
Cruise control, active with Stop & Go 125
Cruising range 83
Cupholders 163
Current fuel consumption 84
D
Damage, tires 194
Damping control, dy‐ namic 122
Data, technical 230
Date 83
Daytime running lights 94
Defrosting, refer to defrosting the windows 147
Defrosting, refer to Windows, defrosting 151
Defrosting the windows 147
Dehumidifying, air 147, 150
Deleting personal data 25 Deletion of personal data 25
Destination distance 88
Digital clock 83
Digital compass 155
Dimensions 230
Dimmable exterior mirrors 59
Dimmable interior rearview mirror 59
Direction indicator, refer to Turn signals 69
Display, electronic, instru‐ ment cluster 78
Display in windshield 91
Display lighting, refer to In‐ strument lighting 96
Displays, cleaning 227
Disposal, coolant 206
Disposal, vehicle battery 216
Distance control, refer to PDC 133
Distance to destination 88
Divided screen view, split screen 23
Door lock 39
Door lock, refer to Remote control 34
Drive-off assistant 124
Drive-off assistant, refer to DSC 120
Driver assistance, refer to In‐ telligent Safety 107
Driving Assistant, refer to In‐ telligent Safety 107
Driving Dynamics Con‐ trol 122
Driving instructions, break- in 168
Driving mode 122
Driving notes, general 168
Driving stability control sys‐ tems 120
Driving style analysis 179
Driving tips 168
DSC Dynamic Stability Con‐ trol 120 DTC Dynamic Traction Con‐
trol 121
Dynamic Damping Con‐ trol 122
Dynamic Stability Control DSC 120
Dynamic Traction Control DTC 121
E
ECO PRO 175
ECO PRO, bonus range 176
ECO PRO display 175
ECO PRO driving mode 175
ECO PRO driving style analy‐ sis 179
ECO PRO mode 175
ECO PRO Tip - driving in‐ struction 177
EfficientDynamics 178
Electronic displays, instru‐ ment cluster 78
Electronic oil measure‐ ment 203
Electronic Stability Program ESP, refer to DSC 120
Emergency detection, remote control 35
Emergency release, fuel filler flap 184
Emergency Request 218
Emergency start function, en‐ gine start 35
Emergency unlocking, tail‐ gate 42
Emergency unlocking, trans‐ mission lock 76
Energy Control 84
Energy recovery 84
Engine, automatic Start/Stop function 67
Engine, automatic switch- off 67
Engine compartment 201 Seite 236ReferenceEverything from A to Z236
Online Edition for Part no. 01 40 2 960 707 - II/15