2016 BMW 3 SERIES SPORTS WAGON Pressure
[x] Cancel search: PressurePage 140 of 255
▷When using high-pressure washers, do not
spray the sensors for long periods and
maintain a distance of at least 12 in/30 cm.
Surround View
The concept Surround View comprises various camera as‐
sistance systems that help the driver when
parking, maneuvering, and at complex exits
and intersections.
▷Rearview camera, refer to page 136▷Side View, refer to page 138.▷Top View, refer to page 139.
Rearview camera
The concept The rearview camera provides assistance in
parking and maneuvering backwards. The area
behind the vehicle is shown on the Control
Display.
Hints Check the traffic situation as well
Check the traffic situation around the ve‐
hicle with your own eyes. Otherwise, an acci‐
dent could result from road users or objects
that are not lidtured by the camera.◀
At a glance
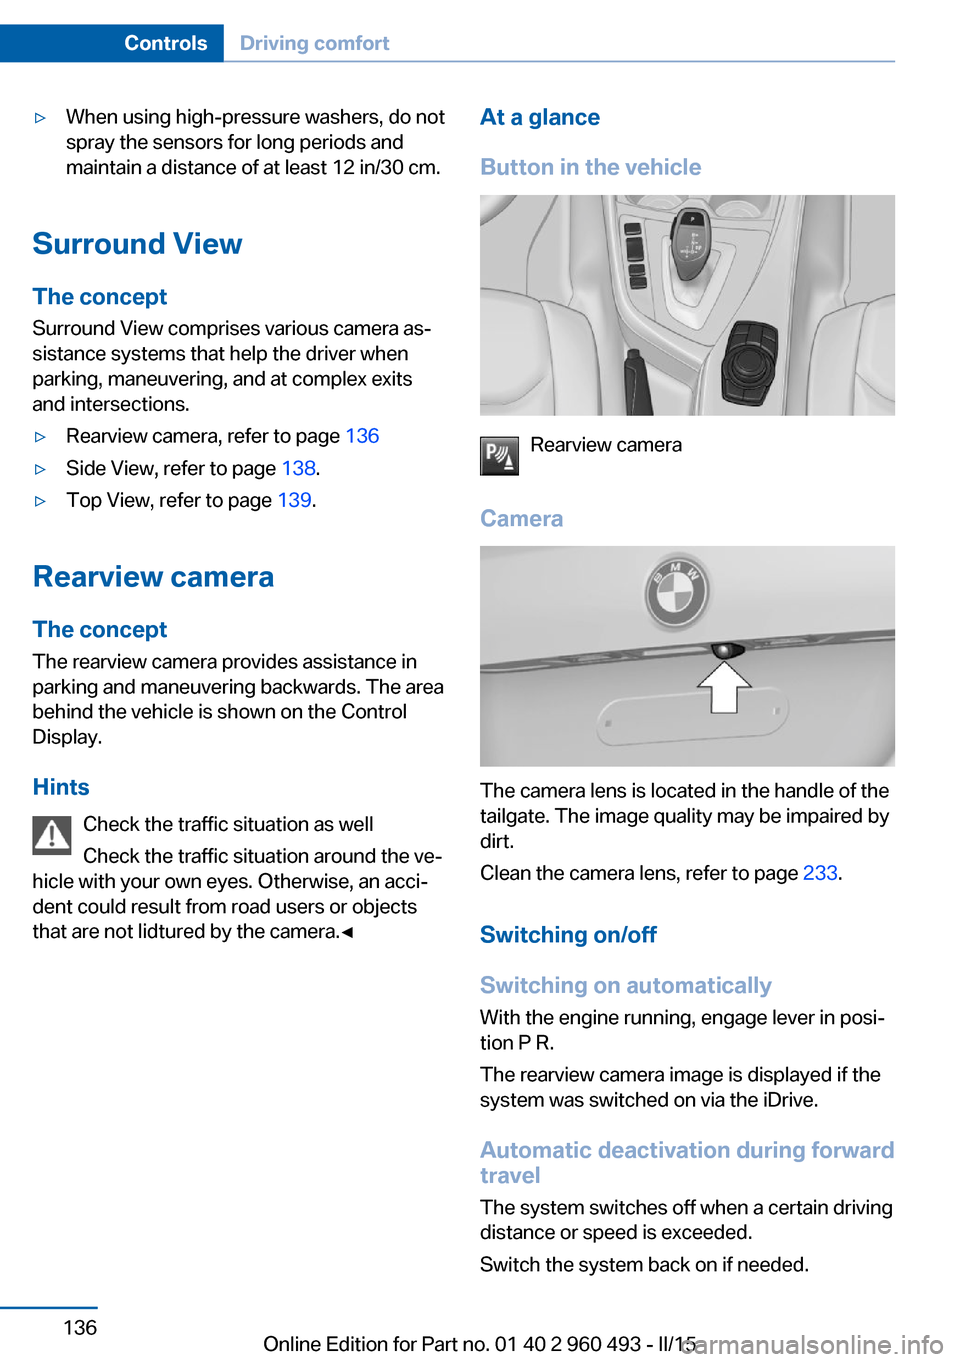
Button in the vehicle
Rearview camera
Camera
The camera lens is located in the handle of the
tailgate. The image quality may be impaired by
dirt.
Clean the camera lens, refer to page 233.
Switching on/off
Switching on automatically With the engine running, engage lever in posi‐
tion P R.
The rearview camera image is displayed if the
system was switched on via the iDrive.
Automatic deactivation during forward
travel
The system switches off when a certain driving
distance or speed is exceeded.
Switch the system back on if needed.
Seite 136ControlsDriving comfort136
Online Edition for Part no. 01 40 2 960 493 - II/15
Page 147 of 255
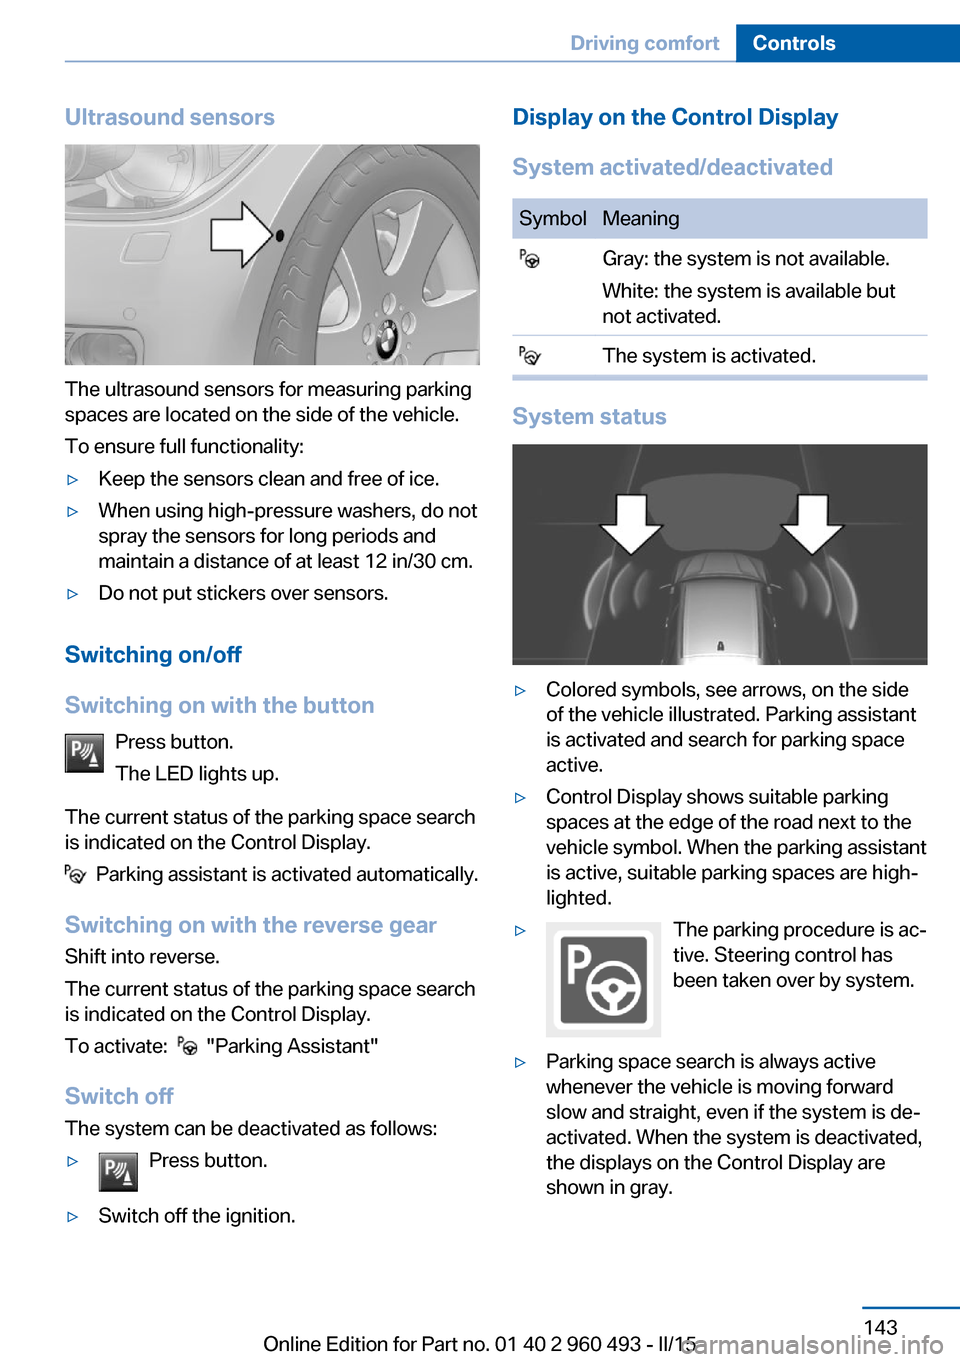
Ultrasound sensors
The ultrasound sensors for measuring parking
spaces are located on the side of the vehicle.
To ensure full functionality:
▷Keep the sensors clean and free of ice.▷When using high-pressure washers, do not
spray the sensors for long periods and
maintain a distance of at least 12 in/30 cm.▷Do not put stickers over sensors.
Switching on/off
Switching on with the button Press button.
The LED lights up.
The current status of the parking space search
is indicated on the Control Display.
Parking assistant is activated automatically.
Switching on with the reverse gear
Shift into reverse.
The current status of the parking space search
is indicated on the Control Display.
To activate:
"Parking Assistant"
Switch off
The system can be deactivated as follows:
▷Press button.▷Switch off the ignition.Display on the Control Display
System activated/deactivatedSymbolMeaning Gray: the system is not available.
White: the system is available but
not activated. The system is activated.
System status
▷Colored symbols, see arrows, on the side
of the vehicle illustrated. Parking assistant
is activated and search for parking space
active.▷Control Display shows suitable parking
spaces at the edge of the road next to the
vehicle symbol. When the parking assistant
is active, suitable parking spaces are high‐
lighted.▷The parking procedure is ac‐
tive. Steering control has
been taken over by system.▷Parking space search is always active
whenever the vehicle is moving forward
slow and straight, even if the system is de‐
activated. When the system is deactivated,
the displays on the Control Display are
shown in gray.Seite 143Driving comfortControls143
Online Edition for Part no. 01 40 2 960 493 - II/15
Page 176 of 255
In certain braking situations, the perforated
brake discs can cause functional problems.
However, this has no effect on the perform‐
ance and operational reliability of the brake.
Objects within the range of movement
of the pedals
No objects in the area around the pedals
Keep floor mats, carpets, and any other
objects out of the pedal area; otherwise, the
function of the pedals could be impeded while
driving and create the risk of an accident.
Do not place additional floor mats over existing
mats or other objects.
Only use floor mats that have been approved
for the vehicle and can be properly attached to
floor.
Ensure that the floor mats are securely fas‐
tened again after they were removed for clean‐
ing, e.g.◀
Driving in wet conditions When roads are wet, salted, or in heavy rain,
press brake pedal ever so gently every few
miles.
Ensure that this action does not endanger other traffic.
The heat generated in this process helps dry
the brake discs and pads.
In this way braking efficiency will be available
when you need it.
Hills Avoid stressing the brakes
Avoid placing excessive stress on the
brake system. Light but consistent brake pres‐
sure can lead to high temperatures, brakes
wearing out and possibly even brake failure.◀Do not drive in neutral
Do not drive in neutral or with the engine
stopped, as doing so disables engine braking.
In addition, steering and brake assist are un‐
available with the engine stopped.◀
Drive long or steep downhill gradients in the
gear that requires least braking efforts. Other‐
wise the brakes may overheat and reduce
brake efficiency.
You can increase the engine's braking effect
by shifting down, going all the way to first gear,
if needed.
Brake disc corrosion
Brake disc corrosion and contamination of the
brake pads are favored by:▷Low mileage.▷Extended periods when the vehicle is not
used at all.▷Infrequent use of the brakes.
Corrosion will built up when the maximum
pressure applied to the brake pads during
braking is not reached - thus discs don't get
cleaned.
Corrosion buildup on the brake discs will cause
a pulsating effect on the brakes in their re‐
sponse - generally that cannot be corrected.
Condensation under the parked
vehicle
When using the automatic climate control,
condensation water develops collecting under‐
neath the vehicle.
These traces of water under the vehicle are
normal.
Seite 172Driving tipsThings to remember when driving172
Online Edition for Part no. 01 40 2 960 493 - II/15
Page 177 of 255
LoadingVehicle features and options
This chapter describes all standard, country-
specific and optional features offered with the
series. It also describes features that are not
necessarily available in your car, e. g., due to
the selected options or country versions. This
also applies to safety-related functions and
systems. The respectively applicable country
provisions must be observed when using the
respective features and systems.
Hints Overloading the vehicle
To avoid exceeding the approved ca‐
pacity of the tires, never overload the vehicle.
Overloading can lead to overheating and in‐
creases the rate at which damage develops in‐
side the tires. This could result in a sudden
loss of tire inflation pressure.◀
No fluids in the cargo area
Make sure that fluids do not leak into the
cargo area; otherwise, the vehicle may be dam‐
aged.◀
Heavy and hard objects
Do not stow any heavy and hard objects
in the car's interior without securing them; oth‐
erwise, they may present a danger to occu‐
pants, e.g., during braking and evasive maneu‐
vers.◀
Determining the load limit1.Locate the following statement on your ve‐
hicle’s placard:▷The combined weight of occupants
and cargo should never exceed XXX kg
or YYY lbs. Otherwise, damage to thevehicle and unstable driving situations
may result.2.Determine the combined weight of the
driver and passengers that will be riding in
your vehicle.3.Subtract the combined weight of the driver
and passengers from XXX kilograms or
YYY pounds.4.The resulting figure equals the available
amount of cargo and luggage load ca‐
pacity.
For example, if the YYY amount equals
1,000 lbs and there will be four 150 lbs
passengers in your vehicle, the amount of
available cargo and luggage load capacity
is 400 lbs: 1,000 lbs minus 600 lbs =
400 lbs.5.Determine the combined weight of lug‐
gage and cargo being loaded on the vehi‐
cle. That weight may not safely exceed the
available cargo and luggage load capacity
calculated in Step 4.Seite 173LoadingDriving tips173
Online Edition for Part no. 01 40 2 960 493 - II/15
Page 180 of 255
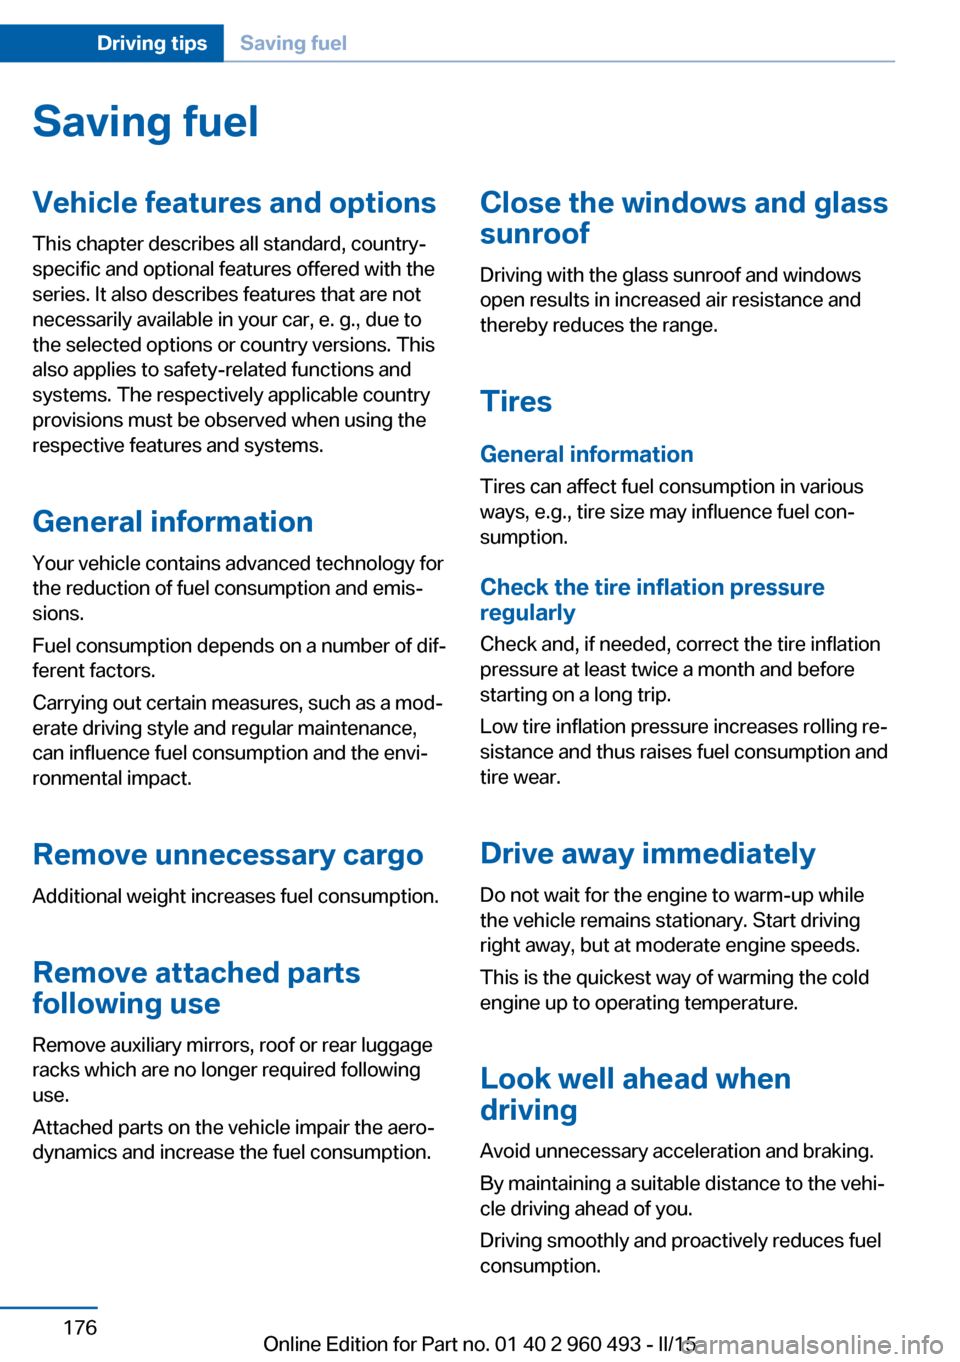
Saving fuelVehicle features and optionsThis chapter describes all standard, country-
specific and optional features offered with the
series. It also describes features that are not
necessarily available in your car, e. g., due to
the selected options or country versions. This
also applies to safety-related functions and
systems. The respectively applicable country
provisions must be observed when using the
respective features and systems.
General information Your vehicle contains advanced technology for
the reduction of fuel consumption and emis‐
sions.
Fuel consumption depends on a number of dif‐
ferent factors.
Carrying out certain measures, such as a mod‐
erate driving style and regular maintenance,
can influence fuel consumption and the envi‐
ronmental impact.
Remove unnecessary cargo
Additional weight increases fuel consumption.
Remove attached parts
following use
Remove auxiliary mirrors, roof or rear luggage
racks which are no longer required following use.
Attached parts on the vehicle impair the aero‐
dynamics and increase the fuel consumption.Close the windows and glass
sunroof
Driving with the glass sunroof and windows
open results in increased air resistance and
thereby reduces the range.
Tires
General information Tires can affect fuel consumption in various
ways, e.g., tire size may influence fuel con‐
sumption.
Check the tire inflation pressure
regularly
Check and, if needed, correct the tire inflation
pressure at least twice a month and before
starting on a long trip.
Low tire inflation pressure increases rolling re‐
sistance and thus raises fuel consumption and
tire wear.
Drive away immediately
Do not wait for the engine to warm-up while
the vehicle remains stationary. Start driving
right away, but at moderate engine speeds.
This is the quickest way of warming the cold
engine up to operating temperature.
Look well ahead when
driving
Avoid unnecessary acceleration and braking.
By maintaining a suitable distance to the vehi‐
cle driving ahead of you.
Driving smoothly and proactively reduces fuel
consumption.Seite 176Driving tipsSaving fuel176
Online Edition for Part no. 01 40 2 960 493 - II/15
Page 197 of 255
Wheels and tiresVehicle features and options
This chapter describes all standard, country-
specific and optional features offered with the
series. It also describes features that are not
necessarily available in your car, e. g., due to
the selected options or country versions. This
also applies to safety-related functions and
systems. The respectively applicable country
provisions must be observed when using the
respective features and systems.
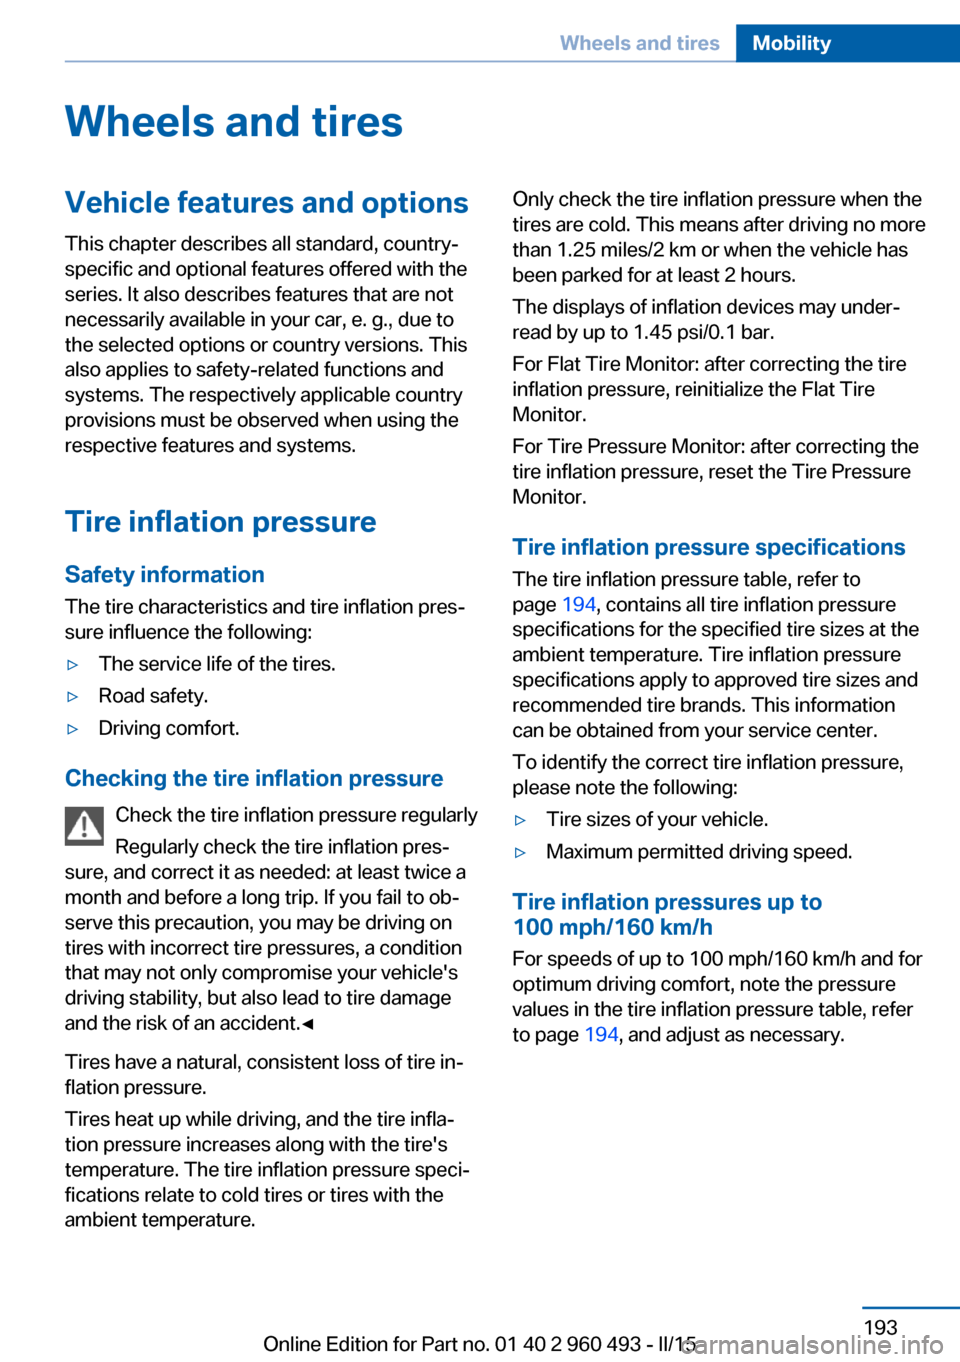
Tire inflation pressure Safety information
The tire characteristics and tire inflation pres‐
sure influence the following:▷The service life of the tires.▷Road safety.▷Driving comfort.
Checking the tire inflation pressure
Check the tire inflation pressure regularly
Regularly check the tire inflation pres‐
sure, and correct it as needed: at least twice a
month and before a long trip. If you fail to ob‐
serve this precaution, you may be driving on
tires with incorrect tire pressures, a condition
that may not only compromise your vehicle's
driving stability, but also lead to tire damage
and the risk of an accident.◀
Tires have a natural, consistent loss of tire in‐
flation pressure.
Tires heat up while driving, and the tire infla‐
tion pressure increases along with the tire's
temperature. The tire inflation pressure speci‐
fications relate to cold tires or tires with the
ambient temperature.
Only check the tire inflation pressure when the
tires are cold. This means after driving no more
than 1.25 miles/2 km or when the vehicle has
been parked for at least 2 hours.
The displays of inflation devices may under-
read by up to 1.45 psi/0.1 bar.
For Flat Tire Monitor: after correcting the tire
inflation pressure, reinitialize the Flat Tire
Monitor.
For Tire Pressure Monitor: after correcting the
tire inflation pressure, reset the Tire Pressure
Monitor.
Tire inflation pressure specifications
The tire inflation pressure table, refer to
page 194, contains all tire inflation pressure
specifications for the specified tire sizes at the
ambient temperature. Tire inflation pressure
specifications apply to approved tire sizes and
recommended tire brands. This information
can be obtained from your service center.
To identify the correct tire inflation pressure,
please note the following:▷Tire sizes of your vehicle.▷Maximum permitted driving speed.
Tire inflation pressures up to
100 mph/160 km/h
For speeds of up to 100 mph/160 km/h and for
optimum driving comfort, note the pressure
values in the tire inflation pressure table, refer
to page 194, and adjust as necessary.
Seite 193Wheels and tiresMobility193
Online Edition for Part no. 01 40 2 960 493 - II/15
Page 198 of 255
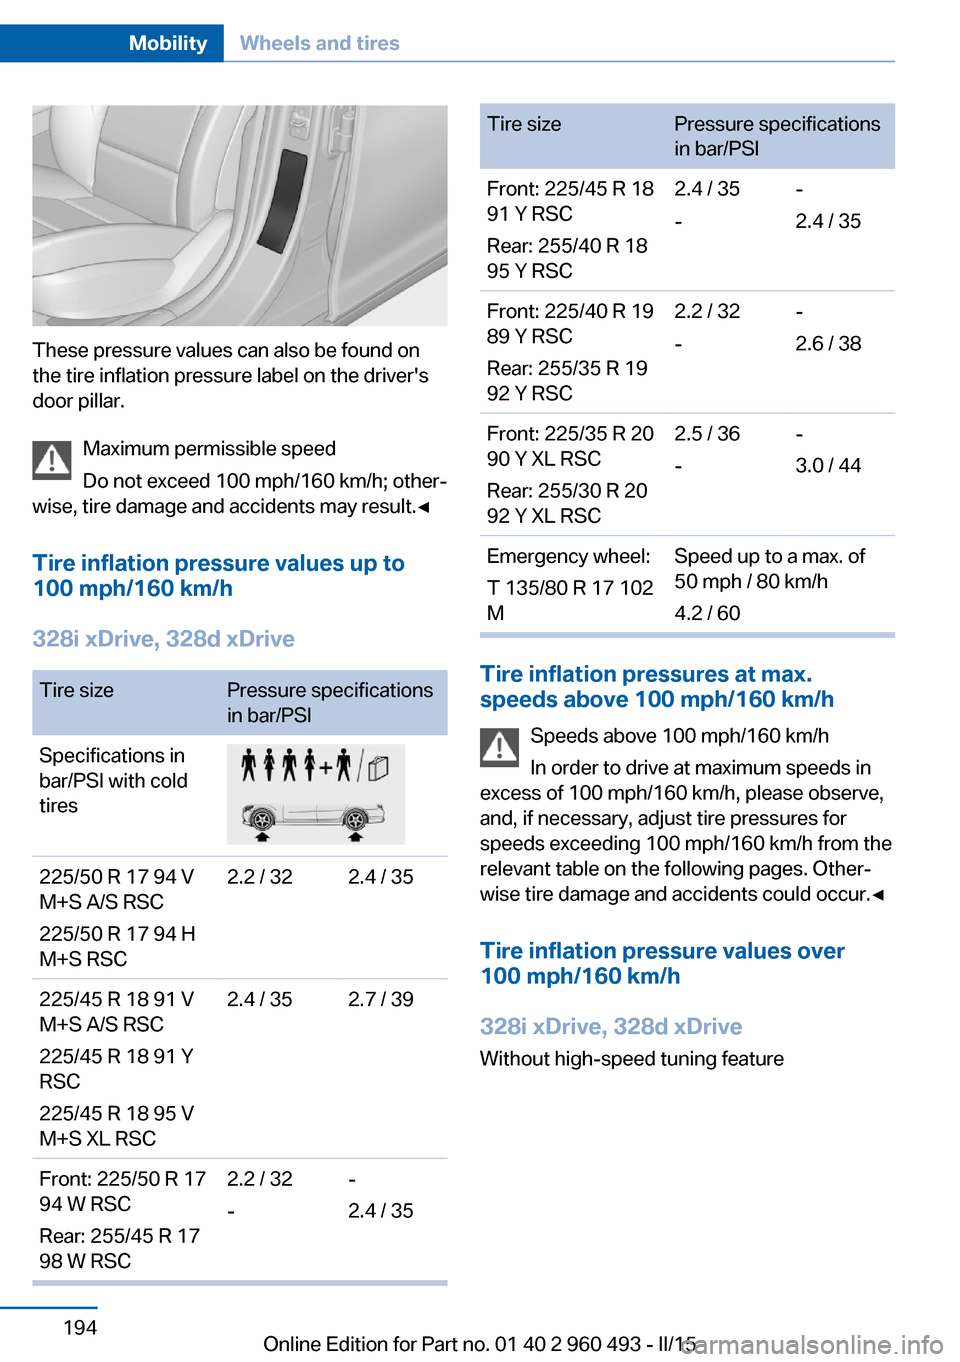
These pressure values can also be found on
the tire inflation pressure label on the driver's
door pillar.
Maximum permissible speed
Do not exceed 100 mph/160 km/h; other‐
wise, tire damage and accidents may result.◀
Tire inflation pressure values up to
100 mph/160 km/h
328i xDrive, 328d xDrive
Tire sizePressure specifications
in bar/PSISpecifications in
bar/PSI with cold
tires225/50 R 17 94 V
M+S A/S RSC
225/50 R 17 94 H
M+S RSC2.2 / 322.4 / 35225/45 R 18 91 V
M+S A/S RSC
225/45 R 18 91 Y
RSC
225/45 R 18 95 V
M+S XL RSC2.4 / 352.7 / 39Front: 225/50 R 17
94 W RSC
Rear: 255/45 R 17
98 W RSC2.2 / 32
--
2.4 / 35Tire sizePressure specifications
in bar/PSIFront: 225/45 R 18
91 Y RSC
Rear: 255/40 R 18
95 Y RSC2.4 / 35
--
2.4 / 35Front: 225/40 R 19
89 Y RSC
Rear: 255/35 R 19
92 Y RSC2.2 / 32
--
2.6 / 38Front: 225/35 R 20
90 Y XL RSC
Rear: 255/30 R 20
92 Y XL RSC2.5 / 36
--
3.0 / 44Emergency wheel:
T 135/80 R 17 102
MSpeed up to a max. of
50 mph / 80 km/h
4.2 / 60
Tire inflation pressures at max.
speeds above 100 mph/160 km/h
Speeds above 100 mph/160 km/h
In order to drive at maximum speeds in
excess of 100 mph/160 km/h, please observe,
and, if necessary, adjust tire pressures for
speeds exceeding 100 mph/160 km/h from the
relevant table on the following pages. Other‐
wise tire damage and accidents could occur.◀
Tire inflation pressure values over
100 mph/160 km/h
328i xDrive, 328d xDrive
Without high-speed tuning feature
Seite 194MobilityWheels and tires194
Online Edition for Part no. 01 40 2 960 493 - II/15
Page 199 of 255
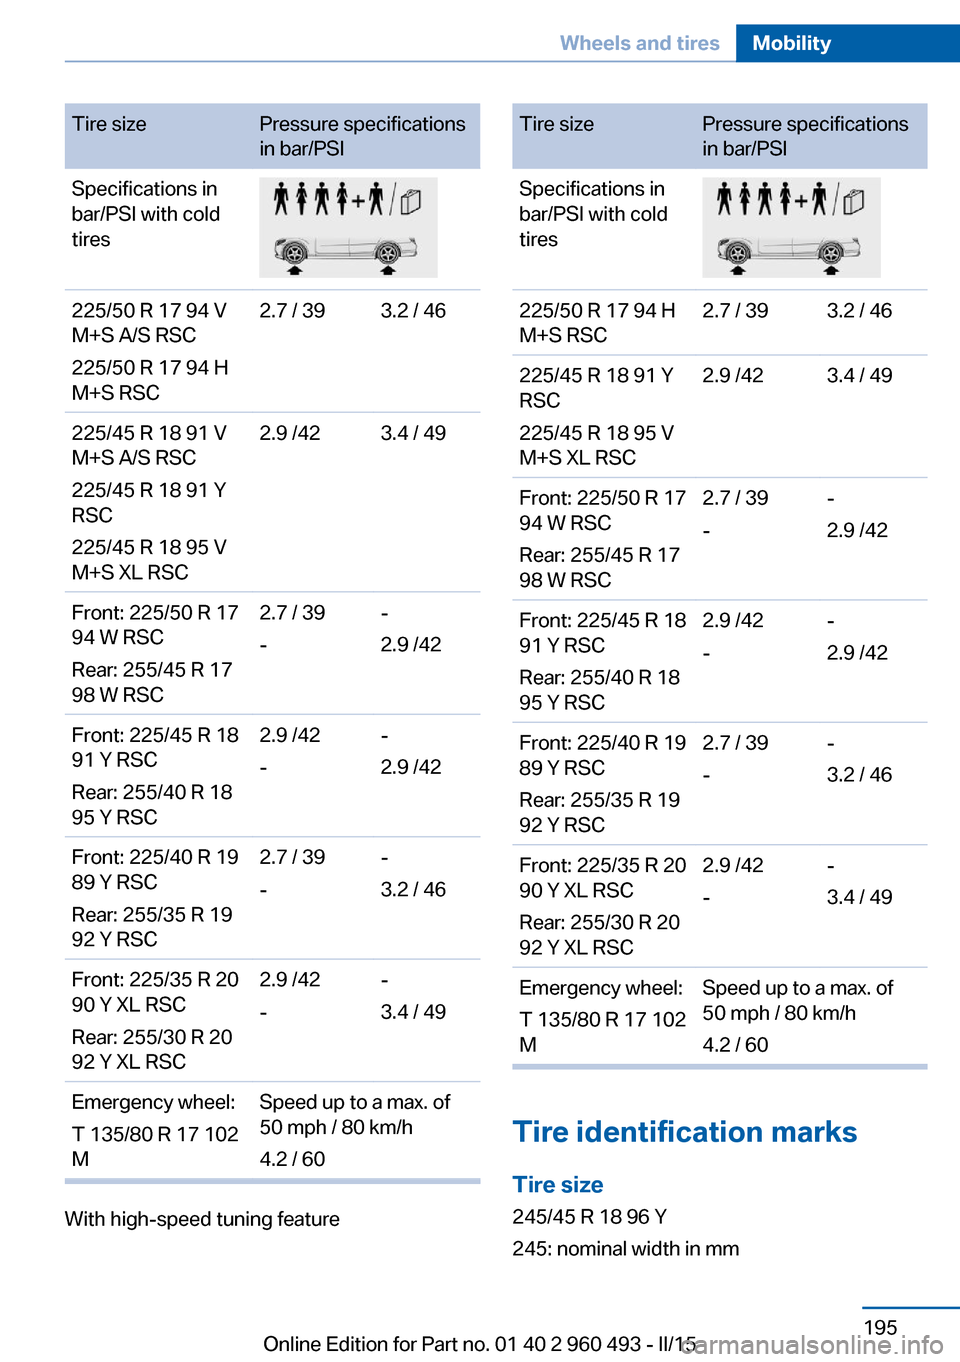
Tire sizePressure specifications
in bar/PSISpecifications in
bar/PSI with cold
tires225/50 R 17 94 V
M+S A/S RSC
225/50 R 17 94 H
M+S RSC2.7 / 393.2 / 46225/45 R 18 91 V
M+S A/S RSC
225/45 R 18 91 Y
RSC
225/45 R 18 95 V
M+S XL RSC2.9 /423.4 / 49Front: 225/50 R 17
94 W RSC
Rear: 255/45 R 17
98 W RSC2.7 / 39
--
2.9 /42Front: 225/45 R 18
91 Y RSC
Rear: 255/40 R 18
95 Y RSC2.9 /42
--
2.9 /42Front: 225/40 R 19
89 Y RSC
Rear: 255/35 R 19
92 Y RSC2.7 / 39
--
3.2 / 46Front: 225/35 R 20
90 Y XL RSC
Rear: 255/30 R 20
92 Y XL RSC2.9 /42
--
3.4 / 49Emergency wheel:
T 135/80 R 17 102
MSpeed up to a max. of
50 mph / 80 km/h
4.2 / 60
With high-speed tuning feature
Tire sizePressure specifications
in bar/PSISpecifications in
bar/PSI with cold
tires225/50 R 17 94 H
M+S RSC2.7 / 393.2 / 46225/45 R 18 91 Y
RSC
225/45 R 18 95 V
M+S XL RSC2.9 /423.4 / 49Front: 225/50 R 17
94 W RSC
Rear: 255/45 R 17
98 W RSC2.7 / 39
--
2.9 /42Front: 225/45 R 18
91 Y RSC
Rear: 255/40 R 18
95 Y RSC2.9 /42
--
2.9 /42Front: 225/40 R 19
89 Y RSC
Rear: 255/35 R 19
92 Y RSC2.7 / 39
--
3.2 / 46Front: 225/35 R 20
90 Y XL RSC
Rear: 255/30 R 20
92 Y XL RSC2.9 /42
--
3.4 / 49Emergency wheel:
T 135/80 R 17 102
MSpeed up to a max. of
50 mph / 80 km/h
4.2 / 60
Tire identification marks
Tire size 245/45 R 18 96 Y
245: nominal width in mm
Seite 195Wheels and tiresMobility195
Online Edition for Part no. 01 40 2 960 493 - II/15