Page 211 of 445
210
uuAudio System Basic Operation*uPlaying a USB Flash Drive
Features
Playing a USB Flash Drive
Your audio system reads and plays sound files on a USB flash drive in either MP3,
WMA or AAC*1 format.
Connect your USB flash drive to the USB port, then press the AUX button.
2USB Port P. 187
*1:Only AAC format files recorded with iTunes are playable on this unit.
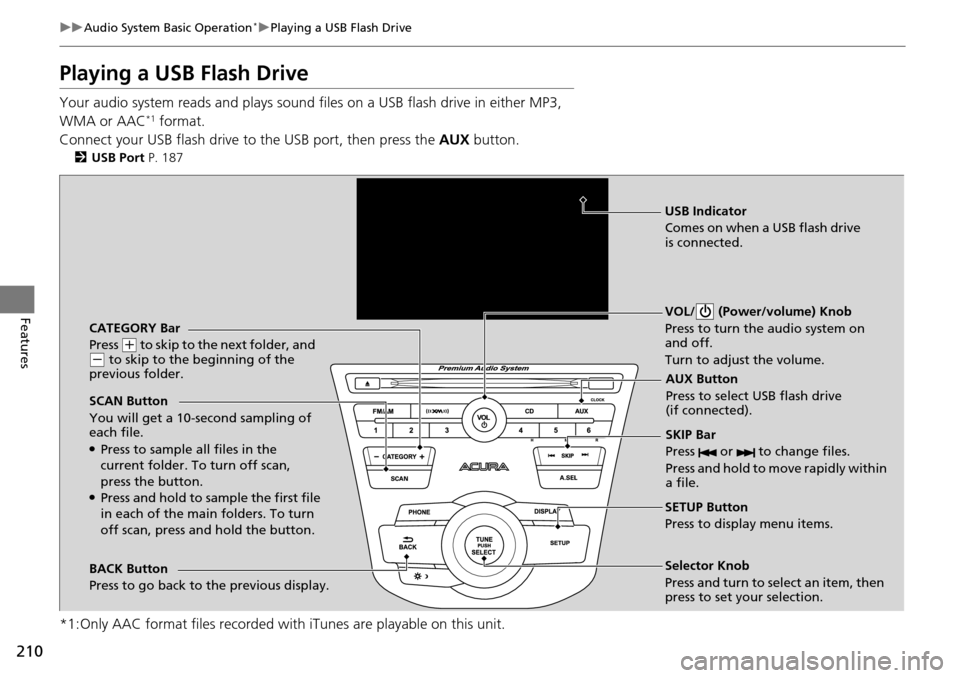
CATEGORY Bar
Press
(+ to skip to the next folder, and (- to skip to the beginning of the
previous folder.
SCAN Button
You will get a 10-second sampling of
each file.
●Press to sample all files in the
current folder. To turn off scan,
press the button.
●Press and hold to sample the first file
in each of the main folders. To turn
off scan, press and hold the button. VOL/ (Power/volume) Knob
Press to turn the audio system on
and off.
Turn to adjust the volume.
SKIP Bar
Press or to change files.
Press and hold to move rapidly within
a file.
SETUP Button
Press to display menu items.
Selector Knob
Press and turn to select an item, then
press to set your selection.
AUX Button
Press to select USB flash drive
(if connected).
USB Indicator
Comes on when a USB flash drive
is connected.
BACK Button
Press to go back to the previous display.
Page 213 of 445
uuAudio System Basic Operation*uPlaying a USB Flash Drive
212
Features
You can select repeat and random modes when playing a file.
1.Press the SETUP button.
2. Rotate to select Play Mode, then press
.
3. Rotate to select a mode, then press .
■To turn off a play mode
1. Press the SETUP button.
2. Rotate to select Play Mode, then press .
3. Rotate to select Normal Play, then press .
■How to Select a Play Mode1How to Select a Play Mode
Play Mode Menu Items
Normal Play
Repeat One Track : Repeats the current file.
Repeat One Folder : Repeats all files in the current
folder.
Random in Folder : Plays all files in the current folder
in random order.
Random All : Plays all files in random order.
Play Mode
Items
Page 214 of 445
213
uuAudio System Basic Operation*uPlaying Bluetooth ® Audio
Continued
Features
Playing Bluetooth ® Audio
Your audio system allows you to listen to music from your Bluetooth-compatible
phone.
This function is available when the phone is paired and linked to the vehicle’s
Bluetooth ® HandsFreeLink ® (HFL) system.
2Phone Setup P. 231
1Playing Bluetooth ® Audio
Not all Bluetooth -enabled phones with streaming
audio capabilities are compatible with the system.
For a list of compatible phones:
•U.S.: Visit www.acura.com/handsfreelink , or call 1-
888-528-7876.
•Canada: Visit www.handsfreelink.ca , or call 1-888-
528-7876.
In some states, it may be il legal to perform some data
device functions while driving.
If more than one phone is paired to the HFL system,
there will be a delay before the system begins to play.
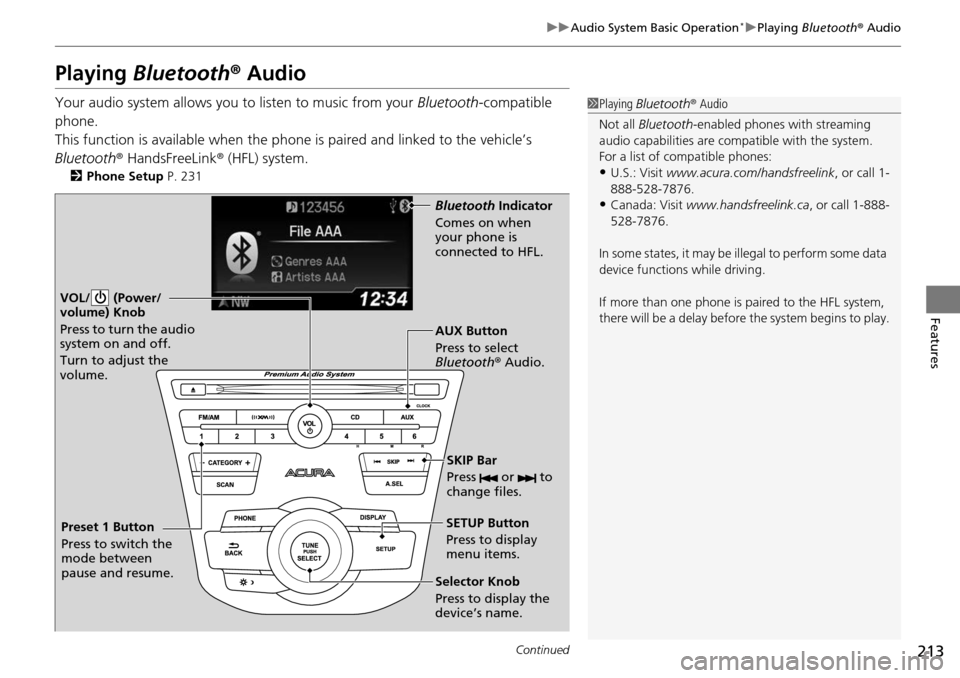
VOL/ (Power/
volume) Knob
Press to turn the audio
system on and off.
Turn to adjust the
volume.
SETUP Button
Press to display
menu items.
Selector Knob
Press to display the
device’s name. AUX Button
Press to select
Bluetooth® Audio.
SKIP Bar
Press or to
change files.
Bluetooth Indicator
Comes on when
your phone is
connected to HFL.
Preset 1 Button
Press to switch the
mode between
pause and resume.
Page 215 of 445
uuAudio System Basic Operation*uPlaying Bluetooth ® Audio
214
Features
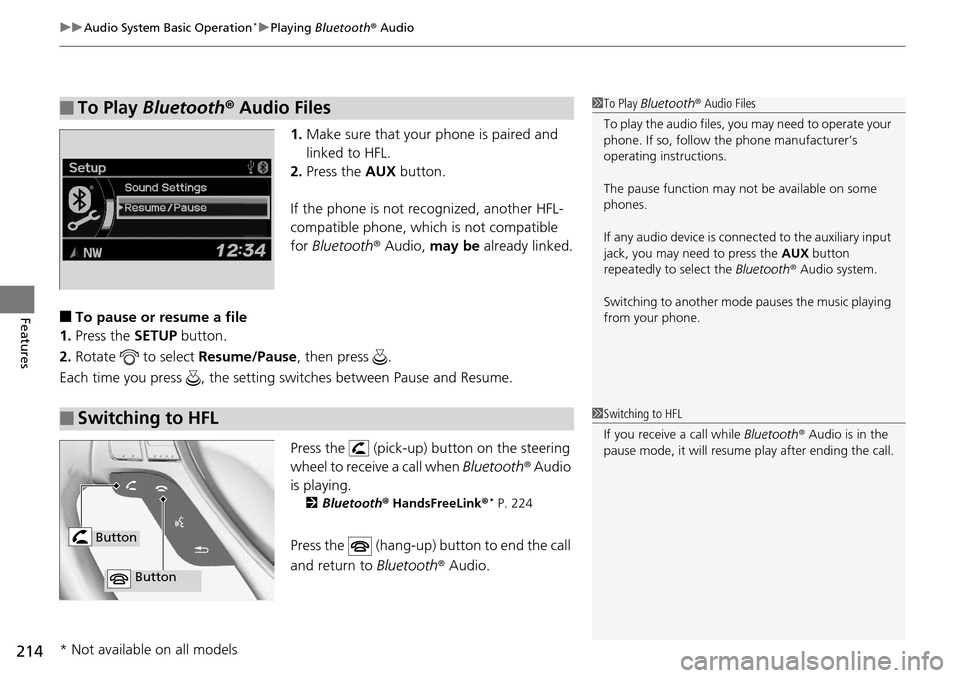
1. Make sure that your phone is paired and
linked to HFL.
2. Press the AUX button.
If the phone is not re cognized, another HFL-
compatible phone, which is not compatible
for Bluetooth ® Audio, may be already linked.
■To pause or resume a file
1. Press the SETUP button.
2. Rotate to select Resume/Pause, then press .
Each time you press , the setting sw itches between Pause and Resume.
Press the (pick-up) button on the steering
wheel to receive a call when Bluetooth® Audio
is playing.
2 Bluetooth ® HandsFreeLink ®* P. 224
Press the (hang-up) bu tton to end the call
and return to Bluetooth® Audio.
■To Play Bluetooth® Audio Files1To Play Bluetooth ® Audio Files
To play the audio files, y ou may need to operate your
phone. If so, follow the phone manufacturer’s
operating instructions.
The pause function may no t be available on some
phones.
If any audio device is conne cted to the auxiliary input
jack, you may need to press the AUX button
repeatedly to select the Bluetooth® Audio system.
Switching to another mode pauses the music playing
from your phone.
■Switching to HFL1 Switching to HFL
If you receive a call while Bluetooth® Audio is in the
pause mode, it will resume play after ending the call.
Button
Button
* Not available on all models
Page 216 of 445
215
Features
Audio Error Messages*
CD Player
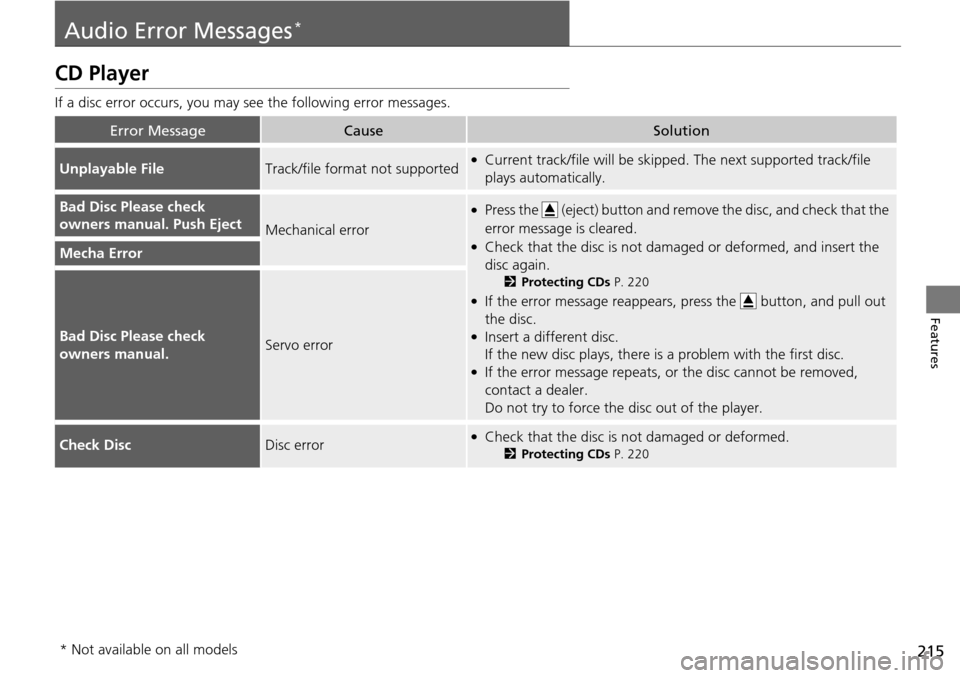
If a disc error occurs, you may see the following error messages.
Error MessageCauseSolution
Unplayable FileTrack/file format not supported●Current track/file will be skipped. The next supported track/file
plays automatically.
Bad Disc Please check
owners manual. Push Eject
Mechanical error
●Press the (eject) button and remo ve the disc, and check that the
error message is cleared.
●Check that the disc is not dama ged or deformed, and insert the
disc again.
2 Protecting CDs P. 220
●If the error message reappears, press the button, and pull out
the disc.
●Insert a different disc.
If the new disc plays, there is a problem with the first disc.
●If the error message repeats, or the disc cannot be removed,
contact a dealer.
Do not try to force the disc out of the player.
Mecha Error
Bad Disc Please check
owners manual.Servo error
Check DiscDisc error●Check that the disc is not damaged or deformed.
2Protecting CDs P. 220
* Not available on all models
Page 219 of 445
218
Features
General Information on the Audio System*
SiriusXM® Radio Service
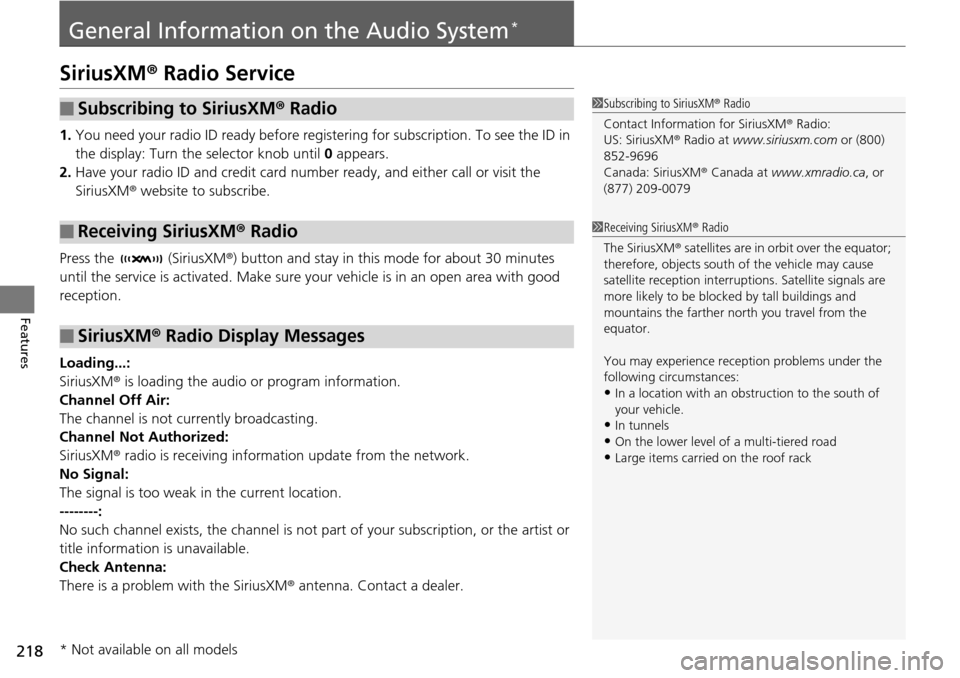
1. You need your radio ID ready before registering for subscription. To see the ID in
the display: Turn the selector knob until 0 appears.
2. Have your radio ID and credit card num ber ready, and either call or visit the
SiriusXM ® website to subscribe.
Press the (SiriusXM ®) button and stay in this mode for about 30 minutes
until the service is activated. Make sure yo ur vehicle is in an open area with good
reception.
Loading...:
SiriusXM ® is loading the audio or program information.
Channel Off Air:
The channel is not currently broadcasting.
Channel Not Authorized:
SiriusXM ® radio is receiving information update from the network.
No Signal:
The signal is too weak in the current location.
--------:
No such channel exists, the channel is not pa rt of your subscription, or the artist or
title information is unavailable.
Check Antenna:
There is a problem with the SiriusXM ® antenna. Contact a dealer.
■Subscribing to SiriusXM® Radio
■Receiving SiriusXM® Radio
■SiriusXM® Radio Display Messages
1 Subscribing to SiriusXM ® Radio
Contact Information for SiriusXM ® Radio:
US: SiriusXM ® Radio at www.siriusxm.com or (800)
852-9696
Canada: SiriusXM ® Canada at www.xmradio.ca , or
(877) 209-0079
1 Receiving SiriusXM ® Radio
The SiriusXM ® satellites are in orbit over the equator;
therefore, objects south of the vehicle may cause
satellite reception interruptions. Sa tellite signals are
more likely to be blocked by tall buildings and
mountains the farther north you travel from the
equator.
You may experience rece ption problems under the
following circumstances:
•In a location with an obstruction to the south of
your vehicle.
•In tunnels•On the lower level of a multi-tiered road
•Large items carried on the roof rack
* Not available on all models
Page 223 of 445
222
Features
HomeLink® Universal Transceiver
The HomeLink ® Universal Transceiver can be pr ogrammed to operate up to three
remote controlled devices around your home, such as garage doors, lighting, or
home security systems.
Refer to the safety information that came wi th your garage door opener to test that
the safety features are functioning properly. If you do not have the safety
information, contact the manufacturer.
Before programming HomeLink, make sure that people and objects are out of the
way of the garage or gate to prevent potential injury or damage.
When programming a garage door opener, park just outside the garage door’s
path.
Training HomeLink
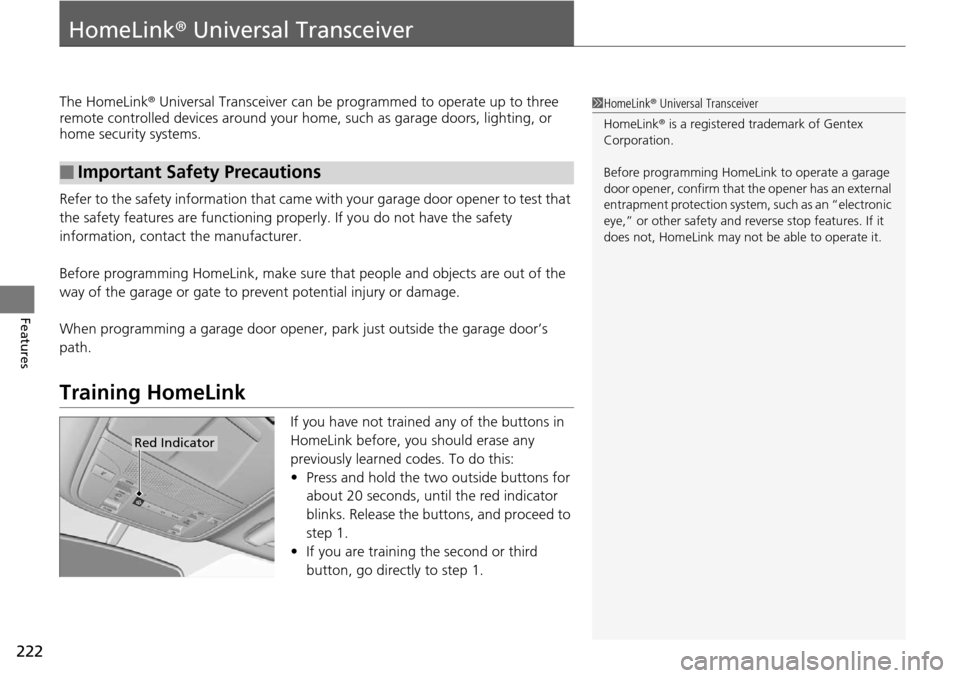
If you have not trained any of the buttons in
HomeLink before, you should erase any
previously learned codes. To do this:
• Press and hold the two outside buttons for
about 20 seconds, until the red indicator
blinks. Release the bu ttons, and proceed to
step 1.
• If you are training the second or third
button, go directly to step 1.
■Important Safety Precautions
1HomeLink ® Universal Transceiver
HomeLink® is a registered tra demark of Gentex
Corporation.
Before programming HomeLi nk to operate a garage
door opener, confirm that the opener has an external
entrapment protection system, such as an “electronic
eye,” or other safety and reverse stop features. If it
does not, HomeLink may not be able to operate it.
Red Indicator
Page 224 of 445
223
uuHomeLink ® Universal Transceiver uTraining HomeLink
Features
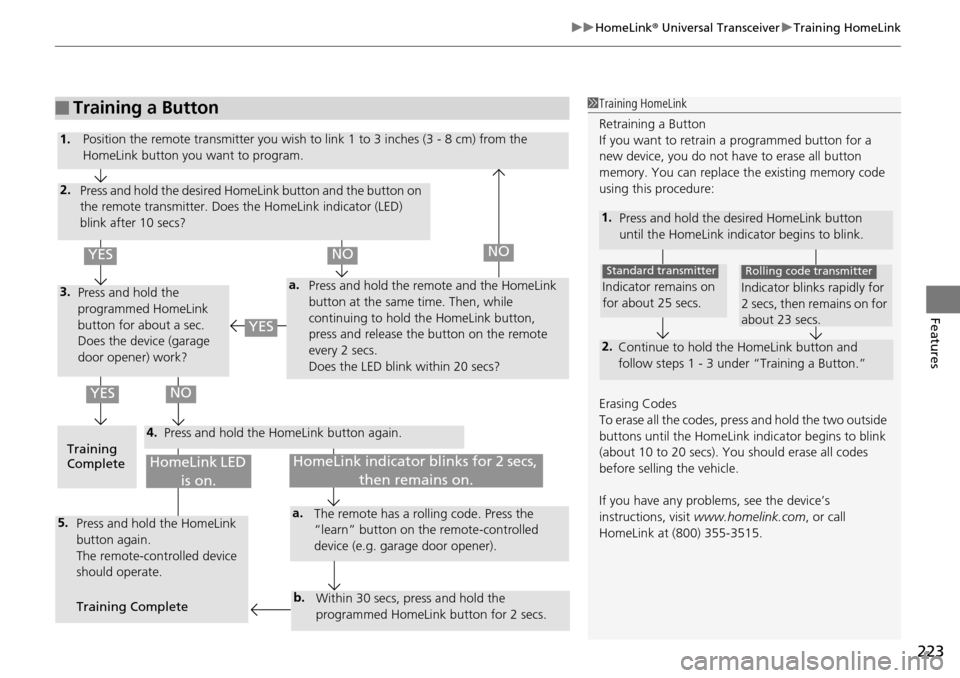
■Training a Button1Training HomeLink
Retraining a Button
If you want to retrain a programmed button for a
new device, you do not ha ve to erase all button
memory. You can replace the existing memory code
using this procedure:
1. Press and hold the desired HomeLink button
until the HomeLink indi cator begins to blink.
2.
Continue to hold the HomeLink button and
follow steps 1 - 3 unde r “Training a Button.”
Indicator remains on
for about 25 secs.
Standard transmitter
Indicator blinks rapidly for
2 secs, then remains on for
about 23 secs.
Rolling code transmitter
Erasing Codes
To erase all the codes, press and hold the two outside
buttons until the HomeLink i ndicator begins to blink
(about 10 to 20 secs). You should erase all codes
before selling the vehicle.
If you have any problems, see the device’s
instructions, visit www.homelink.com , or call
HomeLink at (800) 355-3515.
4.
a.3.
2.
5.a.
b.
1. Position the remote transmitter you wish to link 1 to 3 inches (3 - 8 cm) from the
HomeLink button you want to program.
Press and hold the desired HomeLink button and the button on
the remote transmitter. Does the HomeLink indicator (LED)
blink after 10 secs?
Press and hold the
programmed HomeLink
button for about a sec.
Does the device (garage
door opener) work? Press and hold the remote and the HomeLink
button at the same time. Then, while
continuing to hold the HomeLink button,
press and release the button on the remote
every 2 secs.
Does the LED blink within 20 secs?
Training
Complete Press and hold the HomeLink button again.
Press and hold the HomeLink
button again.
The remote-controlled device
should operate.
Training Complete The remote has a ro
lling code. Press the
“learn” button on the remote-controlled
device (e.g. garage door opener).
Within 30 secs, press and hold the
programmed HomeLink button for 2 secs.
HomeLink indicator blinks for 2 secs, then remains on.HomeLink LED is on.
YESNO
YES
YESNONO