Page 38 of 118

INSTRUMENT AND CONTROL FUNCTIONS
3-23
3Ri
ght
EAU54201
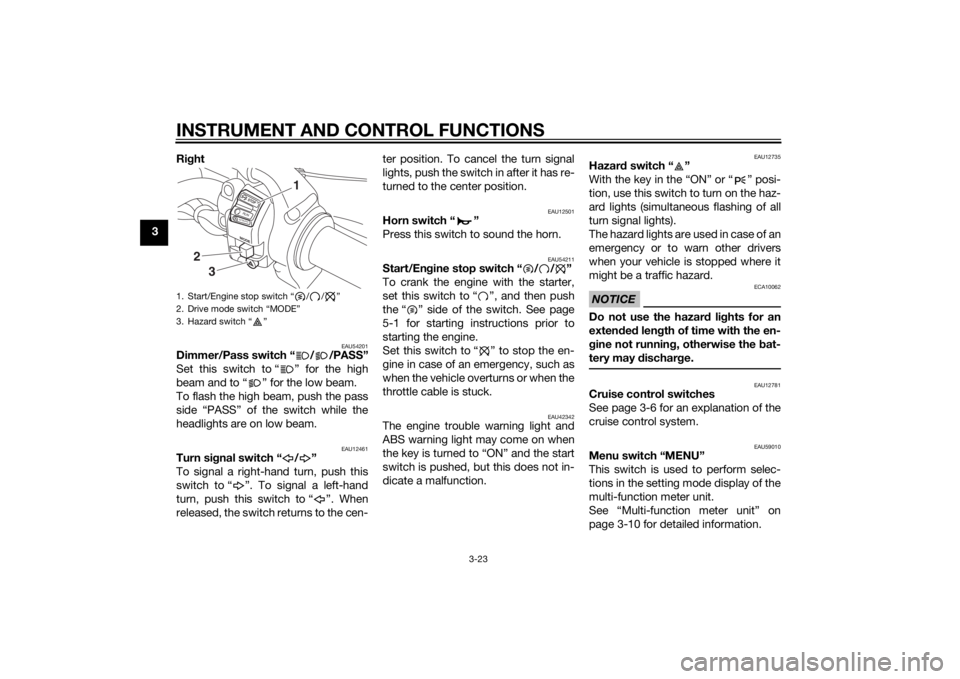
Dimmer/Pass switch “ / /PASS”
Set this switch to “ ” for the high
beam and to “ ” for the low beam.
To flash the high beam, push the pass
side “PASS” of the switch while the
headlights are on low beam.
EAU12461
Turn si gnal switch “ / ”
To signal a right-hand turn, push this
switch to “ ”. To signal a left-hand
turn, push this switch to “ ”. When
released, the switch returns to the cen- ter position. To cancel the turn signal
lights, push the switch in after it has re-
turned to the center position.
EAU12501
Horn switch “ ”
Press this switch to sound the horn.
EAU54211
Start/En
gine stop switch “ / / ”
To crank the engine with the starter,
set this switch to “ ”, and then push
the “ ” side of the switch. See page
5-1 for starting instructions prior to
starting the engine.
Set this switch to “ ” to stop the en-
gine in case of an emergency, such as
when the vehicle overturns or when the
throttle cable is stuck.
EAU42342
The engine trouble warning light and
ABS warning light may come on when
the key is turned to “ON” and the start
switch is pushed, but this does not in-
dicate a malfunction.
EAU12735
Hazar d switch “ ”
With the key in the “ON” or “ ” posi-
tion, use this switch to turn on the haz-
ard lights (simultaneous flashing of all
turn signal lights).
The hazard lights are used in case of an
emergency or to warn other drivers
when your vehicle is stopped where it
might be a traffic hazard.NOTICE
ECA10062
Do not use the hazard lights for an
exten ded len gth of time with the en-
g ine not runnin g, otherwise the bat-
tery may dischar ge.
EAU12781
Cruise control switches
See page 3-6 for an explanation of the
cruise control system.
EAU59010
Menu switch “MENU”
This switch is used to perform selec-
tions in the setting mode display of the
multi-function meter unit.
See “Multi-function meter unit” on
page 3-10 for detailed information.
1. Start/Engine stop switch “ / / ”
2. Drive mode switch “MODE”
3. Hazard switch “ ”
MODESTOPRUNS TA R
T
3
2
1
U2BSE1E0.book Page 23 Thursday, July 31, 2014 4:31 PM
Page 94 of 118

PERIODIC MAINTENANCE AND ADJUSTMENT
6-30
6
EAU58961
Replacing the fusesThe fuse boxes and the ABS motor
fuse are located behind cowling A, and
the main fuse, the cruise control fuse
and the brake light fuse are located be-
hind cowling B. (See page 6-8.)
If a fuse is blown, replace it as follows.1. Turn the key to “OFF” and turn off the electrical circuit in question.
2. Remove the blown fuse, and then install a new fuse of the specified
amperage. WARNING! Do not use a fuse of a hi
gher ampera ge
ratin g than recommen ded to
avoi d causin g extensive d am-
a g e to the electrical system an d
possi bly a fire.
[EWA15132]
1. ABS motor fuse
2. ABS motor spare fuse
3. Main fuse
4. Spare fuse
5. Cruise control fuse
6. Brake light fuse
7. Fuse box123
5
4
67
1. Headlight fuse
2. ABS solenoid fuse
3. Electronic throttle valve fuse
4. Fuel injection system fuse
5. Backup fuse (for clock and immobilizer sys-
tem)
6. Radiator fan motor fuse
7. Ignition fuse
8. Signaling system fuse
9. ABS control unit fuse
10.Auxiliary DC jack fuse
11.Parking lighting fuse
12.O/P (option) fuse
13.Spare fuse
13456
2
7
8
9
10
13
11
12
13
U2BSE1E0.book Page 30 Thursday, July 31, 2014 4:31 PM
Page 95 of 118

PERIODIC MAINTENANCE AND ADJUSTMENT
6-31
6
3. Turn the key to “ON” and turn on
the electrical circuit in question to
check if the device operates.
4. If the fuse immediately blows again, have a Yamaha dealer
check the electrical system.
EAU39014
Replacin g a hea dlig ht bul bThis model is equipped with halogen
bulb headlights. If a headlight bulb
burns out, replace it as follows.NOTICE
ECA10651
Take care not to d amage the follow-
in g parts:
Hea dlig ht bul b
Do not touch the glass part of
the hea dlig ht bul b to keep it free
from oil, otherwise the transpar-
ency of the glass, the luminosity
of the bul b, an d the bul b life will
b e a dversely affected . Thor-
ou ghly clean off any dirt an d fin-
g erprints on the head lig ht bul b
usin g a cloth moistene d with al-
cohol or thinner.
Hea dlig ht lens
Do not affix any type of tinted
film or stickers to the hea dlig ht
lens.
Do not use a hea dlig ht bul b of a
watta ge hi gher than specified .
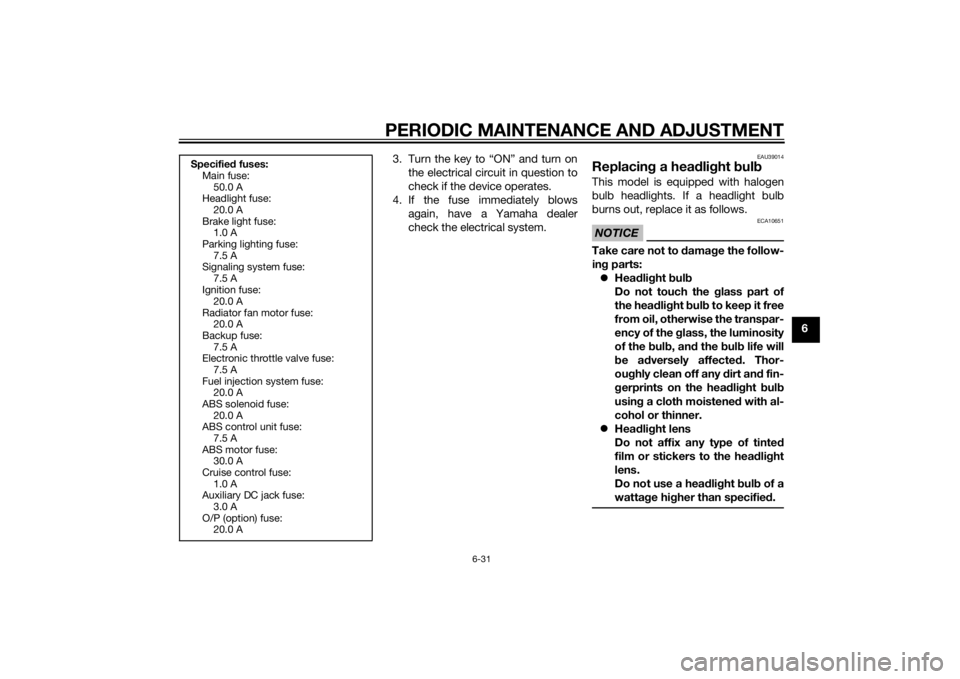
Specified fuses:
Main fuse:
50.0 A
Headlight fuse:
20.0 A
Brake light fuse: 1.0 A
Parking lighting fuse: 7.5 A
Signaling system fuse:
7.5 A
Ignition fuse: 20.0 A
Radiator fan motor fuse: 20.0 A
Backup fuse:
7.5 A
Electronic throttle valve fuse: 7.5 A
Fuel injection system fuse: 20.0 A
ABS solenoid fuse:
20.0 A
ABS control unit fuse: 7.5 A
ABS motor fuse: 30.0 A
Cruise control fuse:
1.0 A
Auxiliary DC jack fuse: 3.0 A
O/P (option) fuse: 20.0 A
U2BSE1E0.book Page 31 Thursday, July 31, 2014 4:31 PM
Page 99 of 118
PERIODIC MAINTENANCE AND ADJUSTMENT
6-35
6
EAU58590
Turn signal li ght an d tail/ brake
lig htThis model is equipped with LED-type
turn signal lights and an LED-type
tail/brake light.
If a turn signal light or the tail/brake
light does not come on, have a
Yamaha dealer check it.
EAU49722
Replacin g a license plate li ght
b ul b1. Remove the license plate light unit
bolts.
2. Remove the license plate light bulb socket (together with the
bulb) by turning it counterclock-
wise, and then pulling it out. 3. Remove the burnt-out bulb by
pulling it out.
4. Insert a new bulb into the socket.
5. Install the socket (together with the bulb) by pushing it in, and then
turning it clockwise until it stops.1. License plate light unit
2. License plate light unit bolt
2
1
1. License plate light bulb socket
1. License plate light bulb
1
1
U2BSE1E0.book Page 35 Thursday, July 31, 2014 4:31 PM
Page 111 of 118

SPECIFICATIONS
8-3
8
Electrical system:Ignition system:TCI
Charging system:
AC magnetoBattery:Model:YTZ12S
Voltage, capacity:
12 V, 11.0 AhHea dlig ht:Bulb type:
Halogen bulbBul b volta ge, watta ge × quantity:Headlight:
12 V, 55.0 W × 2
Tail/brake light: LED
Front turn signal light:
LED
Rear turn signal light: LED
Auxiliary light: 12 V, 5.0 W × 2
License plate light:
12 V, 5.0 W × 1
Meter lighting: LED
Neutral indicator light: LED
High beam indicator light:
LED
Oil level warning light: LED Turn signal indicator light:
LED
Engine trouble warning light: LED
ABS warning light:
LED
Cruise control “SET” indicator light: LED
Cruise control “ON” indicator light: LED
Immobilizer system indicator light:
LED
Traction control system indicator/warning
light:
LED
Fuses:Main fuse:50.0 A
Headlight fuse:
20.0 A
Brake light fuse: 1.0 A
Signaling system fuse: 7.5 A
Ignition fuse:
20.0 A
Parking lighting fuse: 7.5 A
Radiator fan motor fuse: 20.0 A
Fuel injection system fuse:
20.0 A
ABS control unit fuse: 7.5 A ABS motor fuse:
30.0 A
ABS solenoid fuse: 20.0 A
Cruise control fuse:
1.0 A
Auxiliary DC jack fuse: 3.0 A
Backup fuse: 7.5 A
Electronic throttle valve fuse:
7.5 A
O/P (option) fuse: 20.0 A
U2BSE1E0.book Page 3 Thursday, July 31, 2014 4:31 PM
Page 115 of 118
INDEX
10-2
10
Tires ...................................................... 6-18
Tool kit .................................................... 6-2
Traction control system ........................ 3-27
Traction control system indicator/warning light.......................... 3-5
Troubleshooting.................................... 6-37
Troubleshooting charts......................... 6-38
Turn signal indicator lights ..................... 3-4
Turn signal light and tail/brake light ..... 6-35
Turn signal switch................................. 3-23VValve clearance .................................... 6-18
Vehicle identification number ................. 9-1WWheel bearings, checking .................... 6-28
Wheels .................................................. 6-20
Windshield ............................................ 3-34
U2BSE1E0.book Page 2 Thursday, July 31, 2014 4:31 PM