Page 31 of 106
Description
25
Engine compartment
12
3
4 6
5
10 11
8
97
1 Engine cover
2 Air filter case
3 Water separator (page 31)
4 Fuel tank
5 Battery (page 59)
6 Flushing hose connector
7 Watertight storage compartment
8 Spark plug/Spark plug cap/Ignition coil
9 Electrical box
10 Engine oil filler cap (page 51) 11
Dipstick
UF3K71E0.book Page 25 Monday, August 18, 2014 2:54 PM
Page 57 of 106

Operation and handling requirements
51
EJU40291
Engine oil requirementsEJU41513Engine oil
NOTICE
ECJ00282
Use only 4-stroke engine oil. Usage of 2-
stroke engine oil could result in severe en-
gine damage.
TIP:
When the engine is operated at high speeds,
some engine oil may be consumed. Be sure
to check the engine oil level.
Checking the engine oil level
WARNING
EWJ00341
Engine oil is extremely hot immediately af-
ter the engine is turned off. Coming in con-
tact with or getting any engine oil on your
clothes could result in burns.
NOTICE
ECJ01002
Make sure that debris and water do not
enter the oil filler hole. Debris and water in
the engine oil can cause serious engine
damage.
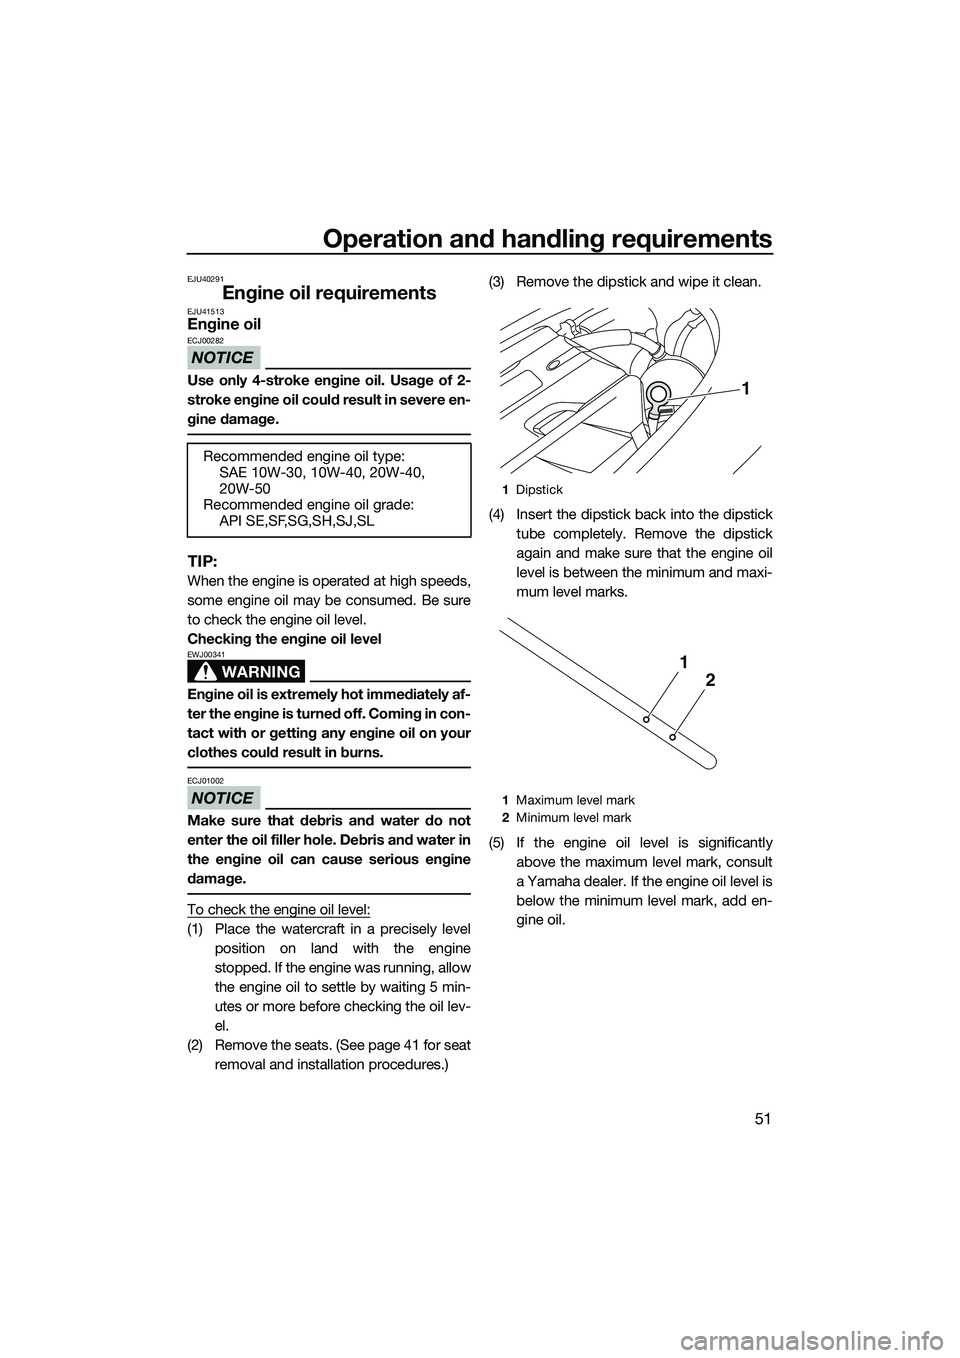
To check the engine oil level:
(1) Place the watercraft in a precisely levelposition on land with the engine
stopped. If the engine was running, allow
the engine oil to settle by waiting 5 min-
utes or more before checking the oil lev-
el.
(2) Remove the seats. (See page 41 for seat removal and installation procedures.) (3) Remove the dipstick and wipe it clean.
(4) Insert the dipstick
back into the dipstick
tube completely. Remove the dipstick
again and make sure that the engine oil
level is between the minimum and maxi-
mum level marks.
(5) If the engine oil level is significantly above the maximum level mark, consult
a Yamaha dealer. If the engine oil level is
below the minimum level mark, add en-
gine oil.
Recommended engine oil type:
SAE 10W-30, 10W-40, 20W-40,
20W-50
Recommended engine oil grade: API SE,SF,SG,SH,SJ,SL
1Dipstick
1 Maximum level mark
2 Minimum level mark
1
2
1
UF3K71E0.book Page 51 Monday, August 18, 2014 2:54 PM
Page 58 of 106

Operation and handling requirements
52
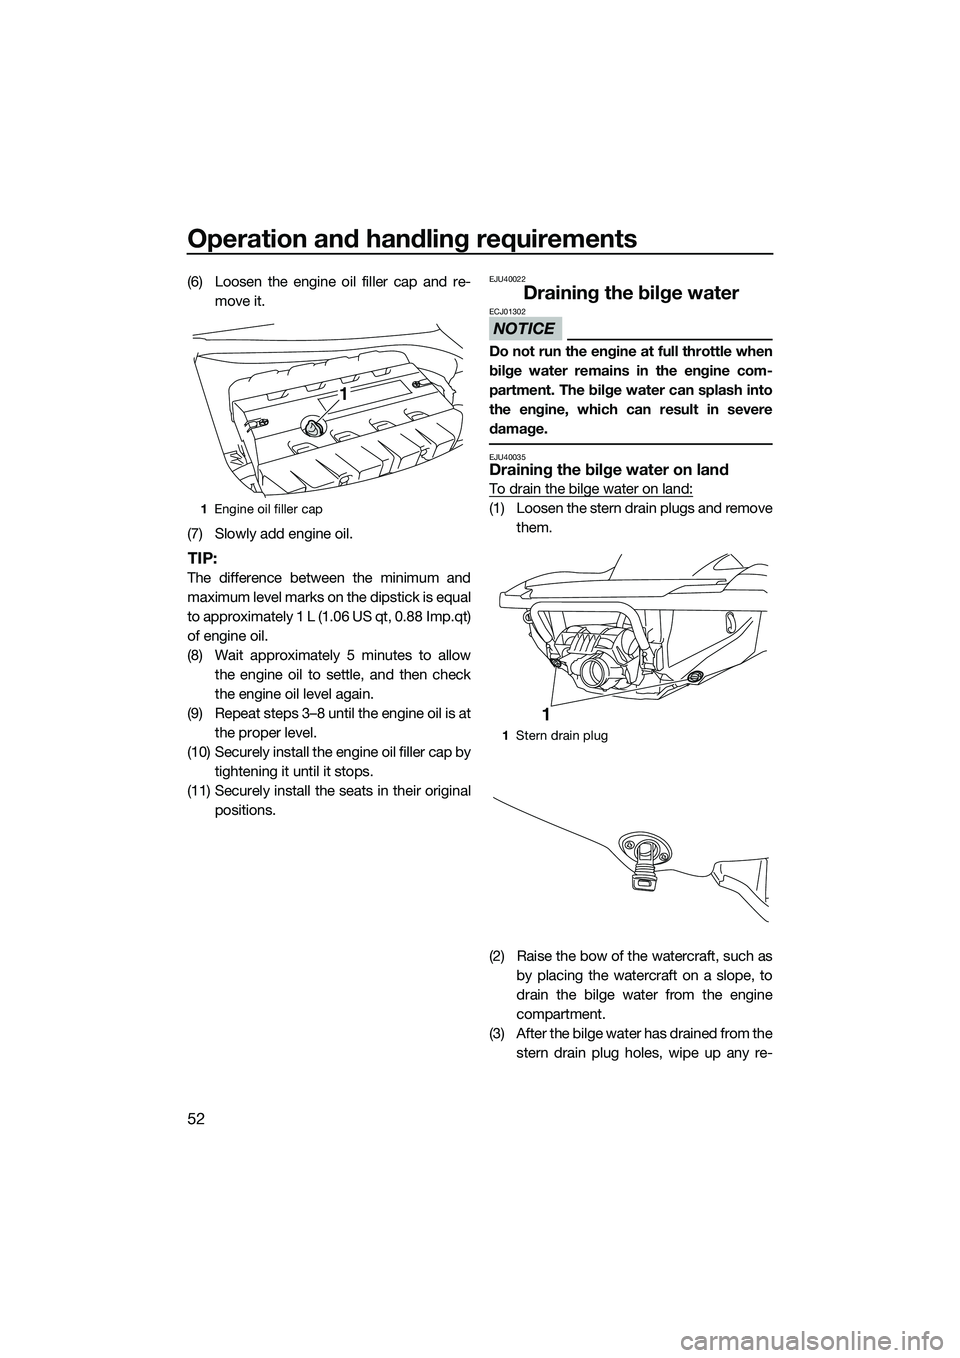
(6) Loosen the engine oil filler cap and re-move it.
(7) Slowly add engine oil.
TIP:
The difference between the minimum and
maximum level marks on the dipstick is equal
to approximately 1 L (1.06 US qt, 0.88 Imp.qt)
of engine oil.
(8) Wait approximately 5 minutes to allow the engine oil to settle, and then check
the engine oil level again.
(9) Repeat steps 3–8 until the engine oil is at the proper level.
(10) Securely install the engine oil filler cap by tightening it until it stops.
(11) Securely install the seats in their original positions.
EJU40022
Draining the bilge water
NOTICE
ECJ01302
Do not run the engine at full throttle when
bilge water remains in the engine com-
partment. The bilge water can splash into
the engine, which can result in severe
damage.
EJU40035Draining the bilge water on land
To drain the bilge water on land:
(1) Loosen the stern drain plugs and removethem.
(2) Raise the bow of the watercraft, such as by placing the watercraft on a slope, to
drain the bilge water from the engine
compartment.
(3) After the bilge water has drained from the stern drain plug holes, wipe up any re-1Engine oil filler cap
1
1Stern drain plug
1
UF3K71E0.book Page 52 Monday, August 18, 2014 2:54 PM
Page 65 of 106

Pre-operation checks
59
EJU40182Engine unit check
Check the exterior of the engine unit for dam-
age or other problem.
EJU36886Engine oil level check
Make sure that the engine oil level is between
the minimum and maximum level marks on
the dipstick. (See page 51 for information on
checking the engine oil level.)
EJU32456Bilge water check
Make sure that no bilge water has collected in
the engine compartment. If bilge water has
collected in the engine compartment, drain it.
(See page 52 for information on draining the
bilge water.)
EJU32485Battery checks
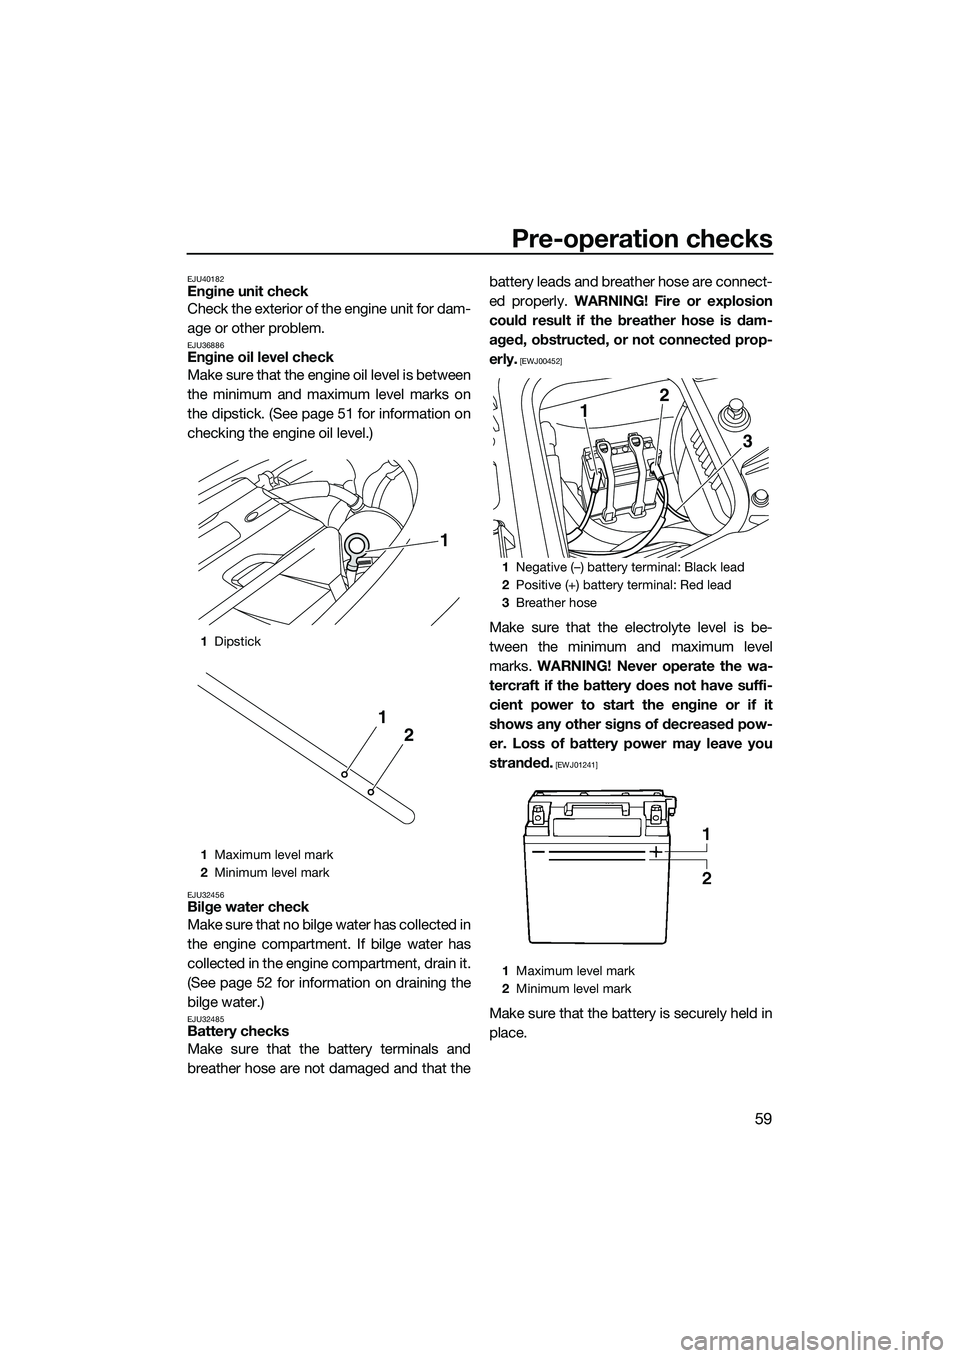
Make sure that the battery terminals and
breather hose are not damaged and that thebattery leads and breather hose are connect-
ed properly.
WARNING! Fire or explosion
could result if the breather hose is dam-
aged, obstructed, or not connected prop-
erly.
[EWJ00452]
Make sure that the electrolyte level is be-
tween the minimum and maximum level
marks. WARNING! Never operate the wa-
tercraft if the battery does not have suffi-
cient power to start the engine or if it
shows any other signs of decreased pow-
er. Loss of battery power may leave you
stranded.
[EWJ01241]
Make sure that the battery is securely held in
place.
1 Dipstick
1 Maximum level mark
2 Minimum level mark
1
2
1
1Negative (–) battery terminal: Black lead
2 Positive (+) battery terminal: Red lead
3 Breather hose
1 Maximum level mark
2 Minimum level mark
12
3
UF3K71E0.book Page 59 Monday, August 18, 2014 2:54 PM