2015 VOLVO V60 wheel
[x] Cancel search: wheelPage 134 of 414

03 Your driving environment
Transmission
03
132
Geartronic: starting on slippery
surfaces
Selecting 3rd gear in Geartronic’s manual shifting mode can help provide better tractionwhen starting off on slippery surfaces. To doso:
1. Depress the brake pedal and move the gear selector to the side from D toward
+S– .
2. Press the gear selector forward and release it (this selects 2nd gear). Press the selector forward again and release itto select 3rd gear. The optional steeringwheel paddles can also be used; see theprevious section "Geartronic: steeringwheel paddles."
3. Release the brake pedal and press gently on the accelerator pedal.
Shiftlock override
If the vehicle cannot be driven, for example because of a dead battery, the gear selectormust be moved from the P position before
the vehicle can be moved 4
.
Lift away the rubber mat on the floor of the storage compartment behind the cen-ter console to expose the small openingfor overriding the shiftlock system.
Insert the key blade into the opening. Press the key blade down as far as possi-ble and keep it held down.
Move the gear selector from the P posi-
tion. For information on the key blade, see page 64.
All Wheel Drive: AWD 5
Your Volvo can be equipped with permanent All Wheel Drive, which means that power isdistributed automatically between the frontand rear wheels. Under normal driving condi-tions, most of the engine's power is directedto the front wheels. However, if there is anytendency for the front wheels to spin, an elec-tronically controlled coupling distributespower to the wheels that have the best trac-tion.
4
If the battery is dead, the electric parking brake cannot be applied or released. Connect an auxiliary battery if the battery voltage is too low, see page 127.5
Standard on certain models.
Page 139 of 414

03 Your driving environment
Eco*
03
}}
* Option/accessory, for more information, see Introduction.137
engaged from the engine and engine rpm will be reduced to the idle level(approx. 700-800 rpm), which helps reducefuel consumption. This feature is primarily intended to be used in driving situations where a decrease inspeed is expected, such as when approach-ing an intersection or a traffic light.
Eco Coast enables proactive driving with as little braking as possible.
Combinations of On and OffDepending on the driving situation, Eco can be used in different ways to help reduce fuelconsumption:
• Eco activated
: this enables Eco Coast,
which allows the vehicle to roll freely for
as far as possible when the driver relea-
ses the accelerator pedal (e.g., when approaching a traffic light or intersection).
or
• Eco deactivated
: engine braking can be
used when the vehicle will only roll for
a short distance (in heavy traffic, etc.) or
when driving down hills .
To help keep fuel consumption as low as possible, Eco Coast should not be used intraffic situations where the brakes have toused frequently.
Activating Eco CoastEco Coast is activated when the accelerator pedal is released completely if:
• Eco is activated
• The gear selector is in
D
• The vehicle's speed is between approxi- mately 40–85 mph (65–140 km/h). Alwaysobserve posted speed limits
• The gradient of a down-slope is less thanapproximately 6%
Deactivating Eco CoastIn certain situations, it may be advisable to switch off the Eco Coast function, such as:
• When driving down steep hills, in order to utilize engine braking
• Prior to passing another vehicle, in orderto do so as safely as possible
Deactivating Eco Coast (and reactivating engine braking) can be done in the followingways:
• Press the
ECO button on the center con-
sole
• Move the gear selector to the manual "
S
+/– " position
• Change gears using the steering wheel paddles*
• Press the brake or accelerator pedal
Eco Coast limitationsThis function will not be available if:
• Cruise control is activated
• The gradient of a down-slope is morethan approximately 6%
• The steering wheel paddles* are used tomanually change gears
• The engine and/or transmission have notreached their normal operating tempera-ture
• The gear selector is moved from
D to the
manual " S+/–" position
• The vehicle's speed is not within the40–85 mph (65–140 km/h). interval
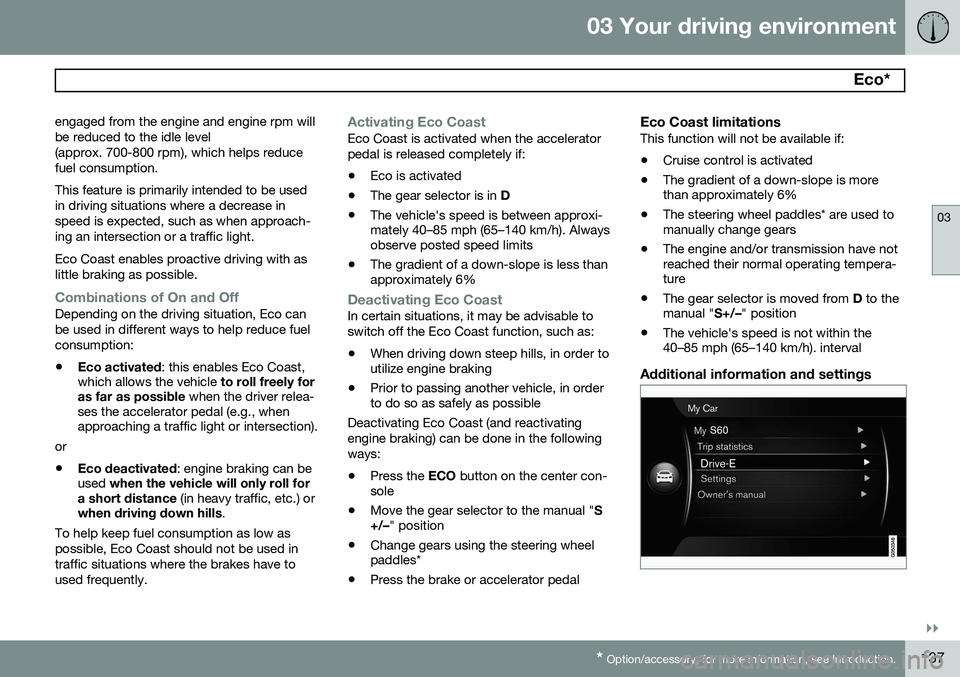
Additional information and settings
Page 142 of 414

03 Your driving environment
Start/Stop*
03
140* Option/accessory, for more information, see Introduction.
Auto-stop exceptions
In certain situations or conditions, the engine may not auto-stop when the vehicle comes
to a standstill, such as if:
Condition/situation
The vehicle's speed has not reached a speed of approx. 5 mph (ca 8 km/h) afterthe most recent auto-start or after thedriver has started the engine.
The driver unbuckles his/her seat belt.
The main battery's charge is below the minimum level.
The engine has not reached its normal operating temperature.
The ambient temperature is below freezing or above approx. 85°F (30°C).
The windshield's heating function* is acti- vated.
The climate system cannot keep the desired settings in the passenger compart-ment; the blower will operate at highspeed.
The vehicle is backing up.
Condition/situation
The main battery's temperature is below freezing or too high.
The driver is turning the steering wheel hard.
The road's incline is very steep.
A trailer's electrical system is connected to the vehicle.
The hood has been opened A
.
The transmission has not reached its nor- mal operating temperature.
Atmospheric pressure is below a level equivalent to an altitude of approx. 4,900–8,200 ft (1500–2500 m) above sea level.The actual pressure is also affected by cur-rent weather conditions.
The Adaptive Cruise Control's* Queue Assist feature is activated.
The gear selector is in the SB
or " +/–" posi-
tion.
A Certain engines only
B Sport mode (where applicable)
Auto-start exceptions
In certain situations or conditions, the engine may auto-start even though the driver is still
pressing the brake pedal, such as if:
Condition/situation
Condensation forms on the windows.
The climate system cannot keep the desired settings in the passenger compart-ment.
Electrical current consumption is tempo- rarily high or the main battery's charge isbelow the minimum level.
The brake pedal is pumped repeatedly.
The hood has been opened A
.
The vehicle begins to move or increases speed slightly (if the engine auto-stoppedbefore the vehicle was at a standstill (seepage 136)).
The driver unbuckles his/her seat belt while the gear selector is in the D or N positions.
The steering wheel is turned A
.
Page 145 of 414

03 Your driving environment
Brakes
03
}}
* Option/accessory, for more information, see Introduction.143
Brake system
The brake system is a hydraulic system con- sisting of two separate brake circuits. If aproblem should occur in one of these circuits,it is still possible to stop the vehicle with theother brake circuit. If the brake pedal must be depressed farther than normal and requires greater foot pres-sure, the stopping distance will be longer. A warning light in the instrument panel will light up to warn the driver that a fault hasoccurred. If this light comes on while driving or braking, stop immediately and check the brake fluidlevel in the reservoir.
NOTE
Press the brake pedal hard and maintain pressure on the pedal – do not pump thebrakes.
WARNING
If the fluid level is below the MIN mark in
the reservoir or if a brake system message is shown in the information display: DO
NOT DRIVE . Have the vehicle towed to a
trained and qualified Volvo service techni-cian and have the brake system inspected.
Brake pad inspectionOn vehicles equipped with a jack*, the condi- tion of the brake pads can be checked byraising the vehicle (see page 336 for informa-tion about using the jack and removing awheel) and performing a visual inspection ofthe brake pads.
WARNING
• If the vehicle has been driven immedi- ately prior to a brake pad inspection,the wheel hub, brake components,etc., will be very hot. Allow time forthese components to cool before car-rying out the inspection.
• Apply the parking brake and put thegear selector in the Park (
P) position.
• Block the wheels standing on theground, use rigid wooden blocks orlarge stones.
WARNING
•Use the jack intended for the vehicle when changing a tire. For any otherjob, use stands to support the vehicle.
• The jack should be kept well-greasedand clean, and should not be dam-aged.
• Be sure the jack is on a firm, level,non-slippery surface.
• No objects should be placed betweenthe base of jack and the ground, orbetween the jack and the attachmentbar on the vehicle.
• The jack must correctly engage thejack attachment.
• Never allow any part of your body tobe extended under a vehicle suppor-ted by a jack.
Brake lightsThe brake lights come on automatically when the brakes are applied.
Adaptive brake lightsThe adaptive brake lights activate in the event of sudden braking or if the ABS system isactivated. This function causes an additionaltaillight on each side of the vehicle to illumi-nate to help alert vehicles traveling behind.
Page 148 of 414

03 Your driving environment
Parking brake
03
146
Electric parking brake
An electric parking brake has the same func- tion as a manual parking brake.
NOTE
•A faint sound from the parking brake's electric motor can be heard when theparking brake is being applied. Thissound can also be heard during theautomatic function check of the park-ing brake.
• The brake pedal will move slightlywhen the electric parking brake isapplied or released.
Low battery voltageIf the battery voltage is too low, the park- ing brake cannot be applied or released. Connect an auxiliary battery if the battery voltage is too low, see page 127.
Applying the electric parking brake
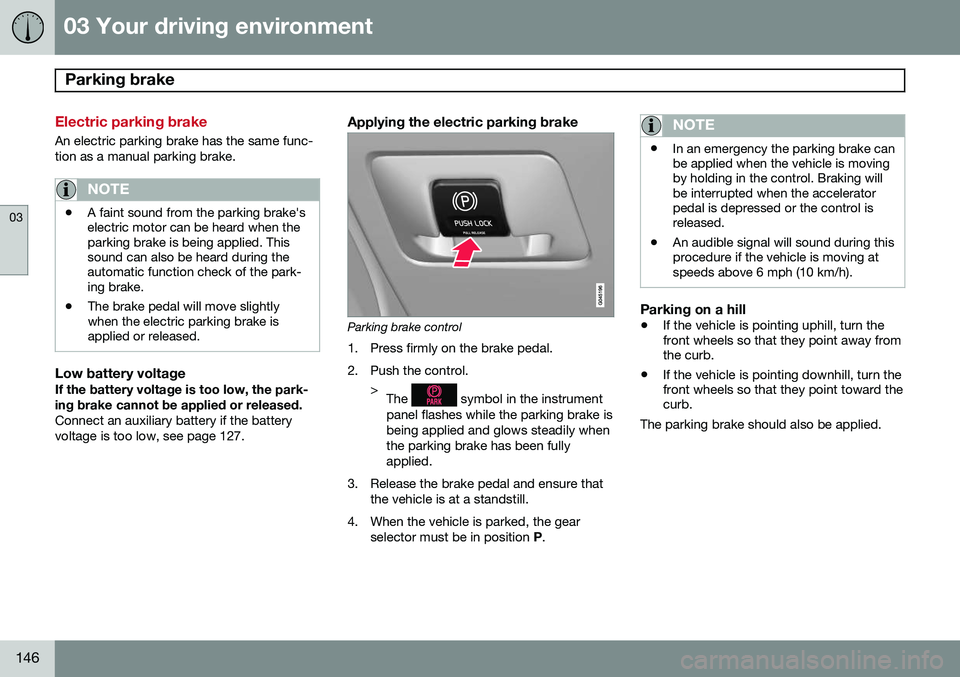
Parking brake control
1. Press firmly on the brake pedal.
2. Push the control. >The
symbol in the instrument
panel flashes while the parking brake is being applied and glows steadily whenthe parking brake has been fullyapplied.
3. Release the brake pedal and ensure that the vehicle is at a standstill.
4. When the vehicle is parked, the gear selector must be in position P.
NOTE
• In an emergency the parking brake can be applied when the vehicle is movingby holding in the control. Braking willbe interrupted when the acceleratorpedal is depressed or the control isreleased.
• An audible signal will sound during thisprocedure if the vehicle is moving atspeeds above 6 mph (10 km/h).
Parking on a hill
•
If the vehicle is pointing uphill, turn the front wheels so that they point away fromthe curb.
• If the vehicle is pointing downhill, turn thefront wheels so that they point toward thecurb.
The parking brake should also be applied.
Page 150 of 414

03 Your driving environment
Parking brake
03
148
SymbolMessageDescription/action
-Park brake not fully releasedA fault is preventing the parking brake from being released. Try to apply the parking brake and release it sev- eral times. If the problem persists, contact an authorized Volvo workshop. If you drive off with this error mes-sage showing, a warning signal sounds.
-Parking brake not appliedA fault is preventing the parking brake from being applied. Try to apply the parking brake and release it several times. If the problem persists, contact an authorized Volvo workshop. If you drive off with this error messageshowing, a warning signal sounds.
-Parking brake Service requiredA fault has occurred. Try to apply and release. Contact a Volvo workshop if the fault remains
WARNING
If the vehicle must be parked before the fault has been corrected, always put thegear selector in P and turn the wheels so
that they point away from the curb if thevehicle is pointing uphill or toward the curbif it is pointing downhill.
Page 154 of 414

04 Driver support
Stability system
04
152
Introduction
The Dynamic Stability and Traction Control system (DSTC) consists of a number of func-tions designed to help reduce wheel spin,counteract skidding, and to generally helpimprove directional stability.
CAUTION
A pulsating sound will be audible when the system is actively operating and is normal.
Traction control (TC)This function is designed to help reduce wheel spin by transferring power from a drivewheel that begins to lose traction to thewheel on the opposite side of the vehicle (onthe same axle). TC is most active at low speeds.This is one of DSTC's permanent functions and cannot be switched off.
Active Yaw Control (AYC)This function helps maintain directional stabil-ity, for example when cornering, by brakingone or more of the wheels if the vehicleshows a tendency to skid or slide laterally. This is one of DSTC's permanent functions and cannot be switched off.
Spin control (SC)The spin control function is designed to helpprevent the drive wheels from spinning whilethe vehicle is accelerating.
Corner Traction Control – CTCCTC compensates for understeering andhelps provide additional stability when accel-erating through a curve by preventing theinside wheel from spinning. This is particularlyuseful when accelerating on a curving high-way on-ramp. CTC is most effective if the stability system's Sport mode is selected. See the section
about Sport mode.
Engine Drag Control (EDC)EDC helps keep the engine running if thewheels show a tendency to lock, e.g., whenshifting down in the Geartronic manual shift-ing mode or while using the engine's brakingfunction on a slippery surface. If the enginewere to stop, power steering would not func-tion, making the vehicle more difficult tosteer.
Trailer Stability Assist – TSATrailer Stability Assist helps stabilize a vehiclethat is towing a trailer when the vehicle andtrailer have begun to sway. See page 308 formore information. This system is automatically deactivated if thedriver selects
Sport mode.
Operation
Sport modeThe stability system is always activated and cannot be switched off. However, the driver can select Sport mode,
which offers more active driving characteris- tics. In this mode, the engine managementsystem monitors movement of the acceleratorpedal and steering wheel for sportier drivingby allowing more lateral movement of the rearwheels before DSTC is activated. Under certain circumstances, such as when driving with snow chains, or driving in deepsnow or loose sand, it may be advisable totemporarily use Sport mode for maximum
tractive force. If the driver releases pressure on the acceler- ator pedal, DSTC will also activate to helpstabilize the vehicle. To switch to Sport mode:
1. Press the My Car button in the center
console control panel and select
My V60
DSTC in the menu.
Page 155 of 414

04 Driver support
Stability system
04
}}
153
2. Unselect the symbol and leave the menu
by pressing EXIT.
> This puts DSTC in Sport mode. Sport
mode remains active until the driver
switches it off in the menu or until the engine is switched off. DSTC will return to normal mode when the engine is restarted.
Symbols and messages in the main instrument panel
SymbolMessageDescription
DSTC Temporarily OFFThe DSTC system function has been temporarily reduced due to high brake disc temperature. DSTC reactivates automatically when the brakes have cooled.
DSTC Service requiredThe DSTC system is not functioning properly.
• Stop the vehicle in a safe place, turn off the engine and restart it.
• If the message is still displayed when the engine has restarted, drive to an authorized Volvo work- shop to have the system inspected.
and
"Message"Read the message in the instrument panel
Steady glow for 2 secs.The system is performing a self-diagnostic test.
Flashing symbolDSTC is actively functioning to help counteract wheel spin and/or a skid.
-Sport
mode has been activated.