2015 VAUXHALL MERIVA Starting the car
[x] Cancel search: Starting the carPage 109 of 245

Instruments and controls107
Vehicle messages on the
Colour-Info-Display Some important messages appear
additionally in the
Colour-Info-Display. Press the
multifunction knob to confirm a
message. Some messages only pop- up for a few seconds.
Warning chimes Only one warning chime will sound at
a time.
The warning chime regarding
unfastened seat belts has priority
over any other warning chime.
When starting the engine or
whilst driving ■ If seat belt is not fastened.
■ If a door or the tailgate is not fully closed when starting-off.
■ If a certain speed is exceeded with parking brake applied.
■ If a programmed speed is exceeded.■ If a warning message or a warningcode appears in the Driver
Information Centre.
■ If the parking assist detects an object.
■ If reverse gear is engaged and the rear end carrier is extended.
■ If a fault in the automatic locking system is detected.
■ If the diesel particle filter has reached the maximum filling level.
When the vehicle is parked and/ or the driver's door is opened ■ When the key is in the ignition switch.
■ With exterior lights on.
During an Autostop ■ If the driver's door is opened.
Battery voltage
When the vehicle battery voltage is
running low, a warning message or
warning code 174 will appear in the
Driver Information Centre.1. Switch off immediately any electrical consumers which are
not required for a safe ride, e.g.
seat heating, heated rear window
or other main consumers.
2. Charge the vehicle battery by driving continuously for a while or
by using a charging device.
The warning message or warning
code will disappear after the engine
has been started twice consecutively
without a voltage drop.
If the vehicle battery cannot be
recharged, have the cause of the fault
remedied by a workshop.
Page 134 of 245
132Climate control
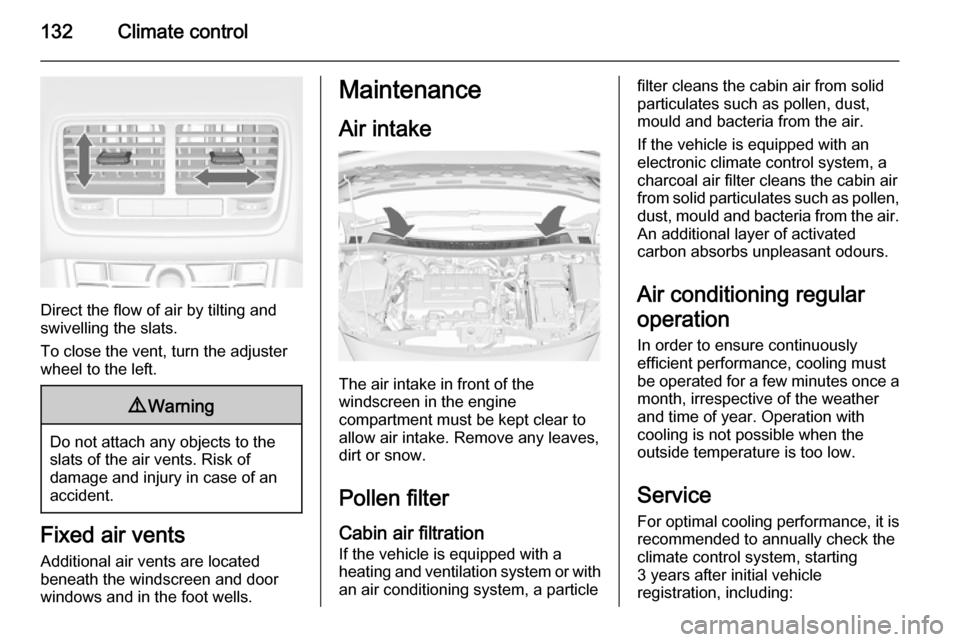
Direct the flow of air by tilting and
swivelling the slats.
To close the vent, turn the adjuster
wheel to the left.
9 Warning
Do not attach any objects to the
slats of the air vents. Risk of
damage and injury in case of an
accident.
Fixed air vents
Additional air vents are located
beneath the windscreen and door windows and in the foot wells.
Maintenance
Air intake
The air intake in front of the
windscreen in the engine
compartment must be kept clear to
allow air intake. Remove any leaves,
dirt or snow.
Pollen filterCabin air filtration
If the vehicle is equipped with a
heating and ventilation system or with an air conditioning system, a particle
filter cleans the cabin air from solidparticulates such as pollen, dust,
mould and bacteria from the air.
If the vehicle is equipped with an
electronic climate control system, a
charcoal air filter cleans the cabin air
from solid particulates such as pollen, dust, mould and bacteria from the air.
An additional layer of activated
carbon absorbs unpleasant odours.
Air conditioning regular
operation In order to ensure continuously
efficient performance, cooling must
be operated for a few minutes once a
month, irrespective of the weather
and time of year. Operation with
cooling is not possible when the
outside temperature is too low.
Service
For optimal cooling performance, it is recommended to annually check the
climate control system, starting
3 years after initial vehicle
registration, including:
Page 159 of 245

Driving and operating157
Fill the tank completely at regular
intervals to prevent corrosion in the
tank.
Faults and remedies
If gas mode is not possible, check the following:
■ Is there enough liquid gas present?
■ Is there enough petrol present for starting?
Due to extreme temperatures in
combination with the gas
composition, it may take slightly
longer before the system switches
from petrol to liquid gas mode.
In extreme situations, the system may
also switch back to petrol mode if the
minimum requirements are not
fulfilled.
Seek the assistance of a workshop in the event of all other faults.Caution
Repairs and adjustments may onlybe made by trained specialists in
order to maintain the safety and
warranty on the LPG system.
Liquid gas is given a particular odour
(odorised) so that any leaks can be
detected easily.
9 Warning
If you smell gas in the vehicle or in
the immediate vicinity, switch to petrol mode immediately. No
smoking. No naked flames or
ignition sources.
If possible, close the manual shut-off
valve on the multivalve. The
multivalve is located on the liquid gas
tank in the load compartment,
underneath the rear floor cover.
Turn the thumb wheel clockwise.
If no further gas odour is perceptible
when the manual shut-off valve is
closed, the vehicle can be used in
petrol mode. If the gas odour persists, do not start the engine. Have the
cause of the fault remedied by a
workshop.
When using underground car parks,
follow the instructions of the operator
and local laws.
Notice
In the event of an accident, switch off
the ignition and lights. Close the
manual shut-off valve on multivalve.
Page 169 of 245

Vehicle care167Vehicle careGeneral Information...................167
Vehicle checks ........................... 168
Bulb replacement .......................175
Electrical system ........................185
Vehicle tools .............................. 190
Wheels and tyres .......................192
Jump starting ............................. 209
Towing ....................................... 211
Appearance care .......................213General Information
Accessories and vehicle
modifications
We recommend the use of genuine parts and accessories and factory
approved parts specific for your
vehicle type. We cannot assess or
guarantee reliability of other products
- even if they have a regulatory or
otherwise granted approval.
Do not make any modifications to the electrical system, e.g. changes of
electronic control units (chip tuning).Caution
When transporting the vehicle on
a train or on a recovery vehicle, the
mud flaps might be damaged.
Vehicle storage
Storage for a long period of time
If the vehicle is to be stored for several months:
■ Wash and wax the vehicle.
■ Have the wax in the engine compartment and underbody
checked.
■ Clean and preserve the rubber seals.
■ Fill up fuel tank completely.
■ Change the engine oil.
■ Drain the washer fluid reservoir.
■ Check the coolant antifreeze and corrosion protection.
■ Adjust tyre pressure to the value specified for full load.
■ Park the vehicle in a dry, well ventilated place. Engage first orreverse gear or set selector lever to P . Prevent the vehicle from rolling.
■ Do not apply the parking brake.
Page 176 of 245

174Vehicle care
Stop-start system 3 137.
Charging the vehicle battery9 Warning
On vehicles with stop-start
system, ensure that the charging potential does not exceed
14.6 volts when using a battery
charger. Otherwise the vehicle
battery might be damaged.
Jump starting 3 209.
Warning label
Meaning of symbols: ■ No sparks, naked flames or smoking.
■ Always shield eyes. Explosive gases can cause blindness or
injury.
■ Keep the vehicle battery out of reach of children.
■ The vehicle battery contains sulphuric acid which could cause
blindness or serious burn injuries.
■ See the Owner's Manual for further
information.
■ Explosive gas may be present in the vicinity of the vehicle battery.Diesel fuel system
bleeding
If the tank has been run dry, the diesel
fuel system must be bled. Switch on
the ignition three times for
15 seconds at a time. Then crank the
engine for a maximum of
40 seconds. Repeat this process after
no less than 5 seconds. If the engine fails to start, seek the assistance of a
workshop.
Wiper blade replacement Wiper blades on the windscreen
Page 211 of 245

Vehicle care209
If your vehicle gets a flat tyre in the
rear while towing another vehicle,
mount the temporary spare wheel in
the front and the full tyre in the rear.
Tyre chains 3 197.
Directional tyres Fit directional tyres such that they rollin the direction of travel. The rolling
direction is indicated by a symbol
(e.g. an arrow) on the sidewall.
The following applies to tyres fitted
opposing the rolling direction:
■ Driveability may be affected. Have the defective tyre renewed or
repaired as soon as possible.
■ Drive particularly carefully on wet and snow-covered road surfaces.Jump starting
Do not start with quick charger.
A vehicle with a discharged vehicle
battery can be started using jump
leads and the vehicle battery of
another vehicle.9 Warning
Be extremely careful when starting
with jump leads. Any deviation
from the following instructions can
lead to injuries or damage caused
by vehicle battery explosion or
damage to the electrical systems
of both vehicles.
9 Warning
Avoid contact of the vehicle
battery with eyes, skin, fabrics and painted surfaces. The fluid
contains sulphuric acid which can
cause injuries and damage in the
event of direct contact.
■ Never expose the vehicle battery to
naked flames or sparks.
■ A discharged vehicle battery can already freeze at a temperature of
0 °C. Defrost the frozen battery
before connecting jump leads.
■ Wear eye protection and protective
clothing when handling a vehicle
battery.
■ Use a booster battery with the same voltage (12 volts). Its capacity(Ah) must not be much less than
that of the discharged battery.
■ Use jump leads with insulated terminals and a cross section of at
least 16 mm 2
(25 mm 2
for diesel
engines).
■ Do not disconnect the discharged battery from the vehicle.
■ Switch off all unnecessary electrical
consumers.
■ Do not lean over the battery during jump starting.
■ Do not allow the terminals of one lead to touch those of the other
lead.
Page 212 of 245

210Vehicle care
■ The vehicles must not come intocontact with each other during thejump starting process.
■ Apply the parking brake, transmission in neutral, automatic
transmission in P.
■ Open the positive terminal protection caps of both batteries.
Lead connection order:
1. Connect the red lead to the positive terminal of the booster
battery.
2. Connect the other end of the red lead to the positive terminal of the
discharged battery.
3. Connect the black lead to the negative terminal of the booster
battery.
4. Connect the other end of the black
lead to a vehicle grounding point,
such as the engine block or an
engine mounting bolt. Connect as far away from the discharged
battery as possible, however at
least 60 cm.
Route the leads so that they cannot
catch on rotating parts in the engine
compartment.
To start the engine: 1. Start the engine of the vehicle providing the jump.
2. After 5 minutes, start the other engine. Start attempts should be
made for no longer than
15 seconds at an interval of
1 minute.
3. Allow both engines to idle for approx. 3 minutes with the leads
connected.4. Switch on electrical consumers (e.g. headlights, heated rear
window) of the vehicle receiving
the jump start.
5. Reverse above sequence exactly when removing leads.
Page 243 of 245

241
Oil............................................... 169
Oil, engine .......................... 217, 221
Oil pressure .................................. 97
Operate pedal ............................... 95
Outside temperature ....................85
Overrun cut-off ........................... 136
P Parking ................................ 17, 139
Parking assist ............................ 151
Parking brake ............................ 146
Parking lights ............................. 120
Particulate filter ........................... 140
Performance .............................. 227
Performing work ........................168
Personalisation ........................... 111
Pollen filter ................................. 132
Power outlets ............................... 87
Power steering fluid ....................171
Power windows ............................ 30
Preheating ................................... 96
Puncture ..................................... 203
Q
Quickheat ................................... 131
R Radio Frequency Identification (RFID) ..................................... 237
Radio remote control ...................20Reading lights ............................ 122
Rear carrier system ......................64
Rear doors ................................... 25
Rear floor storage cover ..............75
Rear fog light ............................... 98
Rear fog lights ........................... 120
Rear seats .................................... 41
Rear storage ................................ 74
Rear view camera ...................... 153
Rear window wiper/washer .......... 84 Recommended fluids and lubricants ........................ 217, 221
Reduced engine power ...............98
Refuelling ................................... 158
Remote control ............................. 20
Retained power off ....................135
Reversing lights .........................120
Ride control systems ..................148
Roof .............................................. 33
Roof load ...................................... 79
Roof rack ..................................... 79
S Safety belts ................................... 44
Safety net .................................... 76
Seat adjustment ....................... 6, 36
Seat belt ........................................ 8
Seat belt reminder .......................93
Seat belts ..................................... 44
Seat heating ................................. 40Seat position ................................ 36
Selector lever ............................. 142
Service ............................... 132, 216
Service display ............................ 90
Service information ....................216
Service vehicle soon .................... 94
Side airbag system ......................52
Sidelights .................................... 115
Side turn signal lights ................183
Spare wheel ............................... 207
Speedometer ............................... 88
Starting and operating ................135
Starting off ................................... 16
Starting the engine ....................135
Steering ...................................... 134
Steering wheel adjustment ......9, 81
Steering wheel controls ...............81
Steering wheel, heated .................82
Stop-start system........................ 137
Storage ......................................... 61
Storage compartments .................61
Sunvisor lights ........................... 122
Sun visors .................................... 32
Symbols ......................................... 4
T
Tachometer ................................. 89
Tailgate ......................................... 25
Tail lights ................................... 180
Technical data ............................ 224