Page 64 of 245

62Storage
Detachable cupholderA cupholder can be attached either to the upper or lower guide rails in the
front console.
Fold the frame out of initial position
before using.
Notice
If the cupholder is installed in the
lower guide rail and the detachable
armrest in the upper guide rail, make sure that the frame is folded back
into the initial position before moving
one of the parts. Otherwise the
armrest and the cupholder might be
damaged while moving them one
above the other.
Armrest 3 39.
Installing cupholder
Press the buttons at the front and the
rear and insert the guide pins into the upper or lower guide rails. The front
button has to be pressed firmly.
Release the buttons and move the
cupholder until it engages audibly.
Notice
Install the cupholder in the direction
as shown in the illustration.
Otherwise the cupholder may not
engage properly.
Moving cupholder
Press the front button slightly and
move the cupholder to the desired
position. Release the button and
move the cupholder until it engages audibly.
Removing cupholder
Press the buttons at the front and the
rear and remove the cupholder. The
front button has to be pressed firmly.
Page 93 of 245

Instruments and controls91
In the Uplevel-Display or
Uplevel-Combi-Display the remaining
oil life duration is displayed in the
Vehicle Information Menu .
In the Midlevel-Display the remaining
engine oil life duration is displayed by
the control indicator I. The ignition
must be switched on, with the engine not running.
The menu and function can be
selected via the buttons on the turn
signal lever.
To display the remaining engine oil life duration:Press the MENU button to select the
Vehicle Information Menu .
Turn the adjuster wheel to select
Remaining Oil Life .
The system must be reset every time
the engine oil is changed to allow
proper functionality. Seek the
assistance of a workshop.
Press the SET/CLR button to reset.
The ignition must be switched on, with the engine not running.
When the system has calculated that
engine oil life has been diminished,
Change Engine Oil Soon or a warning
code appears in the Driver
Information Centre. Have engine oil
and filter changed by a workshop
within one week or 300 miles
(whichever occurs first).
Driver Information Centre 3 99.
Service information 3 216.
Control indicators
The control indicators described are
not present in all vehicles. The
description applies to all instrument
versions.
Depending on the equipment the
position of the control indicators may vary.
When the ignition is switched on,
most control indicators will illuminate
briefly as a functionality test.
The control indicator colours mean:red=danger, important reminderyellow=warning, information, faultgreen=confirmation of activationblue=confirmation of activationwhite=confirmation of activation
Page 102 of 245

100Instruments and controls
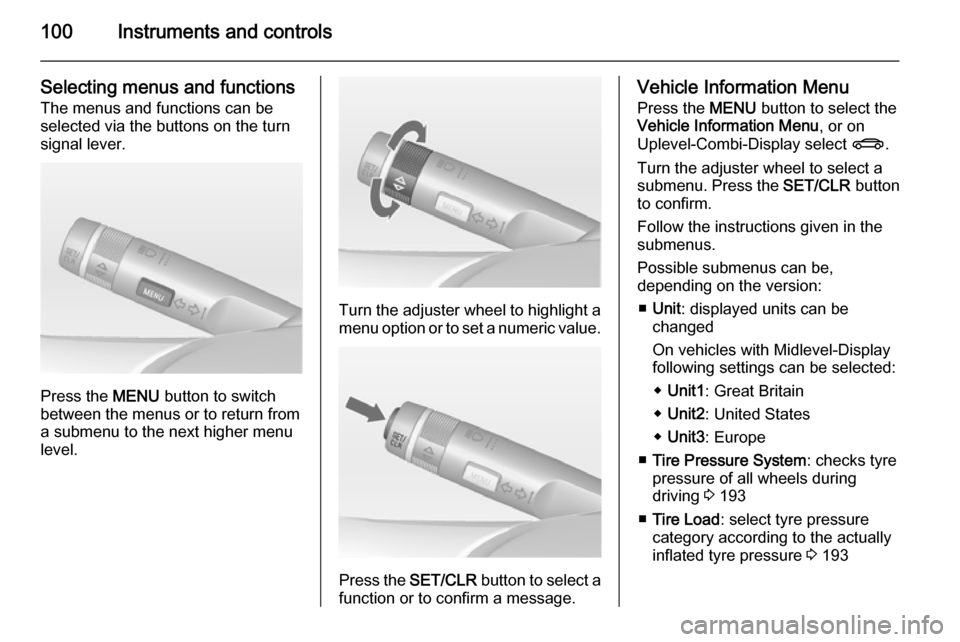
Selecting menus and functions
The menus and functions can be
selected via the buttons on the turn
signal lever.
Press the MENU button to switch
between the menus or to return from
a submenu to the next higher menu
level.
Turn the adjuster wheel to highlight a
menu option or to set a numeric value.
Press the SET/CLR button to select a
function or to confirm a message.
Vehicle Information Menu
Press the MENU button to select the
Vehicle Information Menu , or on
Uplevel-Combi-Display select X.
Turn the adjuster wheel to select a
submenu. Press the SET/CLR button
to confirm.
Follow the instructions given in the submenus.
Possible submenus can be,
depending on the version:
■ Unit : displayed units can be
changed
On vehicles with Midlevel-Display
following settings can be selected:
◆ Unit1 : Great Britain
◆ Unit2 : United States
◆ Unit3 : Europe
■ Tire Pressure System : checks tyre
pressure of all wheels during
driving 3 193
■ Tire Load : select tyre pressure
category according to the actually
inflated tyre pressure 3 193
Page 105 of 245

Instruments and controls103
Colour-Info-Display
The Colour-Info-Display indicates incolour:
■ time 3 85
■ outside temperature 3 85
■ date 3 85
■ electronic climate control settings 3 126
■ rear view camera 3 153
■ Infotainment system, see description for Infotainment systemin the Infotainment system manual
■ navigation, see description for Infotainment system in the
Infotainment system manual
■ system settings
■ vehicle messages 3 104
■ settings for vehicle personalisation 3 111
The type of information and how it is
displayed depends on the equipment
of the vehicle and the settings made.
Selecting menus and settings
Menus and settings are accessed via the display.Selections are made via:
■ menus
■ function buttons and multifunction knob of the Infotainment system
Selecting with the Infotainment
system
Select a function via the Infotainment
system buttons. The menu of the
selected function is displayed.
The multifunction knob is used to
select an item and to confirm.
Multifunction knob
The multifunction knob is the central control element for the menus:
Page 110 of 245
108Instruments and controlsTrip computerThe menus and functions can be
selected via the buttons on the turn signal lever 3 99.
Press the MENU button to select the
Trip/Fuel Information Menu , or select
W on the Uplevel-Combi-Display.
Trip/Fuel Information Menu on
Uplevel-Display
Turn the adjuster wheel to select one of the submenus:
■ Trip odometer 1
■ Trip odometer 2
■ Range
■ Average consumption
■ Instantaneous consumption
■ Average speed
■ Digital speed
Trip/Fuel Information Menu on
Uplevel-Combi-Display
Turn the adjuster wheel to select a
page:
Page 124 of 245

122LightingReading lights
Operated with s and t buttons in
front and rear courtesy lights.
Sunvisor lights
Illuminate when the cover is opened.
Lighting features
Centre console lighting
Spotlight incorporated in the interior
lighting comes on when the low beam
is switched on.
Entry lighting Welcome lighting
The exterior lights, instrument panel
light and interior lights are switched
on for a short time by pressing the
unlocking button c on the radio
remote control twice. This function
works only in the dark and facilitates
locating the vehicle.
The lighting switches off immediately
when the ignition key is turned to
position 1 3 135.
Activation or deactivation of this
function can be changed in the menu Settings in the Info-Display. Vehicle
personalisation 3 111.
The settings can be saved for the key
being used 3 21.The following lights will additionally
switch on when the driver's door is
opened:
■ All switches
■ Driver Information Centre
Exit lighting
The following lights illuminate if the
key is removed from the ignition
switch:
■ Interior lights
■ Instrument panel light (only when it
is dark)
They will switch off automatically after
a delay. Both lights will be activated
again if the driver's door is opened.
The exterior lights illuminate the
surrounding area for an adjustable
time after leaving the vehicle.
Page 130 of 245

128Climate control
If the minimum temperature Lo is set,
the climate control system runs at
maximum cooling, if cooling n is
switched on.
If the maximum temperature Hi is set,
the climate control system runs at
maximum heating.
Notice
If n is switched on, reducing the set
cabin temperature can cause the
engine to restart from an Autostop or inhibit an Autostop.
Stop-start system 3 137.Demisting and defrosting the
windows V
■
Press button V. Activation is
indicated by the LED in the button.
■ Temperature and air distribution are set automatically and the fan
runs at high speed.
■ Switch on heated rear window Ü.
■ To return to previous mode: press button V, to return to automatic
mode: press button AUTO.
Setting of automatic rear window
heating can be changed in the menu
Settings in the Info-Display. Vehicle
personalisation 3 111.
Notice
If button V is pressed while the
engine is running, an Autostop will
be inhibited until V is pressed
again.
If V is pressed while the engine is
in an Autostop, the engine will restart automatically.
Stop-start system 3 137.
Manual settings Climate control system settings can
be changed by activating the buttons
and rotary knobs as follows.
Changing a setting will deactivate the
automatic mode.
Page 156 of 245

154Driving and operating
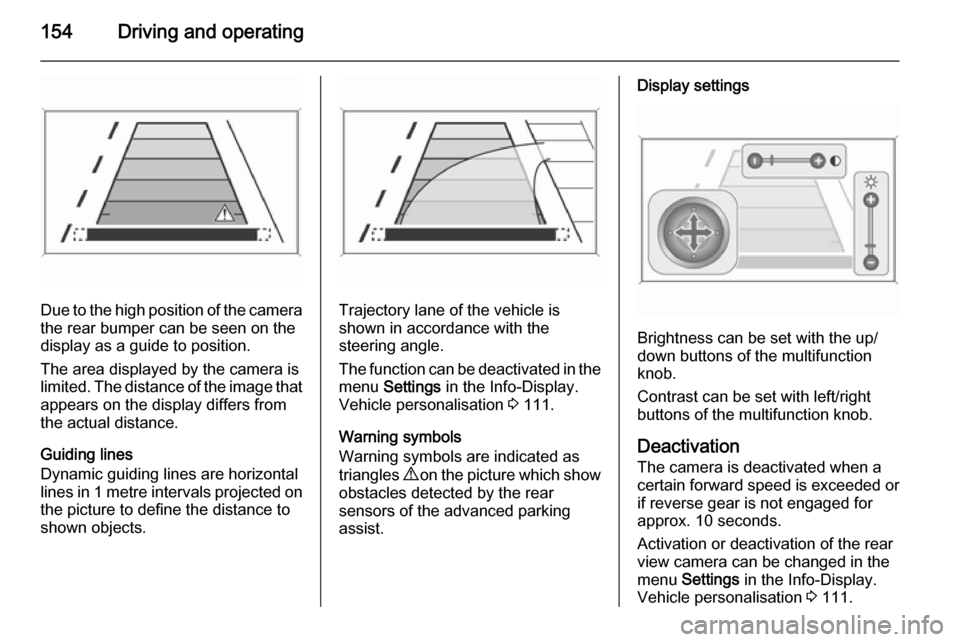
Due to the high position of the camera
the rear bumper can be seen on the
display as a guide to position.
The area displayed by the camera is
limited. The distance of the image that appears on the display differs from
the actual distance.
Guiding lines
Dynamic guiding lines are horizontal
lines in 1 metre intervals projected on
the picture to define the distance to
shown objects.Trajectory lane of the vehicle is
shown in accordance with the
steering angle.
The function can be deactivated in the
menu Settings in the Info-Display.
Vehicle personalisation 3 111.
Warning symbols
Warning symbols are indicated as
triangles 9 on the picture which show
obstacles detected by the rear
sensors of the advanced parking
assist.
Display settings
Brightness can be set with the up/
down buttons of the multifunction
knob.
Contrast can be set with left/right
buttons of the multifunction knob.
Deactivation
The camera is deactivated when a
certain forward speed is exceeded or if reverse gear is not engaged for
approx. 10 seconds.
Activation or deactivation of the rear
view camera can be changed in the menu Settings in the Info-Display.
Vehicle personalisation 3 111.