Page 73 of 223

Storage71Roof rack system
Roof rack For safety reasons and to avoiddamage to the roof, the vehicle
approved roof rack system is
recommended. For further
information contact a workshop.
Fasten the roof rack to the roof rails following the instructions that
accompany the system, ensuring that
the roof load is evenly distributed over the side or cross rails.
Loads must not be placed on the roof
surface. To prevent damage or loss,
check frequently that roof loads are
securely fastened.
Driving with a roof load affects the
vehicle centre of gravity; drive
carefully in crosswinds and do not
drive at high speeds.
Remove the roof rack when not in use.Loading information
■ Heavy objects in the load compartment should be evenly
distributed and placed as far
forward as possible. Ensure the
backrests are securely engaged. If
objects can be stacked, the heavier
objects should be placed at the bottom.
With rear seats in the folded
position, objects must not be
stacked higher than the seat
backrests.
■ Secure objects with lashing straps attached to lashing eyes 3 70.
■ Secure loose objects in the load compartment, e.g. with a luggage
floor net, to prevent sliding.
■ When transporting objects in the load compartment, the backrests ofthe rear seats must not be angled
forward.
■ Do not allow the load to protrude above the upper edge of the
backrests.■ Do not place any objects on the load compartment cover or the
instrument panel, and do not cover
the sensor on top of the instrument
panel.
■ The load must not obstruct the operation of the pedals, electrical
parking brake and gear selector, or hinder the freedom of movement ofthe driver. Do not place any
unsecured objects in the interior.
■ Do not drive with an open load compartment.9 Warning
Always make sure that the load in
the vehicle is securely stowed.
Otherwise objects can be thrown
around inside the vehicle and
cause personal injury or damage
to the load or vehicle.
■ The payload is the difference between the permitted gross
vehicle weight (see identification
plate 3 201) and the EC kerb
weight.
Page 84 of 223
82Instruments and controls
Control indicators on theinstrument panel
k illuminates red.
Front passenger seat belt reminder
3 42.
* illuminates yellow.
The front passenger airbag is
deactivated 3 49.
9 Danger
Risk of fatal injury for a child using
a child restraint system together
with activated front passenger
airbag.
Risk of fatal injury for an adult
person with deactivated front
passenger airbag.
Page 94 of 223

92Instruments and controlsAnti-theft alarm system
a illuminates yellow.
Illuminates when alarm system
monitoring of the passenger
compartment and vehicle inclination
has been switched off with button
a in the roof lining.
Anti-theft alarm system 3 25.Information displays
Board-Info-Display
The Info-Display is located in the
instrument panel above the
Infotainment system.
Info-Display indicates:
■ time 3 77
■ outside temperature 3 76
■ date 3 77
■ Infotainment system - see Infotainment system instruction
manual
An F in the display indicates a fault.
Have the cause of the fault remedied by a workshop.
Trip computer, Board-Info-Display
3 101.
Selecting functions
Functions and settings of the
Infotainment system can be accessed via the Info-Display.
Functions are selected and executed
in the menu on the display using the
arrow buttons on the Infotainment
system or the left adjuster wheel on
the steering wheel.
If a check control warning message
appears on the Info-Display, the
display is blocked from other
functions. Acknowledge the message
by pressing the OK button or the left
adjuster wheel. If there are several
warning messages, acknowledge
them one at a time.
Check control 3 100.
Page 97 of 223

Instruments and controls95
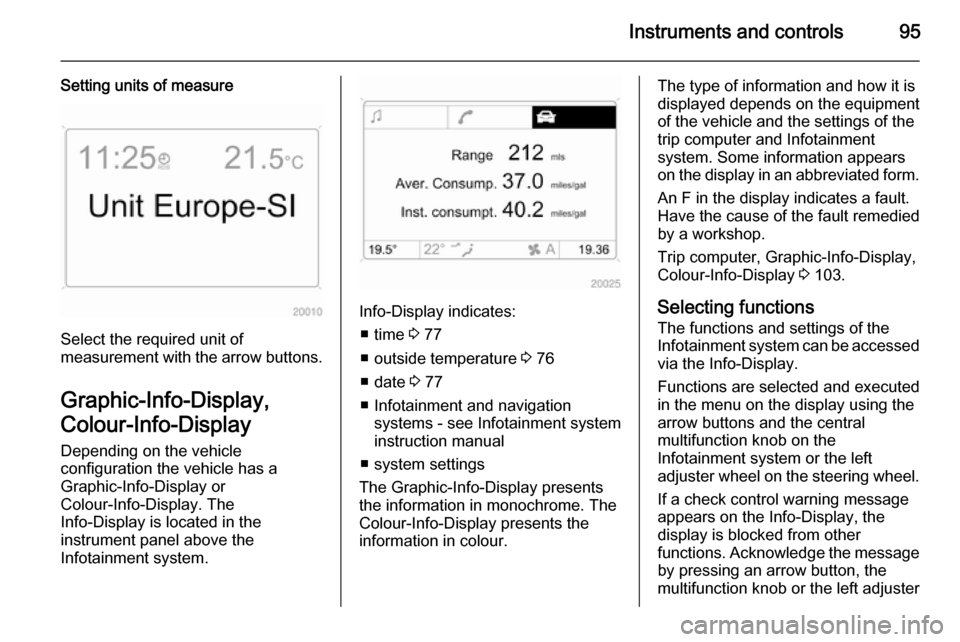
Setting units of measure
Select the required unit of
measurement with the arrow buttons.
Graphic-Info-Display,
Colour-Info-Display Depending on the vehicle
configuration the vehicle has a
Graphic-Info-Display or
Colour-Info-Display. The
Info-Display is located in the
instrument panel above the
Infotainment system.
Info-Display indicates:
■ time 3 77
■ outside temperature 3 76
■ date 3 77
■ Infotainment and navigation systems - see Infotainment systeminstruction manual
■ system settings
The Graphic-Info-Display presents
the information in monochrome. The
Colour-Info-Display presents the
information in colour.
The type of information and how it is
displayed depends on the equipment
of the vehicle and the settings of the
trip computer and Infotainment
system. Some information appears
on the display in an abbreviated form.
An F in the display indicates a fault.
Have the cause of the fault remedied
by a workshop.
Trip computer, Graphic-Info-Display,
Colour-Info-Display 3 103.
Selecting functions
The functions and settings of the
Infotainment system can be accessed
via the Info-Display.
Functions are selected and executed
in the menu on the display using the
arrow buttons and the central
multifunction knob on the
Infotainment system or the left
adjuster wheel on the steering wheel.
If a check control warning message
appears on the Info-Display, the
display is blocked from other
functions. Acknowledge the message by pressing an arrow button, the
multifunction knob or the left adjuster
Page 109 of 223
Lighting107
To ensure automatic light control
functions properly, do not cover the
light sensor on top of the instrument
panel.
Driving abroad 3 108.
Wiper activated lighting
With light switch in the AUTO
position, when the windscreen wiper is operated for 8 cycles or more the
exterior lights illuminate
automatically.
High beamTo switch from low to high beam,
push lever.
To switch to low beam, pull lever back
again.
Control indicator C 3 91.
Headlight flash To activate the headlight flash, pull
lever.Headlight range
adjustment
Manual headlight range
adjustment ?
With low beam switched on, adapt
headlight range to suit vehicle load.
Correct adjustment of the headlight
range reduces dazzle for other road
users.
Page 113 of 223

Lighting111Interior lighting
Instrument panel
illumination control
Brightness of the following lights can
be adjusted when the exterior lights
are on:
■ Instrument panel illumination
■ Info-Display
■ Illuminated switches and operation elements.
Turn thumb wheel k to the right or left
until the desired brightness is
obtained.
If driver's door is opened or q is
pressed on the remote control,
instrument panel illuminates
automatically for 30 seconds until
ignition switch is turned to position ACC .
Display mode 3 95.
Interior lights
During entry and exit of the vehicle,
the front and rear courtesy lights
automatically switch on and then off
after a delay.
Notice
In the event of an accident with airbag deployment the courtesy
lights are turned on automatically.Front courtesy light
Front and rear reading lights and the
load compartment lights function as
courtesy lights and illuminate when
the doors or the tailgate are opened.
If the doors or tailgate remain open, the lights stay illuminated for
10 minutes. Once all doors and the tailgate are closed, the courtesy lights dim gradually after 10 seconds.
By pressing button d in the roof
lining, both the front and rear reading lights illuminate. Press again to turn
off.
Page 145 of 223

Driving and operating143Parking assist
The parking assist system makes
parking easier by measuring the
distance between the vehicle and obstacles to the front and rear, and
giving acoustic signals. It is the driver,
however, who bears full responsibility for the parking manoeuvre.
The system consists of four ultrasonic
parking sensors in both the front and
rear bumpers.
Control indicator r 3 87.
Activation
With the ignition on, the system must
be activated manually.
Press button r on the instrument
panel. The LED in the button will
illuminate and will activate when a
forward gear or reverse gear is
engaged and the electrical parking
brake is released.
An obstacle is indicated by an
acoustic signal. The interval between
the sounds becomes shorter as the
vehicle gets closer to the obstacle.
When the distance is less than
30 cm, the signal is continuous. The
acoustic signal may differ depending
on the type of object detected.
Deactivation
To deactivate, press the button again
and the LED in the button will
extinguish. The control indicator r
in the instrument cluster will illuminate
until the vehicle speed exceeds
18 mph.
The system is deactivated
automatically when the vehicle speed is above 5 mph or when selector leveris in neutral (automatic transmission
in N or P).
If the b button is pressed again, the
LED in the button will extinguish and the system will be reactivated as soon
as a forward gear or reverse gear is
engaged and the electrical parking
brake is released.
Fault
In the event of a fault in the system,
control indicator r illuminates in the
instrument cluster.
Page 169 of 223

Vehicle care167
Rear reading lights
1. Using a suitable screwdriver, prylamp lens away from roof lining.
2. Remove bulb.
3. Insert new bulb.
4. Reinstall lamp lens in roof lining.
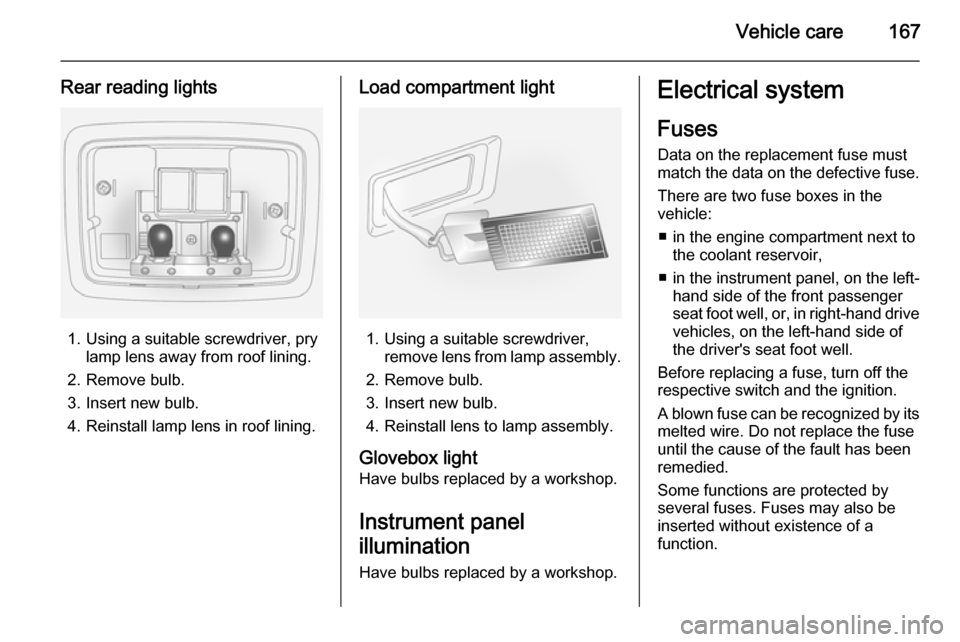
Load compartment light
1. Using a suitable screwdriver, remove lens from lamp assembly.
2. Remove bulb.
3. Insert new bulb.
4. Reinstall lens to lamp assembly.
Glovebox light
Have bulbs replaced by a workshop.
Instrument panel
illumination Have bulbs replaced by a workshop.
Electrical system
Fuses
Data on the replacement fuse must
match the data on the defective fuse.
There are two fuse boxes in the
vehicle:
■ in the engine compartment next to the coolant reservoir,
■ in the instrument panel, on the left- hand side of the front passenger
seat foot well, or, in right-hand drive
vehicles, on the left-hand side of
the driver's seat foot well.
Before replacing a fuse, turn off the
respective switch and the ignition.
A blown fuse can be recognized by its melted wire. Do not replace the fuse
until the cause of the fault has been
remedied.
Some functions are protected by
several fuses. Fuses may also be
inserted without existence of a
function.