Page 78 of 364
782. Instrument cluster
Multi-infor mation display
Clock (P. 80)
Outside temperature display ( P. 81)
Shift position and gear step position indicator ( P. 139)
Drive information ( P. 7 9 )
Fuel gauge
The multi-information display presents the driver with a variety
of driving-related data including the clock.
Display contents
Ty p e ATy p e B
Ty p e C
1
2
3
4
5
Page 79 of 364
792. Instrument cluster
2
Instrument cluster
.
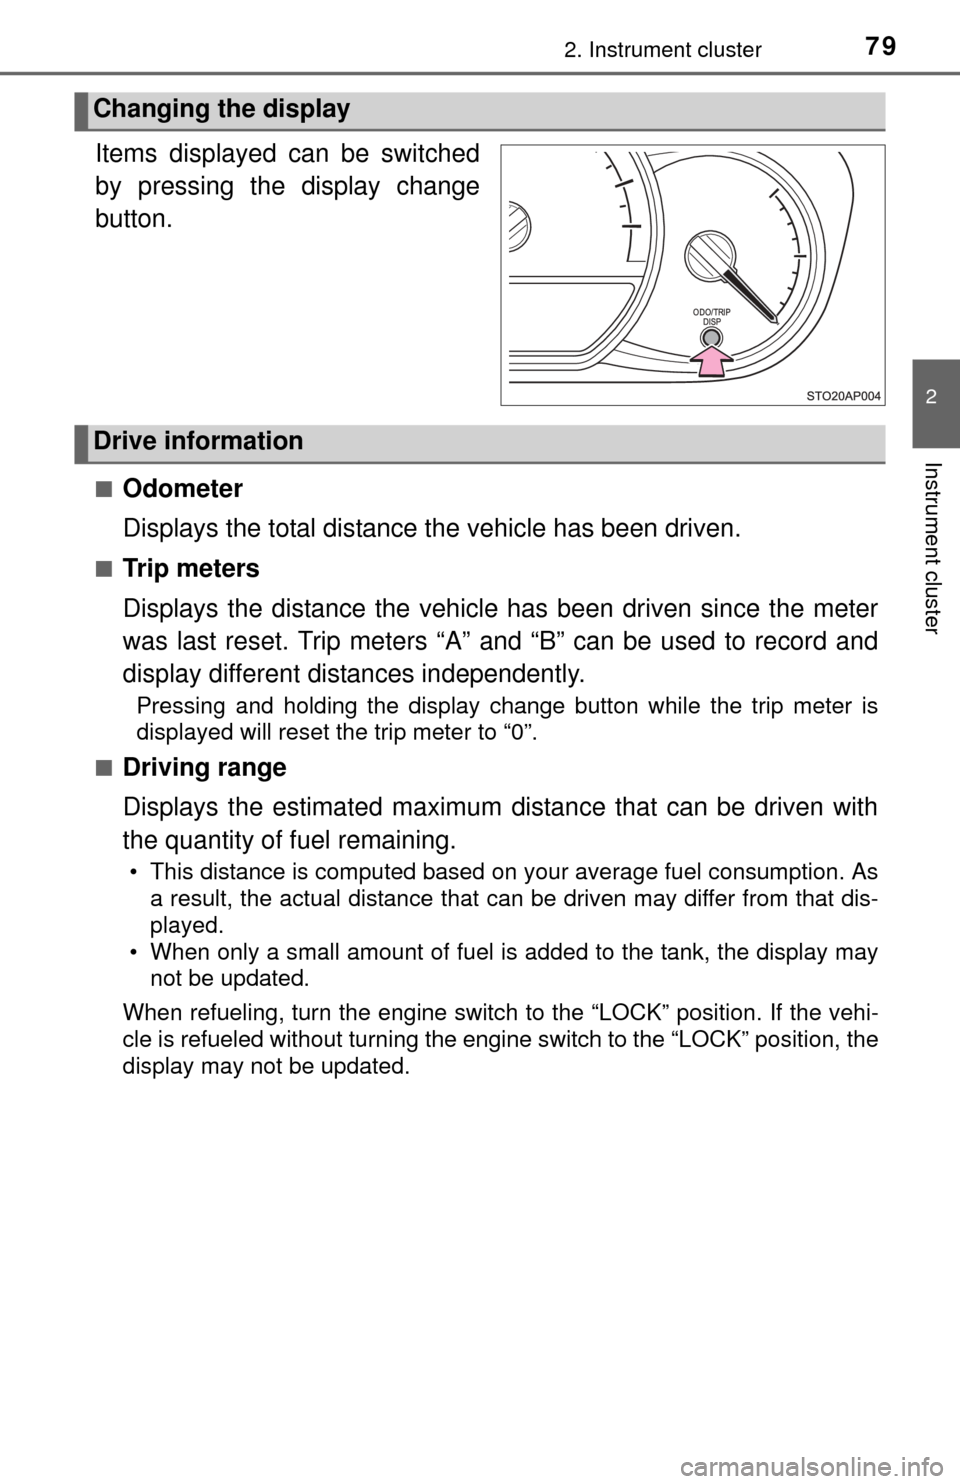
Items displayed can be switched
by pressing the display change
button.
■Odometer
Displays the total distance the vehicle has been driven.
■Tr i p m e t e r s
Displays the distance the vehicle has been driven since the meter
was last reset. Trip meters “A” and “B” can be used to record and
display different distances independently.
Pressing and holding the display change button while the trip meter is
displayed will reset the trip meter to “0”.
■
Driving range
Displays the estimated maximum distance that can be driven with
the quantity of fuel remaining.
• This distance is computed based on your average fuel consumption. As a result, the actual distance that can be driven may differ from that dis-
played.
• When only a small amount of fuel is added to the tank, the display may not be updated.
When refueling, turn the engine switch to the “LOCK” position. If th\
e vehi-
cle is refueled without turning the engine switch to the “LOCK” po\
sition, the
display may not be updated.
Changing the display
Drive information
Page 80 of 364
802. Instrument cluster
■Average fuel consumption
Displays the average fuel consumption since the function was
reset.
• The function can be reset by pressing and holding the display change button when the average fuel consumption is displayed.
• Use the displayed average fuel consumption as a reference.
■
Instantaneous fuel consumption
Displays the instantaneous of fuel consumption.
■Average vehicle speed
Displays the average vehicle speed since the engine was last
started.
Eco Driving Indicator Light can be activated or deactivated by press-
ing the display change button when the Eco Driving Indicator Light
customization display is displayed.
To change the Eco Driving Indicator Light customization display, display the
odometer and press and hold the display change button until the display
changes.
After customization, press the display change button for more than 2 sec-
onds to return to the odometer.
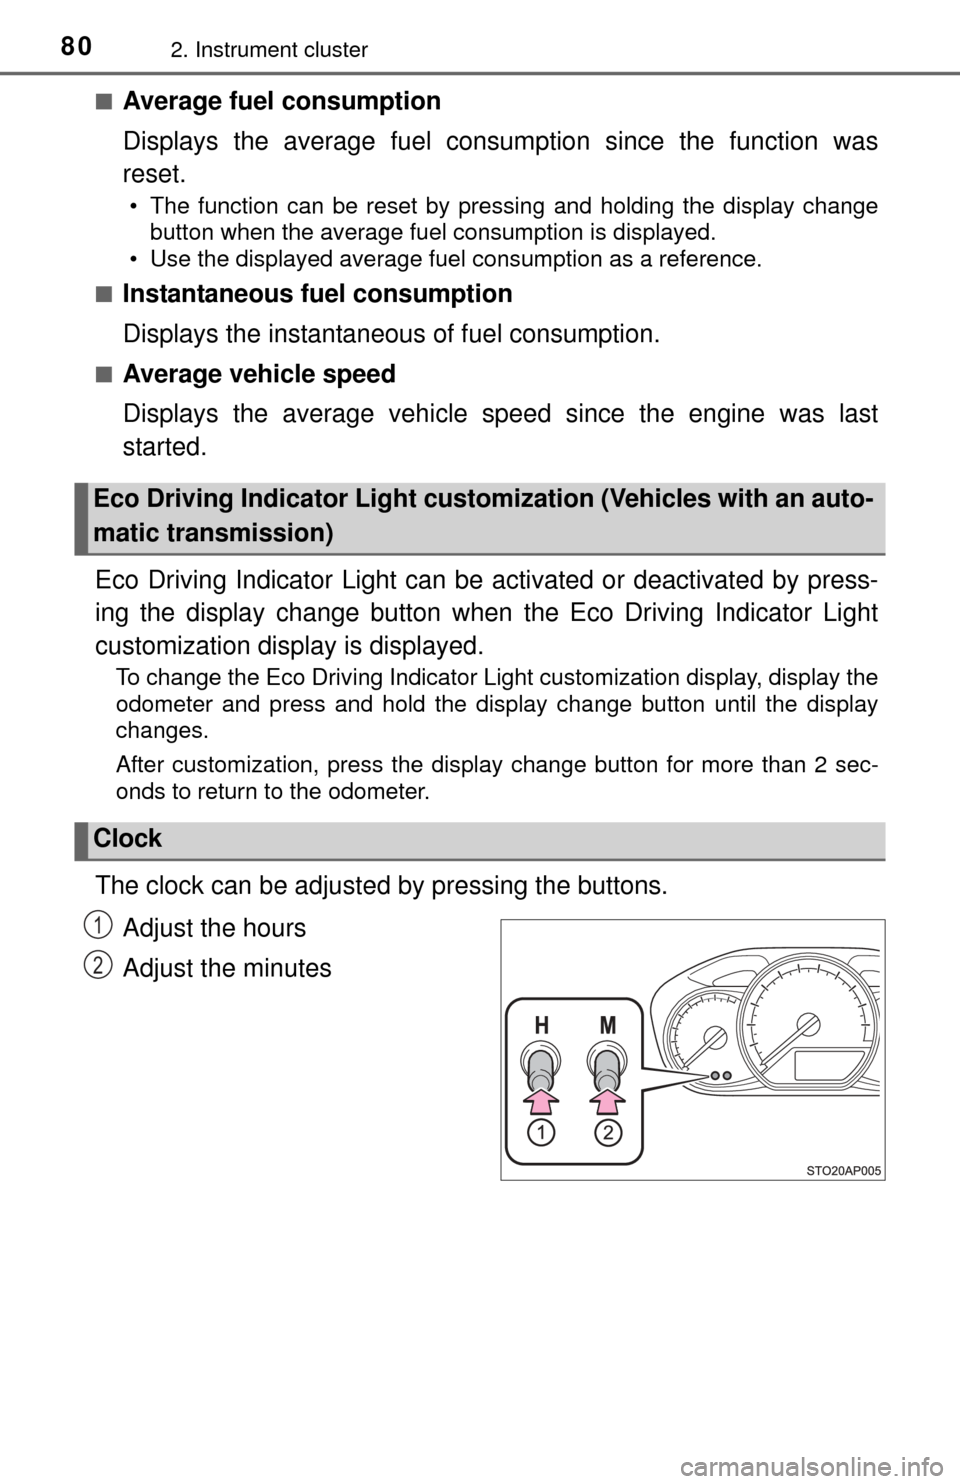
The clock can be adjusted by pressing the buttons.
Adjust the hours
Adjust the minutes
Eco Driving Indicator Light custom ization (Vehicles with an auto-
matic transmission)
Clock
1
2
Page 81 of 364
812. Instrument cluster
2
Instrument cluster
The temperature display shows temperatures within the range of
-40°F (-40°C) and 122°F (50°C).
■Display
In the following situations, the correct outside temperature may not
be displayed, or the display may take longer than normal to change:
●When the vehicle is stopped, or moving at low speeds (less than
16 mph [25 km/h])
● When the outside temperature has changed suddenly (at the
entrance/exit of a ga rage, tunnel, etc.)
■When “” or “E” is displayed
The system may be malfunctioning. Ta ke your vehicle to your Toy-
ota dealer.
■ When disconnecting and reco nnecting battery terminals
The following information data will be reset.
● Driving range
● Average fuel consumption
● Average vehicle speed
● Clock data
■ Liquid crystal display
Small spots or light spots may appear on the display. This phenomenon is
characteristic of liquid crystal display, and there is no problem continuing to
use the display.
Outside temperature display
NOTICE
■The multi-information disp lay at low temperatures
Allow the interior of the vehicle to warm up before using the liquid crystal
information display. At extremely low temperatures, the display monitor may
respond slowly, and display changes may be delayed.
Page 115 of 364

115
4Driving
4-1. Before drivingDriving the vehicle ............. 116
Cargo and luggage ........... 127
Vehicle load limits ............. 131
Trailer towing..................... 132
Dinghy towing (vehicles with an automatic
transmission)................... 133
Dinghy towing (vehicles with a manual
transmission)................... 134
4-2. Driving procedures Engine (ignition) switch ..... 136
Automatic transmission ..... 139
Manual transmission ......... 141
Turn signal lever................ 142
Parking brake .................... 143 4-3. Operating the lights
and wipers
Headlight switch ................ 144
Fog light switch ................. 147
Windshield wipers and washer ..................... 149
Rear window wiper and washer ..................... 152
4-4. Refueling Opening the fuel tank cap .................................. 155
4-5. Using the driving support systems
Cruise control .................... 158
Driving assist systems ...... 162
4-6. Driving tips Winter driving tips ............. 167
Page 120 of 364
1204-1. Before driving
■Eco-friendly driving (vehicles with an automatic transmission)
● The vehicle speed is approximately 80 mph (130 km/h) or higher.
Eco Driving Indicator Light can be activated or deactivated. ( P. 80)
■ Operating your vehicle in a foreign country
Comply with the relevant vehicle registration laws and confirm the availability
of the correct fuel. ( P. 317)
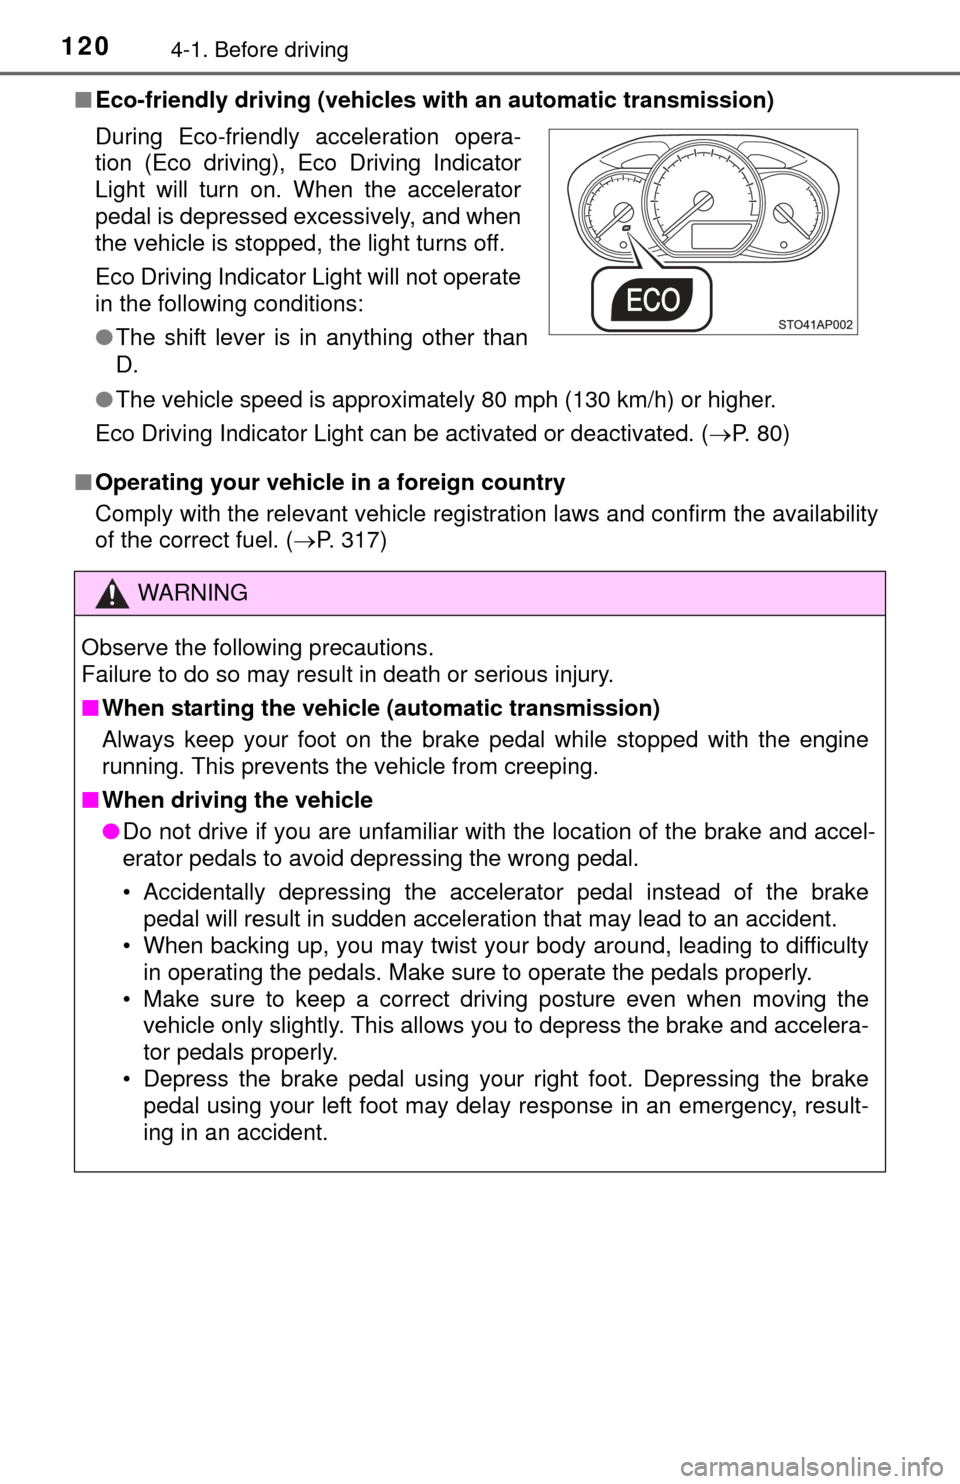
During Eco-friendly acceleration opera-
tion (Eco driving), Eco Driving Indicator
Light will turn on. When the accelerator
pedal is depressed excessively, and when
the vehicle is stopped, the light turns off.
Eco Driving Indicator Light will not operate
in the following conditions:
●
The shift lever is in anything other than
D.
WARNING
Observe the following precautions.
Failure to do so may result in death or serious injury.
■When starting the vehicle (automatic transmission)
Always keep your foot on the brake pedal while stopped with the engine
running. This prevents the vehicle from creeping.
■ When driving the vehicle
● Do not drive if you are unfamiliar with the location of the brake and ac\
cel-
erator pedals to avoid depressing the wrong pedal.
• Accidentally depressing the accelerator pedal instead of the brake
pedal will result in sudden acceleration that may lead to an accident.
• When backing up, you may twist your body around, leading to difficulty
in operating the pedals. Make sure to operate the pedals properly.
• Make sure to keep a correct driving posture even when moving the vehicle only slightly. This allows you to depress the brake and accelera-
tor pedals properly.
• Depress the brake pedal using your right foot. Depressing the brake pedal using your left foot may delay response in an emergency, result-
ing in an accident.
Page 127 of 364
1274-1. Before driving
4
Driving
Cargo and luggage
Cargo capacity depends on the total weight of the occupants.
(Cargo capacity) = (Total load capacity) (Total weight of occupants)
Steps for Determining Correct Load Limit—
(1) Locate the statement “The combined weight of occupants and cargo should never exceed XXX kg or XXX lbs.” on your vehicle’s
placard.
(2) Determine the combined weight of the driver and passengers that will be riding in your vehicle.
(3) Subtract the combined weight of the driver and passengers from
XXX kg or XXX lbs.
(4) The resulting figure equals the available amount of cargo and lug- gage load capacity.
For example, if the “ XXX” amount equals 1400 lbs. and there will be
five 150 lb passengers in your v ehicle, the amount of available
cargo and luggage load capacity is 650 lbs. (1400 750 (5 150) =
650 lbs.)
(5) Determine the combined weight of luggage and cargo being loaded on the vehicle. That weight ma y not safely exceed the available
cargo and luggage load capacity calculated in Step 4.
Take notice of the following information about storage precau-
tions, cargo capacity and load:
● Stow cargo and luggage in the luggage compartment whenever
possible.
● Be sure all items are secured in place.
● To maintain vehicle balance while driving, position luggage evenly
within the luggage compartment.
● For better fuel economy, do not carry unnecessary weight.
Capacity and distribution
Page 146 of 364
1464-3. Operating the lights and wipers
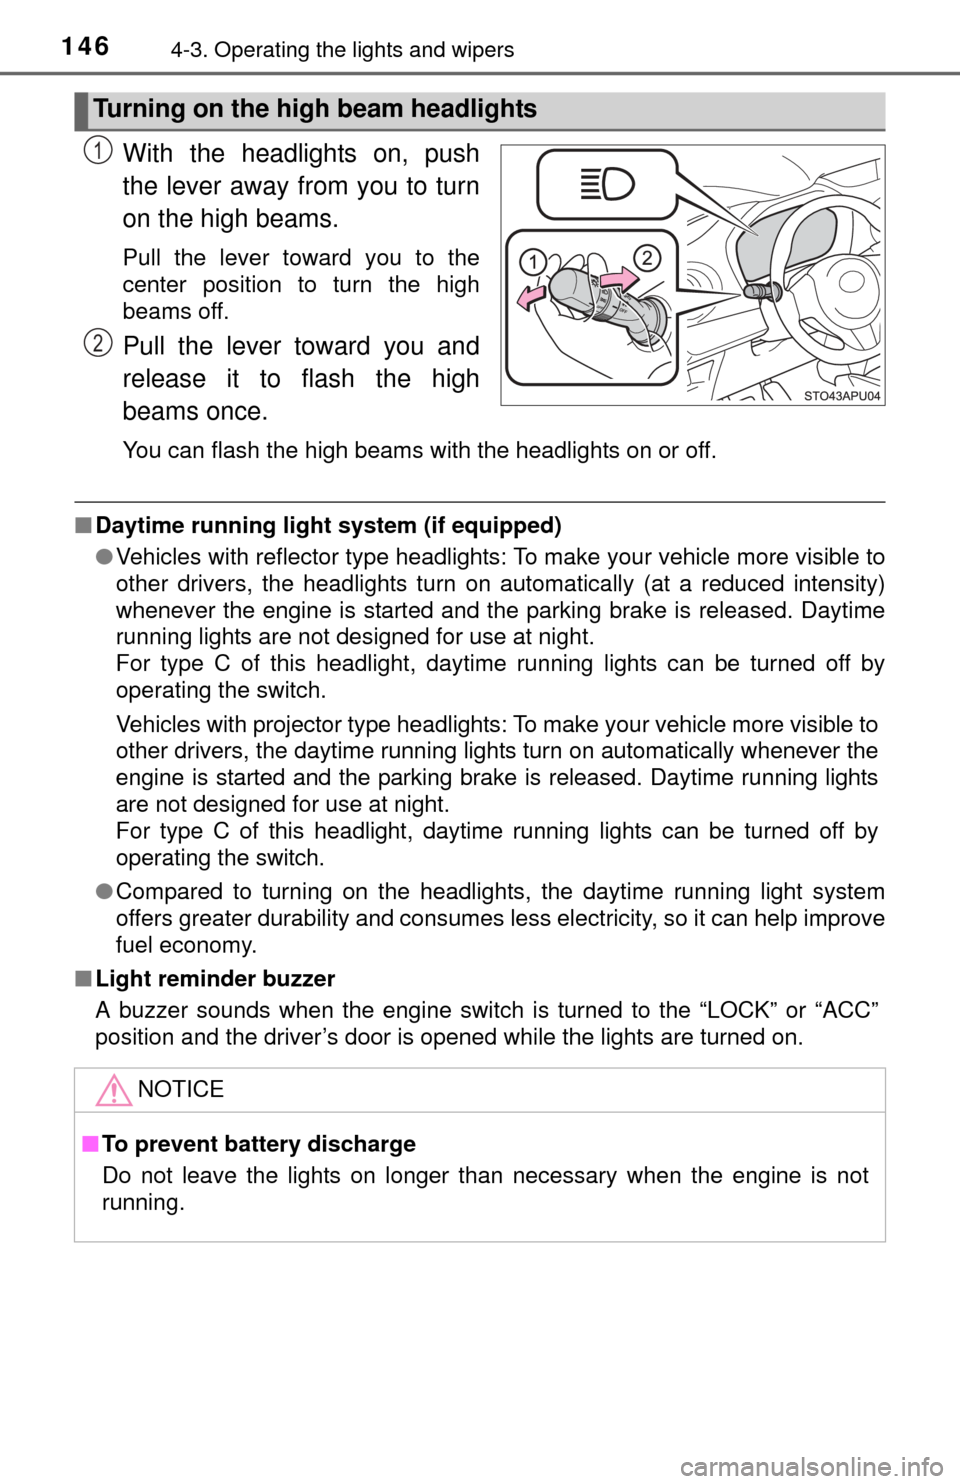
With the headlights on, push
the lever away from you to turn
on the high beams.
Pull the lever toward you to the
center position to turn the high
beams off.
Pull the lever toward you and
release it to flash the high
beams once.
You can flash the high beams with the headlights on or off.
■Daytime running light system (if equipped)
●Vehicles with reflector type headlights: To make your vehicle more visible to
other drivers, the headlights turn on automatically (at a reduced intensity)
whenever the engine is started and the parking brake is released. Daytime
running lights are not designed for use at night.
For type C of this headlight, daytime running lights can be turned off by
operating the switch.
Vehicles with projector type headlights: To make your vehicle more visible to
other drivers, the daytime running lights turn on automatically whenever the
engine is started and the parking brake is released. Daytime running lights
are not designed for use at night.
For type C of this headlight, daytime running lights can be turned off by
operating the switch.
● Compared to turning on the headlights, the daytime running light system
offers greater durability and consumes less electricity, so it can help improve
fuel economy.
■ Light reminder buzzer
A buzzer sounds when the engine switch is turned to the “LOCK” or “ACC”
position and the driver’s door is opened while the lights are turned on.
Turning on the high beam headlights
1
2
NOTICE
■To prevent battery discharge
Do not leave the lights on longer than necessary when the engine is not
running.