Page 267 of 650
267 2-4. Using other driving systems
2
When driving
Cruise control can be set when
Vehicles with a Multidrive
The shift lever is in the “D” or range 4 or higher of “M” has been selected.
Range 4 or higher has been selected by using the paddle shift.
(vehicles with paddle shift switch)
Vehicle speed is above approximately 40 km/h (25 mph).
Vehicles with an automatic transmission
The shift lever is in “D”.
Range 4 or higher of “D” has been selected by using the paddle shift.
(vehicles with paddle shift switch)
Vehicle speed is above approximately 40 km/h (25 mph).
Accelerating after setting the vehicle speed
The vehicle can be accelerated normally. After acceleration, the set
speed resumes.
Even without canceling the cruise control, the set speed can be
increased by first accelerating the vehicle to the desired speed and then
pushing the lever down to set the new speed.
Automatic cruise control cancellation
Cruise control will stop maintaining the vehicle speed in any of the following
situations.
Actual vehicle speed falls more than approximately 16 km/h (10 mph)
below the preset vehicle speed.
At this time, the memorized set speed is not retained.
Actual vehicle speed is below approximately 40 km/h (25 mph).
VSC+ is activated.
Speed limiter is activated (if equipped).
If the cruise control indicator light flashes
Press the “ON-OFF” button once to deactivate the system, and then press
the button again to reactivate the system.
If the cruise control speed cannot be set or if the cruise control cancels
immediately after being activated, there may be a malfunction in the cruise
control system. Have the vehicle inspected by any authorized Toyota dealer
or repairer, or another duly qualified and equipped professional.
VERSO_WE.book Page 267 Thursday, June 19, 2014 11:31 AM
Page 276 of 650

276 2-4. Using other driving systems
Detection range of the sensors
Approximately 100 cm (3.2 ft.)
Approximately 150 cm (4.9 ft.)
Approximately 60 cm (2.0 ft.)
The diagram shows the detection
range of the sensors. Note that
the sensors cannot detect obsta-
cles that are extremely close to
the vehicle.
The range of the sensors may
change depending on the shape
of the object etc.
The Toyota parking assist-sensor can be operated when
The Toyota parking assist-sensor switch is on.
Vehicles without smart entry & start system:
The engine switch is in “ON” position.
Vehicles with smart entry & start system:
The “ENGINE START STOP” switch is in IGNITION ON mode.
Front center sensors:
• The shift lever is in a position other than “P” (Multidrive or automatic
transmission) or “R”.
• The vehicle speed is less than about 10 km/h (6 mph).
Front corner sensors:
• The shift lever is in a position other than “P” (Multidrive or automatic
transmission).
• The vehicle speed is less than about 10 km/h (6 mph).
VERSO_WE.book Page 276 Thursday, June 19, 2014 11:31 AM
Page 293 of 650
293
2-4. Using other driving systems
2
When driving
Hill-star t assist control
Hill-start assist control operating conditions
The hill-start assist control system operates under the following condi-
tions.
• The shift lever is in a position other than “P” (Multidrive or automatic
transmission).
• The parking brake is not applied.
• The accelerator pedal is not depressed.
The hill-start assist control system cannot be operated while the slip indi-
cator light is illuminated.
Hill-start assist control
While hill-start assist control is operating, the brakes remain automati-
cally applied after the driver releases the brake pedal. The stop lights and
the high mounted stoplight turn on.
Hill-start assist control operates for about 2 seconds after the brake pedal
is released.
If the slip indicator does not flash and the buzzer does not sound when
the brake pedal is further depressed, slightly reduce the pressure on the
brake pedal (do not allow the vehicle to roll backward) and then firmly
depress it again. If the system still does not operate, check if the operat-
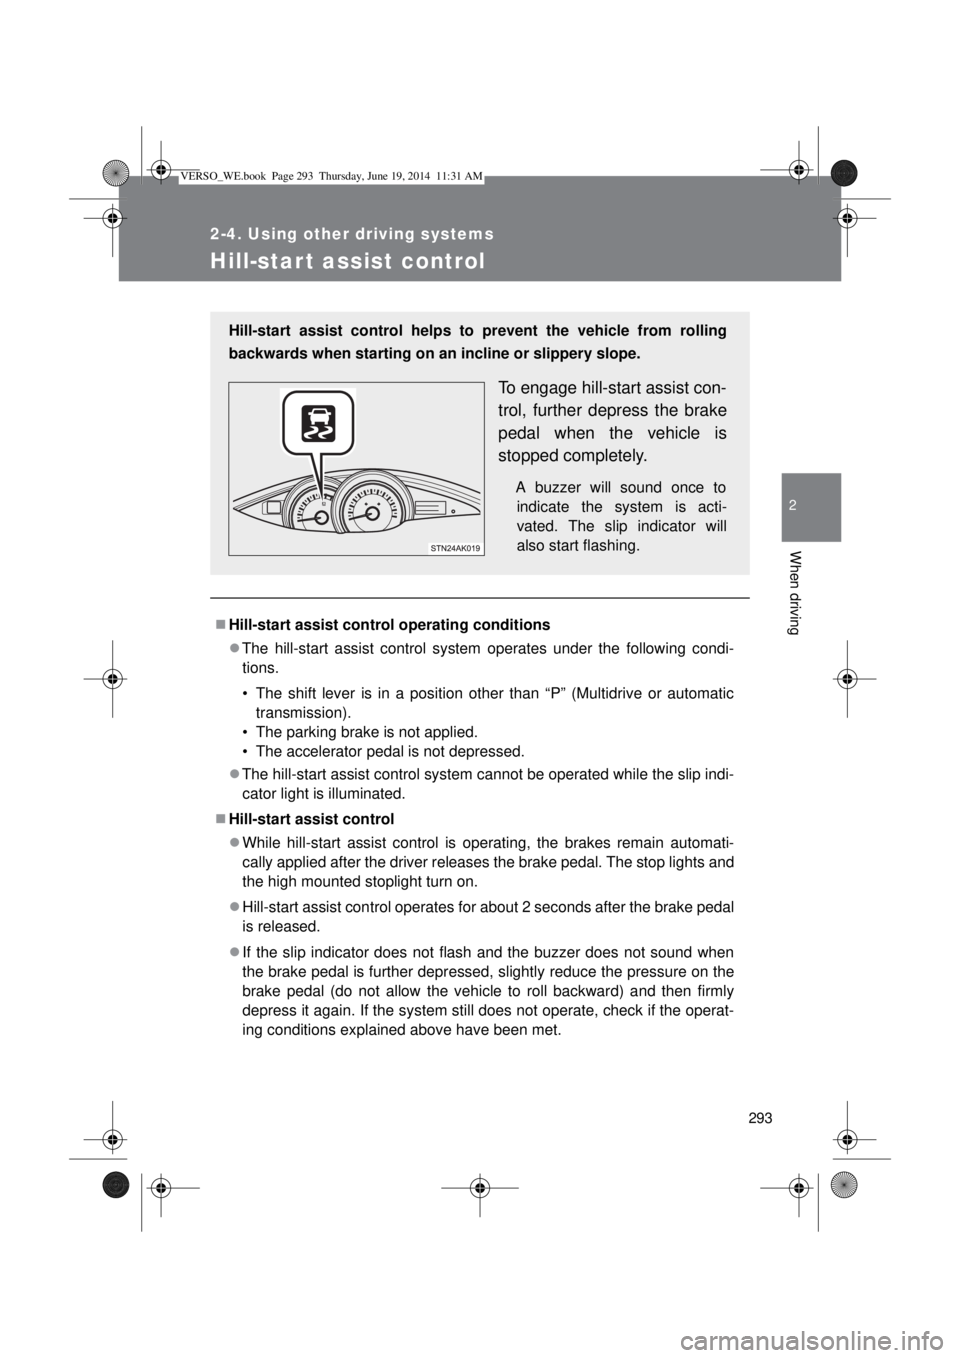
ing conditions explained above have been met. Hill-start assist control helps to prevent the vehicle from rolling
backwards when starting on an incline or slippery slope.
To engage hill-start assist con-
trol, further depress the brake
pedal when the vehicle is
stopped completely.
A buzzer will sound once to
indicate the system is acti-
vated. The slip indicator will
also start flashing.
VERSO_WE.book Page 293 Thursday, June 19, 2014 11:31 AM
Page 294 of 650

294 2-4. Using other driving systems
Hill-start assist control buzzer
When hill-start assist control is activated, the buzzer will sound once.
In the following situations, hill-start assist control will be canceled and the
buzzer will sound twice.
• No attempt is made to drive the vehicle within approximately 2 seconds
of releasing the brake pedal.
• The shift lever is moved to “P” (Multidrive or automatic transmission).
• The parking brake is applied.
• The brake pedal is depressed again.
If the slip indicator comes on
It may indicate a malfunction in the system. Contact any authorized Toyota
dealer or repairer, or another duly qualified and equipped professional.
CAUTION
Hill-start assist control
Do not overly rely on hill-start assist control. Hill-start assist control may
not operate effectively on extremely steep inclines or roads covered in ice.
Unlike the parking brake, hill-start assist control is not intended to hold the
vehicle stationary for an extended period of time. Do not attempt to use
hill-start assist control to hold the vehicle on an incline for an extended
period of time, as doing so may lead to an accident.
VERSO_WE.book Page 294 Thursday, June 19, 2014 11:31 AM
Page 299 of 650
299 2-5. Driving information
2
When driving
Selecting tire chains
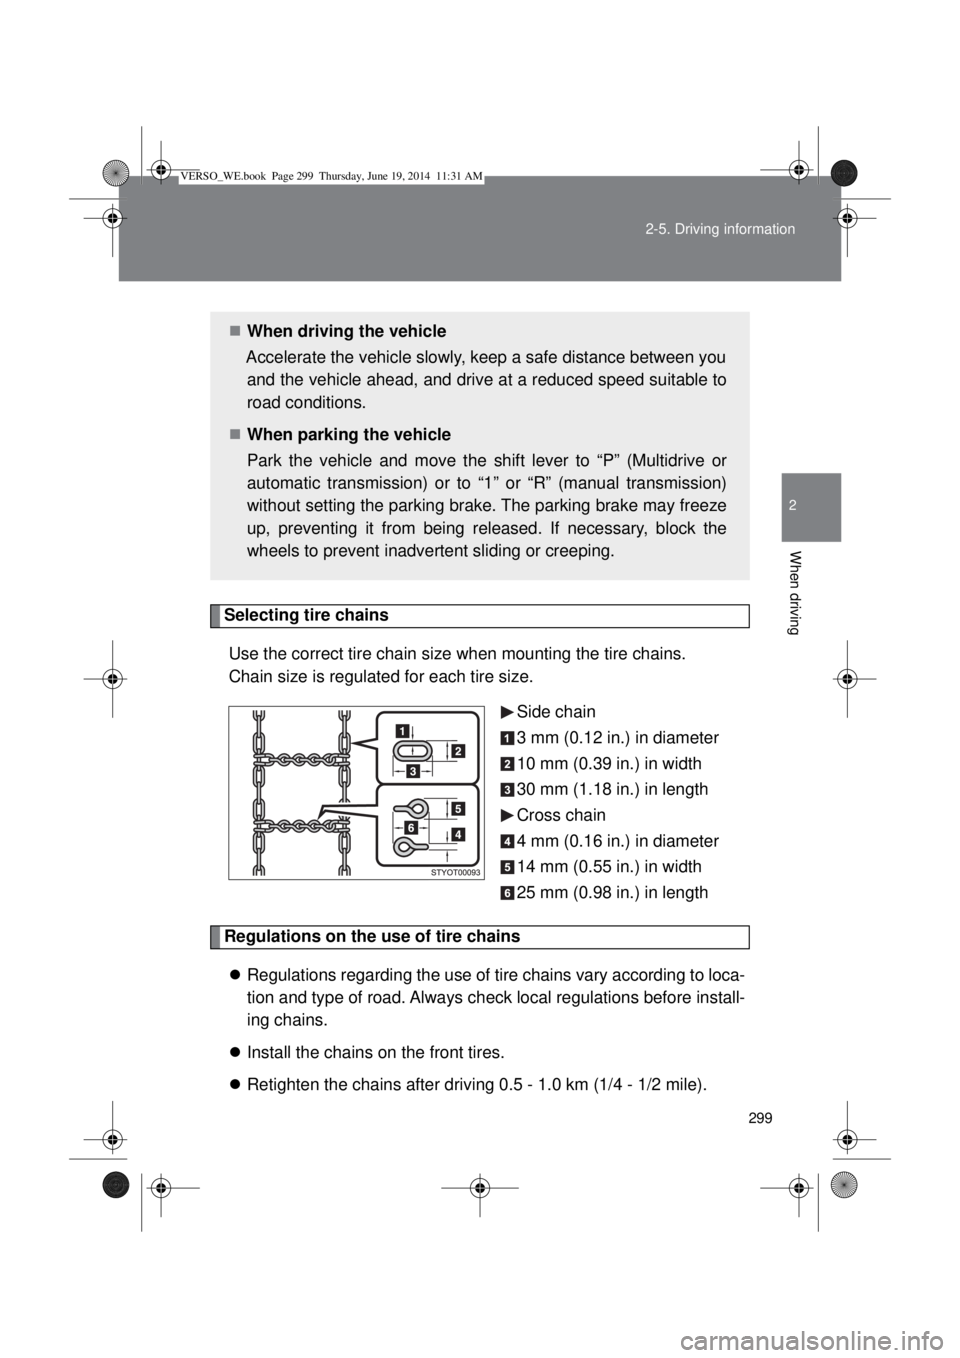
Use the correct tire chain size when mounting the tire chains.
Chain size is regulated for each tire size.
Side chain
3 mm (0.12 in.) in diameter
10 mm (0.39 in.) in width
30 mm (1.18 in.) in length
Cross chain
4 mm (0.16 in.) in diameter
14 mm (0.55 in.) in width
25 mm (0.98 in.) in length
Regulations on the use of tire chains
Regulations regarding the use of tire chains vary according to loca-
tion and type of road. Always check local regulations before install-
ing chains.
Install the chains on the front tires.
Retighten the chains after driving 0.5 - 1.0 km (1/4 - 1/2 mile).
When driving the vehicle
Accelerate the vehicle slowly, keep a safe distance between you
and the vehicle ahead, and drive at a reduced speed suitable to
road conditions.
When parking the vehicle
Park the vehicle and move the shift lever to “P” (Multidrive or
automatic transmission) or to “1” or “R” (manual transmission)
without setting the parking brake. The parking brake may freeze
up, preventing it from being released. If necessary, block the
wheels to prevent inadvertent sliding or creeping.
VERSO_WE.book Page 299 Thursday, June 19, 2014 11:31 AM
Page 309 of 650

309 2-5. Driving information
2
When driving
Important points regarding turning
The wheels of the trailer will travel closer to the inside of the curve
than the wheels of the vehicle. To make allowance for this, take the
turns wider than you would normally.
Important points regarding stability
Vehicle movement resulting from uneven road surfaces and strong
crosswinds will affect handling. The vehicle may also be rocked by
passing buses or large trucks. Frequently check behind when mov-
ing alongside such vehicles. As soon as such vehicle movement
occurs, immediately start to decelerate smoothly by slowly apply-
ing the brakes. Always steer the vehicle straight ahead while brak-
ing.
Passing other vehicles
Consider the total combined length of your vehicle and trailer, and
ensure that the vehicle-to-vehicle distance is sufficient before exe-
cuting lane changes.
Transmission information
Multidrive or automatic transmission
To maintain engine braking efficiency, when using engine brak-
ing, do not use the transmission in “D”. Transmission shift gear
position must be in “4” in the 7-speed sport sequential shiftmatic
mode (Multidrive) (P. 206) or the “M” mode (automatic trans-
mission) (P. 212).
Manual transmission
To maintain engine braking efficiency, when using engine brak-
ing, do not use the transmission in “5” and “6” gear. (P. 220)
When towing a trailer, check the engine coolant temperature
warning light (Red)
Towing a loaded trailer up a long steep incline in temperatures
exceeding 30C (85F) may result in the engine overheating.
If the engine coolant temperature warning light (Red) flashes or
comes on, turn the air conditioning off immediately and stop the
vehicle in a safe place. (P. 589)
VERSO_WE.book Page 309 Thursday, June 19, 2014 11:31 AM
Page 310 of 650
310 2-5. Driving information
When parking the vehicle
Always place wheel chocks under the wheels of both the vehicle
and trailer. Firmly set the parking brake and shift the shift lever to
“P” for Multidrive or automatic transmission, and “1” or “R” for man-
ual transmission.
CAUTION
Follow all the instructions described in this section.
Failure to do so could cause an accident resulting in death or serious injury.
Trailer towing precautions
When towing, make sure that none of the weight limits are exceeded.
(P. 303)
Before descending hills or long declines
Reduce speed and downshift. However, never downshift suddenly while
descending steep or long downhill grades.
Operation of the brake
Do not hold the brake pedal depressed often or for long periods.
Doing so may result in the brake overheating or reduce braking effects.
To avoid accident or injury
Do not exceed 100 km/h (62 mph) or the posted towing speed limit, which-
ever is lower.
Do not use cruise control when you are towing.
Vehicles with a compact spare tire: Do not tow a trailer when the compact
spare tire is installed on your vehicle.
Vehicles with an emergency tire puncture repair kit: Do not tow a trailer
when the tire installed is repaired with the emergency tire puncture repair
kit.
VERSO_WE.book Page 310 Thursday, June 19, 2014 11:31 AM
Page 391 of 650
391 3-5. Other interior features
3
Interior features
CAUTION
Observe the following precautions.
Failure to do so may cause the driver’s floor mat to slip, possibly interfering
with the pedals while driving. An unexpectedly high speed may result or it may
become difficult to stop the vehicle, leading to a serious accident.
When installing the driver’s floor mat
Do not use floor mats designed for other models or different model year
vehicles, even if they are Toyota Genuine floor mats.
Only use floor mats designed for the driver’s seat.
Always install the floor mat securely using the retaining hooks (clips) pro-
vided.
Do not use two or more floor mats on top of each other.
Do not place the floor mat bottom-side up or upside-down.
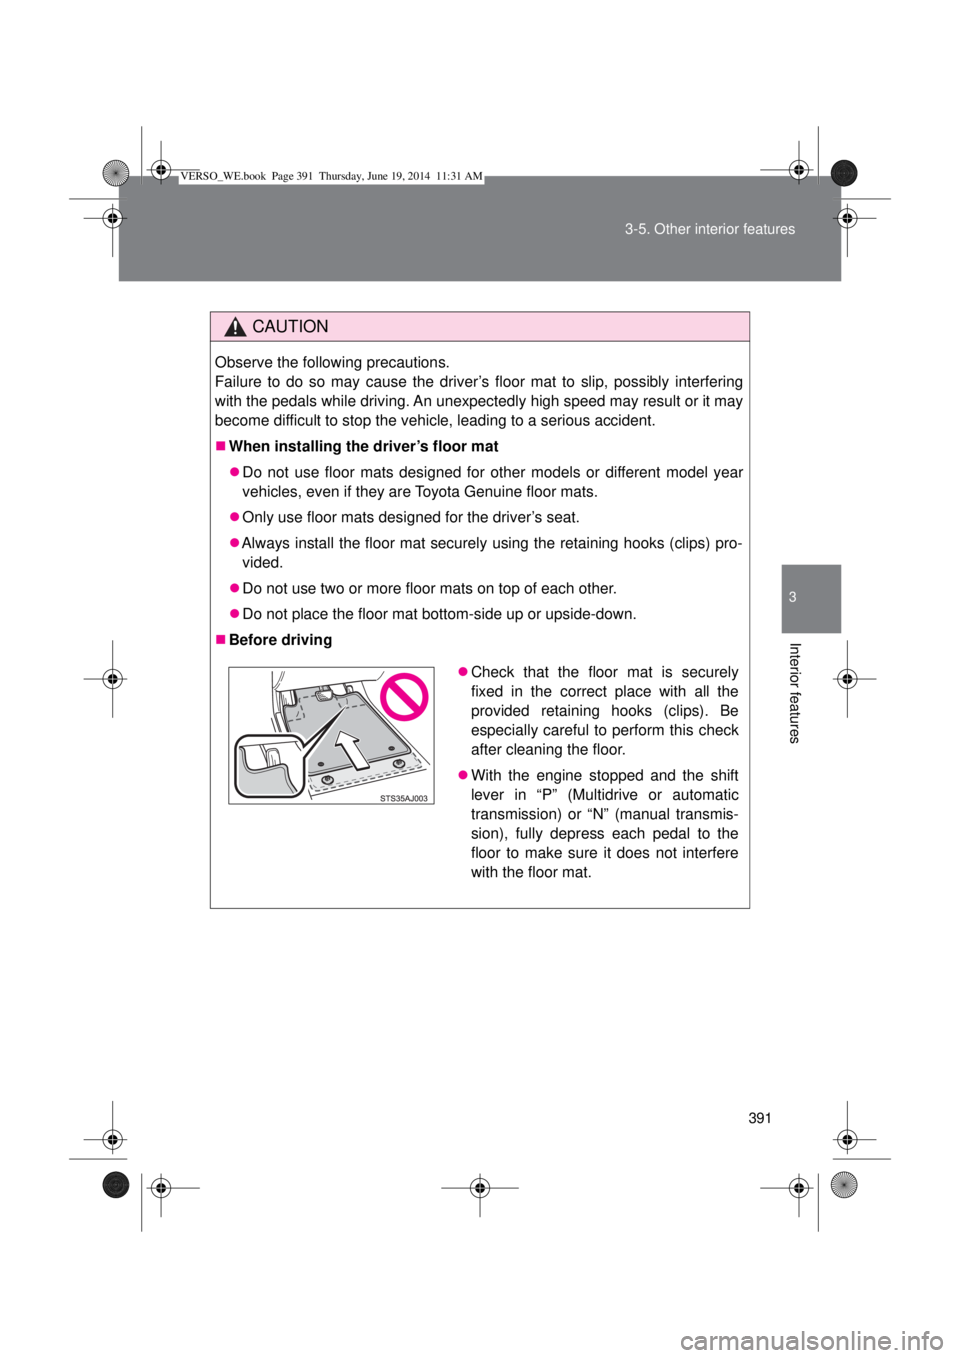
Before driving
Check that the floor mat is securely
fixed in the correct place with all the
provided retaining hooks (clips). Be
especially careful to perform this check
after cleaning the floor.
With the engine stopped and the shift
lever in “P” (Multidrive or automatic
transmission) or “N” (manual transmis-
sion), fully depress each pedal to the
floor to make sure it does not interfere
with the floor mat.
VERSO_WE.book Page 391 Thursday, June 19, 2014 11:31 AM