Page 205 of 464
205 2-2. Instrument cluster
2
When driving
Setting the REV indicator (if equipped)
Changing the REV indicator settings
The engine speed at which the REV indicator turns on at and
whether a buzzer sounds or not when the light turns on can be set.
Engine speed setting range: From 2000 to 7400 rpm (r/min)
Press the “DISP” switch repeatedly until the setting screen is
displayed. (P. 204)
Press and hold the “DISP”
switch.
“REV.” and the thousandth place
flash. After flashing, the number
changes each time the button is
pressed and held.
Press the “DISP” switch.
The hundredth place flashes.
After flashing, the number
changes each time the button is
pressed and held.
Press the “DISP” switch.
A buzzer sounds once, and setting of the engine speed value is
complete.
STEP 1
STEP 2
STEP 3
STEP 4
Page 206 of 464
206 2-2. Instrument cluster
Press and hold the “DISP”
switch.
Each time the “DISP” switch is
pressed and held, the buzzer
changes between activated and
deactivated.
“b-on”: Buzzer activated
“b-oFF”: Buzzer deactivated
When the setting changes from
“b-oFF” to “b-on”, the buzzer
sounds 3 times.
Press the “DISP” switch.
When the buzzer sounds, all settings have been completed. The set-
tings are displayed.
Deactivating the REV indicator settings
After setting the thousandth
place to “-”, press the “DISP”
switch once.
STEP 5
STEP 6
Page 221 of 464
221 2-4. Using other driving systems
2
When driving
Adjusting the set speed
To change the set speed, operate the lever until the desired set
speed is obtained.
Increases the speed
Decreases the speed
Fine adjustment: Momentarily
move the lever in the desired
direction.
Large adjustment: Hold the
lever in the desired direction.
The set speed will be increased or decreased as follows:
Fine adjustment (vehicles with a km/h odometer display): By approxi-
mately 1 km/h (0.6 mph) each time the lever is operated.
Fine adjustment (vehicles with an mph odometer display): By approxi-
mately 1.6 km/h (1 mph) each time the lever is operated.
Large adjustment: The set speed can be increased or decreased con-
tinually until the lever is released.
Page 250 of 464

250 3-1. Using the air conditioning system and defogger
To adjust the temperature settings, turn the temperature con-
trol dial clockwise (warm) or counter-clock wise (cool).
To adjust the temperature control dial clockwise (warm) or counter-
clockwise (cool) on the passenger side to separately adjust the tem-
perature for the passenger and driver sides (dual mode).
Press (the indicator on turns off) to return the driver
and passenger side temperatures to the same setting (simultaneous
mode).
The air conditioning system switches between dual and simultane-
ous modes each time is pressed.
To change the air outlets, press .
The air outlets used are switched each time either side of the button
is pressed.
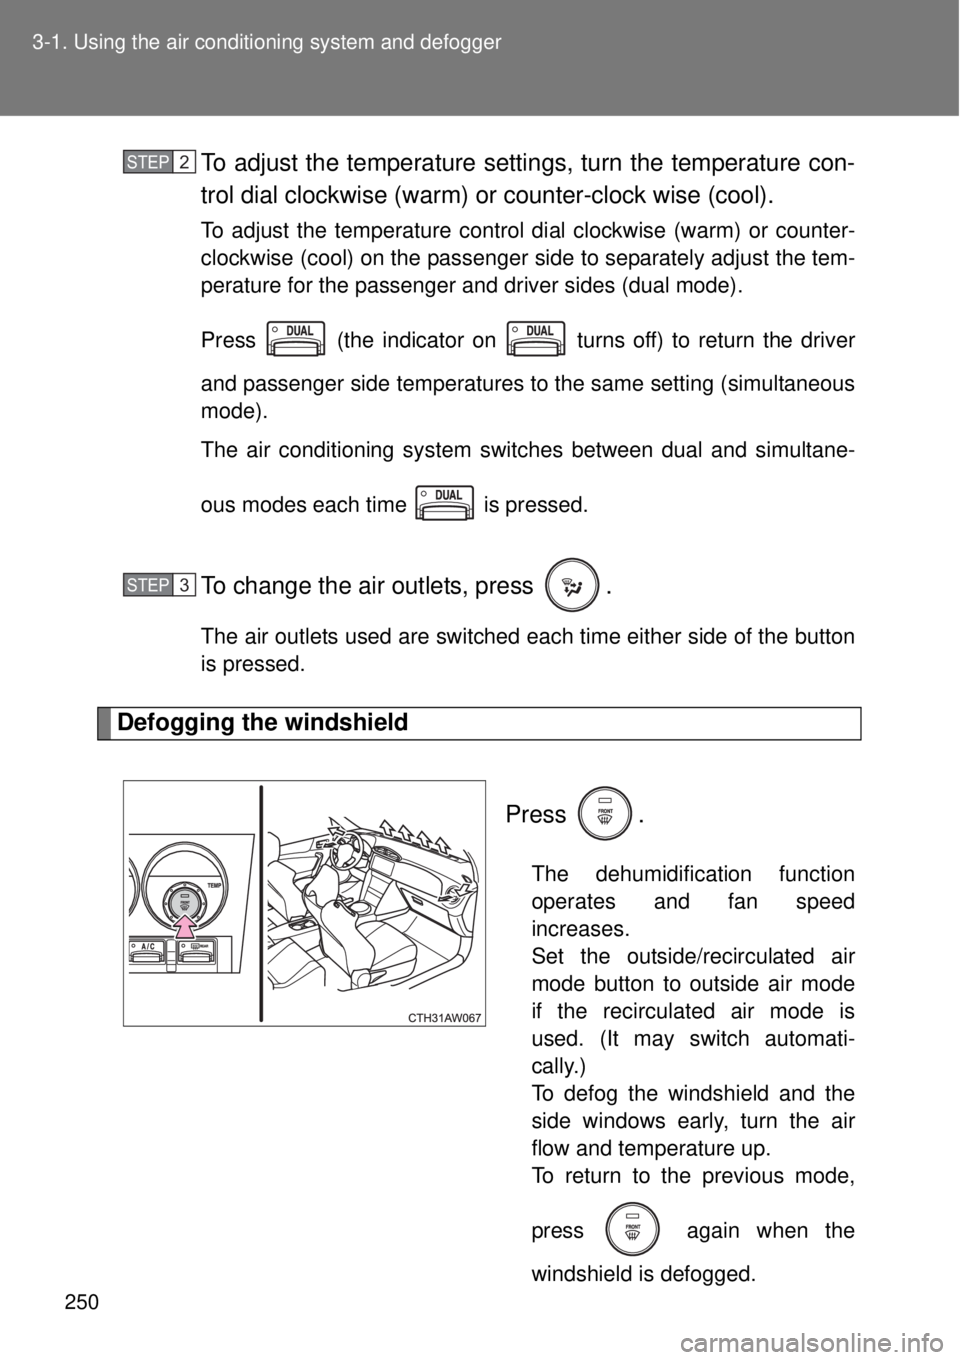
Defogging the windshield
Press .
The dehumidification function
operates and fan speed
increases.
Set the outside/recirculated air
mode button to outside air mode
if the recirculated air mode is
used. (It may switch automati-
cally.)
To defog the windshield and the
side windows early, turn the air
flow and temperature up.
To return to the previous mode,
press
again when the
windshield is defogged.
STEP 2
STEP 3
Page 260 of 464

260 3-3. Using the interior lights
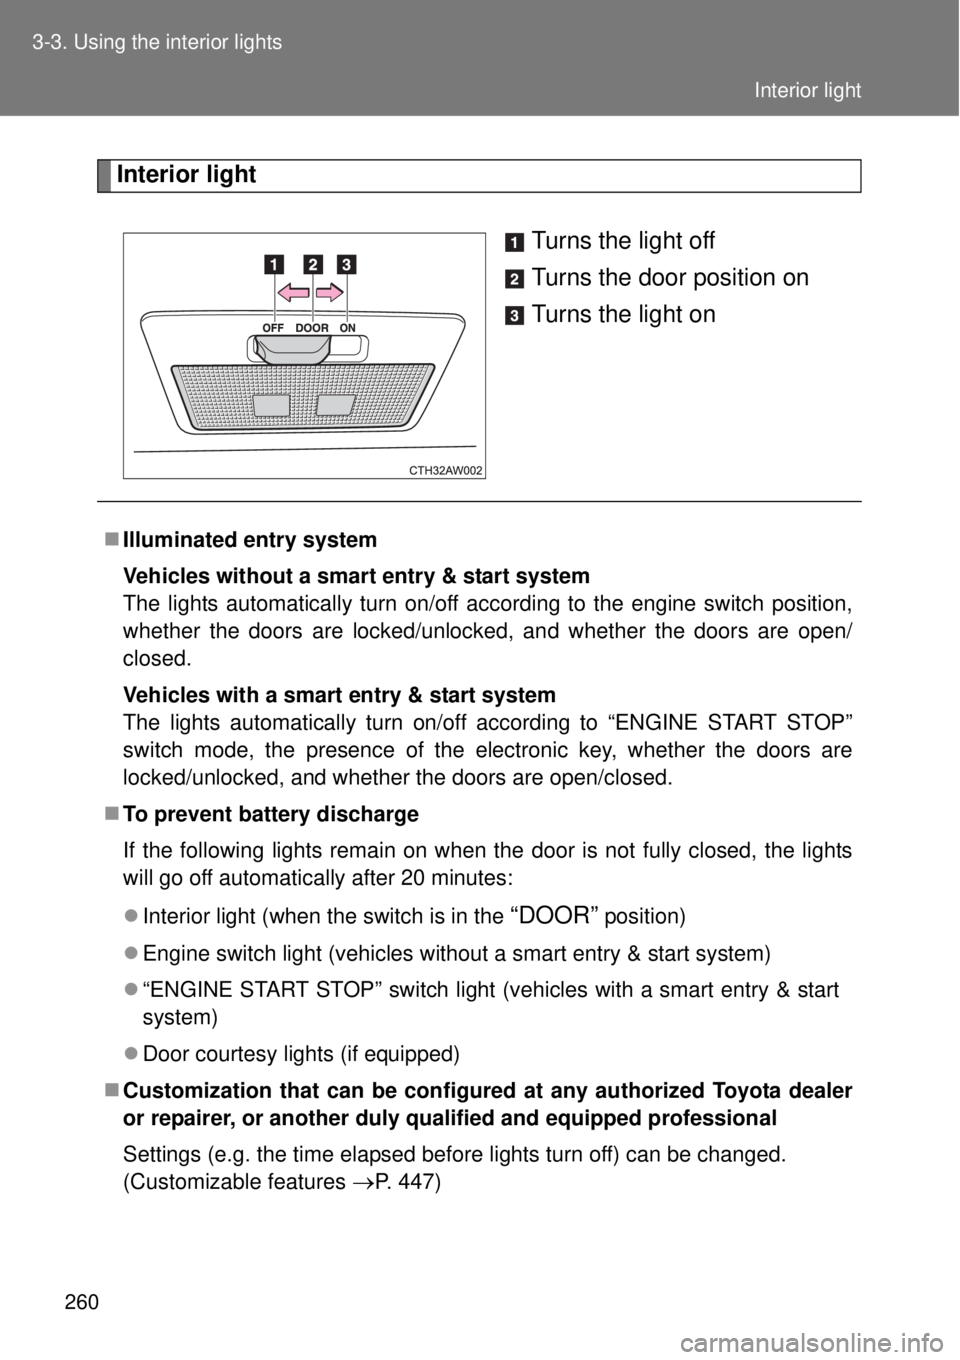
Interior light
Turns the light off
Turns the door position on
Turns the light on
Illuminated entry system
Vehicles without a smart entry & start system
The lights automatically turn on/off according to the engine switch position,
whether the doors are locked/unlocked, and whether the doors are open/
closed.
Vehicles with a smart entry & start system
The lights automatically turn on/off according to “ENGINE START STOP”
switch mode, the presence of the electronic key, whether the doors are
locked/unlocked, and whether the doors are open/closed.
To prevent battery discharge
If the following lights remain on when the door is not fully closed, the lights
will go off automatically after 20 minutes:
Interior light (when the switch is in the
“DOOR” position)
Engine switch light (vehicles without a smart entry & start system)
“ENGINE START STOP” switch light (vehicles with a smart entry & start
system)
Door courtesy lights (if equipped)
Customization that can be configured at any authorized Toyota dealer
or repairer, or another duly qualified and equipped professional
Settings (e.g. the time elapsed before lights turn off) can be changed.
(Customizable features
P. 447)
Interior light
Page 388 of 464
388 5-2. Steps to take in an emergency
Firmly tighten each nut two or
three times in the order shown in
the illustration.
Tightening torque:
120 N•m (12.2 kgf•m, 89 ft•lbf)
Stow the flat tire, tire jack and all tools.
STEP 4
After completing the tire change
The tire pressure warning system must be reset. (P. 315)
Storing the tire
STEP 5
Always install the center fastener as
shown in the illustration.
Page 417 of 464

5
417 5-2. Steps to take in an emergency
When trouble arises
Stopping the engine
Vehicles with an automatic transmission: Shift the shift lever to P and press
the “ENGINE START STOP” switch as you normally do when stopping the
engine.
Vehicles with a manual transmission: Shift the shift lever to N and press the
“ENGINE START STOP” switch as you normally do when stopping the
engine.
Replacing the key battery
As the above procedure is a temporary measure, it is recommended that the
electronic key battery be replaced immediately when the battery depletes.
(P. 331)
Changing “ENGINE START STOP” switch modes
Vehicles with an automatic transmission
Release the brake pedal and press the “ENGINE START STOP” switch in
above.The engine does not start and modes will be changed each
time the switch is pressed. (P. 172)
Vehicles with a manual transmission
Release the clutch pedal and press the “ENGINE START STOP” switch in
above.The engine does not start and modes will be changed each
time the switch is pressed. (P. 172)
If the doors cannot be locked or unlocked by the smart entry & start
system
Lock and unlock the doors by the mechanical key or wireless remote control.
STEP 3
STEP 3
Page 447 of 464

447
6
Vehicle specifications
6-2. Customization
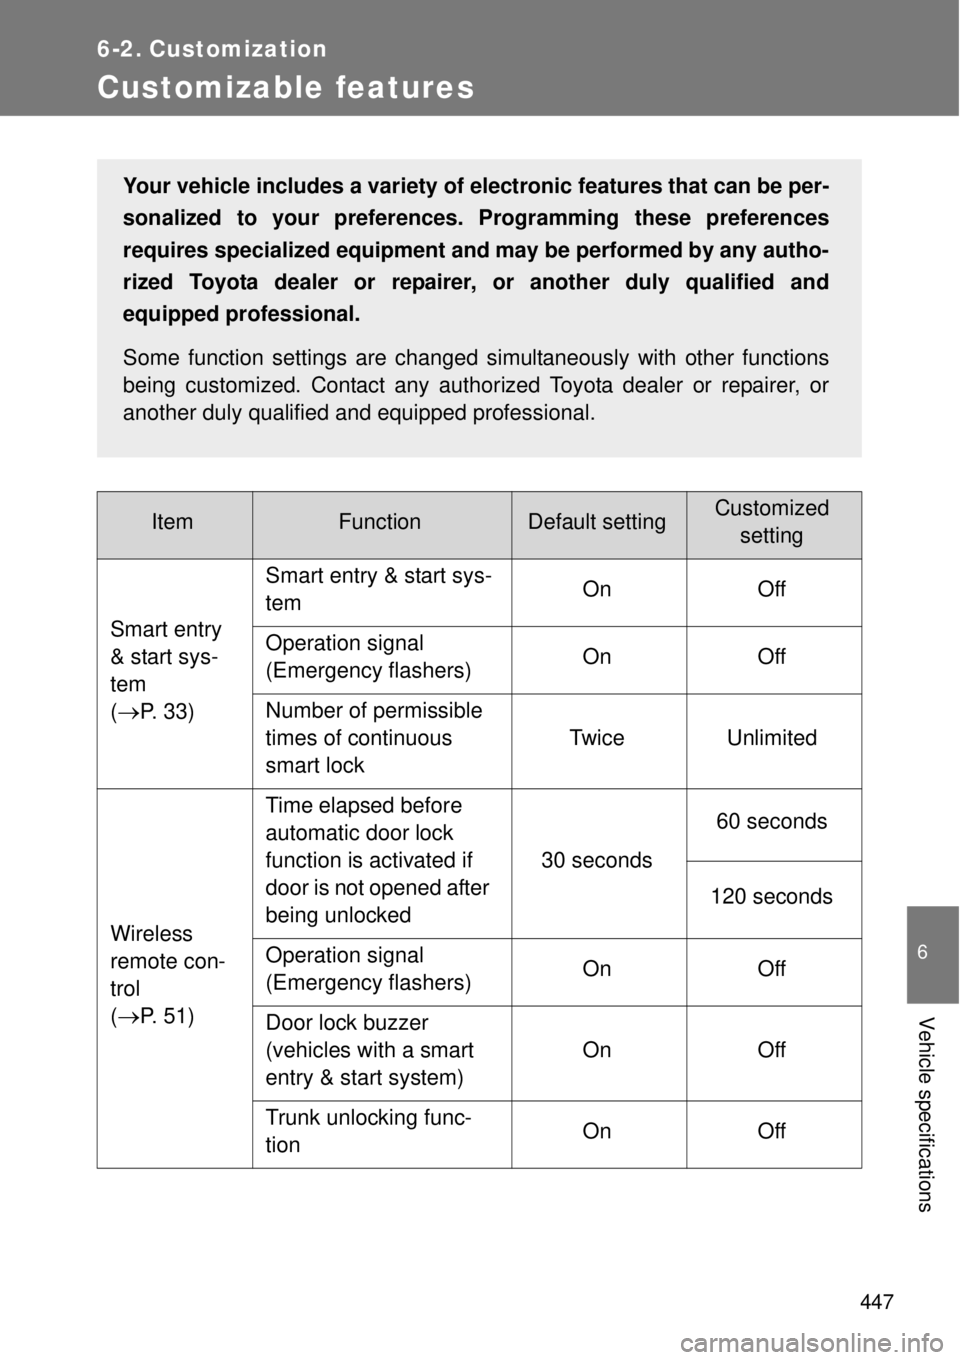
Customizable features
ItemFunctionDefault settingCustomized
setting
Smart entry
& start sys-
tem
(
P. 33)Smart entry & start sys-
temOn Off
Operation signal
(Emergency flashers) On Off
Number of permissible
times of continuous
smart lockTwice Unlimited
Wireless
remote con-
trol
(
P. 51)Time elapsed before
automatic door lock
function is activated if
door is not opened after
being unlocked30 seconds60 seconds
120 seconds
Operation signal
(Emergency flashers) On Off
Door lock buzzer
(vehicles with a smart
entry & start system)On Off
Trunk unlocking func-
tionOn Off
Your vehicle includes a variety of electronic features that can be per-
sonalized to your preferences. Programming these preferences
requires specialized equipment and may be performed by any autho-
rized Toyota dealer or repairer, or another duly qualified and
equipped professional.
Some function settings are changed simultaneously with other functions
being customized. Contact any authorized Toyota dealer or repairer, or
another duly qualified and equipped professional.