Page 324 of 500

3246-3. Do-it-yourself maintenance
AVALON (U)_(OM41456U)■
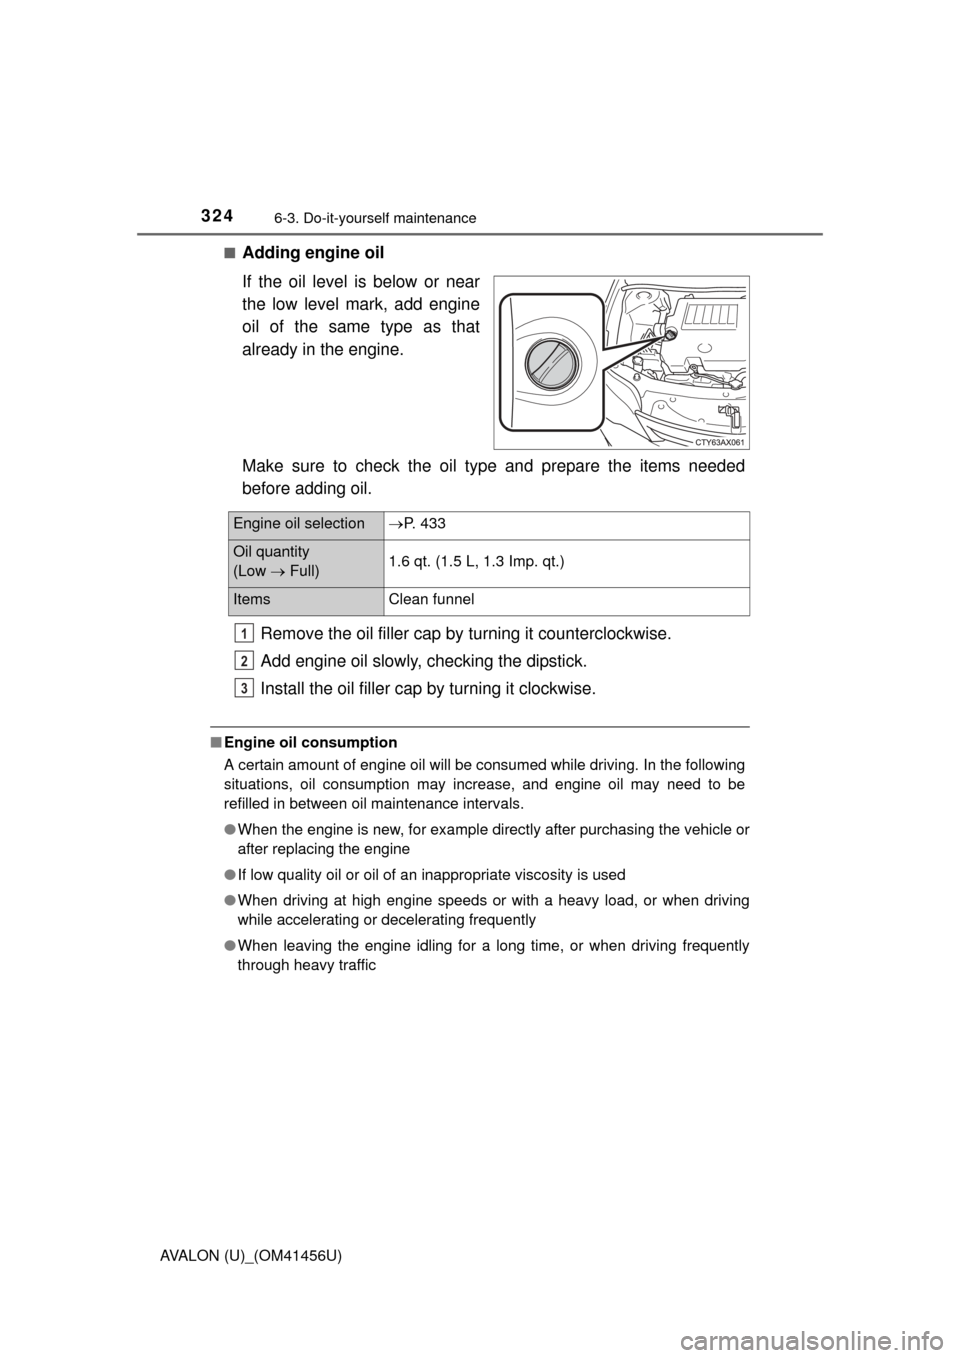
Adding engine oil
If the oil level is below or near
the low level mark, add engine
oil of the same type as that
already in the engine.
Make sure to check the oil type and prepare the items needed
before adding oil.
Remove the oil filler cap by turning it counterclockwise.
Add engine oil slowly, checking the dipstick.
Install the oil filler cap by turning it clockwise.
■ Engine oil consumption
A certain amount of engine oil will be consumed while driving. In the following
situations, oil consumption may increase, and engine oil may need to be
refilled in between oil maintenance intervals.
●When the engine is new, for example directly after purchasing the vehicle or
after replacing the engine
● If low quality oil or oil of an inappropriate viscosity is used
● When driving at high engine speeds or with a heavy load, or when driving
while accelerating or decelerating frequently
● When leaving the engine idling for a long time, or when driving frequently
through heavy traffic
Engine oil selection P. 433
Oil quantity
(Low Full) 1.6 qt. (1.5 L, 1.3 Imp. qt.)
Items
Clean funnel
1
2
3
Page 364 of 500
3646-3. Do-it-yourself maintenance
AVALON (U)_(OM41456U)■
Headlight low beam (halogen bulb)
Unplug the connector while
pressing the lock release.
Turn the bulb base counter-
clockwise.
Set the new light bulb.
Align the 3 tabs on the light bulb
with the mounting, and insert.
Turn it clockwise to set.
Set the connector.
After installing the connector,
shake the bulb base gently to
check that it is not loose, turn
the headlights on once and visu-
ally confirm that no light is leak-
ing through the mounting.
Replacing light bulbs
1
2
3
4
Page 365 of 500
3656-3. Do-it-yourself maintenance
6
Maintenance and care
AVALON (U)_(OM41456U)■
Headlight high beam and daytim
e running light (vehicles with
halogen bulbs for low beams)/Headlight high beam (vehicles
with discharge bulbs for low beams)
Unplug the connector while
pressing the lock release.
Turn the bulb base counter-
clockwise.
Set the new light bulb.
Align the 3 tabs on the light bulb
with the mounting, and insert.
Turn it clockwise to set.
Set the connector.
After installing the connector,
shake the bulb base gently to
check that it is not loose, turn
the headlights on once and visu-
ally confirm that no light is leak-
ing through the mounting.
1
2
3
4
Page 367 of 500
3676-3. Do-it-yourself maintenance
6
Maintenance and care
AVALON (U)_(OM41456U)
Unplug the connector while
pressing the lock release.
Turn the bulb base counter-
clockwise.
Set the new light bulb.
Align the 3 tabs on the light bulb
with the mounting, and insert.
Turn it clockwise to set.
Set the connector.
After installing the connector,
shake the bulb base gently to
check that it is not loose, turn
the fog lights on once and visu-
ally confirm that no light is leak-
ing through the mounting.
3
4
5
6
Page 370 of 500
3706-3. Do-it-yourself maintenance
AVALON (U)_(OM41456U)
Unplug the connector while
pressing the lock release.
Turn the bulb base counter-
clockwise.
Remove the light bulb.
When installing, reverse the steps listed.3
4
5
6
Page 372 of 500
3726-3. Do-it-yourself maintenance
AVALON (U)_(OM41456U)
Turn the bulb base counter-
clockwise.
Remove the light bulb.
When installing, reverse the steps listed.4
5
6
Page 373 of 500
3736-3. Do-it-yourself maintenance
6
Maintenance and care
AVALON (U)_(OM41456U)■
Back-up light
Open the trunk lid and
remove the clips. Then partly
remove the trunk panel
cover.
Turn the bulb base counter-
clockwise.
Remove the light bulb.
When installing, reverse the steps listed.
1
2
3
4
Page 486 of 500

486Alphabetical index
AVALON (U)_(OM41456U)
Child-protectors....................... 112
Child safety ................................ 50Airbag precautions .................. 36
Battery precautions ....... 331, 422
Child restraint system ............. 51
How your child should wear the seat belt ................. 30
Installing child restraints ......... 55
Moon roof precautions .......... 140
Power window lock switch .... 134
Power window precautions ... 136
Rear door child-protectors .... 112
Removed electronic key battery precautions ...... 351
Seat belt extender precautions ........................... 33
Seat belt precautions .............. 54
Seat heater precautions........ 276
Trunk precautions ................. 116
Cleaning ........................... 302, 306
Aluminum wheels.................. 303
Exterior ................................. 302
Interior................................... 306
Seat belts .............................. 307
Clock ......................................... 268
Coat hooks ............................... 281
Compass .................................. 296
Condenser ................................ 328
Console box ............................. 258 Cooling system
Engine overheating............... 423
Cruise control Cruise control ....................... 194
Dynamic radar cruise control ................................ 198
Cup holders ............................. 259
Curtain shield airbags............... 34
Customizable features ............ 455
Daytime running light system.................................... 174
Defogger Front windshield ................... 247
Outside rear view mirrors ..... 252
Rear window ......................... 252
Dimension ................................ 430
Dinghy towing.......................... 158
Display Cruise control ....................... 194
Dynamic radar cruise control ................................ 198
Multi-information display ......... 80
Trip information....................... 81
Warning message................. 399
D